


How to Use Lightroom Classic (Beginner’s Guide)
Discover comprehensive tips and techniques for mastering Lightroom Classic, including how to import, organise, edit and export your pictures efficiently.
Lightroom | Software | By Ana Mireles
If you’re new to Adobe Lightroom and you’re wondering if you should use Lightroom Classic, this is the guide for you.
Here, I’ll briefly cover the difference between both Lightroom programs and why we should use Classic instead of CC.
After that introduction, I’ll explain how to use Lightroom Classic.

Popular course reveals the simple tricks to getting incredible results with Lightroom in record time.
Give Your Photos The Look They Deserve!
Many Lightroom tutorials tend to concentrate solely on editing techniques or photo organization methods. However, this guide offers a more comprehensive approach.
In addition to other important topics, I will include a dedicated section outlining a fundamental editing workflow.
The main goal of this Lightroom tutorial is to show you that LrC is much more than just an editing software.
So, I’ll discuss all you can do with it and give you a brief introduction as to how to do it.
I’ll include links to other Lightroom tutorials we’ve published to deepen your knowledge of each feature.
Finally, I’ve also included a FAQ section that will hopefully clear any doubts you might have.
So, this guide will show you how to use Lightroom to its full potential, even if you’re a beginner.
Sounds good? Let’s dive in!
Table of Contents
ToggleWhy Use Lightroom Classic?

Adobe products are the standard software in the photography industry.
Lightroom Classic was the first Lightroom to come along, and it’s still the most powerful in terms of photo editing capabilities compared to Lightroom CC (now confusingly referred to as just ‘Lightroom’).
Lightroom offers all the features of file management software combined with the creative tools of photo editing software.
It even has some basic publishing tools for creating books, slideshows, and web galleries.
Adobe Lightroom supports raw files from most digital cameras and is most commonly used for batch editing. It can sync with the Creative Cloud and allows collaborations.
What’s the Difference Between Lightroom Classic and Lightroom?
Lightroom Classic (LrC) is the current name of the original software called Adobe Lightroom. It’s developed and optimized for use on desktop.
LrC primarily targets professional photographers who work in the studio and like to archive their files locally. However, it can synchronize with Adobe Cloud and other Adobe products.
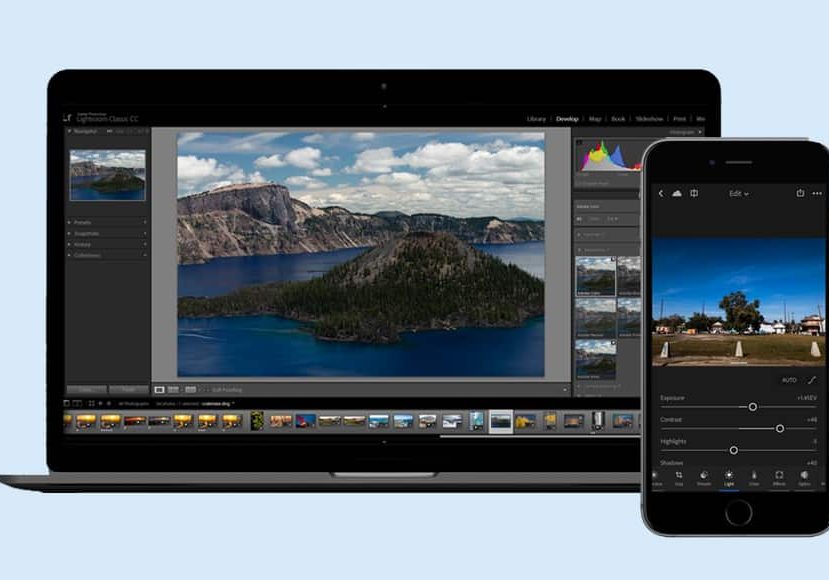
On the other hand, Lightroom is the newer version – also called Lightroom CC or Adobe Photoshop Lightroom.
This software is mainly optimized for photographers who work on the road and use multiple devices.
Everything you do on one of them is automatically synced on the cloud – so every file is updated on every device.
When you use the computer, you can access Lightroom CC via a desktop app or on the web version. It’s also available as Lightroom mobile to use on your smartphone.
In Adobe’s own words:
Lightroom is the new cloud-based photo service that works across desktop, mobile, and web. Lightroom Classic is the desktop-focused digital photography product.
In addition, Lightroom CC has fewer editing features, or they arrive later than they do on LrC.
What Is Lightroom Classic Best Used for?
LrC is used by photographers who work on one or two computers – mainly studio-based.
It’s best used for its organizational tools and the editing process.
It also allows for tether shooting and has publishing and printing tools – although this isn’t where it shines.
Is Lightroom Classic Worth It for Beginners?
In my opinion, yes. However, it depends on your workflow.
As long as you work mainly on your computer and you like to store your files locally – then LrC is worth it.
LrC has more editing tools, resulting in a steeper learning curve. However, you can easily use the basic editing tools when you start and work your way up – maybe following a Lightroom tutorial.
Lightroom Classic: Main Features
Brenda Bergreen
Adobe Lightroom allows you to manage your files, edit photos, and publish your photos in different ways. These features are structured in modules.
Library
When you launch Lightroom, it opens in the Library module. This is the photo management section of the program.
The Library module is where you can browse and organize your photos. You can also apply ratings, color labels, keywords, and other tools for culling and categorizing photos.
There is a Quick Develop panel where you can do some basic edits to your photos and videos.
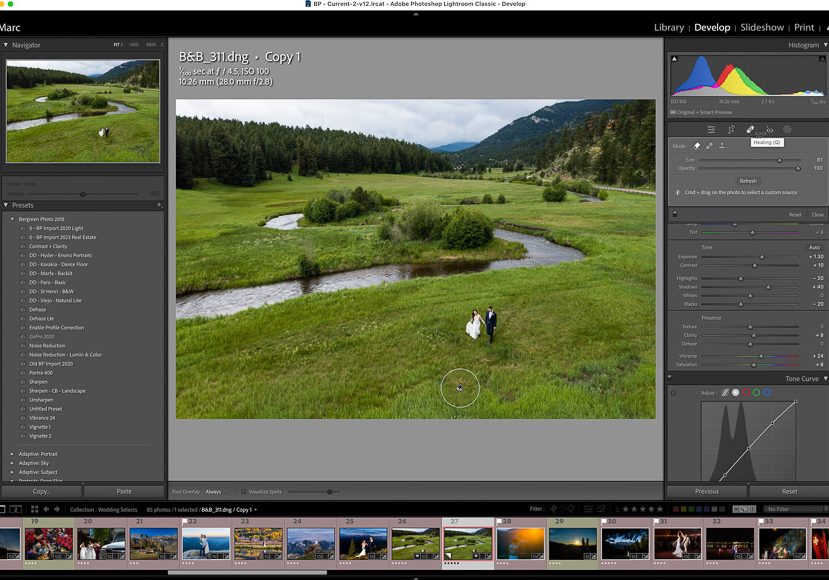
Develop
The Develop module is where you’ll find all the photo editing tools. I’ll discuss more about this module when I show you how to edit a photo in LrC.
Map
If your photos have GPS coordinates embedded in the metadata, you can use the Map module to see where the picture was taken. To use this feature, you need to be online.
You can use the Search bar to find a specific location and see all your photos taken there. You can create a collection with them, too.
You can add the coordinates manually if the pictures don’t have GPS information embedded.
Book
The Book module allows you to create a book using your photos. You can save these books as PDF files or upload them to the printing service Blurb.com.
This feature is template-driven. All the templates can be customized in layout, size, font, etc. Then, you can choose the paper and cover type before printing. If you’re not ready to print or export your book, save it in the collection.
It’s possible to save the customizations as presets.
Slideshow
You can use this module to create a slideshow using customizable templates. Here, you can choose the transitions and replay options – even add music.
Slideshows are useful for creating presentations or sending photos to your clients.
From the Print module, you can handle all your print jobs. It’s possible to print a single photo, arrange multiple photos per page, set up contact sheets, etc.
You can choose the margins on each page, add watermarks, etc.
Web
In the Web module, you can easily create web galleries. Choose one of the customizable templates and add the photos and info you want.
You can then create a link to share with your clients so they can see the gallery on any browser.
Using these galleries on a website is possible but not ideal. It’s much easier to sync Lightroom with Adobe Portfolio if this is what you need.
Getting Started: How to Import Photos into Lightroom Classic
Lightroom won’t browse all the files and folders on your hard drive. So, you can’t simply open a photo; you have to import it first.
However, it doesn’t import the file; it creates a link to it and generates a preview for you to work on. I’ll talk about how this impacts management and photo editing later on.
Step 1 – Connect your source
You can import photos that already exist on your computer’s hard drive.
However, you can also import from external devices such as a camera, SD card, or an external hard drive.
Step 2 – Open the Import dialog
There are different methods to import photos into Lightroom. It doesn’t matter which one you use; they will all launch the same dialog box.
Method 1 – Drag and drop
To import a photo into Lightroom, you need to click and drag the file into the Library module.
Method 2 – Import button
Another way to import photos is to click on the Import button you’ll find in the bottom left corner of the Library module.
This is the most commonly used method.
Method 3 – File menu
The last method is to open the File menu and select Import Photos and Video.
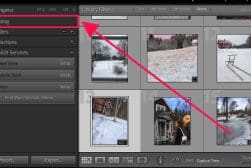
Step 3 – Select a source
Once you open the Import dialog, you’ll notice it’s divided into three parts. On the top, you’ll notice the arrows showing you that you should start from the left – selecting a source.
On the left side, you’ll find the available files for you to browse your device and find the photos you want to import.
Step 4 – Choose an action
Moving toward the center of the Import dialog, you’ll find a series of actions on the top.
Here, you’ll tell Lightroom what you want to do with the images selected on the Source panel. You can choose between Copy as DNG, Copy, Move, or Add.
Please note that when you select Add, you’ll have fewer options available on the right panel because the photos are already at their destination.
Step 5 – Import settings and options
Lightroom gives you a series of options to set up to do as the photographs get imported.
For example, you can rename the files, build Smart Previews, add keywords, apply develop settings, etc.
You can also choose the destination of the copies.
Note that File Renaming and Destination are unavailable if you choose the Add option in step 4.
Step 6 – Import
Once you’ve selected the images to import and chosen all your settings, it’s time to start importing the photos.
To do so, you need to click the Import button in the bottom right corner.
How to Organize Photos in Lightroom Classic
To use LrC as your photo manager, it’s important to understand how it works. As it is a desktop-based software, you’ll be working with files that exist on your hard drive.
However, you’ll work with them through the imported photos inside the Lightroom software, which works as a link.
So, if you move or delete a file in your hard drive, Lightroom won’t find it anymore because you broke the link. This means that all the management needs to happen in Lightroom.
This relationship can be confusing at first. I know I was very confused as I’m used to working with a Bridge + Photoshop workflow. So, I misplaced and even lost many edited photos at first.
Now that you know this let’s see all the tools you have to organize your images in LrC.
Catalog
The catalog is the main database that you’re working with. It will include all your photos.
If this is the first time you use LrC, you’ll have an empty catalog already created. If you want to start a new organization from scratch, you must create a new catalog.
To do so, go to File > New Catalog. On the pop-up window, you can give your catalog a name and decide where in your computer you want it.
Choose your preferred location – it doesn’t need to be the same folder where you save your photos. Now click Create.
Most people only have one catalog. So, once it’s created, you don’t need to touch it again.
However, it is possible to have more than one. This may be useful if other people have access to your LrC – for example.
- Read more about Lightroom Catalogs and how to back them up.
Folders
The files will mimic the ones on your hard drive. Anything you do here, from creating new folders, renaming them, or moving files, will also happen on the hard drive.
It doesn’t work the other way around, though. Remember that if you do it on the hard drive, then Lightoom will be lost.
In the future, you can add new photos by importing them, as explained in the previous section of the article. It’s possible to add folders and subfolders in Lightroom.
After importing photos into the right folder, there’s no reason to use the Folder panel anymore.
Collections
Unlike the folders, the collections don’t have a link to your original image files. So, you have full freedom. This is where you can move and rearrange your photos all you want.
You can add the same photo to all the collections you want, and it won’t create any more copies.
In the Collections, you can mix photos from any folder, and they won’t move from their original location or mess with the hard drive.
Drag and drop photos into the collections. Note that any edits you make to the photo in a collection will apply to the photo in all collections because they are the same photo.
If you want multiple versions of it, create virtual copies. These will only exist in the collection where you create or add them manually.
Smart collections.
These collections automatically update based on certain criteria you set up.
So, if you create a Smart collection based on a 5-star rating, every time you give that rating to a new photo, it will be added automatically to this collection.
Flags
Flags are the easiest way to cull images.
There are two types of flags – Pick and Reject. The Pick flag is for the ones that you like, and the Reject flag is for the ones you can delete.
It’s possible to leave an image unflagged and to use other categorizing tools, such as color labels and star ratings, together with the flag system.
Photos marked as rejects are easily deleted by pressing Cmd + Del (Mac) or Ctrl + Backspace (PC). You can choose to delete them just from Lightroom or from your hard drive, too.
You can also use the filter to see only the flagged photos.
Star ratings and Color labels
You can assign ratings to your images based on a 5-star system. Assigning a number from zero to five is as simple as it sounds.
Colors work like the stars, but they’re normally used for something different than how good the photo is.
A mix of both helps you categorize different things, such as how much you like the photo and the post-processing stage.
You can use the filter tool to see only the ones with a certain rating or color.
Keywords
Adding keywords is the easiest way to organize and find photos in the future. The keywords get embedded in the files to be recognized by other Adobe software and programs that read XMP metadata.
Where Should I Put My Lightroom Catalog?
The Lightroom catalog needs to be in a local drive.
Generally, it’s best to put the Lightroom catalog on your computer’s internal disk. This way, the program will run more efficiently.
Also, it’s less likely that the catalog gets corrupted in case there’s a connection interruption while the catalog is updating.
How Many Catalogs Should I Have in Lightroom Classic?
There isn’t a single answer to this, as it depends on your individual needs.
In most cases, having a single Lightroom catalog is the best option. This is because organizing your photos and using the search bar to find them later is easier.
It’s also easier to use one catalog when you have to keep working while processes are running in the background. This is because Lightroom won’t let you switch catalogs before it finishes all the processes.
However, using multiple catalogs may be useful for some specific needs. For example, if you want to keep a separate Lightroom catalog for each one of your clients.
It’s also a good idea to have more than one catalog if you give access to different users.
How to Edit Photos in Lightroom Classic
Now, let’s talk about photo editing. This is where Adobe Lightroom Classic really shines. While you have a Quick Develop panel in the Library for basic adjustments, you’ll mainly want to work in the Develop Module.
Lightroom users may have different ways of post-processing their images. This is because editing photos is not a fixed process.
Each photo may require different adjustments, and each photographer will have a different style. So, I’ll show you a basic post-processing flow to get you started – but feel free to change it and experiment on your own.
Step 1 – Lens corrections
All lenses create distortions – some more than others- but they should be adjusted.
So, start editing by going to the Lens Correction panel on the right side of the Develop Module.
Click on Remove Chromatic Aberration and Enable Profile Corrections – this will fix the problem automatically based on the lens you used.
You can fix this manually if the Adobe software doesn’t recognize the lens.
Step 2 – White balance
To fix the white balance, you need to go to the Basic panel on the Develop module.
Then, grab the white balance eye dropper and click somewhere in the image where it should be white, grey, or black. It’s best if you use a grey card in the picture.
You can fine-tune it using the Temp and Tint sliders.
Step 3 – Tone
Here, you can adjust the light and contrast of the image to achieve the correct exposure. It’s a good idea to start with the Exposure slider to fix the overall brightness of the photo.
Then, you can fine-tune the contrast using sliders or the Tone Curve.
The Tone Curve gives you further control, but it may require some more editing skills. You can work with the Parametric or the Point Curve on the overall image.
Then, you can also work with each of the channels separately.
Step 4 – Color
To work on the color, you have the Color Mixer. You can work on each color’s Hue, Saturation, and Luminance using the sliders.
I find it easier to switch to the Point Color version. Then, I use the eye dropper to select which color I want to adjust.
You can also use the Color Grading panel (before it was the Split Toning panel) to adjust the colors by tone.
Step 5 – Local edits
You can perform local edits by using the Mask tool, which is above the Basic panel.
Many AI-powered masks will make your life easier. You can layer the masks to create one that’s more complex.
Of course, you can also use the Brush tool to fine-tune the mask.
Once the mask is done, your adjustments will only be applied to that area.
Step 6 – Lightroom presets
Lightroom presets are automated post-processing steps that achieve a specific effect or mood. You can use one of the presets already included or get them online – they’re easy to find on sale and there are also plenty of free Lightroom presets.
Another possibility is to save your edits as your own presets to apply to other photos or share them with others.
To add a preset, go to the left side of the Develop Module and browse the available presets. Click on one to apply it.
You can adjust the intensity using the Amount slider on top. Also, you can fine-tune the effect with the editing panels on the right.
Step 7 – Batch edit
If you want to apply your edits to other photos, go to the Library and select the desired photos. Then, click the Sync button to batch-edit your photos.
Select the adjustments you want to apply to all the images on the pop-up window and click Sync.
How to Export Photos From Lightroom Classic
As I mentioned before, all the edits you do to an image in LrC aren’t applied to your original file. So, if you want to save your final image, you need to export it.
Exporting photos also allows you to save your photos in different image formats and sizes. For example, export a small JPEG if you only want to share it on social media. This way, you won’t fill your memory unnecessarily.
You can export one or multiple photos at the same time. However, all of them will have the same export settings.
To do so, select the image(s) you want. Then, go to File > Export. If you’re in the Library, you’ll also see an Export button on the bottom left – it works similarly.
Both methods will launch the Export Settings window. Here, you can decide several things – the location where your exported file will be saved, the name, the file format and quality, the size, and the metadata.
It’s also possible to adjust the image’s sharpness, add a watermark, and even open it in Adobe Photoshop after exporting if you want to keep working on the file.
Once everything is decided, click Export.
How to Export Photos from Lightroom Classic Without Losing Quality
The image quality is determined in the File Settings section.
To get the most quality, choose Image Format TIFF > Compression None.
If you want a smaller file, you can still use a JPEG format, but make sure you set the Quality to 100 and uncheck the Limit to File Size option.
How to Use the Publish Services in Lightroom Classic
By default, you can publish your images to Adobe Stock and Flickr. However, you can also add other online services like ShootProof.
First, you need to set it up and authorize the account. To publish a photo, drag it to the desired service.
You’ll see a preview of the images to upload if you’re happy – click on Publish. This will upload and publish the photos.
You can see a detailed tutorial on how to use the Publish Services in the YouTube video above.
A Beginner’s Guide to Lightroom Classic: FAQs
How does Lightroom Classic work?
When you import a photo into LRc, you create a link between the original file and Lightroom. So, LRc shows you a representation for you to edit, add keywords, etc.
Everything you do is stored in the LRc catalog and never applied to your original photo. Export the file if you want to see your changes outside of LRc. Then, a copy with all the changes applied will be saved in your desired location.
What is the difference between Lightroom and Lightroom Classic?
Adobe Lightroom automatically syncs with the Creative Cloud. A copy of your photos is stored in the cloud, and you can access their latest version on any device.Instead, LRc works with local files saved on a hard drive. It’s possible to manually sync them through the Creative Cloud, but it’s not designed to work that way. LRc allows more advanced edits.
Do professional photographers use Lightroom or Lightroom Classic?
Each professional photographer chooses the version of Adobe Lightroom based on their own workflow and needs.
If they mainly work on one computer and do advanced edits, they usually prefer LRc.
Instead, they may prefer Lightroom CC if they work on multiple devices.
Is Lightroom Classic easy to use for beginners?
Even if it may look more daunting, all the basic adjustments are easy to use in LRc.
What is the best way to learn Lightroom?
The best way to learn is by following Lightroom tutorials and, most importantly, using the program.
How long will it take to learn Lightroom?
The time depends on each person and the level they’re trying to achieve. It may only take a few hours for a hobbyist who needs to make basic adjustments.
Instead, a professional who wants to specialize in photo retouching may take weeks of full-time study and continued studies to update their skills.
In what order should I edit photos in Lightroom?
My preferred order is to start with lens correction and geometry. Then, adjust the white balance, the exposure, and the color. Once the general adjustments are done, move on to the selective edits.
You'll Also Like These:
 What is a Lightroom Catalog (+ How to Create a Backup)
 Adobe Lightroom Review – Still the Best Image Editor in 2024?
 Virtual Photography Guide (+ Most Popular Video Games)
 Lightroom CC Mobile Guide
 What’s the Best Way to Buy Lightroom in 2024?
 12 Best Adobe Lightroom Alternatives in 2024 [User Tested]

Ana Mireles is a Mexican researcher that specializes in photography and communications for the arts and culture sector.

