


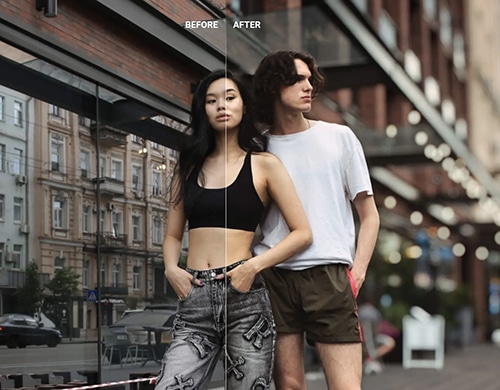
How to Blur Background in Lightroom
Learn how to blur backgrounds in Lightroom using the best 3 methods and filters. Follow this step-by-step guide for both desktop and mobile.
Lightroom | Software | By Ana Mireles
This guide is for every photographer who’s wondered how to blur background in Lightroom.
Perhaps you don’t own a lens with a wide aperture to blur the background with a shallow depth of field.
Or maybe you just wished you’d used a larger aperture in the first place! Whatever the case, we’re here to help.
Easy to use software to blur the background in just one click.
Blurring background in Lightroom is useful for many reasons. Bokeh can be used to highlight your subject by ‘blurring out’ distracting background elements.
It can also help give an image a more three-dimensional-look, with varying degrees of focus across the layers of your image.
Let’s look at three great ways to introduce a background blur effect to your photos using Adobe Lightroom, and one neat way to blur background in Lightroom CC Mobile.
Popular course reveals the simple tricks to getting incredible results with Lightroom in record time. Give Your Photos The Look They Deserve!
![]()
How to Blur Background in Lightroom – 3 Ways
It’s not uncommon for photographers to ask, Is there a blur tool in Lightroom? After all, we tend to think of it as more of a Photoshop function.
But there are, in fact, multiple tools you can use to blur background in Lightroom.
I’m going to show you three such methods. Some of them, like the radial filter, are easier but give you little control. The Graduated filter and Brushes give you more control but require more work.
Choose the one that’s better for your photos. I’m using Lightroom Classic but all three are available in Lightroom CC.
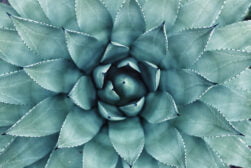
1. Lightroom Background Blur: Brushes

Credit: Dan Golde
With adjustment brushes, you can make the most precise mask to blur the background out of any photo, regardless of the shape of the subject.
You can do this as realistically or as creatively as you want. That’s what makes it so special. Here are the steps to take for this photography blurring brush effect.
Step 1: Import your photo
In Lightroom, you need to import your images into the library instead of just opening them as you would do with Photoshop or other programs.
You can do this in the menu File, Import Photos and Videos. This will open a browser window where you can choose the files that you want. Then click on the Import button on the bottom right of the window.
Step 2: Grab the Adjustment Brush tool
Once you have your images in the Lightroom Library, you need to move into the Develop module to edit them. In there, you’ll have all your controls on the right.
On the top side of the panel, you’ll see the different adjustment tools available in Lightroom. The first one from the right is the Brush. Click on it to activate it.
At the bottom of the panel, you’ll see that the different options to customize the tool change and the ones for the brush become active, for example, size and feather.
Step 3: Customize the Adjustment Brush
Depending on what you want to select, you can adjust how big or small you want the tip of your brush to be. Adjust it with the slider called Size.
Then, with the Feather slider, you can change the hardness of the brush. Adjust this depending on whether you want a smooth transition or hard edges around your selection.
Step 4: Paint the background

Anything you paint will be affected by the changes you make (in this case, it will be blurred), so you need to paint the background, not the subject.
It doesn’t matter if you’re not very precise at first, you can fine-tune the selection in the next step. For more accuracy, you can check the Show Selected Mask Overlay option to see in red everything that you paint.
Step 5: Fine-tune the selection (optional)
If you accidentally painted over the subject when you were making the layer mask, you can easily correct it. On the brush panel, above the Size slider, you’ll find the Erase option. Click on it.
You can then adjust the eraser brush for size and hardness, and remove the mask from any areas where you don’t want it.
Step 6: Blur the background
Move up on the panel and find the Sharpness slider. Drag it to the left to start blurring. You can now uncheck the Show Selected Mask Overlay box to hide the red and see the blur effect on your photo more clearly.
2. Lightroom Background Blur: Radial Filters


Credit: Laura Briedis
Step 1: Import your photo
Import your photo into Lightroom or open it if you already have it in the catalog. This method is based on an oval or circular shape, so you need to choose the photo wisely. For example, if you want to do a soft blur vignette, or when your subject in the foreground is round.
Step 2: Grab the Radial Filter
Move to the Develop module and choose the Radial Filter from the adjustment tools. It’s the second one from the right.
Step 3: Make the selection

Click on the center of your subject and drag the mouse outwards to create the circle or oval around it. Don’t worry if it’s not super precise, you can adjust it as needed after it’s done.
Step 4: Fine-tune the selection
Click and drag the on the edges to adjust the selection. If you can’t manage to fit the circle properly around the subject, it might be because you’re not exactly in the center. You can drag the center pin to fix it.
Then, you can slide the Feather slider left or right to increase or decrease the transition area. To see this more clearly you can have the red mask on.
You can always make extra adjustments to the selection using the brush.
Step 5: Blur the Background
Find the Sharpness slider on the panel and move it towards the left until you reach the desired amount of blur.
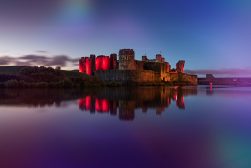
3. Lightroom Background Blur: Graduated Filters


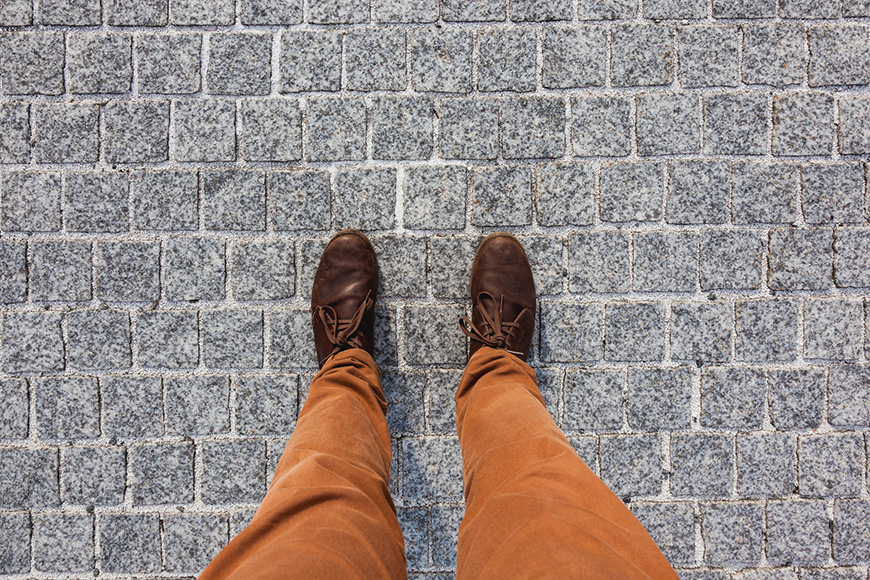
Credit: Karsten Winegeart
Step 1: Import your photo
This is the most natural way to blur a background in Lightroom because the depth of field created on-camera works on planes, so all elements on the same plane will be in focus even if they belong to different subjects.
This is the result you’ll get using the graduated filter. As such, you can choose images where you want to blur the front and back of the subject, as in the above example.
So, choose an appropriate photo and import it into Lightroom. Then move into the Develop workspace.
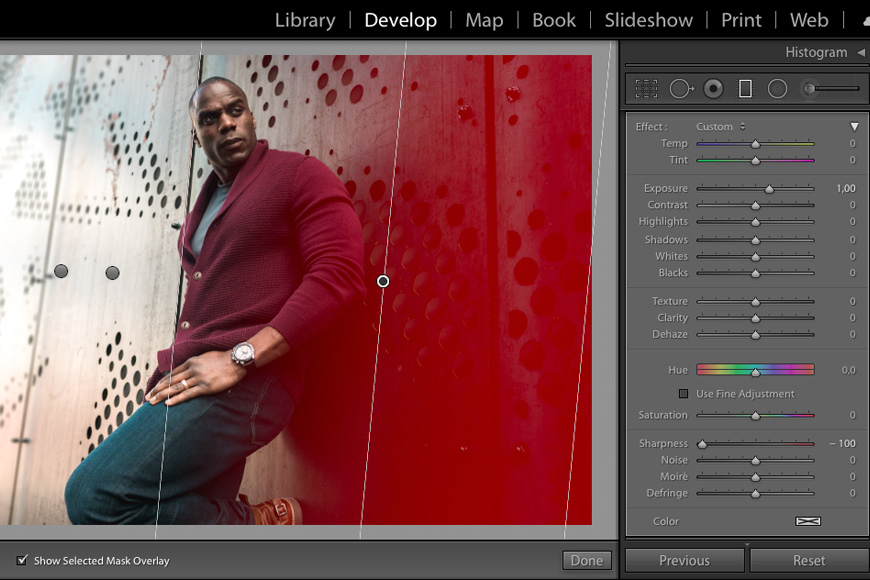
Step 2: Select the Graduated Filter
This is the third adjustment tool from the right, just next to the radial filter. Click on it to activate it.
Notice that you don’t get any new sliders with this one. That’s because you’ll fine-tune it directly, but I’ll get to that.
Step 3: Apply the selection
Click and drag on the area that you want to blur. Notice that three lines appear. You can click and drag the ones on the outside to adjust the feathering.
The more separated you have the lines, the bigger transition you’ll have and vice versa. You can also change the direction of the lines; they don’t have to be horizontal or vertical.
Step 4: Add another Adjustment Filter (optional)
This step is optional depending on what you want to achieve. In my example, I needed one for the back of the subject and one in front.
Step 5: Blur the background
As with any of the other methods, you now just have to find the Sharpness slider and drag it to the left. Click on each filter to adjust them separately.
How Do I Blur the Background in Lightroom CC Mobile?
If you need to blur the background using your smartphone, don’t worry, all three methods are also available in Lightroom Mobile.
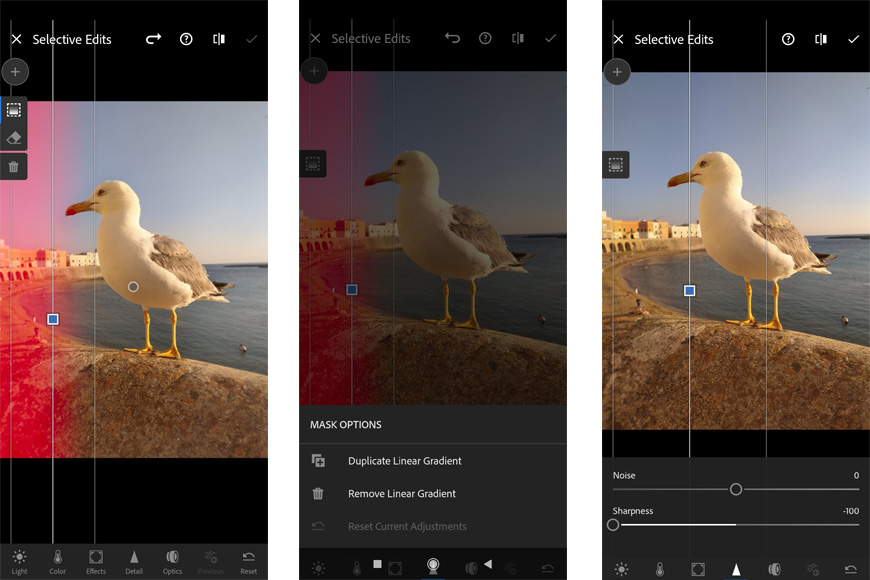
Credit: Ana Mireles
- Import your image into Lightroom or take one using Lightroom’s camera.
- Scroll through the menu and find Selective mode. Tap on it to activate.
- Click on the Plus icon on the left to open the selective tools menu.
- Pick the method of your choice from Radial Filter, Graduated Filter, or Brush.
- Tap and drag on the image to create the selection mask.
- (Optional) Tap and hold on the pin to open the Mask options if you want to Invert, Duplicate, or Delete the mask.
- Scroll through the menu until you find Detail, tap on it to open the sliders.
- Drag the Sharpening slider to blur the background.
- Save or share your final image.
FAQs About Background Blur In Lightroom
How do you blur the background in Lightroom?
There are many ways to add background blur in Lightroom. The most effective tools include the use of the Radial Filter, Graduated Filter, or Brush tool.
We recommend that you experiment with each of the Lightroom background blur tools to get the results that suit you.
Can you add a background in Lightroom?
While you can add background blur in Lightroom, it’s tricky to add a new background to your image.
The best application to add a background to an image is Adobe Photoshop. It allows you to create new layers to take a foreground subject and add it to a new background.
Does Lightroom Classic have a blur tool?
Lightroom Classic has similar features to the standard version of Lightroom.
The process is simple to apply and utilizes the Adjustment Brush, Radial Filter, and Graduated Filter to achieve a blur effect.
How do you blur the background in photos?
To blur the background in photos, you’ll need editing software or a smartphone app that supports the function.
Every app works differently, with features such as a Radial Filter, Graduated Filter, or Brush. Others, such as those found on smartphone apps, apply a simple radial filter in varying strengths.
How to Blur Background in Lightroom | Final Words
I hope you enjoyed this tutorial on how to blur background in Lightroom. As you can see, Lightroom blur effects are actually very easy to create, and particularly useful when editing portraits to help your subject ‘pop’.
If you have any questions or suggestions, let us know in the comments.
Now, see how to blur the background using Photoshop Elements and how to blur background on iPhone.


Ana Mireles is a Mexican researcher that specializes in photography and communications for the arts and culture sector.


