


Best Telescope for Astrophotography: Viewing Planets & Galaxies
Use a telescope for astrophotography to bring you closer to the wonders and mystery of our galaxy. Discover which telescopes offer the best bang for your buck.
Investing in the best telescope for astrophotography will bring the wonders of the night sky closer, and open the doors to creative deep-sky imaging.
Fortunately, astrophotography telescopes are available for a range of budgets here in 2024.
Whether you’re a newcomer to night sky photography or an experienced astrophotographer, this guide is here to help you find the best telescope for your needs.
There’s a variety of deep-sky astrophotography telescopes to choose from: a refractor telescope uses multiple optical glass elements to focus, much like a telephoto lens.
A reflector telescope uses mirrors to perform the same task – you’ll hear of Newtonian, Schmidt Cassegrain, and Maksutov reflectors, which we’ll explain below.
To use an astronomical telescope with your camera of choice, you’ll need a telescope adapter mount – we’ll also discuss the equipment you need for deep sky astrophotography too.
First, let’s have a look at the telescope recommendations..
Best Telescope for Astrophotography in 2024
| Image | Product | Features | |
|---|---|---|---|
 | Explore Scientific ED 80 TelescopeOUR #1 CHOICE |
| View Price → |
 | Orion ED80T CFHIGHTLY RECOMMENDED |
| View Price → |
 | William Optics Zenithstar 61 f/5.9 IIBEST BUDGET |
| View Price → |
 | Sky-Watcher 8" f/3.9 Quattro |
| View Price → |
 | Astro-Tech AT70ED 2.8" f/6 ED Refractor OTA |
| View Price → |
Finding a good telescope that excels at astrophotography as well as visual astronomy is a little harder than one might think.
Many of the more popular scopes – especially those that use alt-azimuth mounts – are great at finding and viewing celestial objects but have limited astrophotography capabilities.
The following telescopes are all excellent for astrophotography, beginner-friendly, and offer a good balance of price and performance.
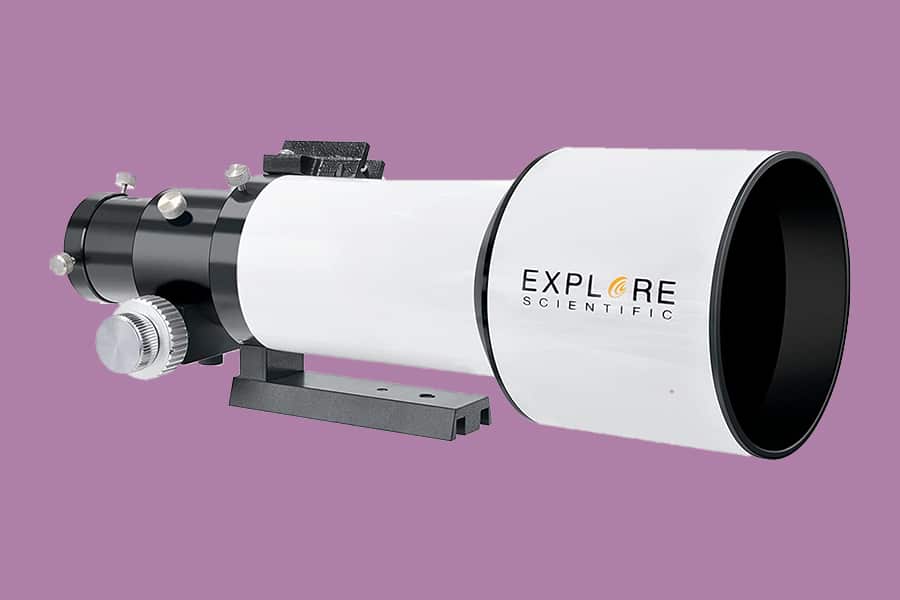
Explore Scientific ED 80 Telescope
- Images have fantastic color and sharpness
- Extremely portable
- Work with most mounts
- Next to no chromatic aberration
- Easy to set up and use
- Free lifetime collimation service
- Excellent value for the money
- Meade-style scope mount makes it hard to use other finder scope brands
- Does not come with eyepieces, mount, or finder scope
To many, this is the best telescope for viewing planets and galaxies.
The Explore Scientific ED80 is a small APO refractor telescope perfect for both intermediate astrophotographers and serious beginners who want to invest in a telescope that will really perform.
Made with advanced optics, the ED80 yields crisp, clear images that are true to color and free of chromatic and spherical aberrations.
Its small size and light weight make it a fantastic grab-and-go scope, in addition to ensuring that it’ll work with just about any entry-level mount (i.e. the Sky-Watcher EQ6-R Pro, Celestron’s advanced VX mount, etc.).
Unless you find a kit, you’ll need to buy the finder scope, mount, and eyepiece(s), as well as a field flattener.
Still, given that most decent entry-level astrophotography telescopes run about $1,500, you’ll have a lot of wiggle room for buying the components you really want.
If photographing star clusters, the milky way, galaxies, and nebulae is what you’re looking to do, the Explore Scientific ED80 is where it’s at.
Definitely one of the best telescopes for astrophotography you can buy in the under-$1,000 bracket.
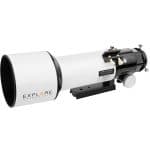
Orion ED80T CF

- Premium optics
- Compact and lightweight
- Great value for the money
- Built-in dew shield
- Includes a carry case
- Does not come with eyepieces, mount, or finder scope
This is the best telescope for beginners dipping their toes in the hobby.
Similar to the Explore Scientific ED80, the Orion ED80T CF is a high-performing 8″ APO refractor at a relatively entry-level price.
Made by Orion Telescopes, the Orion ED80T features top-quality optics with a triple element glass objective lens.
Its ED glass,HOYA filter, and 80mm aperture all work together to provide true-color, detail-rich views of both our solar system and larger deep-sky objects.
Its a joy to use, extremely portable, and provides high-quality imaging at a reasonable price.
Lightweight and compact, the carbon-fiber build and included carrying case make this a great telescope for both home and travel.
Like the ES ED80, the Orion ED80T CF doesn’t come with many accessories – you’ll have to buy your own mount, eyepiece(s), and other equipment. (A field flattener will definitely be needed.)
Overall, an excellent night sky scope for serious beginners who want to build their own astrophotography set-up.
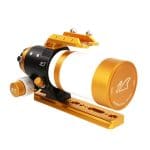
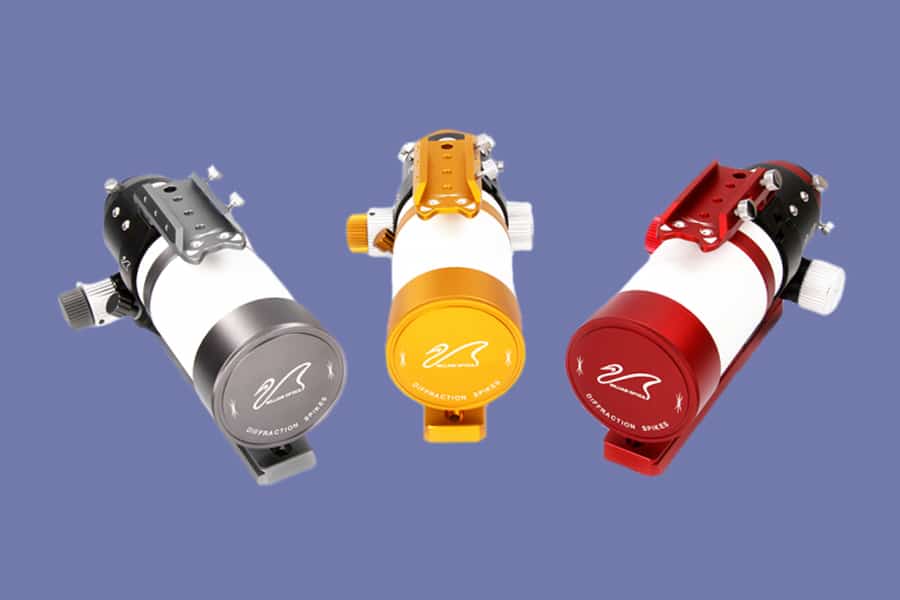
William Optics Zenithstar 61 f/5.9 II
- Ultra-portable
- Doublet APO
- Retractable dew shield
- Integrated Bahtinov mask
- Good looking
- Affordable
- Not the largest aperture
- Does not come with eyepieces, mount, or finder scope
If the previous two scopes are a bit out of your budget but you still are in the market for a high-performing APO refractor, check out the William Optics Zenithstar 61 II. This is one of the best portable telescopes that won’t break the bank.
Excellent imaging in a tiny package, the Zenithstar 61 II features a two-element, air-spaced apochromatic objective glass lens (FPL-53).
The 61mm lens has a focal length of 360mm, making for a nice, mid-range focal ratio of f/5.9.
Sure, it’s not the largest aperture, but this little scope performs amazingly well when paired with mirrorless and DSLR cameras. The high-contrast images come out crisp and clean, and with ample color correction.
The entire optical tube assembly (telescope tube, focuser, etc.) weighs in at less than 5 lbs, making it one of the lightest scopes on this list.
Cool extras include a Bahtinov mask, retracting dew shield, and a color-matching dovetail plate.
Oh, and this is a seriously good-looking scope. Perfect for a gift!
Like its 8″ siblings above, the Zenithstar 61 II is an OTA-only purchase. You’ll need to buy the finder, mount, diagonals, guide scope, eyepiece(s), and field flattener separately.
Note: Like the refractor scopes above, the Zenithstar 61 II is a wide-field, deep-sky scope. It’s not a great pick for planetary photography.
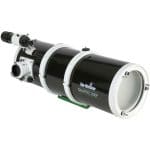
Sky-Watcher 8″ f/3.9 Quattro

- Fantastic image quality
- Designed especially for astrophotography
- Inexpensive
- Super fast (f/4)
- Includes finder scope
- Borosilicate mirrors
- No fan assembly
- Tube construction could be better
If you’re looking for an affordable reflecting telescope, Sky-watcher’s Quattro is a favorite budget option among the amateur astronomy community.
Designed to maximize its astrophotography capabilities, the 8″ Quattro has a shortened focal length of 800 mm, giving it a super-fast f/4 focal ratio.
This means you can take much shorter exposures, capturing quality shots of the moon, planets, and other bright celestial objects.
The borosilicate mirrors help to reduce the effects of temperature variations, and the tube assembly itself is lined with nine internal baffle rings to cut down on light leaks.
The package includes a 2″ Crayford-style focuser, a 2” to 1.25” adapter, and an 8×50 straight-view finderscope.
The 8” Quattro OTA is a bit heavier than our other options here (21 lbs), so you’ll need to choose a mount that can hold at least 25 pounds to cover the weight of your camera and accessories.
You’ll also need to buy a coma corrector. Sky-Watcher has designed one specifically for its Quattro series which works particularly well with this particular scope.
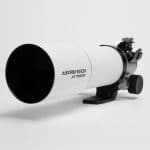
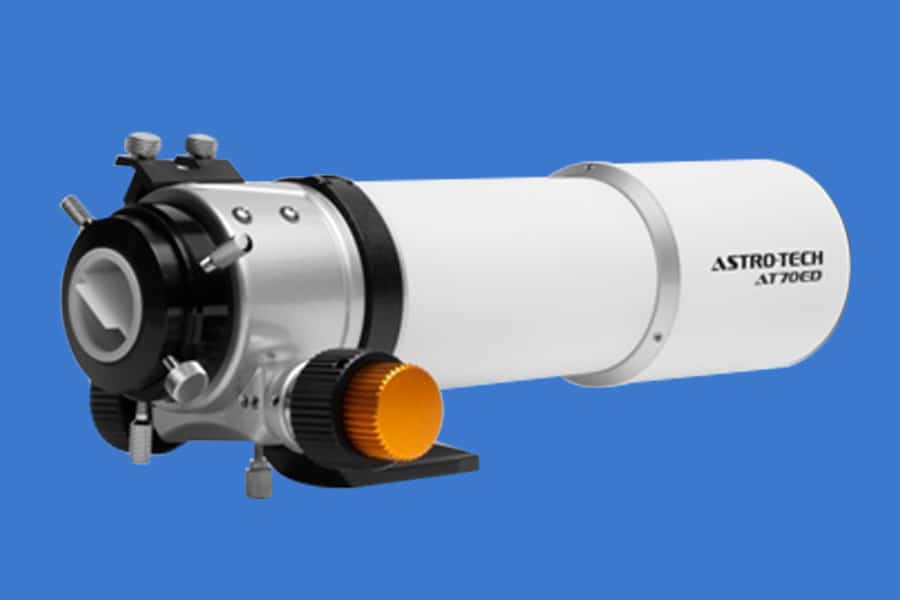
Astro-Tech AT70ED 2.8″ f/6 ED Refractor OTA
- Doublet refractor
- Solid optics
- Excellent build
- Fantastic price
- Retractable dew shield
- OTA only
A beginner telescope for astrophotography at a fantastic price, the Astro-Tech AT70ED 2.8″ f/6 ED is one of the best budget refractor telescopes for getting started in the world of astrophotography.
For around $300, you get a 70mm aperture, 420mm focal length, f/6 scope with fully multi-coated doublet optics and ED glass!
Lunar, planetary, and brighter deep-sky objects all look fantastic through this little scope. With a field flattener, stars are pinpoint sharp, contrast is excellent, and the color is right on.
The OTA weighs less than 5 lbs, yet the build is solid. Its light weight not only enhances portability, but it also means that just about any entry-level equatorial mount will hold it and all your camera gear easily.
Really, you can’t beat the price on this awesome-performing little scope. Definitely one of the best budget telescopes around!
How to Choose a Telescope for Astrophotography

Credit: Benjamin Voros
Which astrophotography telescope you choose will depend largely on what you’re most interested in photographing.
For example, if you’re primarily interested in amazing images of the moon and planets, you’ll likely want a different telescope than one designed for deep-sky photography.
There are also a number of other considerations you’ll want to keep in mind. Here are some of the most important:
-
Price
A cheap telescope – i.e. something in the $150 – $300 range – will buy you a good beginner’s telescope for learning to spot celestial objects, but even an entry-level DSLR camera with a decent lens will usually take better photos.
Note: Anything with a computerized mount in this price range is likely to have poor optics.
A mid-priced telescope – something between $700 and $1,500 – will get you a decent, entry-level astrophotography telescope that you’ll likely be happy with for a long time.
An expensive telescope – those $2,000 and above – will buy you the best telescope for astrophotography with a large aperture and computerized tracking.
Note: When setting your budget, remember that there are a number of accessories you’ll likely also be needing (e.g. a mount, camera adaptor, etc.).
-
Type of Telescope
Refractor Telescopes – use a series of lenses to refract light.
Good for lunar and planetary photography, as well as imaging larger deep-sky objects (i.e. the Andromeda Galaxy or the Orion Nebula).
Note: Inexpensive models have more chromatic aberration than higher-priced models.
Apochromatic (APO) Telescopes – A type of refracting telescope that eliminates chromatic aberration.
Fantastic for any kind of wide-field astrophotography, but expensive.
Note: Small APO refractor telescopes are the best choice for beginners.
Newtonian Reflector Telescopes – use a primary and secondary mirror system to reflect light into the eyepiece.
Reflecting telescopes need to be collimated regularly in order to keep their focus. They also tend to be somewhat big and bulky.
Dobsonian – a type of Newtonian telescope with a simplified mount system, making it particularly easy to set up and use.
Note: Not a good telescope for long-exposure astrophotography or photographing star trails.
Schmidt-Cassegrain Telescopes (SCTs) – combine the technology of the Newtonian reflector telescope with the compactness of a refractor telescope.
SCTs are portable, easy for amateur astronomers to use, and have very little chromatic aberration.
Excellent for observing planets in our solar system, double stars, and smaller objects in deep space that will fit in its narrow field of view.
-
Type of Mount
Alt-azimuth – Fine for visual astronomy, but not recommended for deep-sky astrophotography.
German Equatorial Mount (GEM)- Tracks objects in the night sky as they move. Can be manual or motorized, but motorized with a built-in polar finder is best.
A Multi-role Mount – Combines the functionality of an equatorial mount with the convenience of the Alt-Az mount. These tend to be expensive.
Note: A German equatorial mount or some variation of it is absolutely necessary for long-exposure imaging.
-
Aperture Size
One of the most important aspects of astrophotography is how much incoming light we can get to our camera’s sensor.
This is determined by a telescope’s aperture: a larger aperture will let in more light – see this f-stop chart for clarification.
The more light that gets in, the better your scope will “see.” You’ll also be able to take shorter exposures.
If you have a telescope with a quality optical system, you can get away with a modest aperture when doing long-exposure photography.
For high-resolution imaging of planets and other bright objects, however, you’ll not want to go smaller than 8 inches.
Note: Unlike camera lenses, the mm designation on a telescope refers to its aperture, not its focal length. For example, a 100mm telescope has an aperture of 100mm, but a focal length between 600-800mm.
-
Focal Ratio (F-number)
Related to aperture size, the focal ratio (f-number) determines how “fast” light reaches your sensor or eyepiece.
A faster f/4 or f/5 focal ratio is best for wide-field observing and deep-sky images.
A focal ratio between f/11 and f.15 is ideal for photographing bright objects like the moon, planets, and binary stars – the kind of incredible imagery you might have seen on sites like Astrobin.
Focal ratios between f/6 to f/10 are good all-rounders: versatile enough for photographing bright planetary bodies as well deep-sky objects.
-
Focal Length
On a telescope, the focal length is the distance from the objective lens or mirror to the point where light comes to focus.
Though not as important as focal ratio, it’s still important to choose your focal length carefully: it directly impacts both the magnifying power of your telescope and the field of view.
Telescopes have fixed focal lengths. The only way to change it is by adding a Barlow lens to increase it or focal reducer to reduce it.
The shorter the focal length, the greater your field of view (but you’ll get less magnification).
A longer focal length yields a smaller field of view and higher magnification.
The best telescopes for wide-sky photography are those with a wider field of view, which means a shorter focal length.
For planetary astrophotography where you need a high degree of detail, you’ll want a longer focal length.
Note: Short focal length telescopes are easier for beginners. With a long focal length telescope, it can be challenging to find a target object or keep it in the field of view.
-
Accessories
There are a number of accessories absolutely necessary for successful astrophotography, and most astrophotography equipment doesn’t come cheap.
As a result, you should always keep your future needs in mind with any new telescope purchase.
At minimum you’ll need:
- A sturdy heavy-duty tripod
- A mount (ideally equatorial or multi-role)
- A finder scope with brackets
- A T-ring and T-mount adaptor (or coma corrector)
- A field flattener
- A diagonal for mount alignment and visual observation
- Eyepieces
- Tube rings and a dovetail bar (if there’s no integrated dovetail)
Assume you’ll want to upgrade your accessories and/or scope as you get more experienced and purchase accordingly.
How to Attach a Camera to a Telescope
While you can get some surprisingly good photos by simply placing a camera or smartphone in front of the eyepiece (ideally with an adaptor), this isn’t the best way to go about it, since it leaves a lot of optics between the sensor and the target object.
(Every additional lens brings with it its own optical aberrations, so you’ll never get the best images possible this way.)
This method also creates less-than-sharp images, as there’s more opportunity for camera shake.
As a result, most serious astrophotographers opt for the prime focus method, which involves attaching an interchangeable lens camera directly to the optical tube directly.
Since there’s no eyepiece or extra lenses in between, you get proper alignment while eliminating camera shake.
What you will need
- T-Ring (also called a T-Mount): a ring that fits directly to the camera body, made specific to your camera’s mount.
- T-Mount adapter or Coma Corrector: attaches the t-ring + camera set-up to the telescope. Use a T-mount adaptor for f/6 or slower, a coma corrector for f/5 or faster.)
How to Attach Your Camera Using the Prime Focus Method
- Remove all of the visual accessories from your telescope (eyepiece, etc.).
- Remove the camera lens from your camera (if attached).
- Thread the T-ring onto the camera body. There’s usually a dot on the T-ring that lines up with the lens dot on your DSLR camera. The T-ring should click into place onto your camera body just like a lens would.
- Screw the T-mount adaptor onto the T-ring.
- Attach the field flattener into the eyepiece opening, if you’re using one.
- Screw the entire assembly into the eyepiece opening.
- (Alternatively, you can screw the T-mount adaptor first to the telescope and then attach the camera to it. Whichever is easier.)
- Make sure your camera is securely attached. The eyepiece opening should have locking screws that will hold it in place.
Since the prime focus method makes use of the natural focal length of the telescope, your telescope’s native magnification is all that you’ll get.
If you’re looking to do planetary photography and need more magnification, you can always add a Barlow lens to increase your focal length.
Frequently Asked Questions
What focal length telescope is best for astrophotography?
Which focal length to choose depends on what you want to photograph and how skilled you are with the telescope.
If you want to photograph wide swaths of the sky or you’re a beginner, choose a short focal length. For detailed shots of the moon or planets, choose a long focal length.
Do you need a telescope for astrophotography?
No, you do not need a telescope for astrophotography. Many celestial sights can be photographed using only a DSLR camera and telephoto lenses.
Can I use any DSLR for astrophotography?
Yes, you can use a DSLR for astrophotography, both with and without a telescope.
Final Words
If you’re not sure whether astrophotography is for you, you might well want to start with a cheaper telescope – something like the Astro-Tech AT70ED.
Astrophotography isn’t a cheap hobby – as a full kit, the best telescopes for astrophotography generally start around $1,500.
(OTA-only purchases in the $600-$900 range will still easily hit that price point after all the accessories are added.)
If you’re more into visual astronomy and just want to take occasional photos take a look at the Celestron NexStar 6SE. It’s a decent Schmidt-Cassgerain telescope that’s great for beginners.
What about you? Have you used any of the telescopes on this list for your night sky photography?
 Best Spotting Scope for Birding, Astronomy, Ocean Viewing & More
 Astrophotography for Beginners – How to Create Stunning Images of the Night Sky
 How to Photograph the Moon
 Astrobin Review – Image Hosting & Social Network for Astrophotographers
 Best Sony Lens for Astrophotography and Night Photography

Usnea Lebendig is an experienced photographer and reviewer who loves to photograph professionally and in moments where the world’s beauty and/or strangeness leaps in front of the lens.


