


Butterfly Lighting: 13 Best Techniques, Examples & Setups
Butterfly lighting is a useful tool for portrait photographers to create that 'Hollywood glamour photography' look. Discover how to do it well in this guide.
If you’re a beginner portrait photographer, this guide to the butterfly lighting pattern is what you need to create really striking images.
In studio-portrait photography, there are different lighting setups that photographers use to create consistent results.
In this article, I’ll tell you how to set up butterfly lighting, how to recognize it and the different effects you can create with it by analysing some examples.
This lighting technique is one of the first ones studied by beginner photographers because it’s flattering for all sorts of subjects, although it’s mainly used for beauty shots. It’s also easy to learn and budget-friendly!
So, if you’re interested in improving your portraits and learn about lighting patterns, keep on reading.

Revolutionary lighting simulation software that streamlines studio photography and film making.
Use code SHOTKIT10 to save 10%.
What is Butterfly Lighting?
Butterfly lighting is a type of portrait lighting technique used primarily in a studio setting. Its name comes from the butterfly-shaped shadow that forms under the nose because the light comes from above the camera. You may also hear it called ‘paramount lighting’ or ‘glamour lighting’.
What is butterfly lighting used for?
Butterfly lighting is used for portraits. It’s a light pattern that flatters almost everybody, making it one of the most common lighting setups.
Butterfly lighting was used to photograph some of the most famous stars from classic Hollywood, and that’s why it’s also called Paramount lighting.
With it, you can highlight cheekbones and create shadows under them as well as under the neck – which makes the model look thinner.
That’s why it’s often used for beauty, boudoir and glamour photographs – even if it’s also perfect for photographing men, children or elderly models.
What features identify a photo as having butterfly lighting?
A butterfly lighting pattern is a setup that consists of a main light coming from above and in front of the subject. Thanks to this position, it highlights the nose and cheekbones – making the subject look slimmer and the face longer.
The main characteristic is the shadow created under the subject’s nose that’s shaped like a butterfly. It also causes a shadow underneath the subject’s chin. Both shadows can be less evident if a reflector bounces back the light from the main source.
You can also identify when butterfly lighting is used in a portrait since you’ll be able to see the main light’s reflection on the top part of the iris in the subject’s eyes.
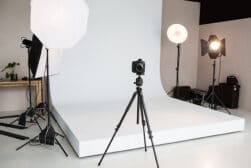
What Equipment do you need for Butterfly Lighting?
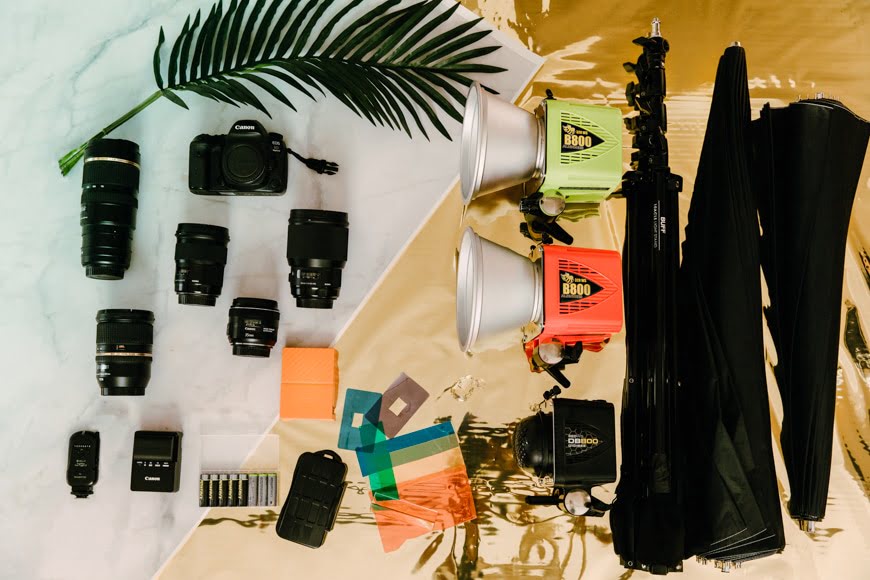
Camera gear of portrait photographer Ambe Williams.
To use butterfly lighting in portrait photography, you need a camera, a main light, and – if you want – a reflector. You don’t need expensive gear or a lot of knowledge in balancing multiple lights.
However, if you want to get serious about portrait lighting – here’s a more in-depth list of what you need.
-
Camera
While you can make portraits with any camera, one with interchangeable lenses would be the best choice. You can choose between DSLR and mirrorless according to your preference; they are both suitable for studio portraits.
What’s more important is the sensor size. If your budget allows it, a full-frame camera will give you sharper images. However, nothing is stopping you from making some spectacular butterfly photography using a crop sensor camera.
Here are some of the best cameras for portrait photography:
Canon 5D Mark IV – full-frame DSLR
Nikon Z7 – full-frame mirrorless
Nikon D3500 – entry-level DSLR
Canon EOS Rebel SL3 – entry-level DSLR
How Much Do You REALLY Know About Photography?! 🤔
Test your photography knowledge with this quick quiz!
See how much you really know about photography...

-
Lens
There are two important things to consider when choosing a lens for portrait photography: the distortion and the bokeh.
To avoid face distortion, you should work with focal lengths that resemble the human eye or longer – anything above a 50 mm lens will do.
However, to achieve a good bokeh effect, you’ll be better with longer focal lengths. A short telephoto lens is the best choice.
Here are the favourite lenses from professional portrait photographer Ambe Williams, whose gear is displayed in the photo above:
Sigma 50mm f/1.4
Canon 35mm f/2
Tamron 24-70mm f/2.8
Tamron 70-20mm f/2.8
-
Light
Butterfly lighting requires a key light that can be a flash unit or continuous. If continuos, it can be artificial or natural. In other words, you can use strobes, speedlights, LEDs or even the sun.
The most important is where the light is placed – but we’ll get to that later. Keep in mind that, even if it can be done with any source of light, it’s typically done with strobes.
Some of the strobes preferred by professional portrait photographers are:
Profoto B1 500 Air TTL
Digi Bee Flash Unit
Neweer Vision 4
LimoStudio AGG1756V2
If you can’t afford strobes just yet, don’t worry. You can start to practice using speedlights, or you can rent an equipped studio for a day and use it to try out different lights and build a portfolio.
As an option, you can enrich the butterfly lighting setup by adding a hair light or add some extra lights for the background.
What is the best camera flash to buy? There are plenty of models to choose from, but the basic advice is to select a model without TTL if you intend to use it off-camera most of the time – this can save you some money.
-
Accessories
– Tripod. This is optional because when the light source is bright enough – as artificial studio lighting will be – you can shoot handheld. If you’re using natural light, then make sure you can use a fast enough shutter speed before ditching the tripod.
– Stand. You will need a light stand to hold the flash unit and place it in the right position. Some photographers make use of a boom arm to get a better angle.
– Light modifiers. A butterfly lighting effect refers to the setup and not to the quality of light – it can be soft or hard light depending on the effect you want.
If you want to create a soft light, you’ll need to use modifiers. A beauty dish is perfect for glamour photography as it distributes the light evenly and smooths the skin. You can also use a softbox or an umbrella.
Instead, if you want to have hard light, you can leave the light source as it is. Alternatively, you can use grid spots to direct it and create different effects – check out MagMod gels for some creative options and examples of what hard light is used for.
Remember that you can rent equipment if you are just starting. This way, you can try different modifiers and their effects to see which ones you like before investing in your own gear.
– Trigger. You need to connect your camera with the flash unit; you can do this via cable or a wireless trigger. If you are working with another fill light, make sure it’s compatible to work on slave mode – if not, you’ll have to connect another receiver to it.
– Reflector. Most photographers use a reflector as part of the butterfly lighting setup. Unless you want to create a very dramatic image, you can place a reflector under the model’s face.
How to Set up a Butterfly Lighting Pattern
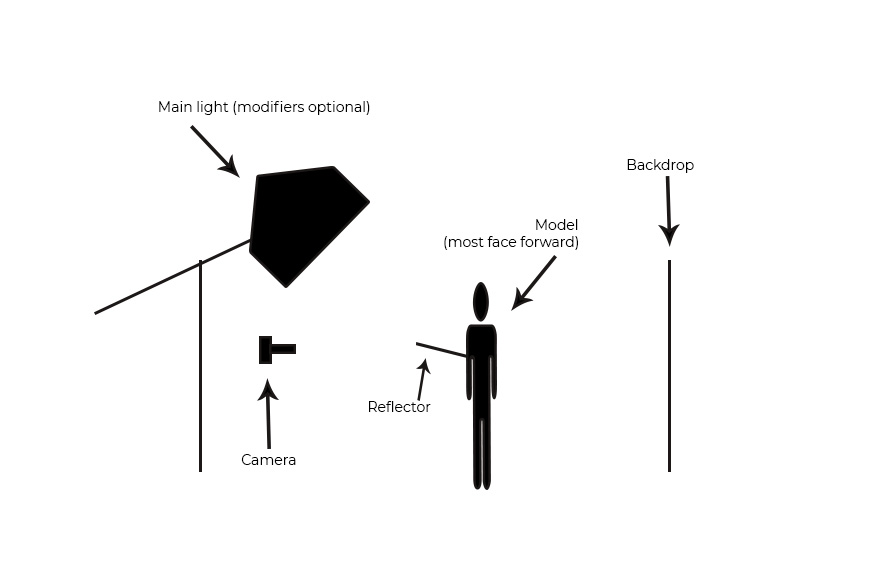
First, position the model in front of the lighting stand. The light should be at a higher angle, pointing down towards the subject’s face.
Then, place the camera directly under the light using a tripod. If you plan on shooting handheld, finish the lighting setup and then come back to position yourself under the light.
Add a light modifier according to the type of light that you want on your portrait. You can place a beauty ring or a softbox on the strobe to achieve soft light. Otherwise, you can use a grid to create a more controlled hard light.
Measure the intensity of the light. Ideally, use an external meter – this will make the reading more precise. Alternatively, you can make a few trial shots and adjust the camera settings and flash intensity accordingly.
Once you have the key light set up, it’s time to fill the shadows. You can use a reflector to bounce the light back up and soften the shadow under the chin and the one from under the nose.
To do so, position the reflector under the subject’s face. Start at waist level and see how it looks. If the shadows are still strong, move it closer to the face and so on.
Experiment with different positions to achieve different effects. You can also change the colour of the reflector. A white one will give you a neutral tone, while a golden one gives a warming overcast.
Once you’re happy with your butterfly lighting, direct the model to have a striking fashion pose or whatever the desired pose or expression you’re looking for.
Just keep in mind that the subject’s face needs to be towards the light in order to have the butterfly shadow under the nose.
That’s the basic butterfly lighting setup for a studio portrait. You can add more lights if you want to create a more complex pattern.
For example, you can add a hair light to create a highlight that separates the subject from the background. You can also add lights to illuminate the background – this can be even light for a solid background or graded to create more depth.
Butterfly lighting cheat sheet
1. Position the subject in between the background and the light.
2. Lift the light source above the subject’s eye level.
3. Put a reflector underneath the subject’s chin.
4. Stand under the light and start shooting – Keep the subject looking straight ahead.
5 Examples of Photos Using Butterfly Lighting
Now that you know what is butterfly light and how to use it as a lighting pattern – here are some examples for you to see what you can create with it.
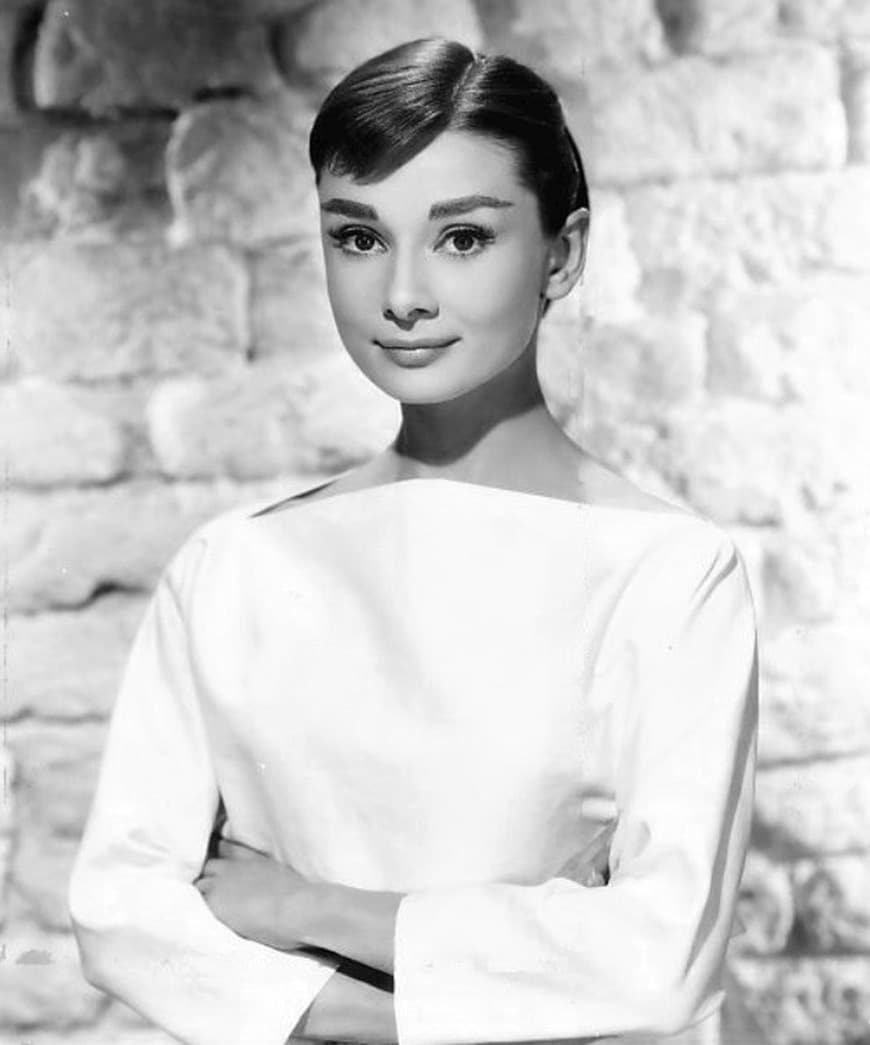
Audrey Hepburn by Bud Fraker. PDM
As I mentioned before, this type of lighting was very popular in the old classic Hollywood portraits. So, I decided to start with one of those images: a public domain picture of Audrey Hepburn from 1946 taken by Bud Fraker.
Notice how – even if it’s a little to the side – you can see the butterfly shadow under the nose. Plus, a strong shadow under the subject’s chin. The cheekbones are highlighted, creating a graded shadow towards the rest of the cheek.

Credit: Monica Silva
In this portrait of former athlete Fiona May photographed by Monica Silva, you can see the butterfly lighting pattern more clearly because of the straightforward pose.
The shadows are softer because there’s a fill light or a reflector underneath. You can see the reflections of both on the subject’s eyes.
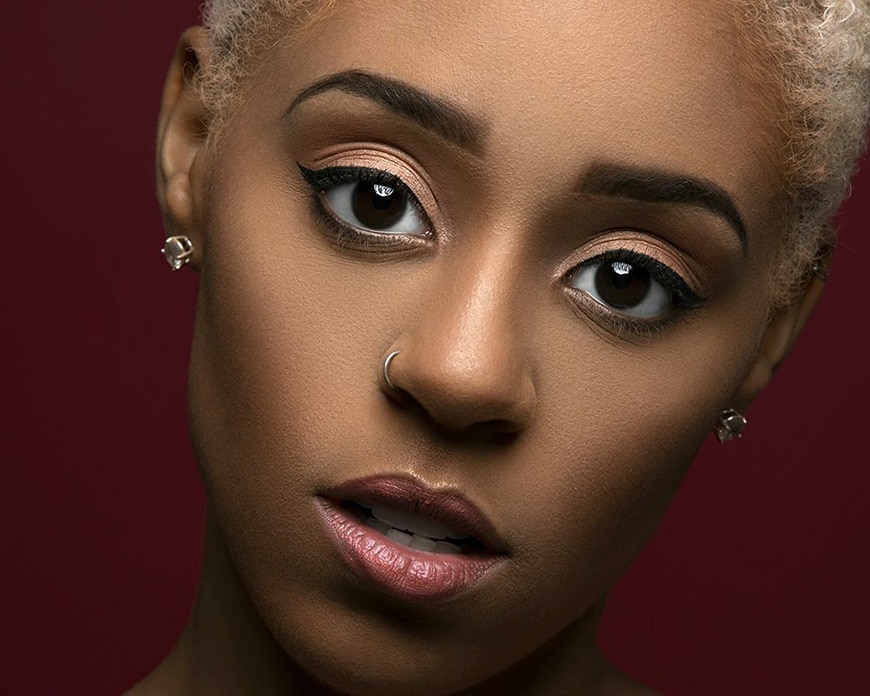
Credit: Ziphaus
In this example, you can see how the shadow under the subject’s nose is not a perfect butterfly because the head is a little tilted. However, the butterfly effect is perfectly achieved.
You can also see the light source reflected on the iris.

Credit: Ludovic Migneaut
Butterfly lighting pattern is not only for female models. In this self-portrait by Ludovic Migneaut, he used a butterfly lighting setup complemented by a backlight coming from the right that separates him from the background and creates a pleasing halo on the hair and the shoulder.

Credit: Cristian Newman
As you can see in this photograph by Cristian Newman, using butterfly lighting for elderly portraits is also a good choice that can result in a very powerful image.
Final Words
If you’re a beginner photographer and you want to start trying some portrait lighting patterns, the butterfly lighting effect is the perfect way to start.
I hope this article showed you how much you could achieve by using just one light. Let us know in the comments section how it goes; we’d love to hear from you!

Check out these 8 essential tools to help you succeed as a professional photographer.
Includes limited-time discounts.
 Best Photography Reflector for Portrait Photographers (& How to Use One)
 Expert Guide to On-Camera Flash (How, When & Why to Use)
 How to Create a Pattern in Photoshop (For Overlays & Backdrops)
 Beginners Guide to Photography Lighting Techniques (+Pro Tips)

Ana Mireles is a Mexican researcher that specializes in photography and communications for the arts and culture sector.


