


Camera Tripod Guide
Everything you need to know about the hunble camera tripod is covered in this in-depth expert guide for amateur & professional photographers.
Camera Gear Guides | Tripod & Monopod Guides | By Matthew Saville | Last Updated: February 21, 2024
A camera tripod may not always be required to make a photograph. However, as soon as you do need one, it quickly becomes the most important piece of equipment you can own!
Not only is a dependable tripod more important than a sharp lens or a high-megapixel sensor, it’s also entrusted with the actual safety of your gear – that is, not letting your expensive camera and lens smash onto rocks or pavement.

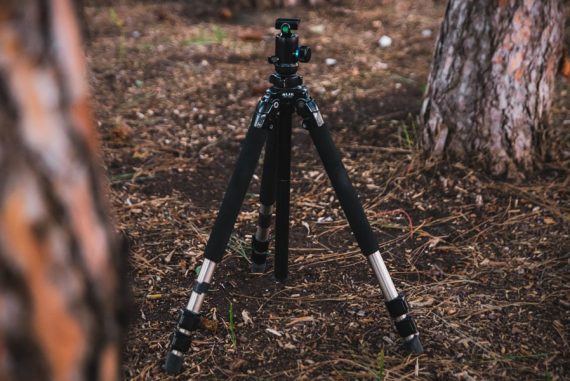
This affordable tripod is sturdy yet light, not to mention genuinely compact enough to fit in your travel bag.
Simply put, one of the best long-term investments a photographer can make is a sturdy, reliable camera tripod. It might not be a glamorous investment, compared to an exotic lens or a new camera body, but it’s just as important.
This camera tripod guide is everything you need to know about our three-legged friends.
Let’s dive right in!
7 Benefits of using a Tripod

Star Trail in Death Valley | Nikon D750 + Rokinon 14mm f/2.8 UMC (comparison/review here!) 1 hr total exposure time, f/4, ISO 1600 | Slik 700DX
The first thing a photographer needs to understand is, why and when should you use a camera tripod?
The answer to this question may vary slightly for different photographers, and it may lead them to buy a tripod that is specialized in one particular way or another.
There are many benefits to using a tripod, and it’s not just about getting sharp images. In fact, one of the biggest benefits is that using one simply forces you to slow down, think about your precise composition and framing, and make sure that each click of the shutter counts.
So before you even check sharpness on the back of your camera, your pictures can start being more thoughtful and creative!
Let’s look at some more benefits of attaching your camera to a tripod.
1) Shoot at Slower Shutter Speeds
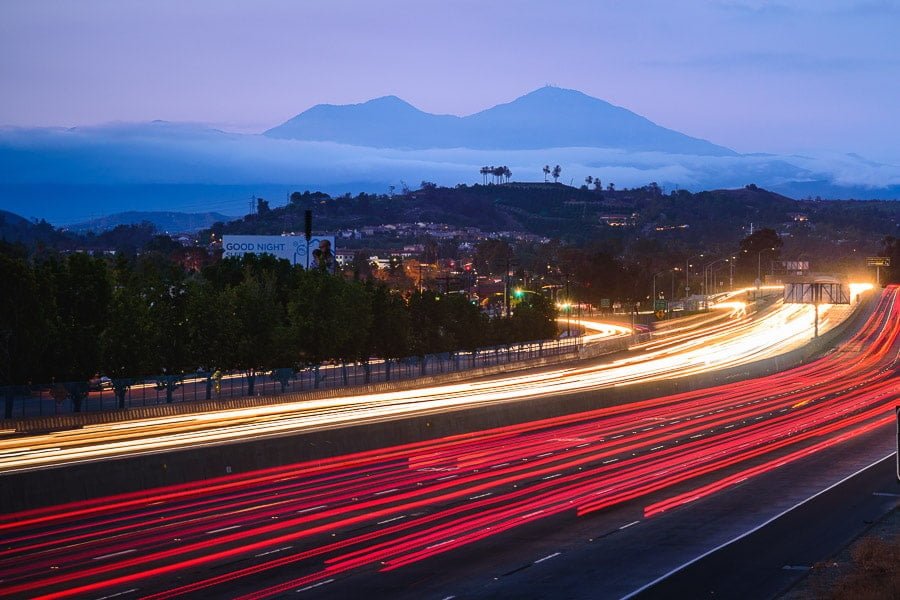
Southern California Cityscape Long Exposure | Nikon D750 + Nikon 24-120mm f/4 VR | 10 sec, f/16, iSO 100 | Slik 700DX, center column raised to shoot over a chain link fence
When you simply can’t hand-hold a camera due to having an extremely long shutter speed, (such as during nightscape astrophotography), a tripod is obviously an absolute requirement.
True, image stabilization (whether in-camera or in-lens) can do amazing things for photographers these days, sometimes even allowing some hand-held shots at half a second.
However, if your shutter speed is measured in whole seconds, you absolutely should be using a tripod.
Also, if you want to capture a very long exposure during the day, for a creative motion blur effect, having a tripod will indeed be a must.
A good DSLR tripod lets you shoot all these easily.
2) Improve Sharpness & Detail in Images at all Shutter Speeds
Even during the day, and even with a stabilized lens or camera, using a tripod can still help you eliminate faint amounts of shake that might be affecting your overall image sharpness, even in the smallest way.
Also, hand-holding, with or without stabilization, isn’t always reliable. You may capture 3-5 images, and only have 1-2 of them turn out perfectly sharp. With a tripod (plus proper technique!) you can trust that every single shot you take is tack-sharp.
3) Improve Depth & Image Quality via Optimal Apertures/Low ISOs

Sunset and Tide Pools | Sony RX10 mk2 | 5 sec, f/9, ISO 100 | Slik 700DX
A lot of beginner photographers may not even realize that they need a tripod or camera stand if they shoot with their camera in Auto mode (AKA Green Box mode) and let it choose a brighter aperture and ISO for them.
Unfortunately, these camera settings simply aren’t optimal for sharp, clean image detail.
By using a tripod, it is usually possible to shoot at ISO 100, f/8 or f/11, and at any shutter speed, instead of, say, ISO 400-800 and f/2.8-3.5, hand-held.
In this way, you can achieve a ‘cleaner’ image (less ‘noisy’, due to a lower ISO), and an image with greater depth of field, due to the smaller aperture.
In addition, most lenses achieve maximum sharpness when ‘stopped down’ to their smaller apertures too – shooting your lens ‘wide open’ (i.e. at the maximum aperture) doesn’t usually mean the sharpest shot possible, if that’s your goal of course.
4) Improve Precision in Framing & Composition for Macro & Telephoto images
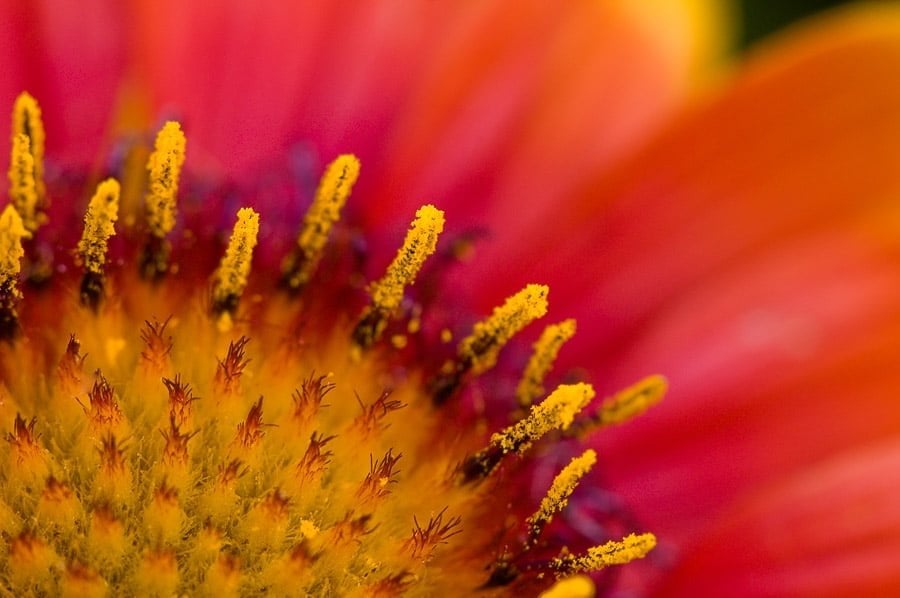
Macro lenses offer incredible magnification for stunning close-up images. Without a tripod, precise framing and focus are difficult | Nikon D300 + Sigma 150mm f/2.8 EX Macro | 1/45 sec, f/4, ISO 400 | Slik Lite CF-422
As I mentioned earlier, having a tripod isn’t just about sharpness – it’s also about causing you to slow down and think about the framing of each shot you take.
Indeed, when it comes to ‘special photography’ such as macro or super-telephoto imagery, a tripod isn’t just a useful tool for helping you frame a shot carefully, it can become an absolute necessity.
With both macro and super-telephoto images, you’re dealing with high-magnification optics. This makes it extremely difficult to hand-hold your shot and get it perfectly framed and in-focus.
Even with autofocus and image stabilization, a macro photographer will find that a tripod is a huge convenience when working at or near 1:1 reproduction/magnification.
A super-telephoto photographer who is working with lenses any longer than 300-400mm (let alone 800-100mm!) will also find that a tripod is extremely beneficial.
Some giant telephoto lenses are so big, they really aren’t practical to use without a tripod and a gimbal head, period. (We’ll talk about gimbal and other types of tripod heads later.)
5) Focus stacking, HDR Bracketing and other Composite Imagery

Grand Canyon Waterfalls Composite: I captured one image at f/8 for optimal sharpness, and another image at f/22 for maximum water blur, then combined the two images using simple layer masking in Photoshop | FotoPro carbon fiber travel tripod.
As soon as a photographer decides to capture more than one photo and combine it later in Photoshop, things get really complicated (in fact, almost impossible) without a camera tripod.
Whether you’re doing a very simple bracketed sequence to create an HDR image, or you’re using a slightly more complex technique such as focus stacking or other composite tricks that involves layer masking and “plate” frames, having a strong (and heavy) tripod is a huge help.
[Related: Aurora HDR Review – a simple software for creating great HDR images.]
6) Panoramic Stitching with a “Nodal Slide” Tripod Head

Yosemite Panorama | Nikon D750 + Tokina 17-35mm | f/4 | 1/25 sec, f/16, ISO 100 | Circular Polarizer, Slik Lite CF-422
Similar to creating composite images, any photographer who gets into panoramic image “stitching” will find that having a strong camera tripod, or even what is called a “nodal head”, can be very helpful.
Using a tripod to create panoramic images will ensure that you get consistent overlap in all of your frames, and that the whole panoramic image stays perfectly level (as long as you level the tripod/head first!).
7) Self-Portraits
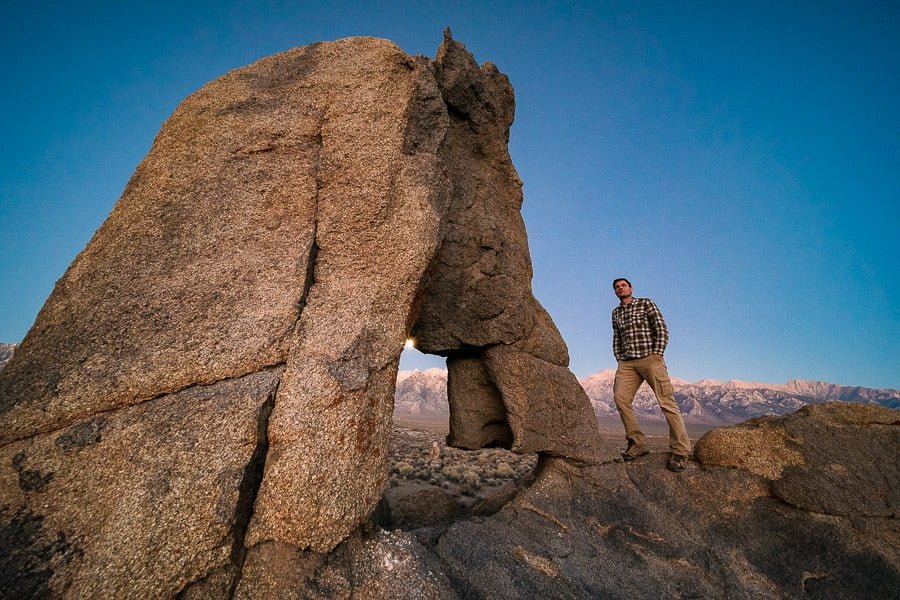
Self-Portrait in The Alabama Hills, Eastern Sierra | Nikon D750 + Laowa 12mm f/2.8 | 1/4 sec, f/8, ISO 3200 | Slik 700DX
Last but not least, I can’t move on without mentioning the “selfie”. Embarrassingly, I once used an actual 5-lb tripod as a “selfie stick” in 2010, before it was a thing to do with your smartphone.
I have never done it again since, however, I do carry 2-3 tripods with me on all my adventures for the specific purpose of documenting the working environment that I’m shooting in, and for group photos with other photographers.
How to Set Up A Tripod for Optimal Stability
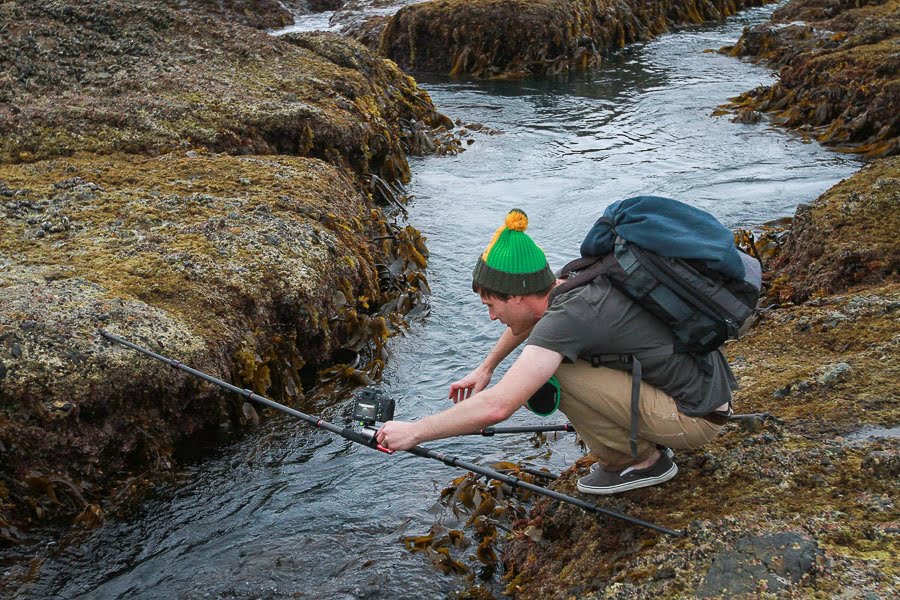
(NOT a safe way to set up a tripod! Don’t try this at home!) | Pictured: FotoPro carbon fiber tripod
If my experience as a landscape, seascape, and nightscape photographer have taught me anything, it is how NOT to set up a tripod if you want your camera gear to live a long, healthy life.
I’m embarrassed to admit that I have had tripods get knocked over quite a few times over the years. Please learn from my “wisdom”!
Incidentaly, here’s the resulting shot from my precarious tripod set up above. Maybe you’ll agree that it was worth it?!
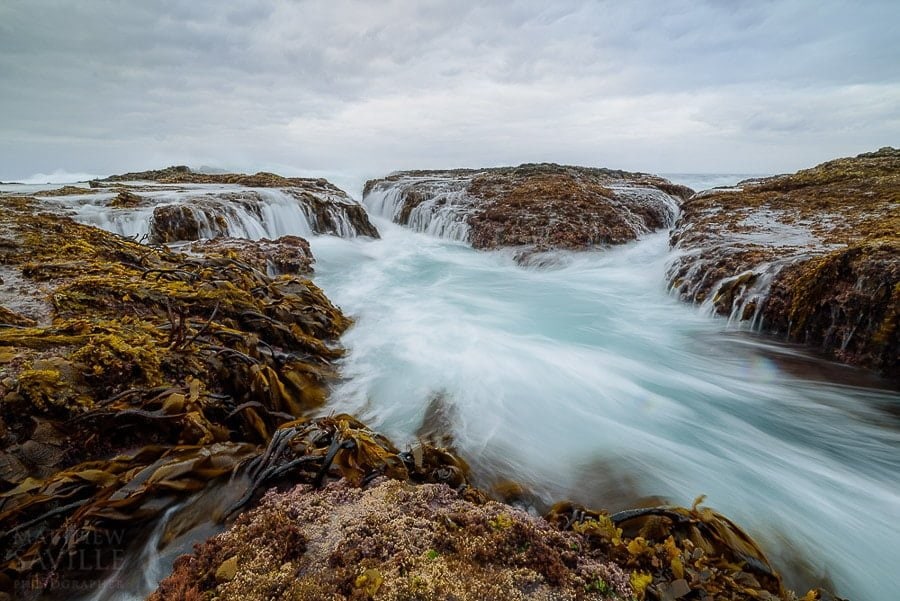
Do be careful when shooting seascapes; it only takes a second for your tripod (and camera) to be knocked over by a wave! | Nikon D750 + Rokinon 14mm f/2.8 | 0.8 sec, f/16, ISO 100 | FotoPro carbon fiber tripod
Here is what I can tell you about the safest way to set up and use a tripod, for your own safety and for the safety of your camera gear.
The Correct Way to Set Up & Break Down a Tripod
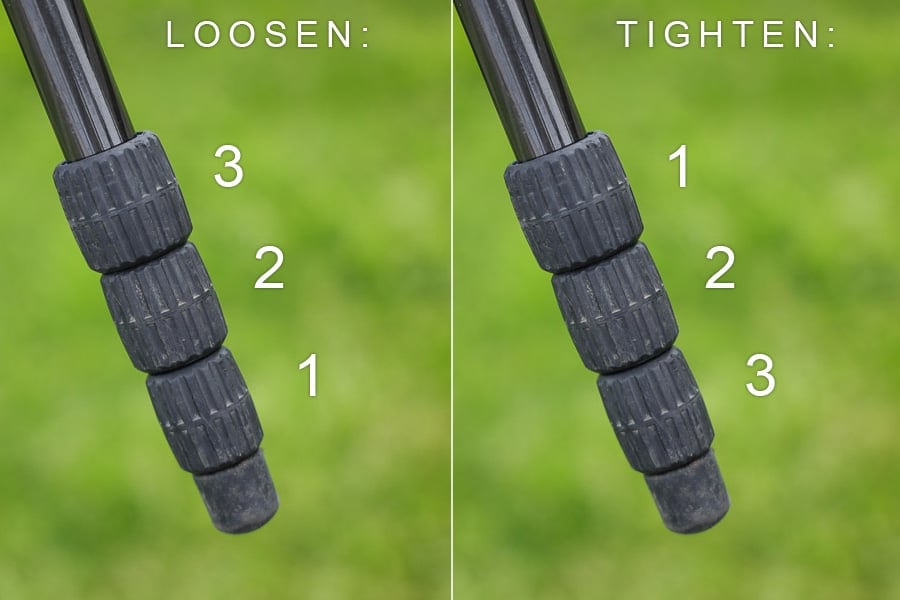
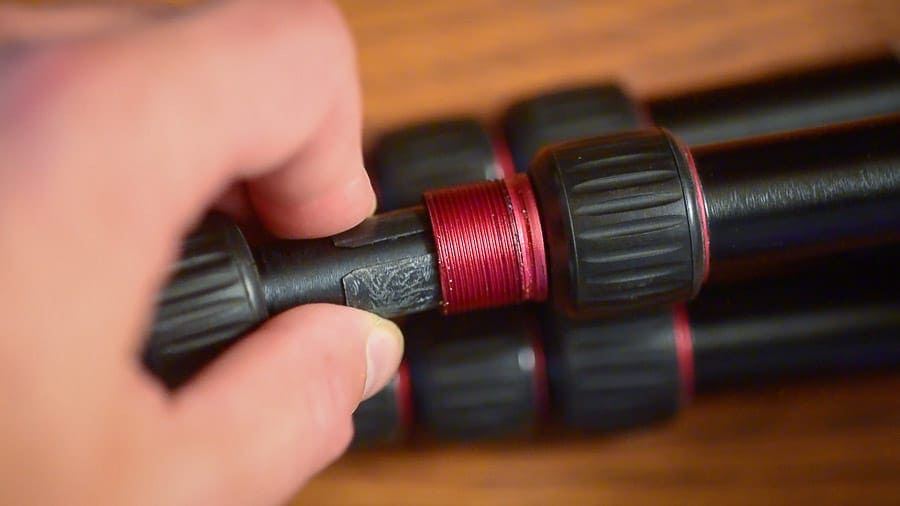
Tripod twist-lock order of operation, to preserve the lifespan of plastic leg lock shims (Pictured: Slik Lite CF-422)
After you’ve set up your tripod, always double-check the tightness of the leg locks and the foot position before you mount your camera. Push on all three legs individually with a little more force/weight than your camera’s own weight, and make sure each leg/foot doesn’t sink or slip.
Although most twist-lock tripod legs do have an anti-rotation design, it is still a good idea to lock and unlock them in the order shown in the above diagram.
Low-budget tripods can become jammed if twisted too aggressively, and after they jam once they will continue jamming more and more often.
This isn’t nearly as much of an issue on the high-end, pricey brand-name tripods such as Really Right Stuff or Gitzo, of course, but it’s still a good habit.
How To Position Tripod Legs
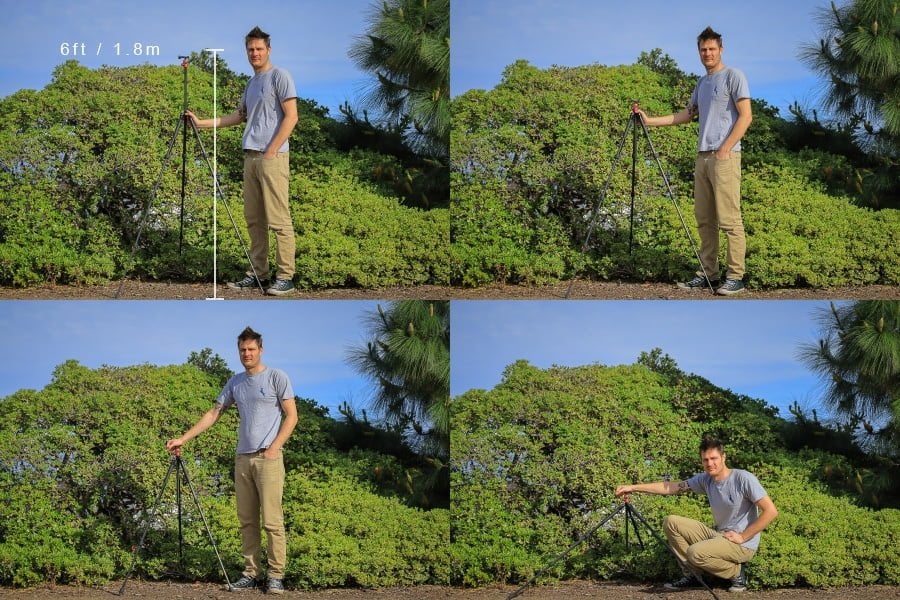
My eye level is about 6 ft, which is enough for this Slik Lite CF-422 travel tripod, but only with the center column extended.
You should only use a tripod at its maximum height, let alone with the center column up, when there is no wind at all.
This is especially true for lightweight travel tripods such as the ~2 lb travel tripod pictured above.
Also, never leave your camera unattended, even when you think it’s calm. If it is indeed windy, consider lowering your tripod legs by at least one section, and better yet, lower the leg angle too.
Lastly, in extreme wind, hang a weight such as your camera bag from your center column. Most center columns now have hooks for this purpose.
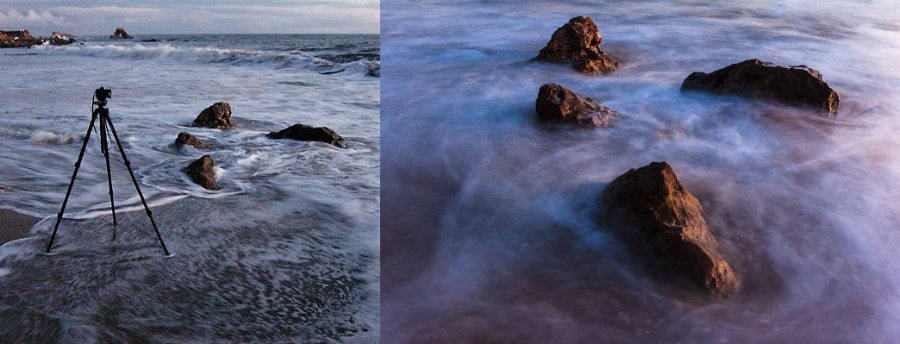
Seascape tripod setup: be careful! Preemptively “sink” your tripod feet/legs into the sand a little bit before mounting your camera | 35mm film camera, Fuji Velvia transparency film, Giottos carbon fiber tripod
Proper Tripod Care, Service & Maintenance
It goes without saying that you should take care of your camera gear. However, tripods are especially likely to be “abused” due to their very nature: they help a photographer shoot in dirty, sandy, watery conditions, and other types of crazy angles/positions.
Inevitably, your tripod may need to be cared for or even dismantled and serviced. A very cheap tripod, especially, may break down after just a few months of abuse without proper care.
Let’s have a closer look at how to wash a tripod, and what can be done to prolong its life.
i) Never over-tighten twist legs
Test the legs’ grip by pushing down on each leg to see if they compress when fully locked. Over-tightening twist-lock legs may lead to the weakening of the legs’ locking ability over time.
ii) Be mindful of the elements
The second most important tip is this: salt and dust will ruin even the best tripods before their time. Proper care will help a good tripod last forever, and even extend the life of the cheaper tripods quite a bit.
When shooting in sand, always extend the lowest section of your tripod legs first, to prevent too much sand from getting inside the leg joints.
Wash your tripod after all encounters with salt. It may be counterintuitive to think of immersing your tripod legs in a shower or under any running water, but it’s actually much better to wash off salt and sand. If you allow them to harden and build up on your tripod, it will eventually break down.
Try not to let your tripod get so wet that water gets inside the legs, of course. Some photographers may decide to shoot with their tripod almost completely submerged in a lake or river, and all I can say is, I hope the shot is worth it!
If you do this, be sure to rinse off the tripod afterward, and let it dry thoroughly. If you have to, disassemble the legs completely, or at one joint, so that dry air can get inside the legs.
These little plastic shims are usually the worst thing about a cheap tripod: they can get gritty, jammed, and/or destroyed entirely.
If you do need to take your tripod completely apart for cleaning, be sure to carefully take apart one leg joint at a time. Put each joint back together before starting the next joint, especially if you lose small things easily!
Lever lock tripods can sometimes get a little loose, and may need to be tightened with an Allen key.
How to Choose the Best Camera Tripod for You

LEFT- ultralight travel tripod: Slik Pro CF-614 (Discontinued, current model: Slik CF-634) | RIGHT- heavy-duty tripod: Slik Pro 700DX AMT
So, which camera tripods are the best tripod for DSLR do I recommend? I’m not going to try to convince every photographer that they must own a $1,000 tripod and a $500 ball head. That would be a totally unrealistic expectation not just for your budget, but also for your actual shooting needs.
The truth is, you don’t have to break the bank to get a solid tripod that is durable and gives you sharp images.
You can get a great tripod for under $100, whether you’re looking for a lightweight travel tripod or a big heavy-duty tripod.
If you can jump to about $300, you can get an even better tripod that is stronger, more durable, and lighter weight too.
There is no one single tripod that I can recommend to every photographer. We’re going to go over a variety of different categories of tripods so that you can choose the right one for your personal needs and budget… but first, an important question:
How Often Will You Use Your Tripod?
Some photographers might only use their tripod once a month, in fair weather conditions. Others might need to use their tripod twice a week, sometimes on the beach, other times in sand dunes or in other tough conditions.
This is the reason why some tripods may last for many years for some photographers, while others may find that the same tripod breaks in less than 6 months. It all comes down to the hours you log with the tripod, and the abuse it is dealt.
The best advice about tripods still has not changed in the last decade: spend a little extra on a solid, reliable tripod in the first place, and you won’t have wasted your money in the long run.
With that said, let’s have a look at our recommendations.
Slik Lite AL-420 | Best Compact Lightweight Travel Tripod
The whole point of a travel tripod is that it weighs almost nothing, is compact enough to fit inside a carry-on suitcase, and yet is still tall enough to be more useful than, say, a Gorillapod or a tabletop tripod.
However, many of the generic, knock-off brand tripods that claim they are “travel” tripods are actually not that light (usually over 3 lbs) and are also rather short and just plain wobbly. Don’t be fooled just because a tripod has “travel” in its name. In fact, beware!
Your ideal ultralight travel tripod should be in the ~2 lb range (900g), tall enough to be at about eye level, and strong enough to support a decently large camera (though you may not manage a full-frame DSLR with an f/2.8 zoom).
If you’re on a $100 budget for an ultralight travel tripod, check out the Slik Lite AL-420 (which you can sometimes get for around $70), or the Sirui T-004X. For a truly “tiny” tripod, check out the Slik Sprint Pro series.
If you’re able to invest a little more, the carbon fiber Slik Lite CF-422 is an amazing set of legs that are, simply put, the lightest way for a tripod to get to eye level for a 6-foot tall person. It also includes a built-in LED flashlight in the center column!
Another good option in this category if you’re willing to invest a little more is the new Peak Design Travel Tripod, which I was lucky enough to review recently.
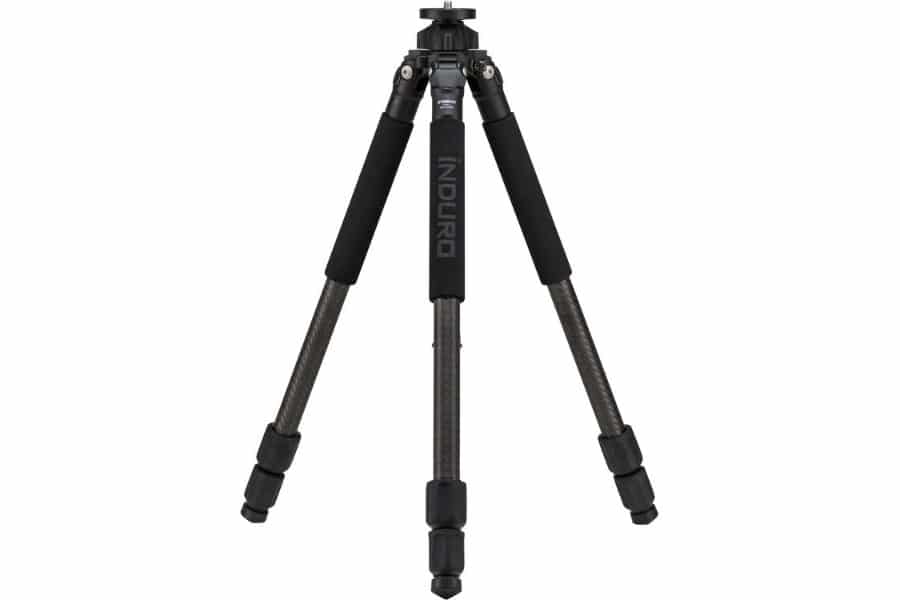
Induro CLT103 | Our #1 Choice of Best Everyday Use Tripod
Of course, since you do have to be rather gentle with a travel tripod, it doesn’t make a good everyday, “beater” tripod.
For frequent, everyday abuse, most photographers will want something stronger, taller, and generally more indestructible than a lightweight travel tripod.
If you’re able to save up and get your tripod legs and head separately, Induro’s CLT103 “Stealth” carbon fiber tripod is one of the best options in the sub-$300 price range. Again, you’ll have to buy a head separately.
Induro’s options generally check all the right boxes when it comes to materials, optimal design, height, and overall durability.
In general, an everyday tripod is something in the 3-4 lb range that can preferably get to eye level without the center column extended.
If you’re on a budget, the only brands that offer dependable quality at a cheaper price are Slik and Manfrotto. Shop for a set of legs in the $100-200 range, and again, buy your head separately.
Slik Pro 700DX AMT | Best Value Choice | Tall & Strong Tripod

Any serious photographer who uses a tripod frequently ought to own a big, tall, strong, even heavy tripod. Why heavy? Because it’s less likely to blow over in a strong wind, of course! It’s more likely to keep all your shots perfectly framed when you’re doing bracketed HDR or composite images.
Simply put, if you’re not hiking long distances, if you’re just shooting from a drive-up vista, it’s great to have one of these beasts around.
You can pick up a Slik 700DX for less than a hundred bucks, or a Manfrotto 055-series. Both are sold legs only.
However, if you like the idea of “indestructible” and tall, but still want a lightweight tripod instead of a heavy one, then I recommend anything from the Feisol Tournament Series, such as the CT-3442 and CT-3342, which cost around $400 each.
These tripods are extremely durable, rigid, and yet they still weigh under 3 lbs. That’s what the extra money buys you!
Oben BE-126 | Best Tripod Ball Head
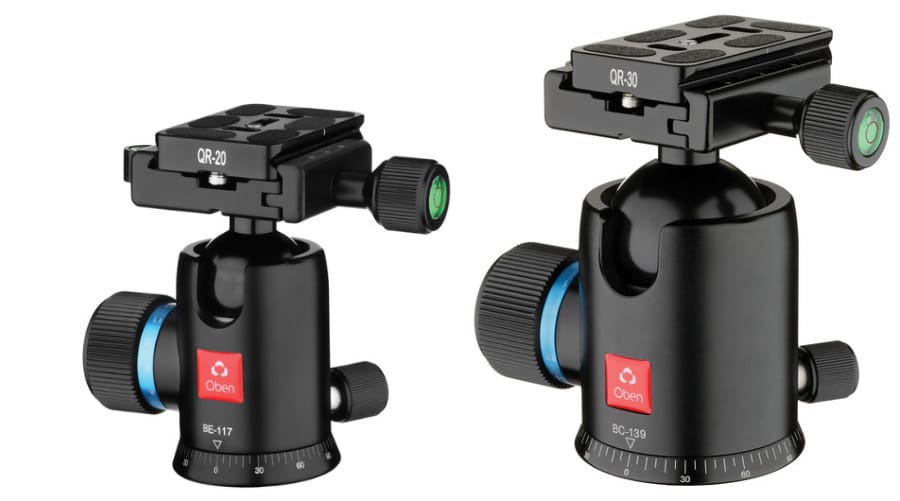
If you’ve purchased a set of legs separately and are looking to get a great ball head, you’ll want to be even more picky when it comes to brand names and reliability.
The relatively affordable brand that I always recommend, due to its durable construction and smooth operation, is Oben.
Their Arca-Swiss series of ball heads are great, from the lightweight BE-108 ($70) or BE-117 ($85) to the heavier-duty BE-126 ($110), BC-139 ($150) or BC-166 ($170).
One thing to note – the Oben “BA” series heads are the ones which do not have Arca-Swiss clamps and plates.
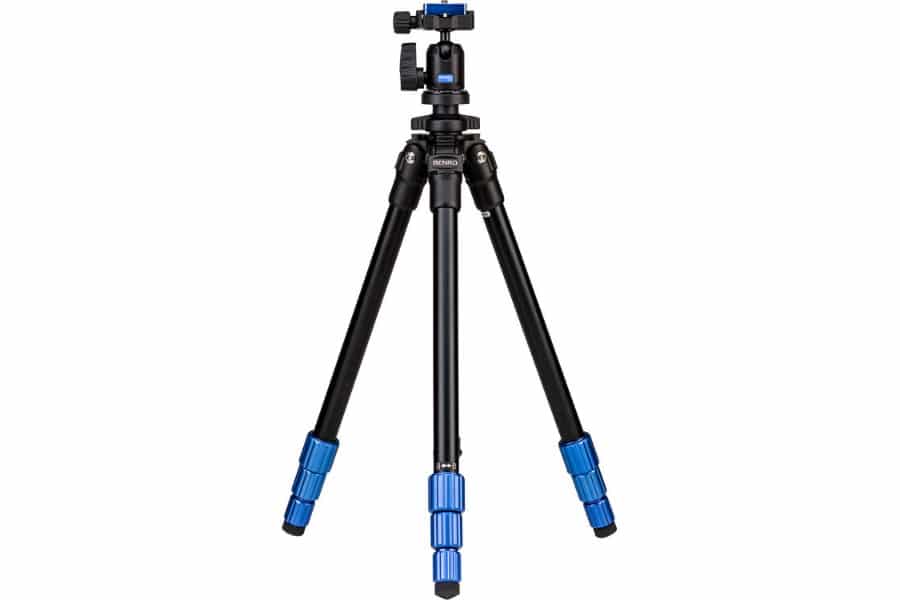
Benro TSL08 | Best Tripod Under $100
If you’re on an extreme budget, don’t worry, you can still find good options whether you’re looking for something lightweight or heavy-duty.
The affordable sibling to the Slik Lite carbon fiber series is the Slik Lite AL (aluminum) series, and for an ultralight hiking/travel tripod, the AL-420 offers good strength, durability, and height for around $100.
Unfortunately, the head that comes with it isn’t optimal for large cameras, but it’ll work great for compact mirrorless cameras.
In the big-and-tall (and heavy) category, Slik has you covered once again with a tried-and-true option that has stood the test of time – the Slik AMT 400DX tripod, little sibling to the 700DX for around $100, including a 3-way head.
Again, I’m not the biggest fan of the Slik 3-way head that comes with the 400DX legs, but those legs are just so durable, it’s hard not to recommend the whole kit.
Lastly, one of the best options that does tick a lot of the quality/design boxes, despite being one of the newer brands on the market, is the Benro Slim TSL 08 aluminum tripod. It includes both a good set of legs and a standard Arca-Swiss ball head again for around $100.
Do treat the Benro Slim nicely, though, since it’s not a name brand ;-)
Manfrotto 209 | Best Tabletop Tripod

A tabletop tripod is something you can always have with you, no matter where you go. They’re so lightweight and small, you can slip them into a side pocket on any camera bag, or even into a large pants or jacket pocket.
Heck, if you wear your camera around your neck with a traditional strap, you can just leave a tabletop tripod attached to the camera!
The Joby Gorillapod is one very popular choice for its versatile adaptability. You can wrap it around a railing, pole, tree branch, anything.
However, the models that don’t include a head make it very difficult to get your camera angle perfect. Be sure to choose one of the models that include a head, such as the GorillaPod 3K Kit for around $45 (the head is good enough for a Gopro or compact camera), to the GorillaPod 5K Kit, which is strong enough even for a full-frame camera, with a small-ish lens.
Check out our in-depth Gorillapod Guide for more info on each model, and some creative uses that don’t always include a camera…
My personal favourite tabletop tripod however is the Manfrotto 209, which I usually have packed away in my camera bag for when the opportunity arises.
Final Words | Heard enough about Tripods yet?!

Time-Lapsing A Sunset | Nikon D750 + Nikon 70-200mm f/2.8 | 200mm | 1/200 sec, f/5.6, ISO 100
I hope that my years of experience with so many different tripods can help you avoid the mistakes that I made, and invest in the perfect model for your shooting style and budget.
If I can offer any further advice, it is simply that I cannot stress enough how important it is to save up and buy something good the first time.
You don’t have to spend a fortune to get durable, long-lasting quality. In fact, even if you’re on an extreme budget, you can still find good quality options!
You might have to be willing to carry around a slightly bigger and heavier tripod at first, while you save up for something just a little bit more “exotic”, but at least you’ll have a tripod that is trustworthy and never lets you (that is, your camera gear) down.
Either way, whether the perfect tripod for you is just one medium-light, tall, stiff, durable choice, or an ultralight option plus a bigger, heavier option, I believe you now have everything you need to make all the right decisions. Good luck, and safe adventures!
This affordable tripod is sturdy yet light, not to mention genuinely compact enough to fit in your travel bag.


Matthew Saville is an astro-landscape and adventure landscape photographer based in California.


