


Capture One Review
Impartial review of Capture One Pro 12 by an experienced Lightroom user. Is it worth making the switch from another editing software? Don't miss this!
Capture One | Software | Software Reviews | By Teryani Riggs | Last Updated: January 22, 2024
This Capture One Review is by landscape and adventure photographer Usnea Lebendig. Having been a long time user of Lightroom, Usnea investigates the pros and cons of making the switch to Capture One Pro.
We live in a world where Adobe Lightroom is the industry standard for serious photographers, and many of us have used it for years.
Now that Adobe products are available only by subscription, many photographers are looking for an alternative.
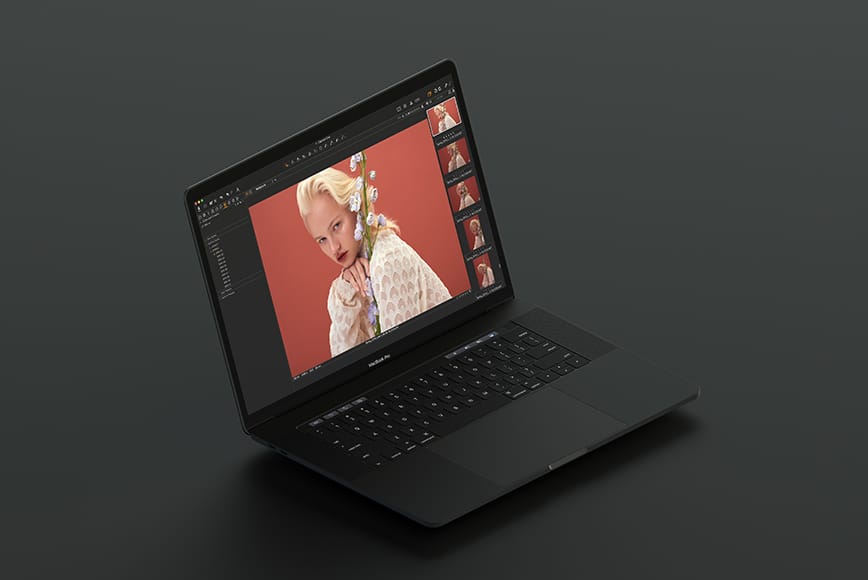
Photo editing software solution with powerful tools for organizing, colour grading, layer editing & more
Use code SHOTKIT10 to save 10%
OnOne and Luminar are both looking for their share of the market, but Capture One Pro has long been the best professional Lightroom alternative, and many photographers are now turning to it.
My long background in Lightroom and Photoshop make me a bit of a hard sell. At the same time I’m shooting on modern gear, and converting everything to DNGs, so my antiquated non-subscription version of Lightroom is struggling to keep up.
So let’s see how Capture One measures up – is it still the best photo editor for professionals here in 2024?
What is Capture One?
Special Offer
Save 10% by using code SHOTKIT when purchasing Capture One.
Capture One is a professional-grade photo editing software designed for pros and serious enthusiasts.
It was first created with tethered image capturing in mind, but quickly branched out to a more full-fledged image processing program.
Now it offers exceptional RAW image file processing, image cataloging, layers, local adjustments, keystone adjustments, as well as just about all the features one would expect out of a pro image editing app.
There are a few different programs available including both free and paid.
The paid versions all have a free 30-day trial period, and I highly recommend you use this to have a play around.
You should also read our guide to Capture One vs Lightroom, if you’re having trouble deciding between the two.
Which Version of Capture One 12 is Right for You?

Thankfully there’s a 30 day free trial on all Capture One Pro products.
There are several versions of Capture One, each with various other options to choose from, which can make the initial download process rather confusing.
Let’s ignore the different payment plans for now (see the section ‘Capture One Price’ below), and assume that most people will want to download a 30 day free trial of the main product before purchasing.
Here’s a simplified way of deciding which version is right for you:
#1 (Recommended) Capture One Pro 12 (Full Version)
Even if you own Sony or Fujifilm cameras (see below) your best best is to download the free trial of the full version of Capture One Pro 12 here, with support for over 500 different cameras.
If you operate a professional multi-user studio, and/or have an in-house production team, there’s also Capture One Studio – more info here.
#2 | Sony/Fujifilm Camera-Specific Versions
You can get a sweet 50% discount if you use either Fujifilm or Sony cameras (and don’t mind limiting your editing software to only one or the other brand’s files).
If you ever need to edit files from other brands’ cameras, you can pay an upgrade fee for the full version of Capture One.
You can download a free trial of either software, then selecting the relevant brand.
#3 | Pared-down (free) version for Fujifilm or Sony
If you shoot exclusively on a Sony or Fujifilm camera, a pared-down version of Capture One (called “Express”) is available for free.
Capture One Express comes with basic editing and workflow features of the Pro version, but lacks many others, including Luma curves and luminosity masks, Advanced Color Editor and Skin Tone tools, Sessions, Local adjustments, Focus Mask, Keystone, Film Grain, Tethering, Color Balance Tool etc.
(To download Capture One Express, click here then select any product, sign up, then choose ‘Express’
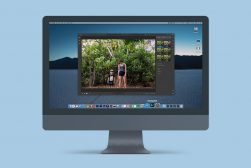
Capture One Review | Interface
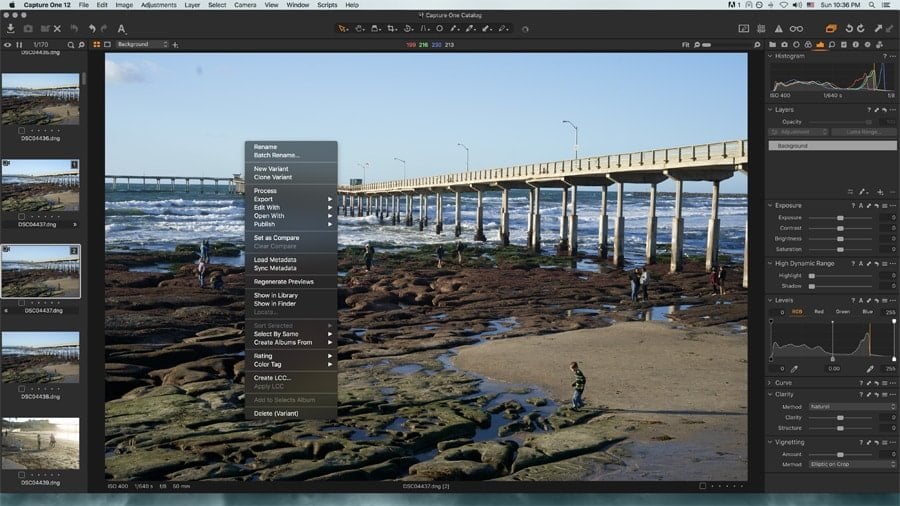
In Capture One Pro, there are plenty of options when right-clicking.
Every program takes some getting used to, and Capture One is no exception. In fact, as similar as it may seem to Lightroom, it’s actually quite a steep learning curve.
In the brief time I’ve been using it, I’ve become aware that, given time to get used to it, the interface is even more powerful than Lightroom’s.
Unlike Lightroom, Capture One’s interface doesn’t offer different workspaces for different functions (i.e. library, develop, etc.). Instead, everything sits in one interface and you toggle through buttons to change functions.
There’s a toolbar at the top with different tool options (6 in Express, 11 in Pro) and a side panel with 8 different options which you toggle through by clicking on the buttons at the top.
Right-click options and short-cuts abound, and like Photoshop many of the tools have a number of other options when you right-click on their buttons.
What makes Capture One’s interface so powerful is its customizability. Like modern cameras, you can basically reassign just about everything to just how you’d like to use it.
It starts with simple options like where do you want your filmstrip viewer (you’ll notice that at least one of these screenshots has it on the right) and then progresses to being able to assign quick keys to just about anything.
Here the film strip is on the bottom, similar to a Lightroom layout.
Making the transition from Lightroom? Simply put your filmstrip on the bottom panel and the adjustment panels to the right.
You can even assign the same keyboard shortcuts to Capture One Pro as you use in Lightroom. This is particularly awesome if you have an established workflow and know what you use the most.
All this being said, the high learning curve often has me frustrated. There are multiple ways of doing everything, but usually I can’t find them and have to look them up in the help manual. Simple things like renaming files or switching from grid to single image view are different in Capture One and they all take some getting used to.
Still, I doubt it’s really any harder than learning Lightroom – given a few more days using solely Capture One to edit and manage my photo library and I’m confident I can master it.
Capture One Pro 12 | Strengths
Capture One Pro is feature-rich with just about everything a photographer needs in an editing app.
As far as photo editors go, there are a couple of places where Capture One just rocks it. I’ve already mentioned interface customizability, but that’s just the starting point.
Here are a few of the other advantages of using Capture One Pro over Lightroom, or most of the other image editing softwares out there:
👍🏼 Excellent Raw File Conversion
Each brand has their own special recipe for rendering RAW files, but Capture One has long been known for being exceptional.
I knew this going in and I wasn’t disappointed. especially in terms of excellent color rendering, dynamic range, and detail capture.
For me, the way that Capture One displays and treats RAW files far exceeds anything I’ve seen in Lightroom or any of the other image editing applications in 2024.
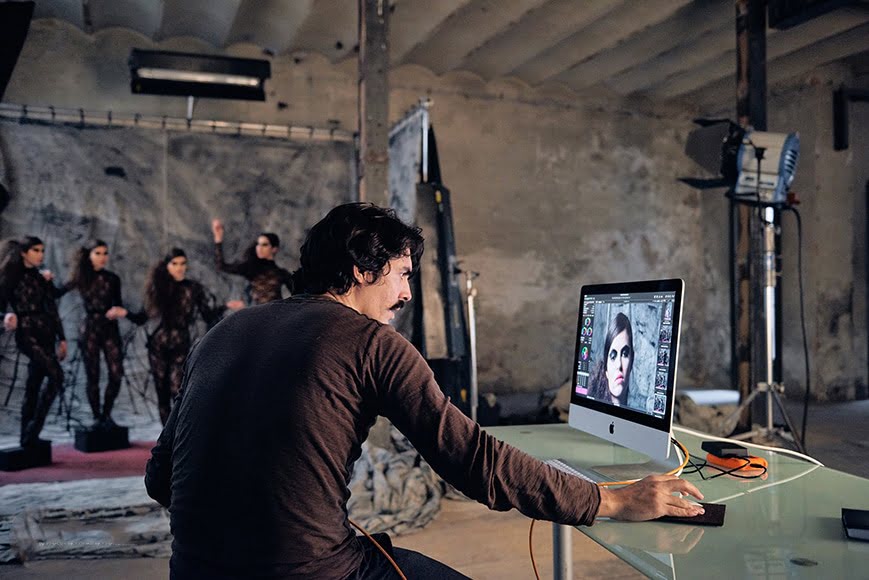
Take a quick look at the video below to see how the photographer uses Capture One Pro to edit high-end fashion portraits.
👍🏼 Adjustment Tools
As far as the level and selection of standard adjustment tools are concerned – exposure, contrast, shadows, highlights, white balance, and so on – Capture One is up there with the best. In the Pro version, there’s everything you need.
Some things are done differently, however. For example, to newcomers the “vibrance” adjustment seems to be missing, but Capture One users the “saturation” adjustment as a vibrance adjustment.
To edit straight-up saturation you need to go to another tab. I wouldn’t have known this if I hadn’t been doing research, but I guess that’s the case whenever you use a brand new software.
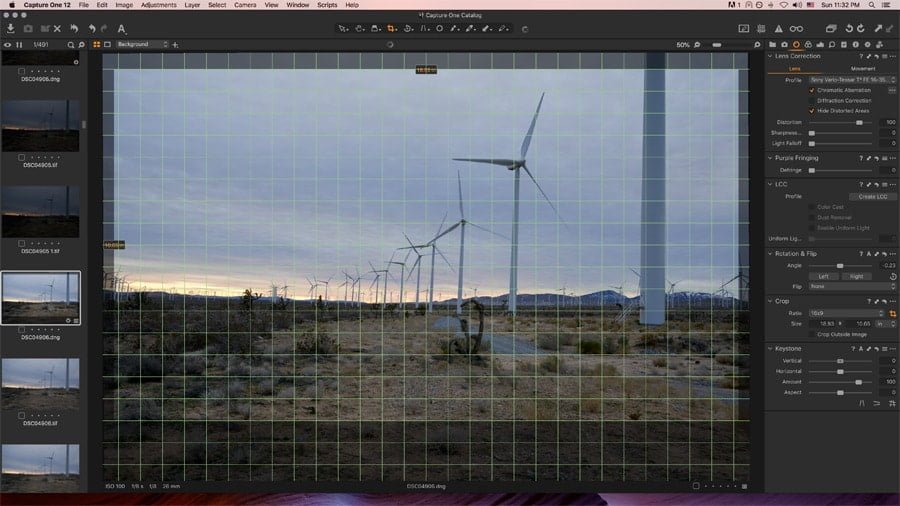
Capture One Pro comes with an excellent Keystone adjustment. (Pro only, not Express.)
There are plenty of useful autocorrect options for just about every tool, and these work better than my version of Lightroom. (I’m not using a version with AI.)
The auto levels adjustment seems particularly spot on. I’m not a big fan of autocorrect on my portfolio photos, but for non-critical photos I don’t mind speeding up my workflow by using them.
It would take an entire separate blog post to go through all Capture One Pro offers in terms of adjustments, but suffice it to say, you’ll find just about everything you need and and at a pro level. (The Express version is obviously a bit more limited.)
👍🏼 Masks and Layers
Like Photoshop, Capture One Pro (not Express) allows you to edit in layers. Lightroom has adjustment points for brushes or gradients, but that isn’t quite the same thing. (Capture One has these too.)
When you use layers in Capture One Pro, you can make targeted adjustments to your photos and still use the majority of the image editing tools available, not just the ones in a given tool. This is a huge benefit for those who like a fine level of control over photo manipulation.
For mask creation you can paint them in manually, create a linear gradient mask, or a radial gradient mask (similar to Luminar, actually). It also offers a feathering tool and edge refinements.
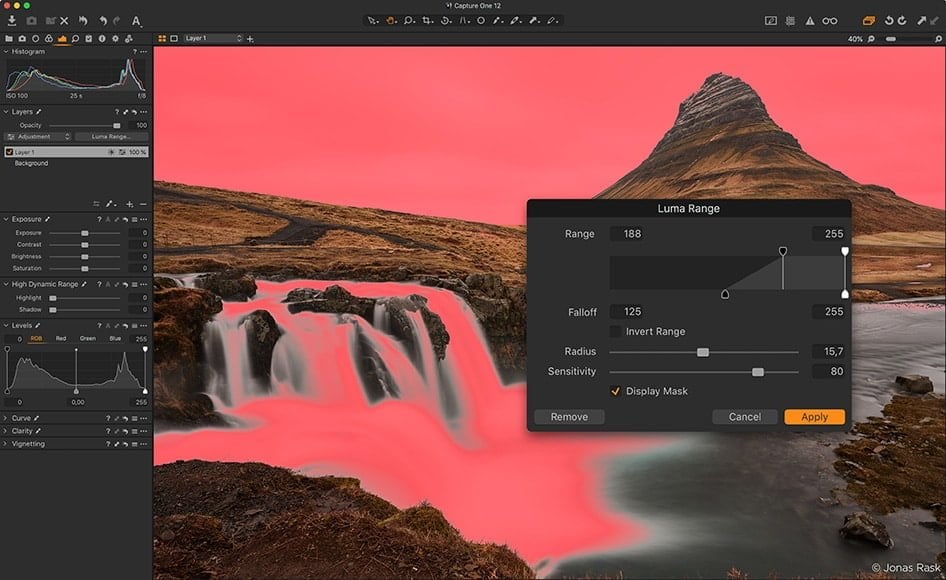
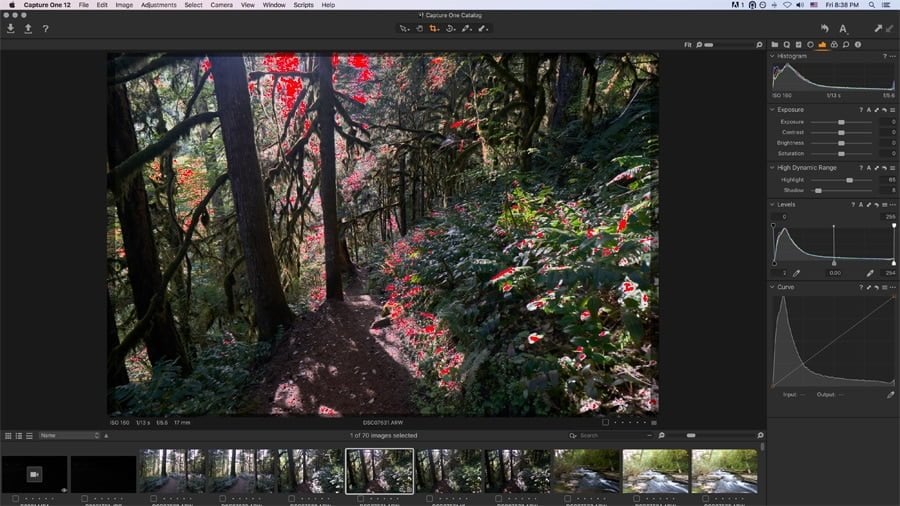
The Luma Range feature in Capture One Pro is a particularly useful way of selecting areas of an image.
Everything from Levels to Color Balance tools work in layers, and you can adjust the opacity of each edit layer – something that can only be done by way of a third party plugin in Lightroom (see these Lightroom Tips for more info).
This latest version of Capture One Pro 12 now has luminosity masks. They’re called Luma and can be found in the layers dialog.
This is definitely a feature win for Capture One and a reason why many pros really love it.
👍🏼 Color Adjustments
If you’re someone who likes to fine tune your color, you’ll fall in love with what Capture One can do. It’s one of the places that it’s always been ahead of Lightroom.
Capture One’s Color Balance tool is more like color grading. Unlike most other editing programs, Capture One doesn’t limit you to the 8-color HSL panel – the Pick Color tool allows you to pick any color or color range in the image.
From there you can adjust the affected color range, hue, saturation and lightness. The 3-Way option even lets you adjust the color tint separately in the shadow, midtone and highlight areas.
Do you want to affect the blues in your photo, but not the blue-greens? Easy! Need to smooth out the skin tones? No problem. Simply choose the Skin Tone tab, select a color range, and adjust the uniformity sliders.
Of course, most of Capture One‘s truly advanced color tools are only available with the Pro version. The Express version just has the Basic tab.
Also, these aren’t adjustments most beginners (or even some pros) would necessarily gravitate to and they do take some time to learn.
However, if you want to have complete control over your color, Capture One certainly wins hands down over Lightroom and everyone else in the same niche.
👍🏼 Tethering
If you shoot in a studio, odds are you know the value of shooting tethered. There’s nothing like seeing the images expanded onto a computer screen as you shoot them. It allows you to check for detail you just can’t see on your camera’s screen.
Most studio photographers who shoot tethered already use Capture One. After all, that’s what it was originally made for and it particularly excels in that area.
Tethering features in Capture One Pro makes it the obvious choice for studio photographers.
With it you can control just about everything via the tether, including details as particular as the flash curtain sync mode. You can also see your camera’s live view on your computer screen.
If you were ever thinking of shooting tethered, Capture One is the editing software to try first.
👍🏼 Spot Healing
While most of today’s editing programs have some version of spot healing, Capture One does it faster and smoother than both Lightroom and Luminar. (I haven’t yet tried OnOne yet but will be reviewing it soon.)
Unlike Lightroom, the healing points don’t overlap, making it easier to work with fine adjustments. It also just looks better – almost on par with Photoshop (which is where I usually do my more difficult spot healing).
👍🏼 Annotations
If you send your work off to an editor or work with a team, Capture One Pro has an annotations feature that makes collaboration much easier.

The annotations feature works well in Capture One Pro, especially with the Microsoft Surface Pro or a tablet device.
It lets you add notes directly to the photo – basically a layer that you can draw/write on. Definitely helpful for collaborative editing or sending an image with notes off to a client.
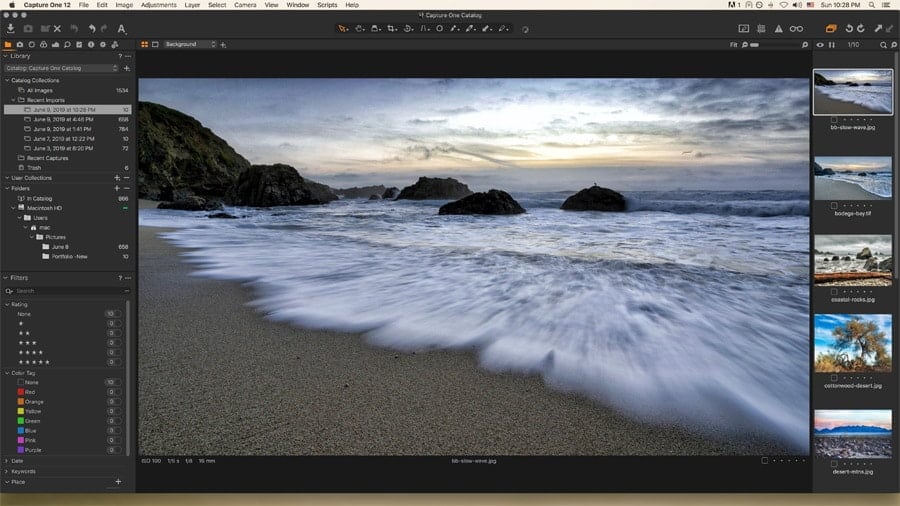
👍🏼 Choice Between Sessions and Catalog
Not everyone likes working with a catalog system, especially if you have a particularly high volume of photos, do a lot of individual shoots, and/or already have a good hard drive file organization system.
Capture One allows you to organize according to your photography sessions instead of of using the catalog. It’s why Capture One is a popular choice for studio pros.
If you’re coming from Lightroom you’ll probably automatically gravitate to the catalog, but it’s nice to know you have choices.
👍🏼 Speed and Performance
Many say that Capture One actually outperforms Lightroom in terms of both speed and stability.
To be honest, I haven’t tested the two softwares side by side extensively enough to draw my own conclusions on this.
👍🏼 Styles
Similar to Lightroom’s presets but a whole lot more powerful, Capture One Styles are one-click solutions for bringing some life to your RAW files.
There are several Styles available by famous photographers, helping you emulate their color grading.
👍🏼 Fujifilm Film Simulations
One of the huge benefits of using Fujifilm X-series camera are the built-in film simulations like Acros, Classic Chrome, Velvia etc.
Capture One 12 now adds the ability to change the starting point of your editing to one of the film simulations, as Curves within the Base Characteristics Tool.
Capture One Pro | Weaknesses
There are a few places where Capture One falls short. They’re admittedly quite minor feature omissions, but have a read to see if they would hinder your workflow.
👎🏼 Lack of Third-party Plugins
Until this most recent version (12), Capture One didn’t have any third-party plugin capabilities. For those of us who use them regularly, this could be an issue.
Into Nik or Topaz filters? No go. Like Skylum’s Luminar or Aurora HDR plugins? You’re out of luck. Use any of the fantastic portrait packages out there? Too bad.
Of course, if plugins aren’t a key part of your work flow, this won’t be an issue. I, however, shoot regularly in HDR and really don’t enjoy having to switch between programs.

Capture One only has a few third-party plugins and no ability to do HDR or panoramas.
As it is, Capture One lets me send the photos to Aurora HDR, but then I have to export from Aurora and re-import to Capture One. No fun.
One thing new in version 12, though, though, is export plug-in support. To date there are only three available plug-ins: Format portfolio service, Helicon Focus (for focus stacking), and JPEGmini’s resizing. At least it’s a start…
👎🏼 No HDR or Panoramas
To add insult to injury for us HDR photographers, Capture One doesn’t have any native HDR options.
We can’t use a plugin and there’s no native version. Same is true for panoramas.
👎🏼 Limited Organization
Most people say that Lightroom beats Capture One in terms of organization, but I’m wondering if that has to do with the frustrations of learning a new system.
There are a few things Lightroom has that Capture One doesn’t have, but in general all the key features are there. (It’s finding them that’s frustrating, at least for someone coming from Lightroom.)
Unlike Lightroom Classic, Capture One doesn’t yet have face detection software. I’m not much of an event photographer, so this isn’t an important feature for me.
Capture One also doesn’t have AI keywording, a feature Lightroom CC has. Since most photographers are probably using Lightroom Classic, it’s hard to miss what you’ve never had. Still, this feature has a lot of amazing potential and I’d be curious to see if Capture One adds it in the future.
Other than these two features, I haven’t really found anywhere that Capture One Pro is seriously lacking in terms of organization.
👎🏼 No History Panel
The history panel is a tool I use often. It’s the easiest way for me to see what I’m doing if I need to go back a few steps in my workflow.
While Capture One lets you undo edits and easily reset adjustments (more easily than Lightroom, actually), not having a history panel really cramps my style.
There are workarounds, like creating a number of clone variants, etc., but it’s not quite the same.
👎🏼 Other Things
There are a few other things I don’t like, but this might be because I’m so used to Lightroom. One of these is that when I rename a file, it moves to somewhere else in the catalog, which can get annoying when trying to compare a series of photos.
I also don’t like how the tilt/straighten tool is separate from the crop tool (a la Photoshop). I’m not quite sure why they separated these, but this adds an extra step to my workflow.
I also don’t like that some very basic features are lacking from the Express version. For instance, there’s no vignette option. This bothers me, as it forces me to go to another program if I need one. Since there’s no plugin options, I have to completely leave Capture One and then reimport for something as simple as a vignette.
There are also no online sharing options, which will definitely affect some folks. (I don’t use them, but I know others do.) You’re also out of luck if you need cloud computing options.
I’m sure there are plenty of other little things here and there, but at some point it feels like nit-picking.
Capture One vs Lightroom
I’ll be comparing Capture One Pro vs Lightroom in detail in another article, so I’ll keep it brief here.
Where Capture One wins:
- Completely customizable workspaces
- Raw image conversion
- Color adjustments
- Layers and Luminosity masks
- Session-based organization option
- Annotations
- Tethering abilities
- The Shadows and Highlights sliders have a greater range of tone control
- Almost no third party plugins
Where Lightroom wins:
- Organization
- HDR and Panorama ability
- Third-party plugins
- Price
- Social media integration
- Face detection
- Better noise reduction
- Fully integrated with other Adobe products
- Extensive Keywording support, including AI
- Cleaner Interface
Capture One Price

There’s currently a 50% discount on Capture One Pro for Sony or Fujifilm shooters.
Unless you’re (solely) a Sony or Fujifilm shooter, Capture One Pro isn’t particularly cheap.
In fact, if you count in upgrades, Lightroom + Photoshop ($10.99/month) may seem the better deal – at least for short term use. Let’s take a look at the numbers.
Capture One Pro (full version):
- You can buy the software outright for $299
- subscribe for $20 per month,
- or pay $15 monthly, if you prepay for a year.
(The above Capture One prices are correct at time of writing)
Any of these options will give you three Capture One Pro licenses (more than Adobe’s two-computer maximum).
At the moment, upgrades for future versions cost $120 or more, depending on what version you’re upgrading from. That’s pretty steep, especially if upgrades come out once every one-two years.
You can get the Pro version exclusively for Sony or Fujifilm for a 50% discount here (limited time), which will work if you’re really just a single-brand user and don’t force yourself ever switching. If you want to switch, you’ll need to upgrade to the full Pro version (prices vary on this).
The bottom line? Only buy the full version if you’re planning to use it more than 2 years and upgrade infrequently.
Capture One Review | Final Words
So, should you switch to Capture One? It all depends on what you’re looking for.
If you really want to get off the Adobe subscription model and you don’t need to edit across various devices or platforms, it’s a great option.
It’s also a great option if you work with color a lot, need annotations or shoot tethered. Studio photographers might also choose to organize by sessions rather than the catalog.
With Capture One Pro, there’s simply no better software for viewing and editing RAWs as they were meant to be viewed by the camera manufacturer.
In the words of Master of Photography Peter Eastway, “Using Capture One after using Lightroom is like looking through a window that was once dirty.”
On the other hand, if you shoot in HDR or create panoramas, regularly use third-party plugins, face recognition, or need to use the cloud, Capture One won’t work for you. Also, if you need precise and powerful keywording options, Lightroom has this part nailed.
Price-wise it’s really up in the air, with Capture One generally coming out more expensive than Lightroom and certainly more than Luminar, On1, or even DxO Optics Pro.
However, you are able to buy Capture One Pro 12 outright, which is more than we can say for Lightroom…
What do you think? Is it worth the switch?
Photo editing software solution with powerful tools for organizing, colour grading, layer editing & more
 Best Fujifilm Cameras of 2024 (Latest Fuji X-Mount Models)
 12 Best Adobe Lightroom Alternatives in 2024 [User Tested]
 How to Use Adobe Express for Designing, Editing & Sharing
 What’s the Best Way to Buy Lightroom in 2024?
 Lightroom CC Mobile Guide
 12 Best Fuji Lenses in 2024 for Fujifilm X Mount (All Budgets)

Teryani Riggs (they/them) is an adventure, who loves all things wild and free. Teryani can often be found in the midst of a social/eco-justice campaign, hiking through wild backcountry, or hitchhiking around the world listening to other people’s stories. While their focus has historically centered on landscape, travel, and wilderness photography, they’ve also been hired to shoot genres as varied as historical fiction reenactments in the studio to product and food photography.


