


How to Photograph Children (29 Tips for Creative & Fun Photos)
A selection of useful tips on children photography. Learning how to photograph children isn't hard - just follow these rules for great pics of your kids!
Learn | Photography Guides | By Mark Condon | Last Updated: November 21, 2023
Let me start by saying I do not formally teach how to photograph children. I enjoy shooting family photography sessions, but photographing children is not something I’d consider myself an expert in.
However, as a professional wedding photographer, I do consider myself to have an adequate, all-round knowledge of most facets of photography, including how to photograph children.
Having 2 sons to practice with helps too of course :-)
Speaking recently to a mother who was desperate to take some meaningful photos of her kids, I realised that most parents don’t know the first thing about how to take a decent photo of their children.
This post is a selection of tips to help you take better photos of your kids. Many of the tips apply to photographing other subjects too, but let’s focus first on getting some great snaps of the little ones!
If you have any good tips on how to photograph children, feel free to leave them in the comments below so we can all benefit. If photographing babies is more your thing, check out these tips on newborn photography, and our guide to newborn photography props.
29 Tips for Photographing Children
Some of these tips on how to photograph children are technical and others are psychological. As with all portrait photography, getting a compelling image starts with engaging with your subject.
As for the child photography technical tips, I’ve tried to keep the information as beginner-friendly as possible, assuming you have had limited experience with a camera.
If you have any specific questions regarding technique or settings, leave them in the comments below and I’ll do my best to answer.
Tip #1: Get them used to the camera
Even as an adult, having a camera point at us makes us squirm. So it’s no wonder that the kids start acting unnaturally when you point a camera at them.
When photographing children, you need to be persistent and patient, lifting the camera often enough that the kids get used to it. Remember, kids photography is all about making sure children are comfortable with a photographer around.
After a while they should forget it’s there and you’ll have those candid, natural shots that always look the best.
To be able to always have your camera on you, be sure to keep your photography gear light and minimal – put away your travel tripods and spare lenses, and concentrate on using the bare minimum accessories.
Related: How do I teach my child to take pictures?
Tip #2: Focus on the eyes
If your camera has the ability to control the focus point manually (i.e. not the camera deciding where to focus by itself), stick that focus point right on the child’s eye. If they’re not facing you, focus on the nearest eye.
Learning how to photograph kids shares a lot in common with photographing adults. It’s all about getting sharp focus on the eyes!
The eyes always need to be in pin-sharp focus, and ideally they’ll show mostly the iris/pupil, as opposed to mostly the white area.
Eyes in a photo attract the viewer’s eye, and make the image instantly more alluring.
If you really want to make your child’s eyes stand out, try and get a ‘catch light’ in them. This can be achieved by ensuring there’s some light falling on your child’s face, and can really help the eyes come alive.
Related: Tips for photographing 6-9 month babies
How Much Do You REALLY Know About Photography?! 🤔
Test your photography knowledge with this quick quiz!
See how much you really know about photography...

Tip #3: Get down to their level
This simple tip will instantly improve the photos of your children. Try and take the majority of photos of your child at their eye level. This may mean bending down, or even laying on the floor.
If you’re photographing more than one child, try and make yourself the same height as the tallest child (unless they’re tall, in which case get them to bend down to match the height of the smaller child).
You can get creative with your compositions to exaggerate the size of your child by getting lower than their eye level and shooting upwards.
Remember that with photography, the interesting images are always those that show the viewer something they haven’t seen before, or something from a view they don’t normally see.
If you want one of the best child photography tips: get just as playful and creative as the kid’s you are photographing!
Related: Fresh 48 newborn photography tips
Tip #4: Shoot everything
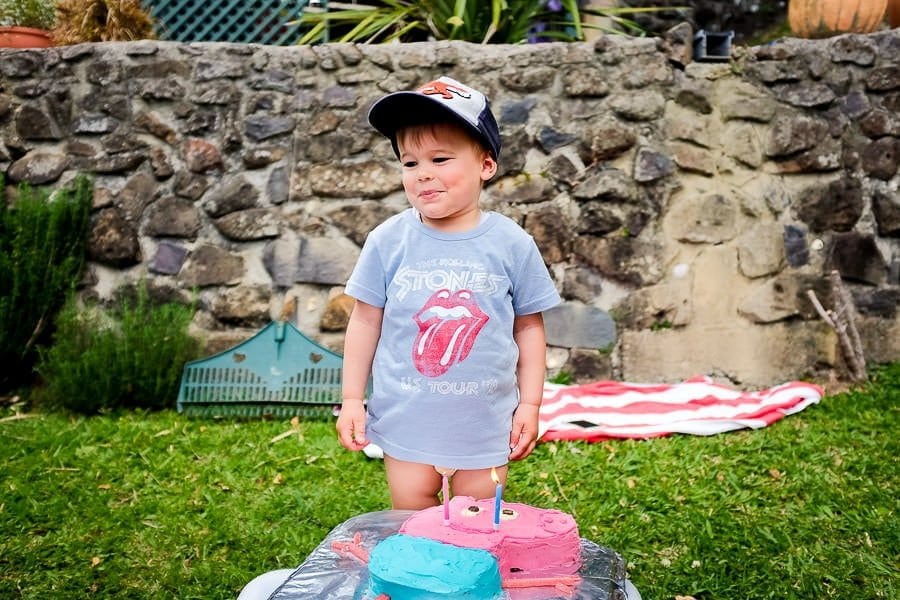
What is child photography even if not showing the world through a child’s eyes? When photographing children, don’t just get your camera out at the big moments – blowing out the candles, opening the presents etc. Have it out and shooting during the in-between bits too.
It’s often these times that show your child’s real personality, and you’ll treasure these moments just as much in the future when you look back at them.
One of the most important child portrait photography tips is to capture the moment.
Staged photos are all well and good for the mantelpiece, but try and get some candid moments too that tell the whole story of your children growing up.
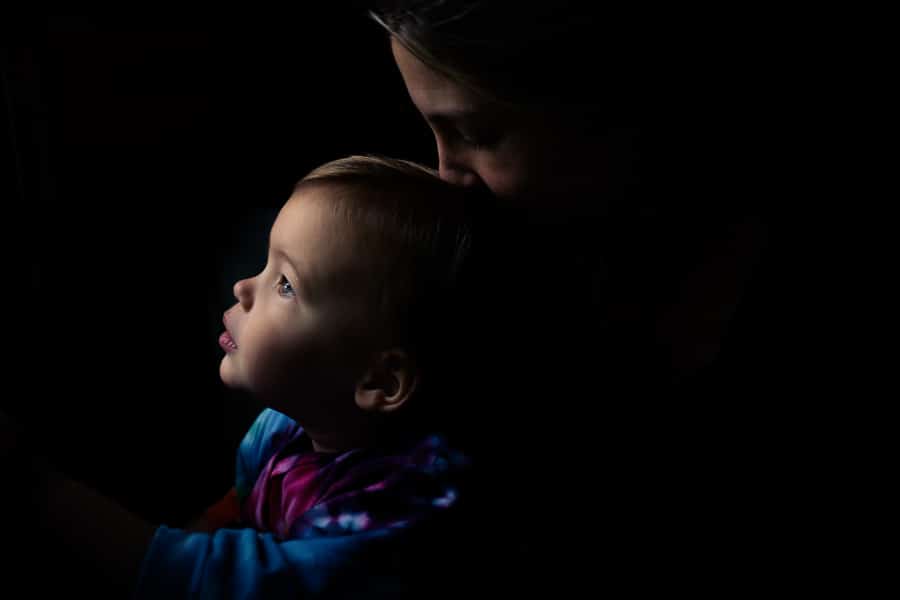
Tip #5: Make the face the brightest thing
The next of our tips for child photography doesn’t apply to every situation, but for the most part, you should try and make sure your child’s face is the brightest thing in your photo.
This can be as simple as moving yourself until your angle puts a dark wall behind the child, rather than the bright sky.
If you can’t do this, try and expose for your child’s face. Look up how to use the ‘Exposure Compensation’ dial and ‘AE Lock’ button on your camera. Then make the adjustment to make the child’s face nice and bright, or at least brighter than that of its background.
If you need quick reference for the optimal camera settings, keep your Photzy Snap Cards handy. They can give you quick tips for the best camera settings for child photography.
If you’re using an iPhone, tap on your subject’s face, then lock the exposure of your image by holding your finger down until ‘af/ae lock’ appears on the screen. Now re-compose your shot, fine tune the exposure if necessary by sliding your finger upwards or downwards, and finally take the shot.
(We wrote a complete guide on iPhone photography tips like this.)
Tip #6: Choose a simple background
Children are often dressed colourfully, or have t-shirts with patterns or characters. Try and find a background that’s uncomplicated, and take care to ensure there are no tree branches or telegraph poles ‘sticking out’ of your subject’s body or head in the background.
Often, learning how to take photos of kids has a lot of overlap with the basics of good composition in general.
Sometimes it’s hard to find something suitable to shoot against, or perhaps your child isn’t willing to cooperate and stand in the right place – in these situations, you can use software with a background remover feature when editing your images.
Tip #7: Direct the viewer’s eye

If there are several people in the photo, how can you make the child the star attraction?
My favourite way of doing this is to ask the adult (or older child) to look towards the younger child. This instantly makes a more compelling image than both subjects looking at the camera (but take this photo too so you have both!)
If you’re photographing a child with two adults, get them both to look at the child for an engaging image. Make sure their heads are close, which will usually mean having them bend down to the child’s height, or having them pick the child up to theirs.
Another of our kids photography tips is to use your leading lines to direct the eye towards your subject.
Tip #8: Shoot discreetly
If you don’t have time to get them used to the camera, try and take some sneaky snapshots of your kids. Taking pictures of children sometimes means catching them by surprise!
I find that using a flip-out LCD screen is the best way to do this, since it looks like you’re just checking your camera. See the final tip for some great cameras I recommend that have this functionality.
If your camera doesn’t have a flip-out screen, practice shooting with the camera away from your face. Holding it at chest level to shoot whilst engaging with the child from a distance will usually mean that their eyes will still look as though they’re looking directly at the camera.
Tip #9: Show your face

This follows on from the point above. Having a big black object blocking your face is hardly the best way to illicit natural responses from kids. Try and take photos with the camera slightly lowered from your face.
You will learn more about how to shoot kids as you gain more experience behind the camera, but keeping the experience personable is great advice all around.
If nothing else, your subject will be confused as to what you’re doing, so you may end up with a cute expression on their face.
Tip #10: Continuous mode is your friend
If your camera has a rapid fire (sometimes called ‘continuous’) mode, make use of it for all your children photography. This is especially so if you’re following the two tips above, which may result in a lot of bodged photos!
It’s not ‘spray and pray’, but rather, maximizing your chances of getting that one good shot! Kids are always running around and child portrait photography means taking advantage of your camera’s features to capture the shot.
Digital photos are essentially free, so don’t be afraid to take lots of them if you’re trying to get that one special moment. Kids are unpredictable and fast moving, so shooting lots of photos at once can help increase the odds of getting good shots.
One word of advice though, try and find the time to go through the shots either on your camera or phone and delete the ones you screwed up before getting them to your computer. This will save you hours of culling later on, but just be careful you delete the right shots!
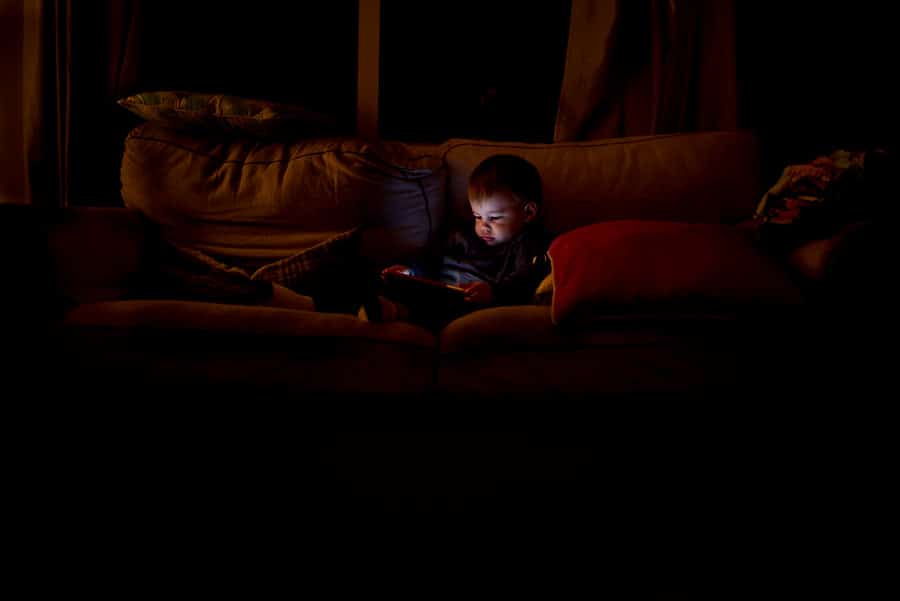
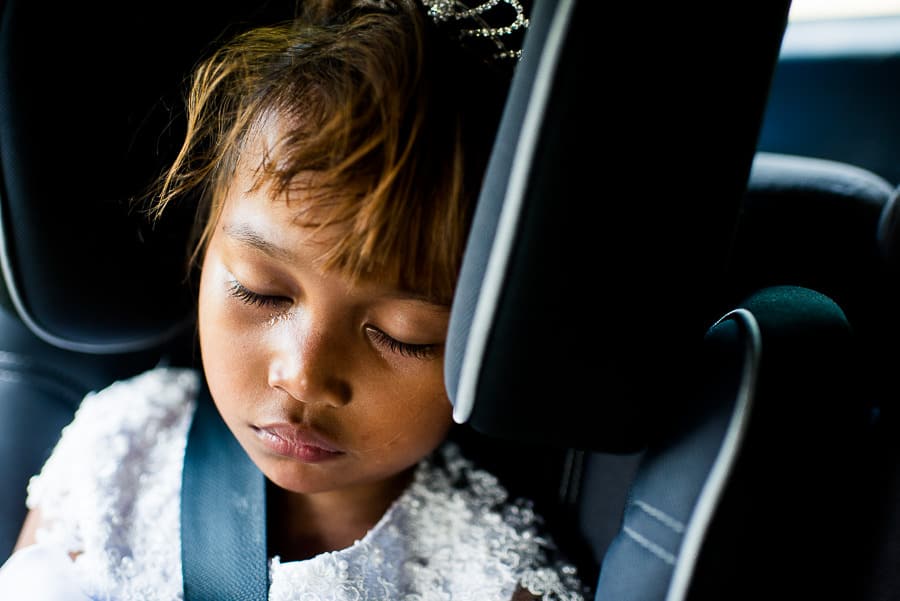
Tip #11: Find good light
This tip is broad and applies to improving all facets of children’s photography. However, with children photography we can simplify this by saying, use natural light as much as possible.
This means getting the child near a window, or even turning off indoor lights if they’re turned on during the day. The above photo was taken just using the light from a window in a dark room.
Obviously if you’re trying to shoot candidly your children won’t always be next to a window in perfect light. However, for those odd shots where you have some time, just asking them to stand in the right place (or picking them up and putting them there) before clicking the shutter button can create a much more pleasing image than one taken in bad light.
‘Good light’ can also mean interesting light, so keep your eye out for small patches of light in an otherwise dark area which you can use to highlight your subject. This is where shooting in your camera’s Manual mode can help, since you can alter your exposure so that the light area is more dominant and the darker area falls away into blackness.
If you’re not confident yet in Manual mode, twist the ‘exposure compensation’ dial on your camera to minus (-) until the photo looks how you want it.
Another precursor to unflattering photos is harsh light, particularly midday sun or sunlight that is very strong and directly overhead. You should still take the photos of the children frolicking in the sun if it’s happening, but for the best photos, tell them to go and run around under the shade of a tree. The light on their faces will be softer and result in much more pleasing images.
Tip #12: Don’t be afraid to crop
I’m talking about cropping in-camera here, not in front of your computer – no parents have time for that!
Don’t be afraid to cut part of your child’s torsos or even face off with your framing if it helps the viewer’s eye to focus on what’s important. Some photography tips for kids portraits require a bit more creativity than with your usual photography sessions.
It can feel strange to cut off a subject’s legs in a photo for an amateur photographer, who will usually try and include their feet and some of the ground too in every image.
However, if you adhere to certain rules of where to crop your subject, you can fill the frame with more of what matters. This is especially true when photographing children.
In general with kids, don’t be afraid to get closer and crop their legs out of the picture, above the knee, or their feet above the ankle.
If your camera has a zoom, use it to show off their face by zooming in tight and cropping the top part of their head, or at the lower neck.
Tip #13: Experiment with your composition
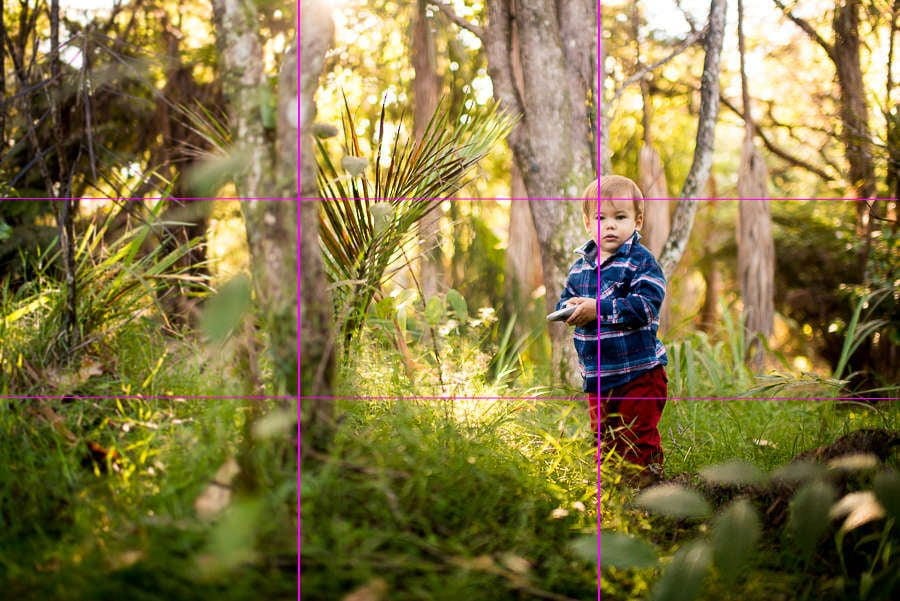
Photography composition is a huge topic with many rules, and most of these rules can also be broken to still create a compelling image. Taking photography of kids requires a mix of classic composition rules and some playful rule breaking.
In the interests of simplicity, I’ll break this down to one piece of advice when photographing children – experiment with placing your child off-centre in the frame. In other words, don’t always take the photo with your subject right in the middle of the picture.
If you want to get more specific about one of the more popular rules of composition, read the basics of the rule of thirds. By simply placing your child’s face on one of the imaginary lines that divide your frame into 3, you can immediately create a more compelling image.
To do this, compose your photo with your subject in the middle and hold down your shutter button halfway to engage the autofocus. Then recompose your image, placing the subject on one of the imaginary ‘rule of thirds’ lines, and press the shutter button all the way down.
Tip #14: Timing is everything
Parents will know where I’m coming from on this one. You’ll know when your child is most happy, and this is no doubt the same for other children of the same age too. After waking up from a good sleep, after snack time, playing with their favourite toy etc etc.
Choose your time wisely to pull out the camera for shots of them looking naturally happy, with no need for you to say “Cheese!”.
A good children’s portrait photographer knows how to anticipate these moments and capture the child’s true candid moments.
Choose a time when your children are distracted with a toy or activity to get a candid photo of them looking happy, totally unaware of your camera.
When you’re taking pictures of kids, you often need to work with their fickle timing rather than forcing the shoot to happen on your adult schedule.
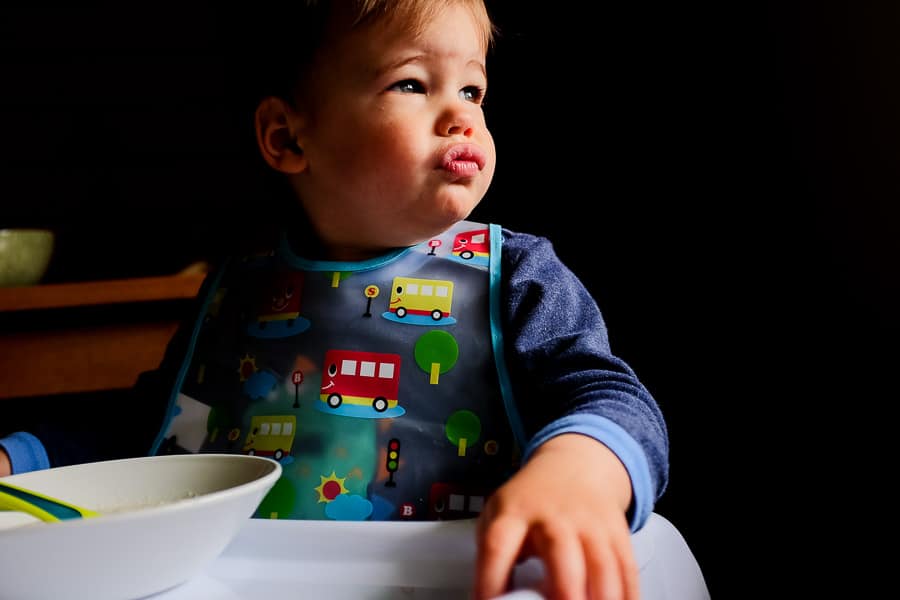
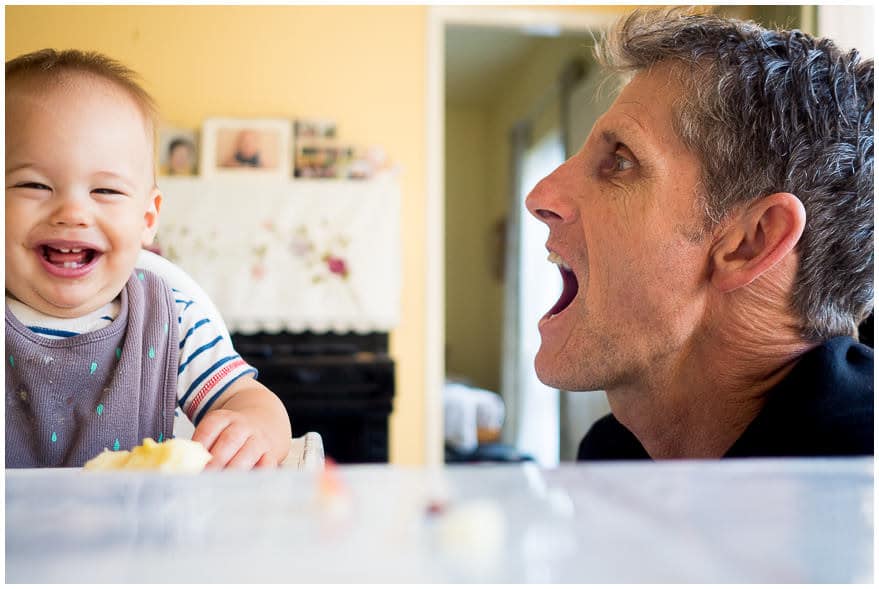
Tip #15: Get them talking
This one holds true for adults too, but it’s a great tip for improving the photos of your children, especially younger kids. Ask them a question and wait until they start answering it before raising the camera to your eye. Or even take a quick snap of them thinking.
Good report between photographer and subject is a great way to help your subjects unwind when taking photos of kids. Kids can be shy, after all!
When the child is talking or thinking they’ll be distracted from your camera, which should allow you to get a natural looking photo… or just one of complete boredom/frustration like the one above!
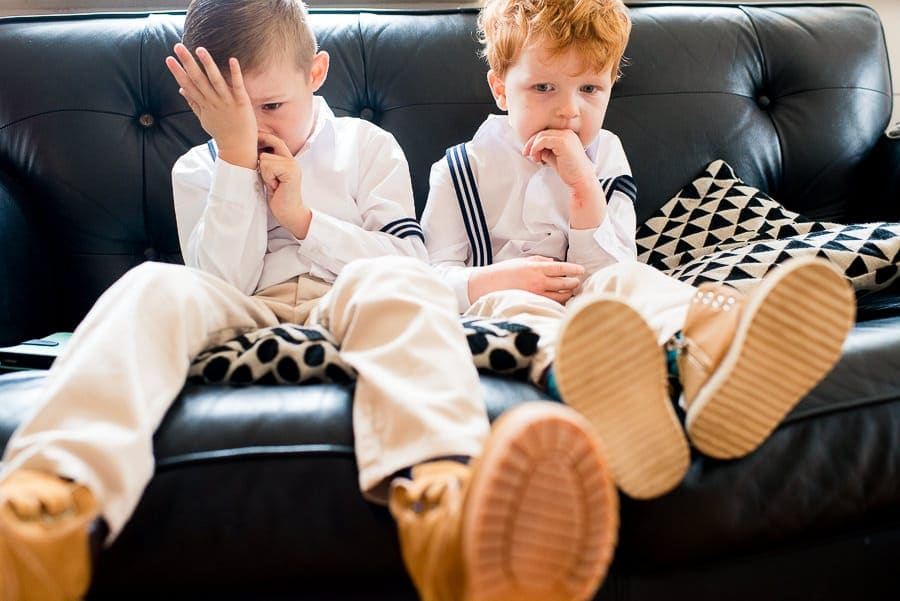
Tip #16: They don’t need to smile
“Cheese” is a word that makes professional photographers cringe, and it should be out of your vocabulary too… unless you’ve got the biscuits out!
Photography of children doesn’t always mean smiles. In fact, sometimes forcing smiles can actually ruin your kids photos.
If your child isn’t smiling when you come to take the photo, don’t worry – take it anyway. Show how they look normally, not how they look when they’re told to create a fake smile, which is basically what “Cheeeese” accomplishes!
If you really want the smiling shot, you’re going to have to make them smile by talking about their favourite animal, food, tv show… or just use your funnies to get them laughing.
Tip #17: Use a helper
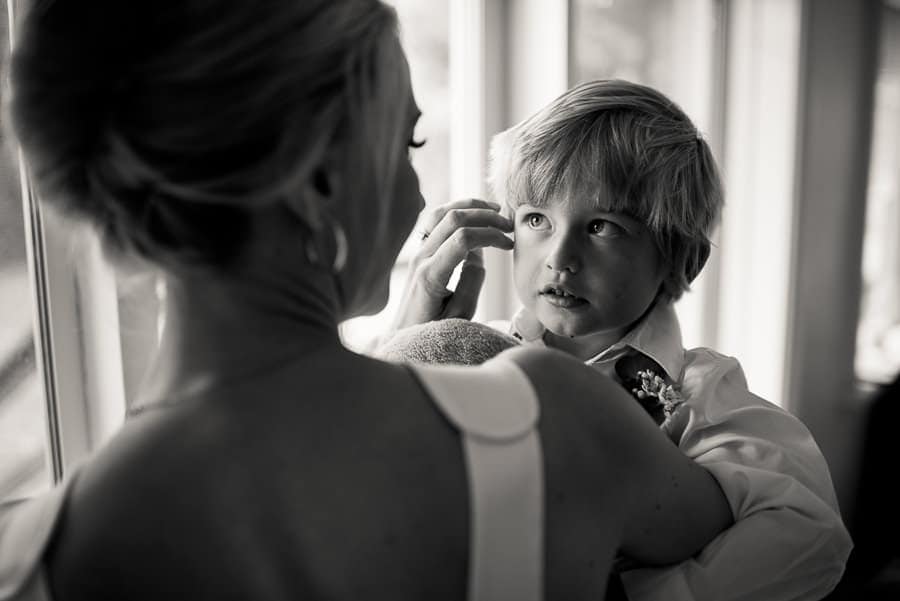
If someone’s available, get them to stand behind you at your level. That bit’s important – they need to be at the same level as you, or your subject’s eyes won’t be looking into the camera.
If you’re taking a photo of another person’s child, get mum or dad to stand or crouch behind you and have them call their name, say something funny, make noises – whatever it takes to get your desired reaction.
If you want some great child photography ideas, try bringing the family into the session for some group portraits. Our children photography tips have a lot of overlap with family photography.
Or even simpler, just wait for the child to be interacting with someone else, such as in the photo above.
- See more: 17 Mommy and me photo shoot ideas
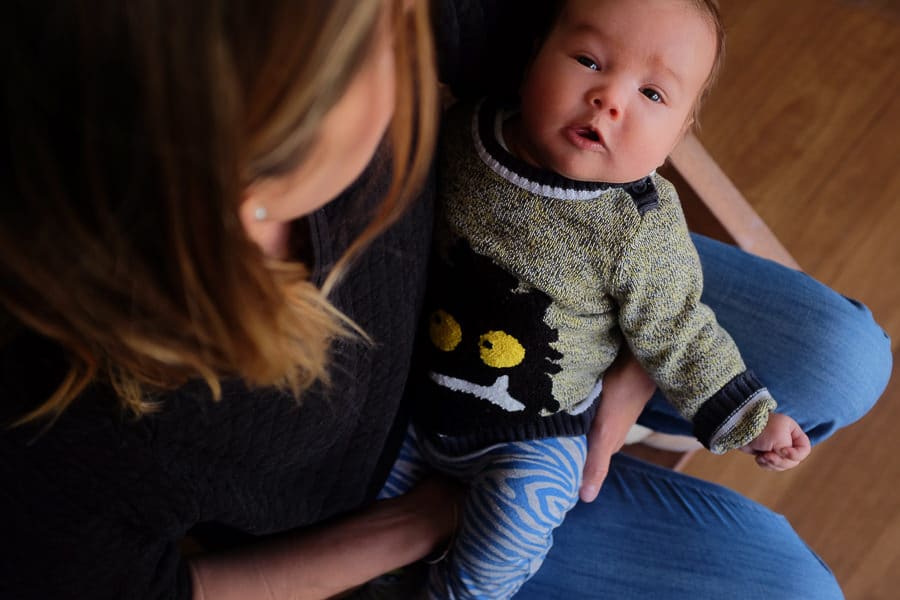
Tip #18: Alter your perspective
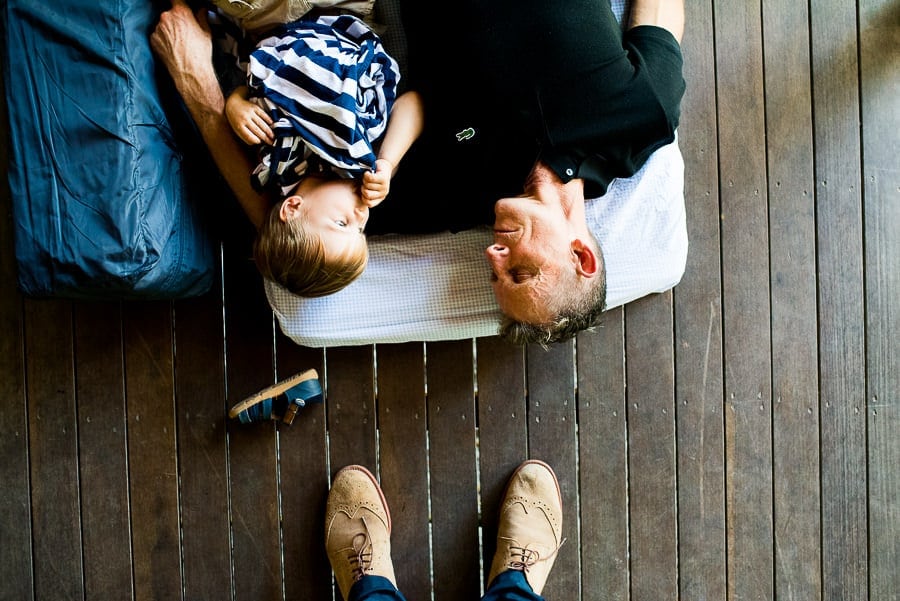
I mentioned earlier that getting down at their level can really help when photographing children. Well it’s now time to break that rule, but we’re still going to be using an angle of view that’s not normal.
Photographing kids from above can give an interesting perspective. If you have a tilting LCD screen on your camera, you’ll find this much easier – look at the final tip in this series for cameras I recommend that have this feature.
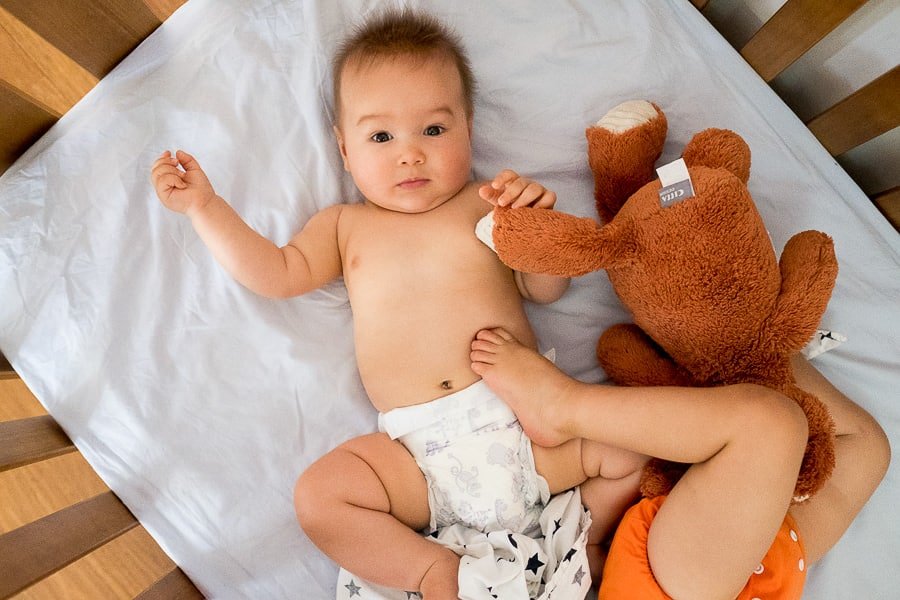
My favourite shots are often those taken directly above the child, especially if they are laying down. This angle of view never fails to create an interesting photo, especially if you have time to compose the shot.
You flex your children’s photo skills from any angle, but be intentional with how you are framing your shots!
You may even decide to include some of yourself in the photo, or just part of another person such as in the two shots above.
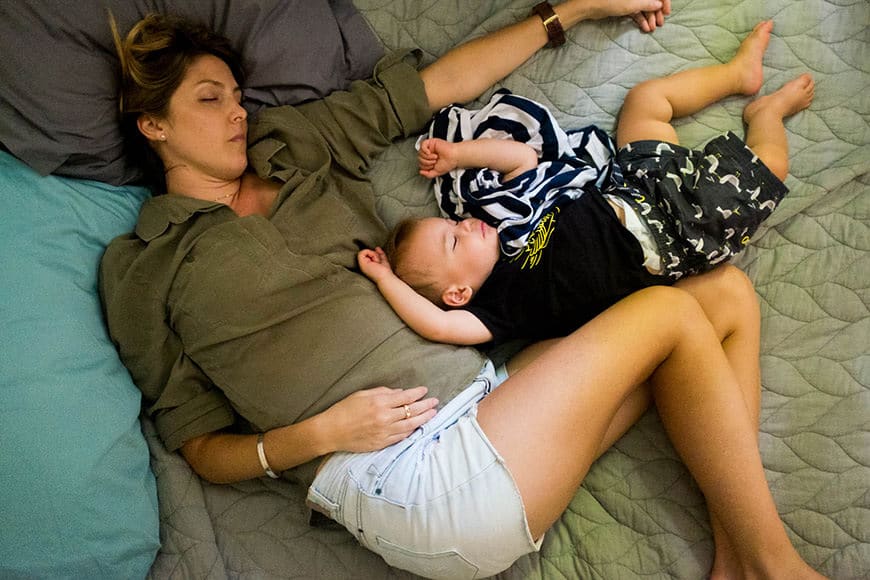
Try it next time your child is asleep. Take extra care to get the shot completely perpendicular to where they are laying. If you’re lucky, your partner will be alseep there too, giving the photo an extra sense of scale… which brings me nicely on to the next tip.
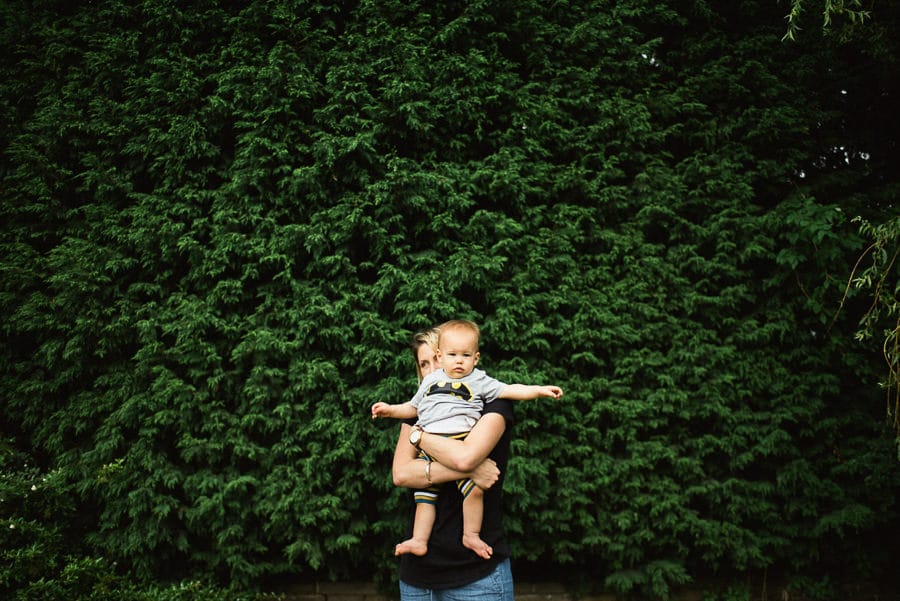
Tip #18: Use scale
Following on from the previous tip, sometimes it’s a fun photo to make the child seem really small, or at least, small in comparison to the other objects in the frame.
This is easily one of the best child photography tips and tricks. Children exist on their own scale unlike adults. What better source of creativity is there than that?
This can be as simple as putting the child on a large arm chair, having them wear adult boots, or stepping right back to shoot them from a distance against a large object such as a wall.

Tip #19: Get in close
This is a tip that applies to all manner of photography, and one that is the difference between a good photo and a great photo.
When photographing children, unless you absolutely need to use the zoom on your camera, don’t touch it. Instead ‘zoom’ with your feet, and get up nice and close to your child for a really engaging shot.
Obviously you’ll want to vary the distance of your child from your camera for variety, but try and take that extra step closer for your next photo and see what a difference it can make.
Don’t have a great backdrop or captivating landscape? A nice closeup can help you discover some child photography ideas at home when you don’t have a great background.
One caveat – if your camera lens is ‘wide’, i.e. has a number lower than 35mm, steer clear of placing your subject on the edges of the frame when you get close to avoid any funny distorted features.
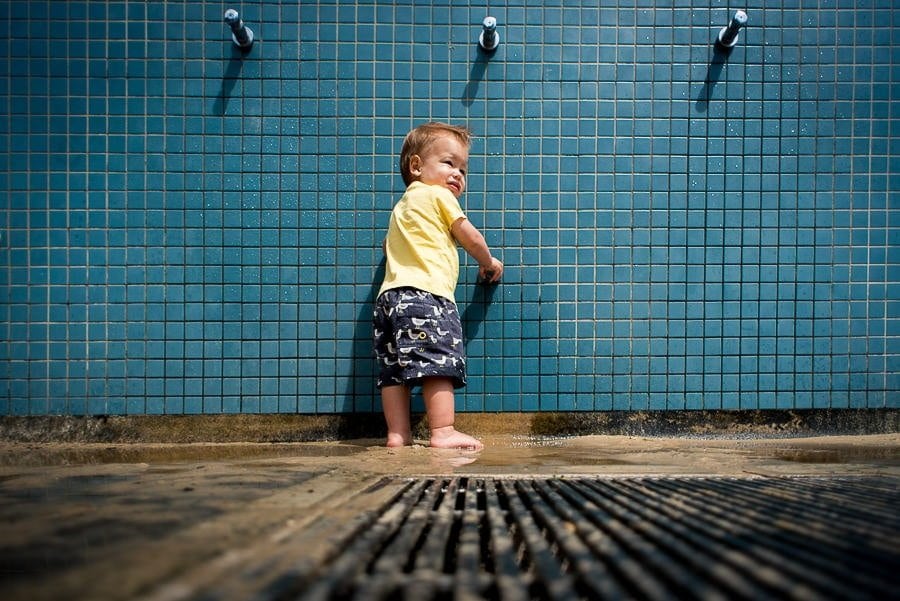
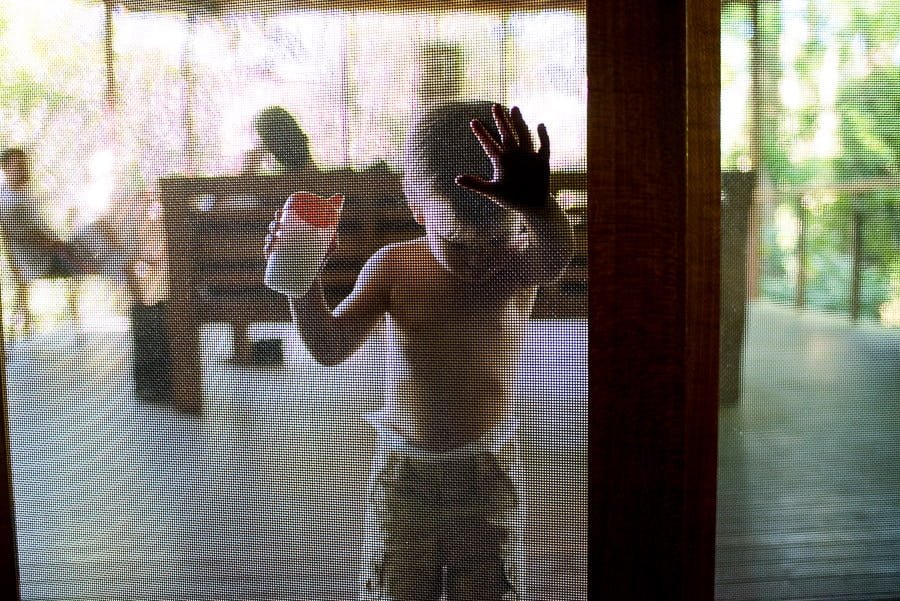
Tip #20: Shoot from behind/Don’t show the face
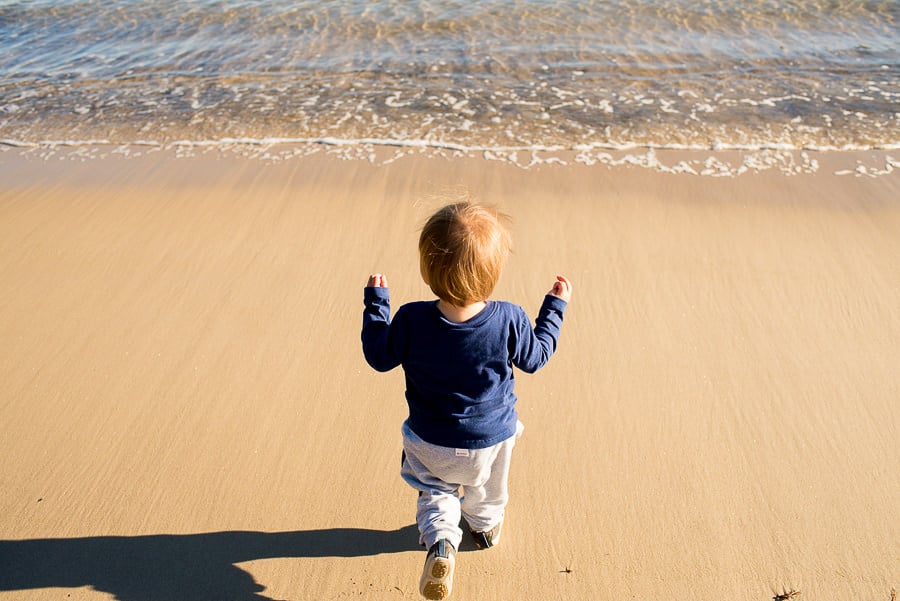
Here’s an often-overlooked concept in kid photography. You don’t always need to take photos from the front when photographing children.
Try mixing in some photos of the kids running away from the camera, or take some from behind whilst they’re looking at a view, or even with their face hidden whilst reading a book for example.
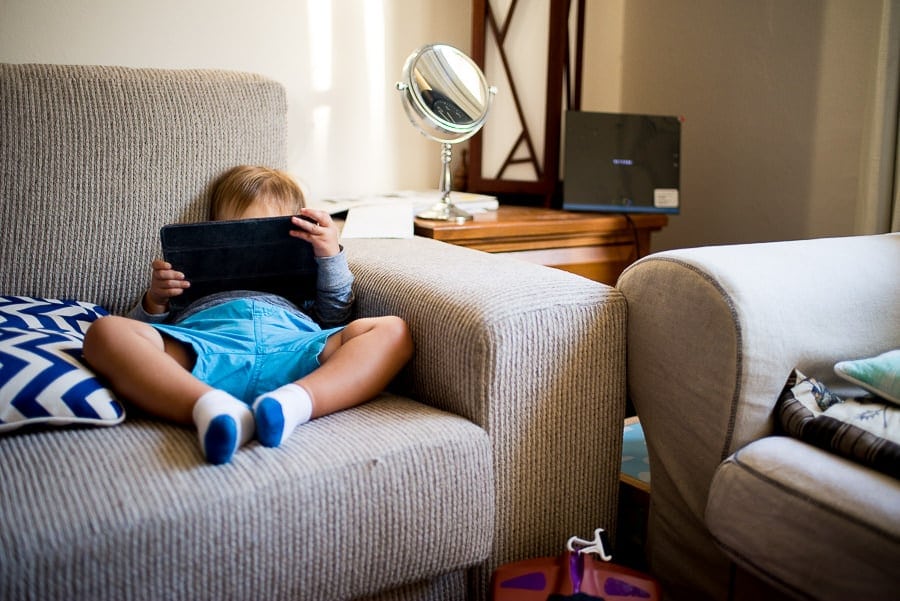
You don’t always need to have a face in a photo to tell a story about a person, and often removing it completely encourages the viewer to paint their own picture about the subject’s emotions.
Tip #21: Focus on body parts
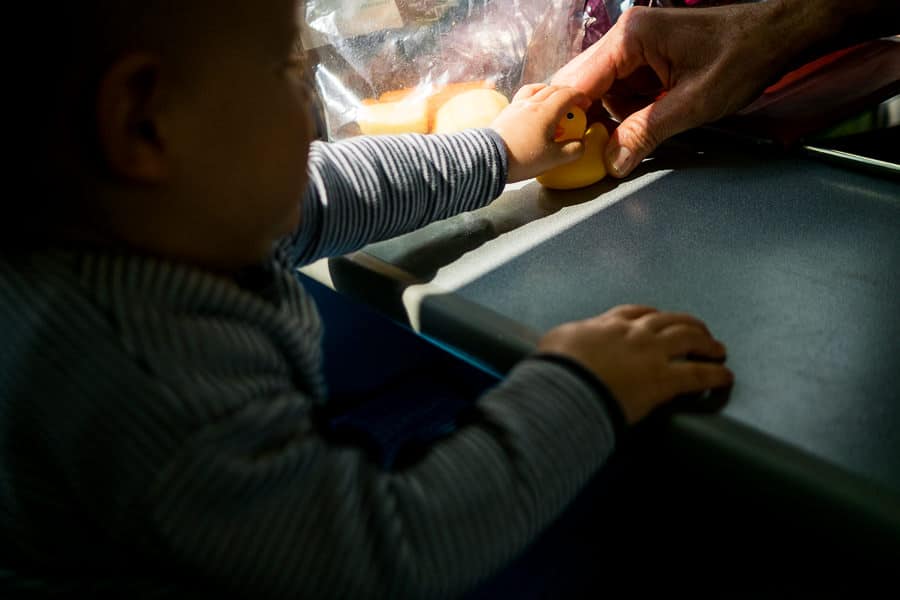
The photo of a baby’s hand clutching daddy’s finger is a bit overdone in baby photography, but it’s still a good one.
Don’t be afraid to crop out everything else and focus just on a single hand, the eyes, the feet, or whatever you find cute.
Including another object or element to highlight how small the body part is will also help tell the story.
This is also a key tip when photographing pregnant women in maternity shoots – focusing on the belly is the obvious one.
Tip #22: Accessorize!
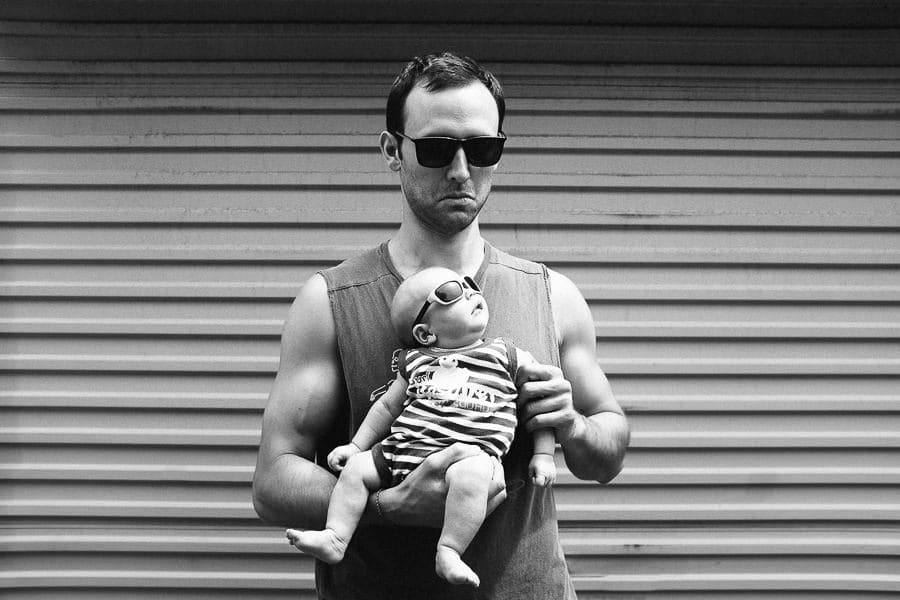
Pictures for kids should be fun and unserious! Putting your sunglasses on your child may only be funny to you… but it’s still funny! Dress children up in adults’ clothes and accessorize them before they’re old enough to complain that you’re embarrassing them :p
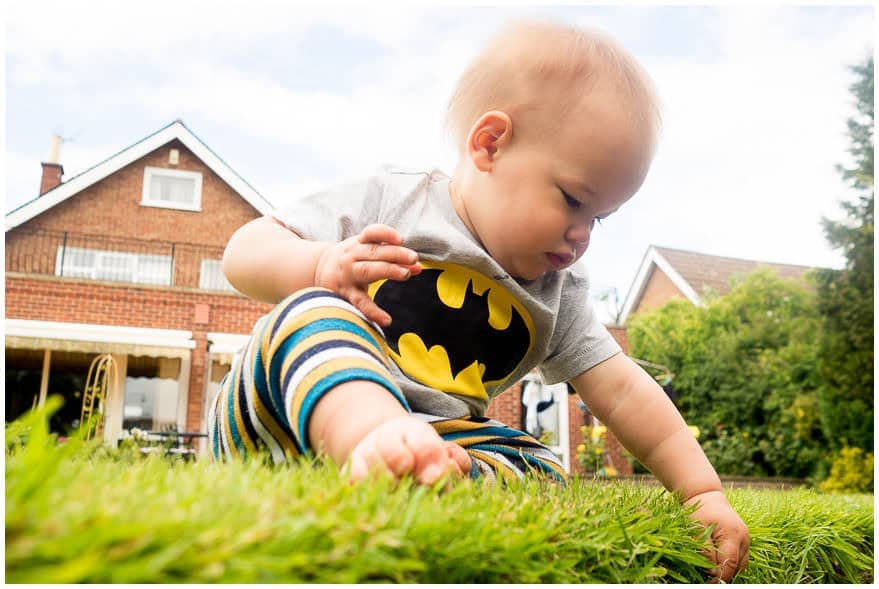
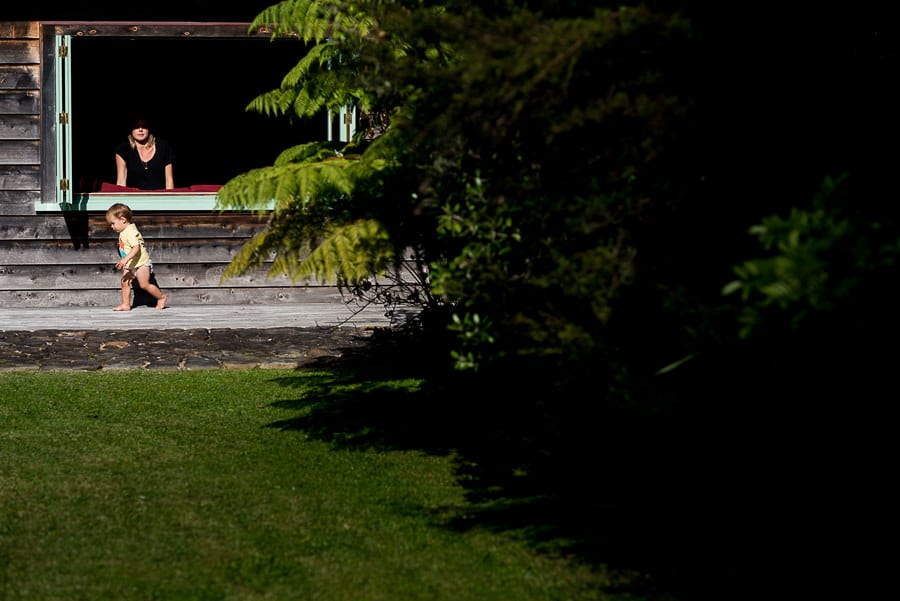
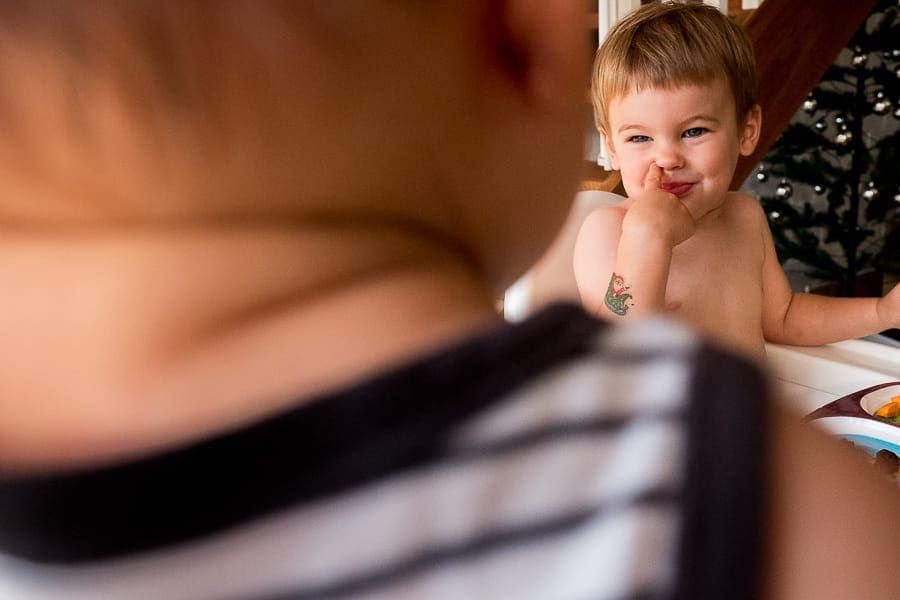
Tip #23: Use layers
This is another favourite tip of mine that can vastly improve all genres of your photography, and it’s also relevant when photographing children.
Layers in this case are foreground and background elements that help create a three dimensional story. You can experiment with shooting through foreground elements, like getting down really low and including the grass in front of a child, whilst keeping the focus on the child.
Another example and a layering technique I use a lot is to include part of another subject’s body as the foreground element, such as their legs if the main subject is a small child. This helps to not only give perspective to the size of the child, but also helps to tell the story, and can even help to ‘frame’ your subject too by directing the viewer’s eye.
You’ll usually want to use as high an aperture as possible on your lens (f/1.4, 1.8, 2, 2.8 etc), or as long a lens as possible (or try zooming right in) to help blur the foreground and background elements and keep the viewer’s focus on the subject.
Take a look at the final tip below for my recommendations for lenses that can achieve the ‘blurred foreground/background’ effect easily, or if you’re using a smartphone, check out this guide on apps to blur the background.

Layering needn’t always necessitate blurring of the foreground and background – you can also use other means to direct the viewer’s eye, such as different lighting or silhouettes as in the photo above.
Tip #24: Tell two stories
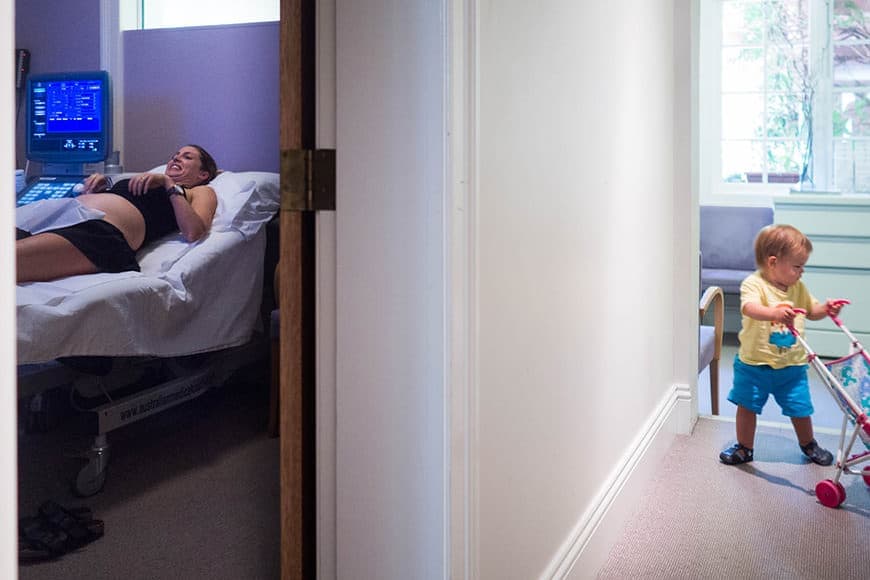
One secret to an engaging photograph is to try and convey two stories in the one frame.
This encourages the viewer’s eye to linger for longer on the photo, since there’s more than one thing happening at the same time. If the two events are related in some way, all the better (such as the photo above during the ultrasound of our second son).
Next time your child is playing with his toys for example, get the candid shot first, then take a step back and see what else you can include in the frame to tell another story – maybe there’s someone in the background cooking, or ironing a shirt for example.
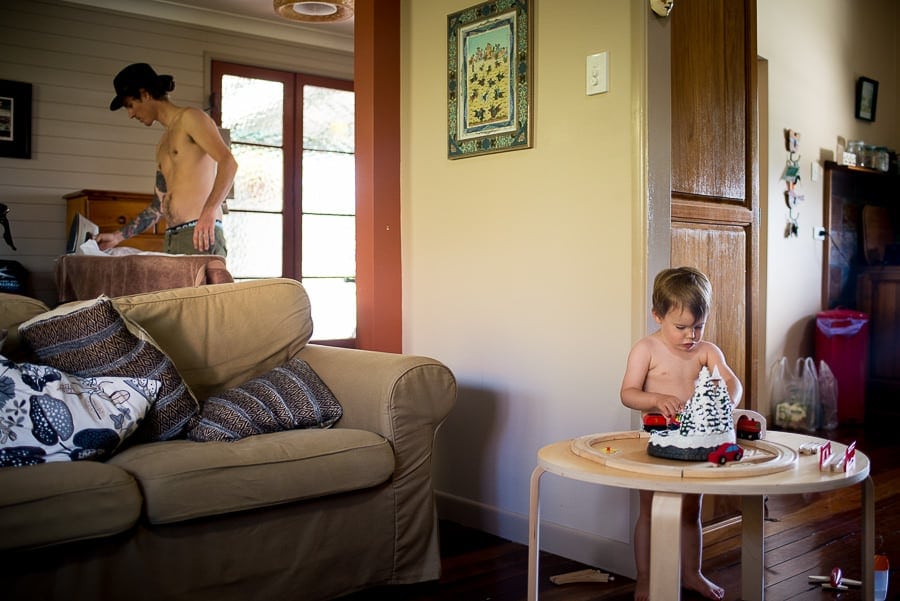
You may even try and include a 3rd element to tell multiple stories at once.
In the photo below I wanted to record our son’s first height measurement, then found that if I made my frame a little wider by holder the camera higher, I could show our second son in his cot too.

This had the additional benefit of balancing the final photo, whilst telling 3 different stories at once.
Tip #25: Learn Lightroom

I know this one’s a really broad tip that does require some investment of time, but being able to make small edits to the photos of your children in Lightroom can make the world of difference to how they look.
Lightroom is a great imaging software since it’s very accessible for amateurs but powerful enough for pros. The cost is not too high (click here to find the best place to buy Lightroom), and unlike Photoshop, you can pretty much guess how to use it after fiddling around for a few minutes.
In simplest terms, Lightroom allows you to ‘rescue’ a photo that’s too dark or too light, by editing it after you’ve shot it.
I’d also recommend you shoot in RAW format to maximise the amount of dynamic range you can get from a photo – see RAW vs JPEG.
Of course, there’s a whole world of various edits you can make to your photos using Lightroom, but if you’re time poor (i.e. most parents out there!), I’d stick to playing around with the ‘Basic’ sliders in the Develop module until you see a look that you like.
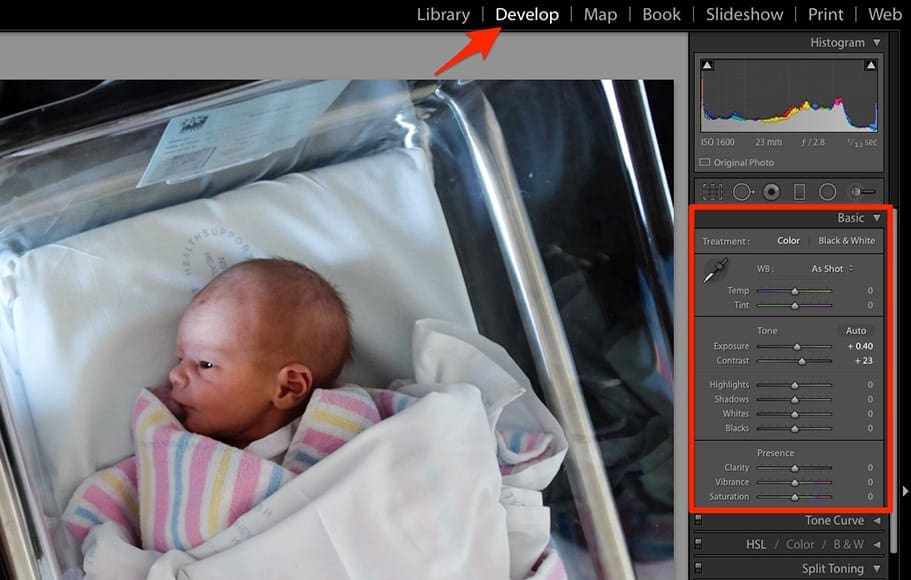
When photographing children, getting the shot is the first hurdle. If you really want to make the most of that photo (and you have the time), post-processing it with software such as Lightroom is essential.
Tip #26: Shoot selfies

Having your kids in the photo is the only socially acceptable time to shoot a selfie… right?! You’ll need to use a lens that is relatively ‘wide’ (any number lower than 35mm), and having a camera with a flip out screen will allow you to compose/time the photo far easier.
If you don’t have a camera with a flip out screen, or any camera at all for that matter, don’t worry – just use your phone like everyone else!
What are the best selfie poses? Click that link to check out our guide.
Tip #27: Use a timer

Every camera these days has a self-timer. Even your phone has a timer, so next time you’re out with the family, set it up on a flat surface and get a DIY group family shot!
I’d recommend setting your camera up to shoot a few photos in quick succession to increase the odds of one of them coming out well.
Some cameras (including the ones I recommend in the final tip) offer Bluetooth connectivity which means that you can see your camera’s screen on your mobile phone screen, making it much easier to compose the shot and get the right moment.
(You can see in the shot above that I’ve got my phone in my hand, pressing the shutter button on my camera remotely.)
See also: What should you wear in family photos?
Tip #28: Just get the shot
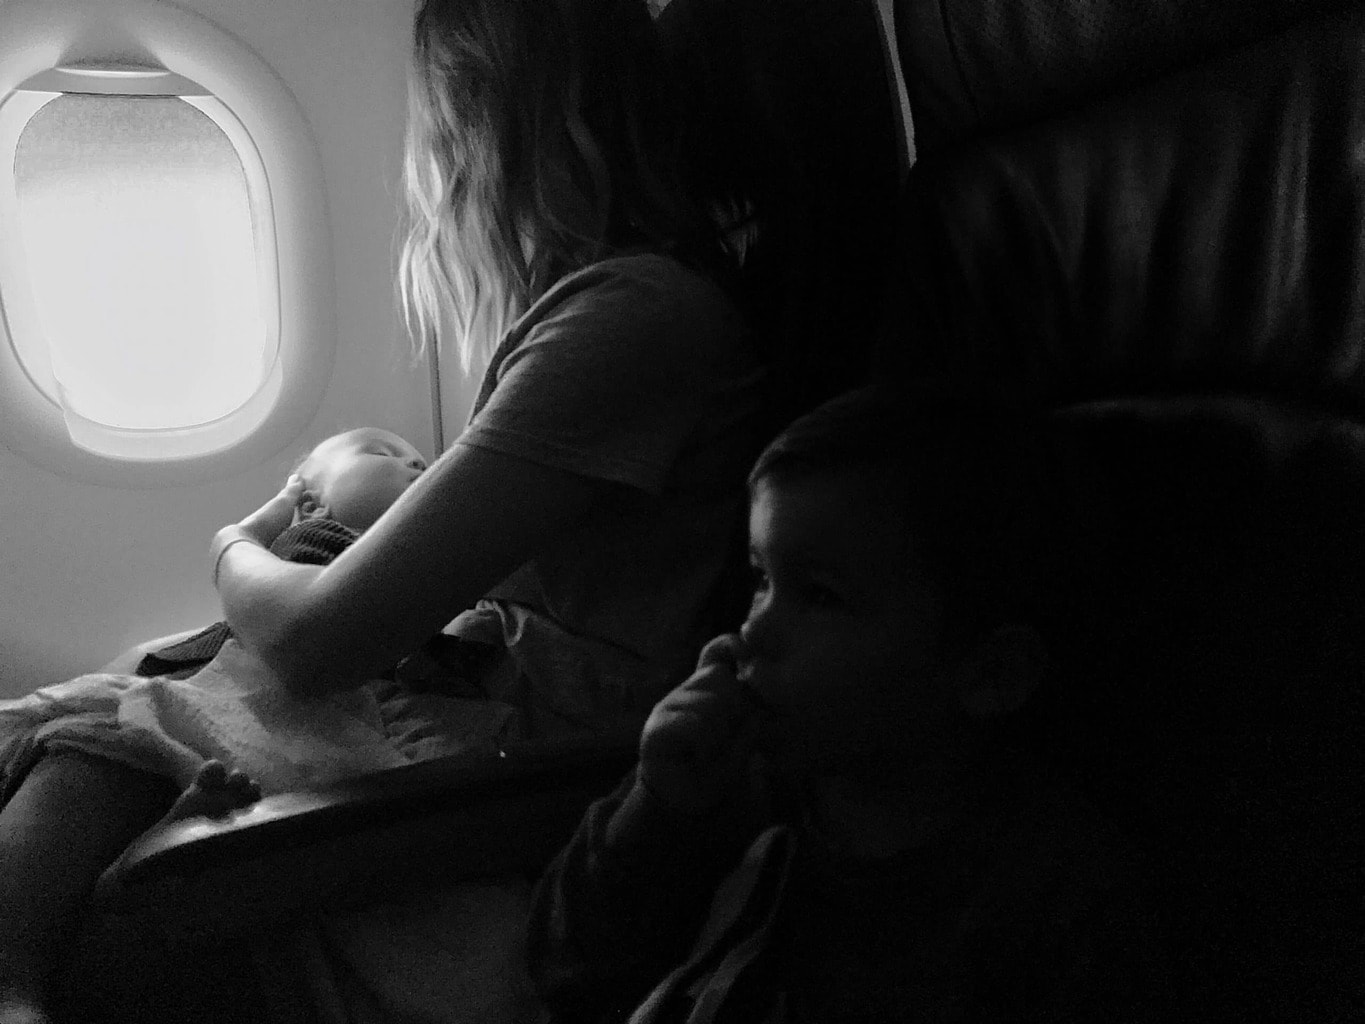
You’ll see in my final tip that I recommend the best compact camera for photographing kids. However, before I get into that, it’s worth remembering that often all that’s important is just getting the shot.
If all you have near you is your mobile phone, that’s fine, just use it. Unless you plan to sell your work, no one will care about the quality of the image – all that matters is that you capture that moment.
For every fancy camera I own, my mobile phone is always closest to me, so that’s what I’ll reach for first. In the shot above I noticed some interesting light falling on my family, so I used my iPhone to capture it. By locking exposure, taking the shot, then converting it to black and white using the standard iPhone Photo app, I think I captured a fleeting moment I would have missed if I’d got my other camera out of the overhead locker.
Tip #29: Get the right camera

I’ve left this tip to last as in some ways it matters the least, but in others it matters the most. What I mean by this is, the best camera is the one you have with you… which usually means it’s your mobile phone.
As Wayne Gretzky once said, “you miss 100% of the shots you don’t take.”
However, if you want to take better photos of your children, you really should invest in a good camera. No matter what the Apple marketing may tell you, your phone still can’t take as good a photo as a dedicated camera!
I’ve lost count of the number of parents who’ve asked me what is the best camera for taking photos of children. I’ve also lost count of the number of parents who’ve invested in a clunky dSLR, never to take it out of the bag.
Follow my advice if you want to buy the right camera for taking photos of your kids. In my opinion, you need a camera that is lightweight, small and has fast Autofocus. If it’s also got ace recognition and a tilting LCD screen, happy days!
I’ve written guides on the best cameras under $500, the best cameras under $200, the best mirrorless cameras and the best compact cameras, but as a parent, you’ll have no time to read all that!!
If you’re willing to invest some money into capturing all those fleeting moments of your children growing up and think you might even take up photography as a hobby, my first choice every time would be this Olympus OM-D EM-10 Mark II mirrorless camera.
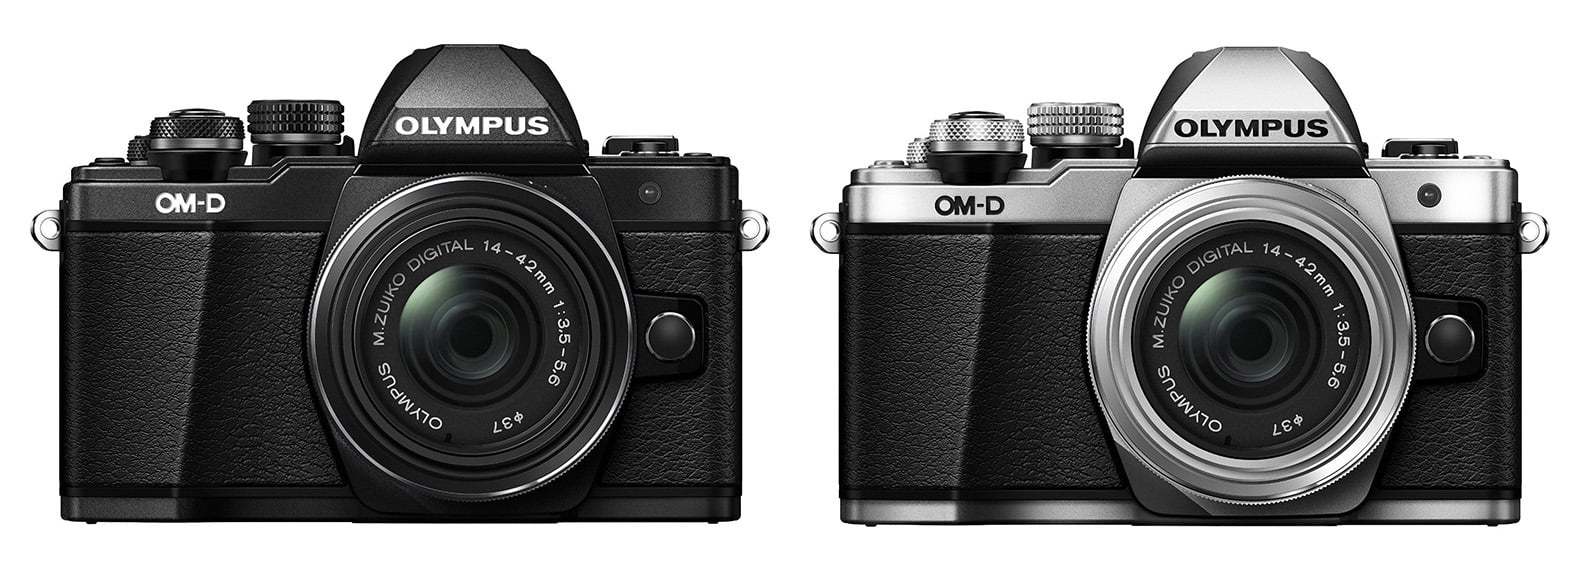
The best camera for photographing kids – The Olympus OMD-EM10 Mark II
There are so many cameras to choose from but that Olympus ticks all the right boxes, and gives you room to grow as a photographer. It also has one killer feature that none of the other cameras do – the ability to touch the screen and instantly focus and take the photo.
This makes it invaluable for fast moving subjects or times you want to take really discreet photographs, and therefore makes it in my opinion the best camera for children photography. Get the latest price on it here.
The kit lens that comes with the Olympus will see you right for the first few months, then if you want to take things further, invest in this M.Zuiko 17mm f/1.8 lens which will make your images look better immediately. You’ll also be able to achieve that coveted ‘blurred background’ effect far easier.
For examples of photos you can achieve with this camera/lens combo, I shot this entire photo series of our family holidays in Europe using this incredible lens.
There’s a point in photography where expensive cameras and lenses stop making a difference to the final image, but at this price point, getting a good lens on the end of your camera can make a huge difference.
Another great camera for children photography is this Sony Alpha a6000 mirrorless camera, which has the fastest auto-focus of any camera in its range, as well as great image quality and that all important flip-out screen.

Another great camera for photographing children – the Sony a6000
When you’ve mastered the zoom lens that comes with the camera, invest in a good prime lens and see how much better your images can look.
Even if you can’t see yourself taking up photography as a hobby, I’d still recommend spending a certain amount on your camera to be sure the photos will remain better than your smart phone for a few years. I’d recommend this Fuji X70 camera which ticks all the boxes I mentioned earlier but won’t distract you with interchangeable lenses.
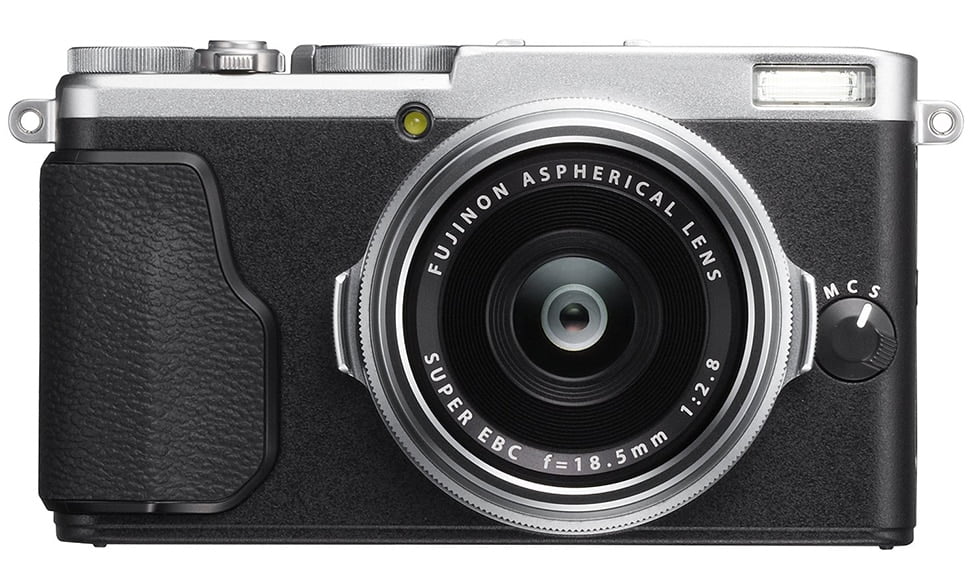
Another great camera for photographing children – the Fuji X70
You’ll notice I don’t recommend one dSLR, for the simple reason that I consider them far too bulky to carry with you on a day-to-day basis.
With the image quality of mirrorless cameras virtually indistinguishable from a dSLR these days, it makes more sense for parents to get a lightweight mirrorless camera that they’re more likely to have with them in a bag or pocket.

Check out these 8 essential tools to help you succeed as a professional photographer.
Includes limited-time discounts.
 8 Best Cameras for Kids in 2024 (Toddlers to Children)
 Photography for Kids: Fun Activities, Latest Lesson Plans & Tips
 Best Drones for Kids in 2024 (9 Fun Toy Drones for 7+ year olds)
 Toddler Photography Tips, Ideas, Props and More
 16 Family Photoshoot Poses: Natural Ways to Pose a Family

Mark Condon is a British wedding photographer and editor of Shotkit. When he’s not taking photos or reviewing the latest camera gear and software, Mark can be found cycling around the northern rivers.


