


How To Photograph The Milky Way
Have you ever seen the Milky Way? Have you ever captured a beautiful photograph of it? If you said no to either of these questions, this article is for you!
Have you ever wondered how to photograph the Milky Way? Maybe you’ve never even seen the Milky Way with your own eyes…
It’s a breathtaking, even life-changing, experience for many people, whether or not they are into photography.
For us as photographers, it can be an even more exciting experience. Not only do you see the Milky Way, but you can actually capture it and see it revealed in your final image.
Unfortunately, photographing the Milky Way presents a handful of obstacles that might seem insurmountable without the right guidance.
Thankfully, I’ll cover all of the necessary information and techniques in this article!
I’ll start by explaining just what the Milky Way is, and how you can find it in the night sky and see it with your own two eyes.
Then, we’ll make sure you understand exactly how to capture it with the camera gear you already own.
Of course, we’ll also make a few recommendations for those who are shopping for a good lens to shoot the Milky Way too.
What is the Milky Way?

Okay, first things first. What is the Milky Way, and how can you see it?
Well, technically speaking, the Milky Way is the galaxy we live in. So, whenever you look up at night and see stars, any stars… they’re all part of the Milky Way.
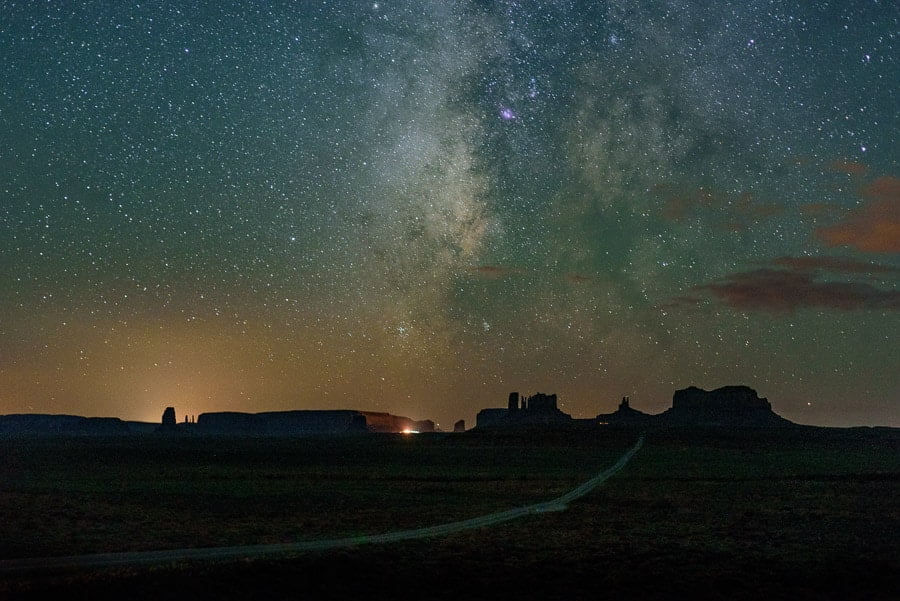
If that is true, then what do people mean when they talk about seeing the Milky Way? They’re talking about the Milky Way core, which is the center of our galaxy.
The core is a dense band of stars that is actually visible to the naked eye, if you’re in the right place at the right time.
When To See The Milky Way
Before you rush to make plans to go check out the night sky, keep this in mind: The Milky Way core is only visible on certain nights of the year.
You won’t be able to see it for quite a few months of the year.
The best months to see the Milky Way core are March through October, or May through August if you want to see the whole Milky Way core without staying up all night.
By the way, this is of course spring, summer, and fall in the Northern Hemisphere.
In the Southern Hemisphere, we’re still talking about the same actual months of the year, so, yeah, you’re going to have to go out in the winter to see the Milky Way!
In addition to the right time of year, a nightscape photographer’s other nemesis is the full moon. There is a full moon approximately every 27 days.
When the moon is full or near full, it’s so bright that you’ll barely be able to see the Milky Way, even if they’re on opposite sides of the night sky.
(See more about this in our article on moon photography.)
We’ll talk about how to plan a Milky Way photo adventure in a little bit.
How Much Do You REALLY Know About Photography?! 🤔
Test your photography knowledge with this quick quiz!
See how much you really know about photography...

Where To See The Milky Way
The Milky Way core can be seen from basically anywhere on planet Earth, as long as the timing is right.
It will appear at different angles in the night sky depending on where you are in the world, but the Milky Way core itself will look the same.
It also rises from the east and sets in the west, like the sun does.
The only questions left are, where should you go to see the Milky Way, and how can you know where in the sky it will appear?
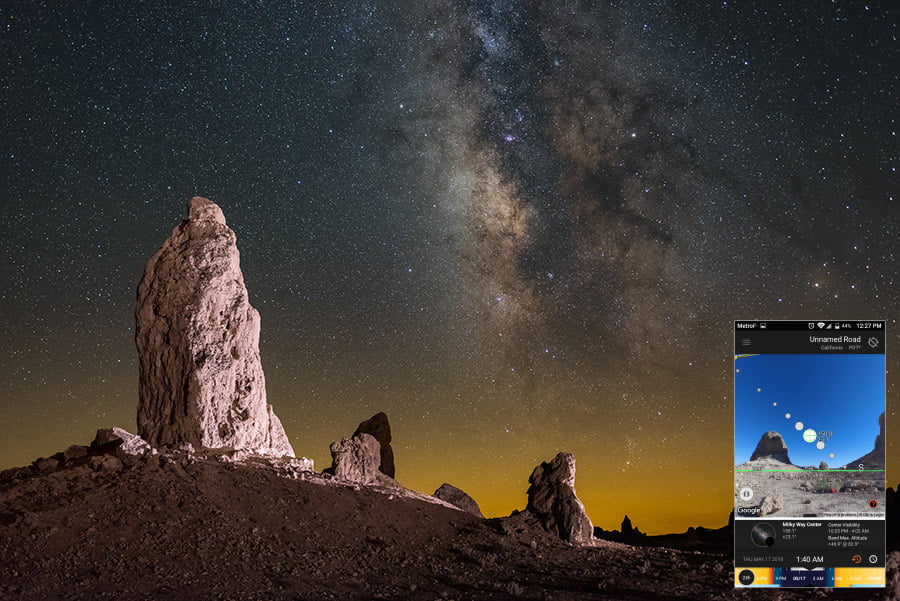
Apps For Finding Dark Skies And The Milky Way
There are so many apps now that can help you find the Milky Way (and the sun and moon) that we can only mention a few of the most common apps.
Sun Surveyor, PhotoPills (review), and The Photographer’s Ephemeris (review) are three of the most popular, and all of them can display the position and timing of the Milky Way for any day of the year, even years into the future.
Most are singular mobile apps, but The Photographer’s Ephemeris has both a desktop version and a mobile app. There are also apps that offer additional features such as 3D terrain rendering.
This information will help you plan a trip to see the Milky Way, and even to predict how it will interact with the composition of your nightscape foreground.
Authenticity of Milky Way Nightscapes
You can also use the aforementioned apps to do some detective work.
If you see a photo online and are inspired to go to visit that place and photograph nightscapes there too, always remember to check to see that the Milky Way actually does appear in the depicted position.
Why? Because some astro-landscape photographers “move” the Milky Way core into their nightscape sky, even though it may never appear there at any time of year.
They do this for artistic, creative reasons, of course, and that’s perfectly fine. However, the artist doesn’t always disclose the astronomical (in both senses of the word) inaccuracy!
Simply put, you don’t want to plan a whole trip around a potential Milky Way photo, only to discover that the Milky Way never appears in your intended composition!
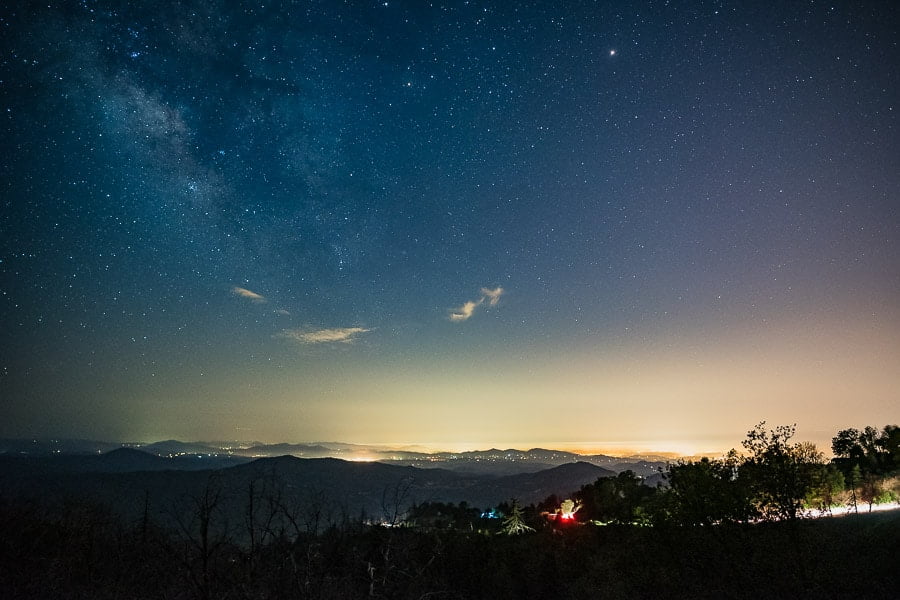
How To Avoid Light Pollution And Find Dark Skies

The last thing to consider before you head off to find a dark landscape is light pollution. (Of course, check the weather to ensure it won’t be overcast, too!)
Thankfully, once again there are plenty of maps online that make it effortless to see where light pollution is the strongest, and where you can go to escape it.
To keep it simple, here are just two of the many great options:
Dark Site Finder (Website)
Dark Sky Finder (Mobile App)
Keep in mind that the darker the conditions, the more pitch-dark your foreground scene will be without any illumination.
In other words, if you find a location with almost zero light pollution, and there’s no moonlight either, well, you might just need that f/1.4 prime you were hoping you’d be able to get by without. It’s going to be really, really dark.
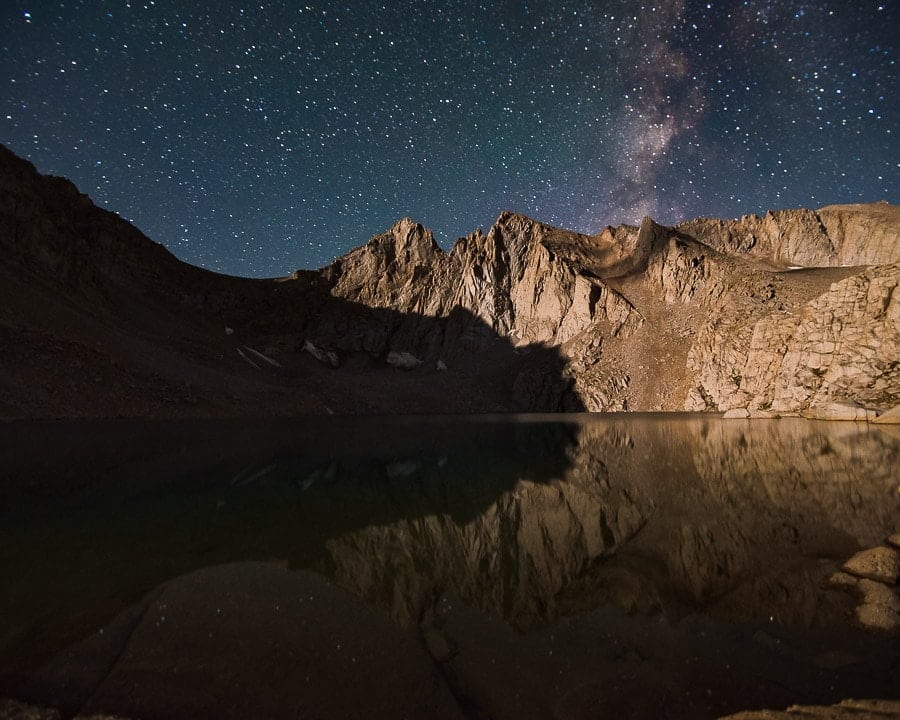
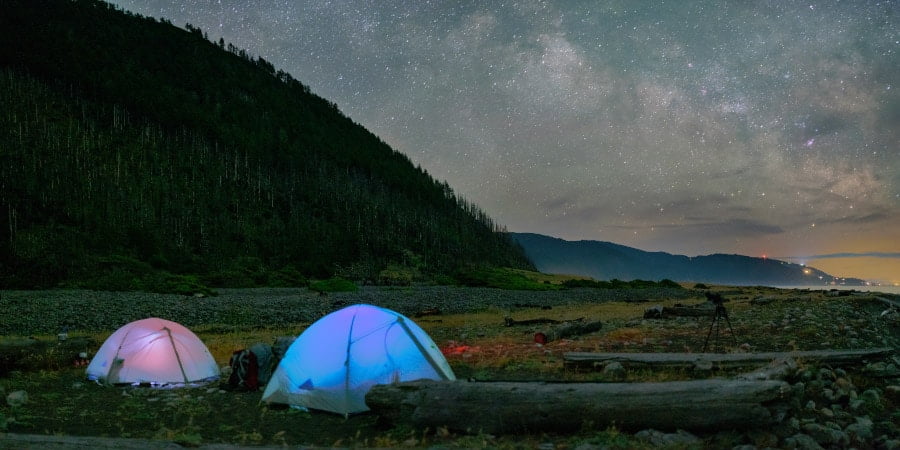
On the other hand, if you just can’t escape your area’s light pollution entirely, you can still see the Milky Way very faintly as long as you can manage to escape the nearest lights and let your eyes adjust to the darkness.
Even a lake shore, or open field, can give you the night vision you need to see the Milky Way.
Camera Equipment For Milky Way Photography

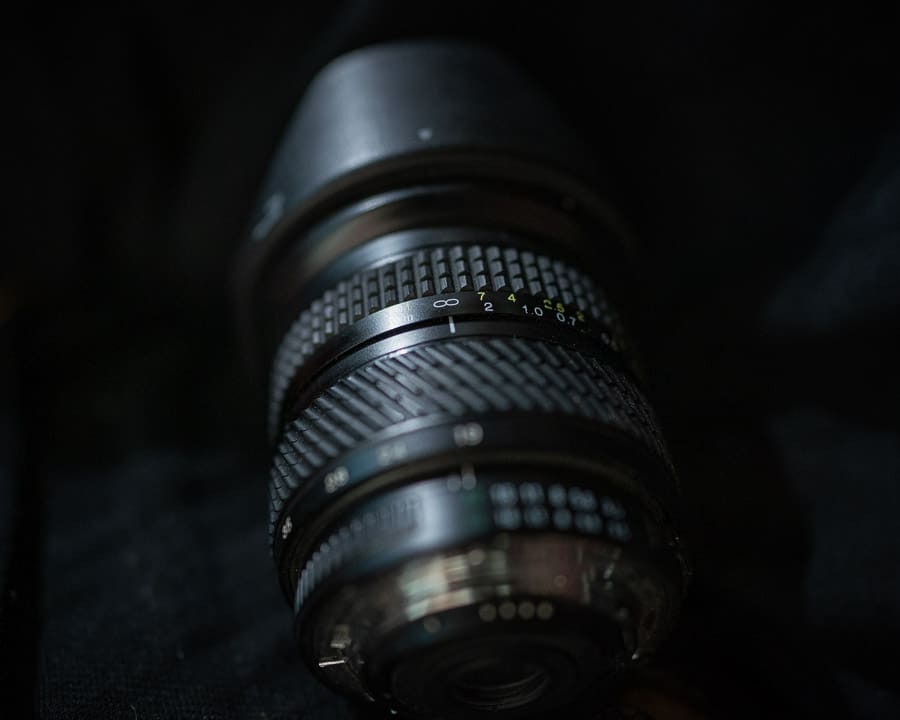
To capture photos of the Milky Way, you’ll need the standard equipment for all nightscape or astrophotography: a sturdy tripod, a camera that can deliver good image quality at high ISOs, and a lens with a fast aperture of at least f/2.8 or brighter.
As you can see in the above photo, your gear choices needn’t break the bank – that particular set up costs less than $1,000, and can still yield excellent results.
Of course, if you’re ready to invest in some of the best gear for Milky Way and Night sky photography, consider a full-frame camera such as a Sony A7iii, or a Nikon D750, and a fast, sharp lens such as the new Sony 24mm f/1.4 GM, or the Rokinon 14mm f/2.8 AF.
For this specific subject matter, however, it’s important to consider which lens is right for your personal style as a nightscape and Milky Way photographer.
- What focal length works best?
Well, you can capture the Milky Way with any fast-aperture lens, however it will appear very different depending on which focal length you choose.
A 14mm ultra-wide lens is a very common choice for wide-field astro-landscape photography, because it allows you to compose images which include not just the Milky Way, but also the surrounding sky, and more than enough of a landscape foreground as well.
Other lenses in the range of 12mm to 16mm are all similarly great for this type of composition.
Then, from 20mm to 35mm, there are various primes and f/2.8 zooms which offer great image quality, and a tighter view of the Milky Way.
By the time you get to 50mm, the Milky Way core will be very big in the frame of your image, and you’ll have very little room to compose anything else in the landscape except for what is on the edge of the horizon.
Still, the results can be impressive if you’re in the right place at the right time!
Other lenses in the range of 12mm to 16mm are all similarly great for this type of composition.
Then, from 20mm to 35mm, there are various primes and f/2.8 zooms which offer great image quality and a tighter view of the Milky Way.
By the time you get to 50mm, the Milky Way core will be very big in the frame of your image, and you’ll have very little room to compose anything else in the landscape except for what is on the edge of the horizon.
Still, the results can be impressive if you’re in the right place at the right time!
Camera Settings For Milky Way Photography
Now that you’ve figured out when and where to see the Milky Way, and you’ve even seen it with your own two eyes, it’s time to take some pictures!
Don’t panic, that impossibly steep learning curve looming in front of you can be easily mastered with just a simple starting point and a bit of practice.
First, set your exposure and focus. We’re going to do everything manually.
Only a few high-end cameras can autofocus on the stars, or correctly meter a night sky, and even then, why risk it? It’s actually a whole lot easier to just do it manually.
(See also: what are the three basic camera settings?)
How to Focus On Stars
Experienced Milky Way photographers may suggest a half-dozen different ways to focus on stars, but the easiest way is to just start at infinity and then fine-tune focus using live view.
(Note: This is another one of the key night/star/astrophotography tips covered on Shotkit.)
Many lenses have an infinity mark where you can start. However, the mark itself may not always be precise enough for pin-sharp stars, especially with any lens that is faster than f/3.5 or so.
So, once you’ve found the infinity mark approximately, use your camera’s live view (or electronic viewfinder) to zoom in to 100% magnification on a bright star or planet.
Then, with your lens starting at infinity, rack the focus ring back and forth very carefully until you’re very sure of where exactly the ring should be set to make stars the smallest pin-point. Done!
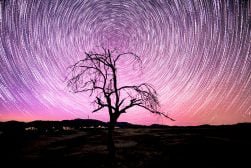
You should also check out our article on star trails photography for some more inspiration.
How to Expose For The Milky Way
Let’s get right to the obvious: night photography is extremely dark, and you’re going to be maxing out your camera settings.
- ISO Settings
Your ISO is going to be as high as you feel comfortable setting it… and maybe even higher! You may even get into the unfortunate realm of “too much noise”, depending on your camera.
Don’t worry, this won’t stop you from learning and practicing the technique.
Start at ISO 3200 or 6400. Go up or down depending on how dark the night sky is, and what your camera is capable of capturing with good detail and low noise.
- Aperture Settings
Your aperture is also going to be as bright as possible. If you have an f/1.4 or f/1.8 lens, start at that wide-open setting, and then stop down just one or two stops if you decide you have enough light to do it.
If you have an f/2.8, f/3.5, or f/4 lens, just shoot with the aperture wide-open.
- Shutter Speed Settings
Your shutter speed is going to be measured in whole seconds, of course. Start somewhere around 1-4 seconds, just to check your exposure, and then dial it up (longer) from there as necessary.
Just beware, if your shutter speed gets too long, you can’t just go into “Bulb” exposure mode and set a 60-second or 2+ minute long exposure.
This will create a star trail image, due to the earth’s rotation. You’ll have to watch your shutter speed.
- Histogram
You should always use your histogram to check exposure. Your camera’s default LCD brightness is way too bright, and it will always fool you into thinking your exposures are bright enough.
Some camera LCDs can be turned way down to be very dim, but even at their dimmest setting they’re still bright enough to fool you. They’re also very flat looking and hard to gauge correctly.
So, just check your histogram. You don’t need to practice perfect ETTR, by the way, it’s okay to leave about ~1EV of empty space on the right edge of your histogram.
The sky is, after all, supposed to look very dark. Also, if you totally ETTR the night sky, you’ll actually be blowing out (clipping) the stars and the Milky Way core itself.
How to do Milky Way Portraits

If you’ve mastered all of this and are ready for an even more incredible, rewarding challenge, try photographing a portrait under the Milky Way!
It’s actually quite easy, if you don’t mind a little noise in your image.
You probably already have the necessary equipment: a sturdy tripod, of course, and also a wireless, off-camera flash.
Alternately, a regular flashlight (torch) or headlamp will do, if you don’t have a wireless flash to use.
In fact, most flashlights and headlamps are already so bright, that you’ll have to set them to their dimmest setting in order to not overexpose your subject!
The real challenge is having your subject hold still for a long exposure.
Even if you compromise a little bit with your aperture and ISO, and shoot at, say, f/1.4 and ISO 6400 or 12800, you might still have a shutter speed that is 1-4 seconds long.
So, the best way to capture a portrait in such conditions is to just have the subject lean against something. A tree, a rock, anything that can help them hold perfectly still.
Of course, standing against the night sky always makes for impressive imagery.
If you’d like to try shooting a portrait of someone standing alone, just know that it will be easier to capture images of perfectly still subjects if you follow these tips.
Shoot wider, give the subjects a bit of distance, and keep your shutter speed to 1-4 seconds, whether you’re using a strobe/flash or a headlamp.
Then, keep shooting multiple images until you get a perfectly sharp one!
Post-Processing Milky Way Photos

In a basic workflow, all you really need is a raw processing application such as Lightroom or Capture One.
These apps have great engines for raw processing of not just tone and color, but two other very important things in Milky Way photography: Noise Reduction and Sharpening.
The best tip that I can give on a subject that definitely deserves a whole article by itself is this:
When post-producing your raw images, don’t be afraid to let dark shadows be dark shadows. Also, don’t over-process the contrast or saturation of your images unless you’re really going for an unnatural artistic effect.
The whole point of Milky Way images is to depict the wonder of a dark night, and having your images be mostly subtle shadow is the name of the game.
One final tip: don’t forget to check your noise reduction and sharpening settings at 100% on your computer display!
Photographing The Milky Way | Final Words

Seeing the Milky Way with your own eyes is a memorable experience. Being able to capture it in a photograph can be even more impressive, because modern cameras and lenses actually allow you to record image quality that is even better than the human eye!
I first saw the Milky Way when I was a young kid, going camping with friends and family. I never thought I’d be able to capture such incredibly detailed images today, let alone with such inexpensive camera gear.
(I thought I might need a giant telescope, or other advanced scientific instruments! And back in the 80’s and 90’s, that was probably true…)
So, grab your camera gear, make sure you’ve got spare batteries (especially for your remote trigger!) and memory cards, and plan a Milky Way photography adventure!
If you found this article on Milky Way photography to be helpful, then check out my complete video workshop on SLR Lounge: How To Photograph the Milky Way.
It dives even deeper into each of the subjects covered here, and includes extensive instruction on advanced shooting techniques such as composite blending and post-production.
Disclaimer: All recommendations are impartial and based on user experience, with no bias to the products or the brand. The products in this post may contain affiliate links.

Check out these 8 essential tools to help you succeed as a professional photographer.
Includes limited-time discounts.
 Astrophotography for Beginners – How to Create Stunning Images of the Night Sky
 Guide to Star Trails Photography
 How to Shoot Night Landscape Photography (+ Best Settings)
 123 Different Styles & Types of Photography To Try in 2024
 How to Photograph the Moon

Matthew Saville is an astro-landscape and adventure landscape photographer based in California.


