


16 Surprising Lightroom Tips & Tricks You Don’t Know
Save time while editing your photos and create the most efficient workflow possible with these useful Lightroom Tips for Classic CC and previous versions.
Lightroom | Software | By Polina Raynova | Last Updated: March 4, 2024
This guide to Lightroom Tips has been updated for the latest version of Adobe Lightroom Classic CC here in 2024.
Lightroom is one of the most widely used pieces of image editing software on the planet.
Despite the emergence of numerous alternatives and Adobe’s restrictive subscription pricing model, it continues to be the de-facto industry standard for everyone from beginners to seasoned pros.
Popular course reveals the simple tricks to getting incredible results with Lightroom in record time. Give Your Photos The Look They Deserve!
![]()
Lightroom is a relatively simple way to get your photos from looking dull in their RAW state to a share-worthy JPEG, but under the bonnet lies a whole suite of powerful features.
In this article, let’s delve deep into a selection of Lightroom Tips to really supercharge your editing experience to create a more efficient and enjoyable workflow.
(If you haven’t got a copy yet, check out this guide on how to buy Lightroom, or if you’re on the fence about upgrading from Lightroom 6 to Lightroom CC.)
16 Time-Saving Tips for Lightroom Classic CC
1. Fast & effective image rating

When you’re working on an extensive project which involves hundreds of images, you first need to rate them in order to decide what’s worth editing afterwards. That’s sometimes not an easy task at all.
The regular (long) way of doing this is by clicking each individual image, then clicking again to give it the desired rating and clicking one more time to move on to the next one. The more time you spend doing it, the more discouraging it can feel…
The good news is that there’s a faster and more effective way to go through all of your photos. You just need to use the numbers 1-5 on your keyboard to apply the rating you want!
Pro Tip: If you leave the Caps Lock key on while you’re doing this, Lightroom will automatically advance to the next photo each time you add a rating. That can save you lots of time and be a real game-changer in your workflow!
2. Fine tuning local adjustment filters
Local adjustment filters come in very handy if you need to change a certain part of your image without affecting the entire photo.
For example, you may want to emphasize your subject and make it stand out by brightening it up a bit. You can also make the sky look darker if you’re looking for a more dramatic effect.
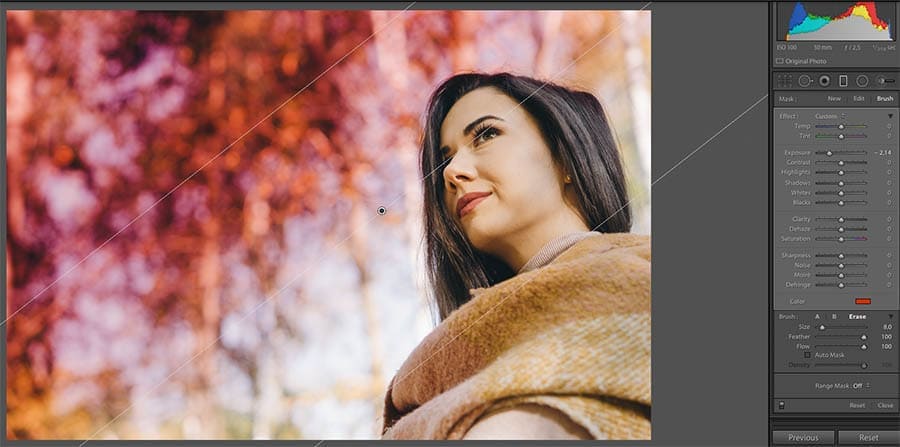
All of this can be easily achieved with the Graduated Filter tool or the Radial Filter tool. After you use these tools, though, you may find that you’ve applied them outside the desired areas and need to clean them up a bit.
To do that, go to the filter and click on ‘Erase’ under the ‘Brush’ panel. There, you can refine the brush’s size, feather, and flow.
When you’re ready, simply grab the brush and erase the parts of the filter that have spilled over into areas you don’t want it to affect.
3. Online gallery for real-time client proofing
When working with clients, it’s very important to maintain clear communication – not doing so is the root of conflict!
Lightroom offers a great way of keeping things in order and making sure that you and the clients are all on the same page.
In order for this to work, you first need to make sure that you are synced with Lightroom Mobile.
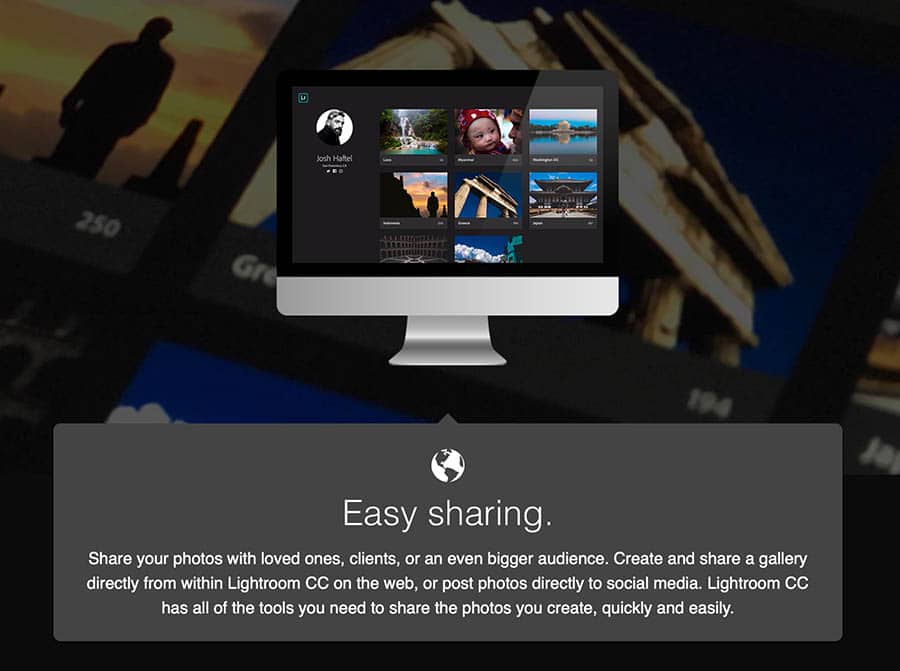
After that, you have to create a collection of the images you want to share. The last step is to make sure you click on the button that says ‘Make Public’ at the top right corner of your screen to make it visible to the clients.
Once you do this, you’ll see that a link is generated. This is the online gallery that you can share with your clients.
This hidden feature is super helpful because if any changes are made, the clients are able to see them in real-time. Plus, they get to comment on the images and let you know what they like.
4. Adjust the preset strength
In our digital world, analogue photography is slowly and steadily fading away for many reasons. Nevertheless, there’s one thing left from this age that we all love: the cinematic look.
In pursuit of adding this desirable pinch of movie magic, countless Lightoom presets have been created. Lightroom offers a great opportunity to apply such filters to your photos, but there’s one problem: they’re usually too strong and punchy.
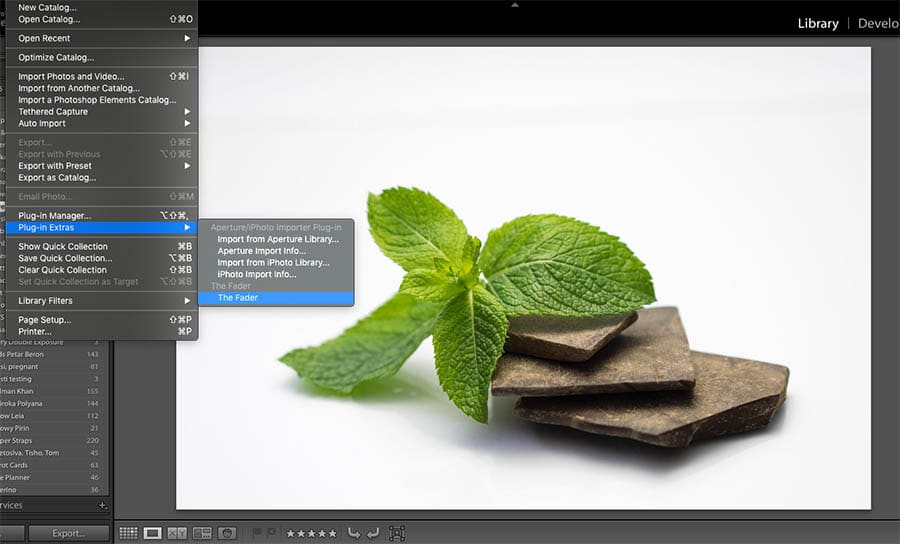
Thankfully, there’s a way to tone down the effect, and it’s free for download: it’s called the Fader Plugin. (It does the work of layer opacity, like in Photoshop.)
Once you’ve it installed and chosen the preset that you’d like to work with, you can select ‘File Plugin Extras Fader’ (it will appear when you have it downloaded).
A pop-up box will appear with an opacity slider – play around with it and you’ll soon figure out the perfect preset strength for your needs.
5. Be more precise when moving the sliders

Have you ever felt that the sliders in Lightroom sometimes tend to jump too quickly, making it hard for you to be as precise as you wish when editing your images?
Well, there’s a quick and simple fix for that: you can expand the Develop Module, making all the sliders in it longer and less sensitive.
To do so, just click on the edge of the Develop Module and drag it until it’s a big as you need it to be to clearly see what you’re doing.
You can also hover your cursor over any of the sliders and press the Up and Down arrows on your keyboard for some fine tuning. If you hold Shift while pressing the Up and Down arrows, it’ll adjust the slider in a larger increment – hat tip to Contrastly for this smart tip.
6. Enabling Solo mode

You can take advantage of Solo Mode if you like to keep your workspace tidy. If you enable it, you’ll only see one window at a time in the Develop Module.
For example, when you’re working on the ‘Tone Curve’, all the other panels will automatically be hidden, as in the image above.
What you need to do in order to turn on the feature is to right click on the header of any of the editing panels, then select ‘Solo Mode’ – do the same to turn it off again.
This tip is particularly useful if you’re working on a laptop, or any screen with confined space.
7. Using masking when sharpening
This next hidden Lightroom tip is connected to the Alt/Option key, which is quite rightfully called the “Secret Weapon of Lightroom”.
When it comes to sharpening, its power lies in allowing you to visualize the effect very precisely.
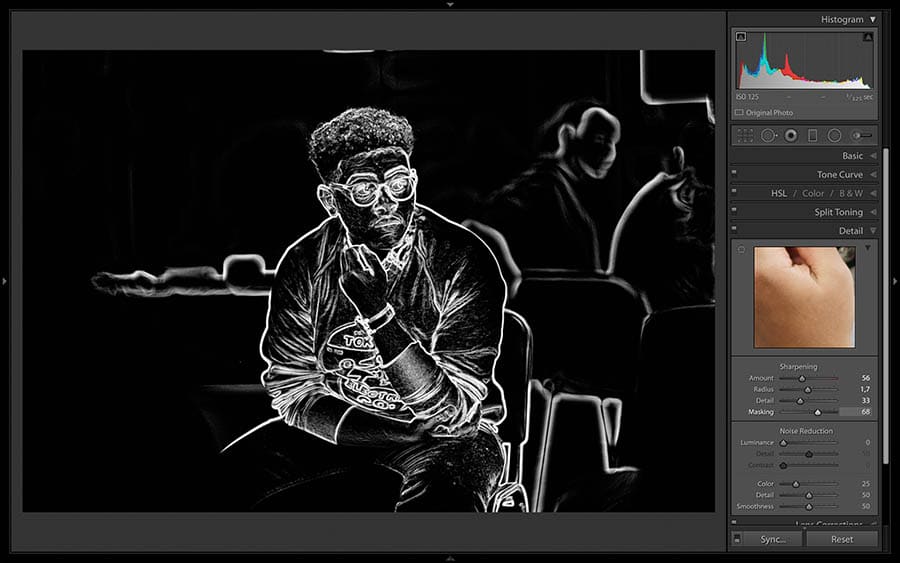
Just hold down the ‘Alt/Option’ key and start moving the sharpening slider. You’ll see a black and white rendition of your image.
The black areas are not affected by the sharpening, but the white ones show you exactly where you’re applying the filter. This gives you much more control and allows you to focus on sharpening the subject of your image rather than anything in the background. It’s particularly useful when making edits to portraits.
8. Matching total exposures
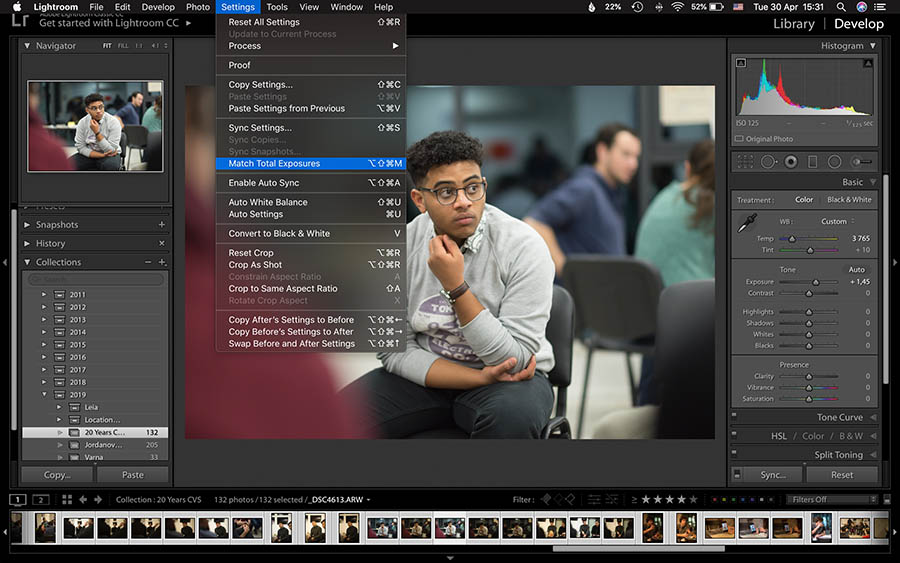
This is truly a great feature and it can seriously up your photography game. Imagine that you have a sequence of images which were shot in Aperture Priority and the exposures end up being significantly different from one another.
That inconsistency needs to be addressed, but what happens when you try to copy the Develop settings from one photo to another?
Since the images have different exposures, some will appear darker or lighter after you’ve synced Develop settings – the entire sequence won’t look consistent.
To fix this, you’ll need to click on the image with the exposure you like, then select the rest of the images from the collection you’re working on.
After that, go to ‘Settings’ and select ‘Match Total Exposures’. When you do this, you’ll finally see the result you desire.
9. Add the fade effect to your photos

Trying to replicate film on digital files is without a doubt very trendy these days. To achieve this effect, you’ll need to follow a few simple steps in Lightroom.
First, you have to open the ‘Tone Curve’ and make sure ‘Linear’ is checked. After that, you’ll need to place just a few points on the line and make a subtle S-shaped curve – see the example image above.
The magic appears when you click on the bottom left point and drag it upwards. As you do this, you’ll see the effect, but be careful – changing its position a lot will lead to unrealistic results.
Pro Tip: Switch between Lightroom before and after views by pressing the / key, to get a quick look at how far your edits have progressed.
10. Begin editing with the right colors
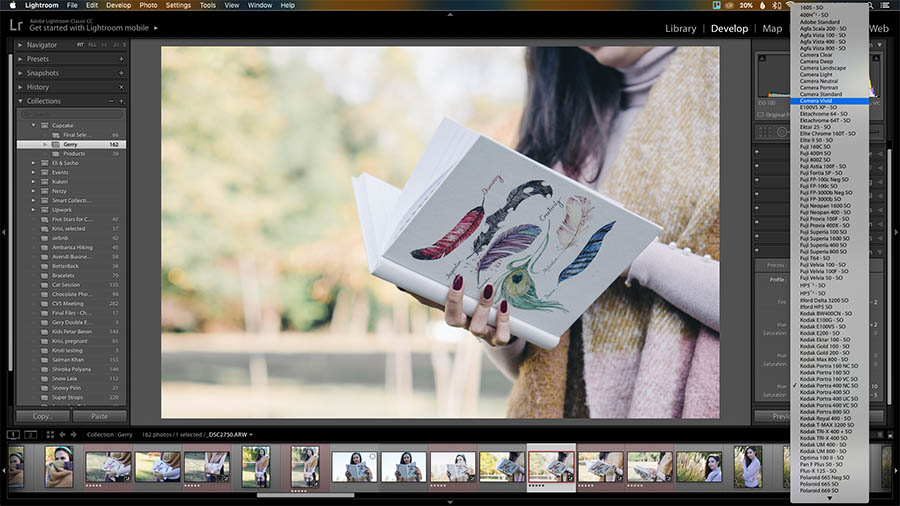
This one is a great tip that you should integrate into your usual workflow. When you import an image into Lightroom, pay attention to the Camera Calibration section before you even begin with the basic adjustments.
You will find that by default, each photo is set to be on a color profile called ‘Adobe Standard’. You need to change it to an option from your camera (like Camera Portrait, Camera Standard, Camera Landscape and so on).
This will revive the colors you lose due to the default profile of Adobe Standard. It’s a great starting point when you edit your photos, and it’s a good habit to develop!
11. Edit directly with the histogram

The histogram is simply a graphical representation of the luminance values within a photo and how they relate to each other.
While there is no “correct” histogram, it does become useful for determining ideal exposure consistency. Did you know you can actually adjust the histogram directly in Lightroom Classic CC?
The histogram is divided into five individual sections. From right to left they are: blacks, shadows, exposure (mid-tones), highlights, whites (see above image).
Each of these represents different areas of luminance within your photo. As you scroll over the histogram each section will highlight and the corresponding adjustment slider in the basic development panel will also be indicated.
To adjust the histogram, all you need to do is hover over the section you want to adjust and then click and drag to the left or right or alternatively top or bottom. You can do this directly with any of the of other luminance section of the histogram.
12. Adjustment Mask Colour Options
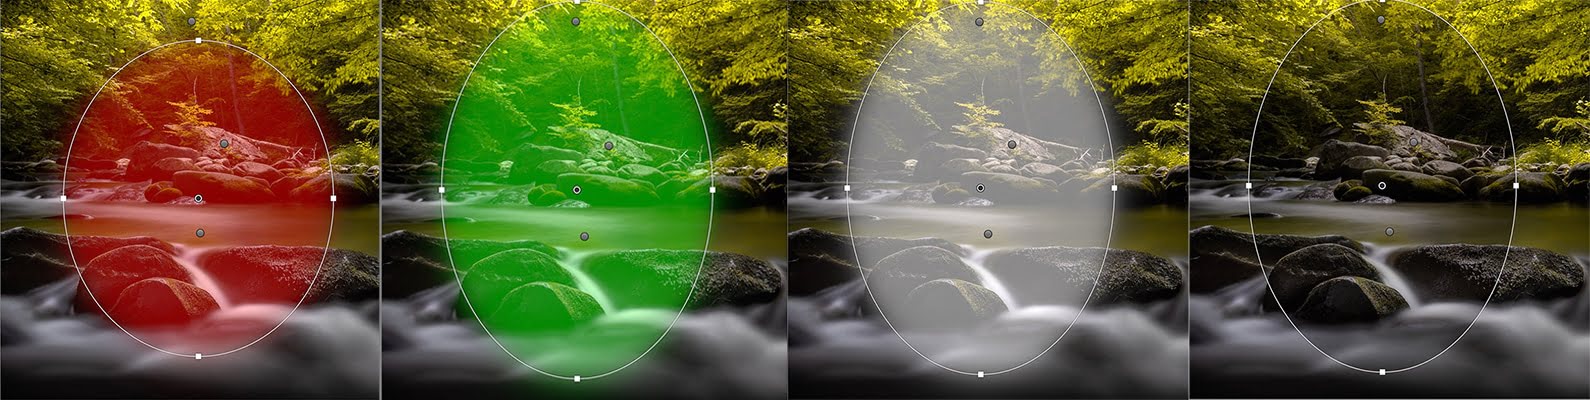
Whenever you use a local adjustment tool in Lightroom such as the radial or graduated filter or adjustment brush, you have the ability to ‘Show selected mask overlay’.
This is just a colourized mask that helps you visually see where your local adjustments are being applied.
Did you know you can change the color of your local adjustment mask overlays to suit your taste or the background colour of the photo you’re editing?
To cycle through the adjustment mask overlay colors, first, make sure the ‘Show selected mask overlay’ at the bottom of the window is ticked. Then, simply use the keyboard shortcut ‘Shift>O’ to change the mask colour.
You can choose from: red, green, white, black or no colour at all.
13. Visualise spots to fine-tune your edits
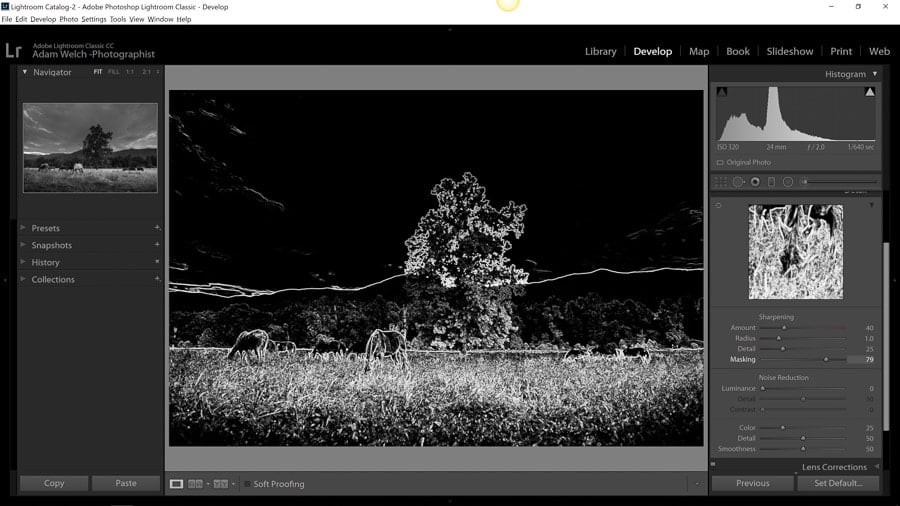
The visualize spots feature is exactly what it sounds like it should be: a method for us to visually discern unwanted spots of dust and dirt within our images.
You’ll find it at the bottom of the view window when using the ‘spot removal’ tool.
Once ticked, the visualize spots feature will instantly transform your photograph into a funky black and white outline that resembles an impressionist charcoal drawing – Lightroom chooses areas of higher contrast and paints them white.
The result is that we can see unwanted artifacts much better. Use the slider to control the sensitivity and once you’ve removed the spots just untick the box to return to the normal view.
14. Customise your Identity Plate
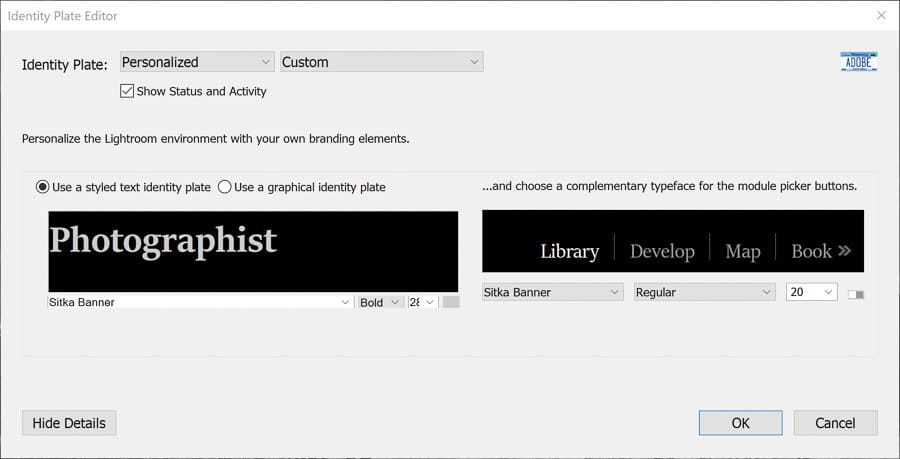
The ‘Identity Plate’ is the image/writing in the top left-hand corner of your Lightroom window – by default, it should say ‘Adobe Lightroom Classic CC’ and your name.
Did you know you can actually customize your identity plate to use custom logos and graphics in place of plain text? Here’s how:
First, click on ‘Edit>Identity Plate Setup’. This brings up the identity plate editor. It’s here where you will make all your changes. Then choose ‘Personalized’ in the drop-down options, and on the next screen, you can go crazy with a custom graphic or just styled text.
You can even change the appearance of the module menus at the top right of the screen as well in the exact same way you created your personalized nameplate.
15. Duplicate your Local Adjustments
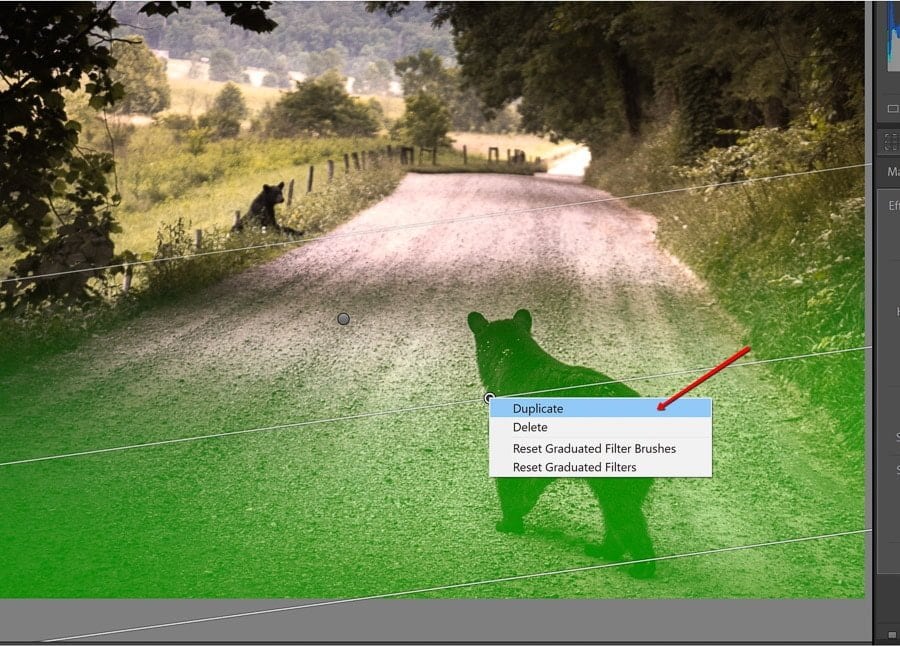
Here’s a little tip for Lightroom Classic CC that surprisingly few people know about. If you’re like me and use a multitude of local adjustments in your editing then you’re going to love this.
Instead of starting from scratch each time you want to create another graduated or radial filter, try duplicating the filter you already have and then just adjust it to your current need.
All you need to do in order to duplicate a local adjustment is to right-click the locator pin and select ‘Duplicate’.
Duplicating your local adjustment filters can save you a load of time in your editing. If you want to take this a step further with a photo editor that uses AI to customise the batch edit to each individual photo, check out our review of Luminar Neo here.
16. Speed things up with Smart Previews
Editor’s comment: The rather long-winded video above was something I made a couple of years ago for Lightroom 6, but it still applies today.
By using ‘Smart Previews’ and disconnecting your main external drive (or disassociating it), you’re able to force Lightroom to use the Smart Previews before looking for the original files.
The most recent version of Lightroom offers you to tell the software to use Smart Previews when both options are available, but this still means you’ll lose a fraction of a second each time it has to ‘check’ whether both are present.
There are lots of other things you can do to help speed up Lightroom.
Want to Learn More Lightroom Classic CC Tips?
There are so many ways to make our Lightroom life a little bit easier if you know where to look. Don’t be afraid to explore the space when you’re editing and find out all the little treasures this powerful software has to offer.
If you want to learn more about all the glory that is Lightroom be sure to check out Lightroom Mastery: A Complete Guide for Working in Lightroom Classic CC – a 230+ page ebook packed to the brim with knowledge, advice, and training material to help you master Lightroom Classic CC.
Lightroom Mastery shows you how to use Lightroom to its full potential; not by droning repetitions of someone else’s editing style, but through teaching you the basic premises of the software using easy-to-understand, real-world language that will unlock your potential for learning.
It’s also kept updated with every new release of Lightroom, so it’s perfect to keep your finger on the pulse of all the latest features.
More Lightroom Tips Coming Soon!

I hope you enjoyed these 15 useful Lightroom tips. Be sure to bookmark this article, as we plan to add to it in the coming months with more features that can help speed up your editing workflow.
Feel free to leave a comment below with any of your favourite tips and tricks so we can all benefit, and be sure to join the Shotkit Facebook Group to continue the discussion.
Also, be sure to check out our friends over at Phlearn for a sample of other great Lightroom tutorials.
Happy editing!


Hi there! I’m Polina, a freelance photographer, always on the look out for creating simple images with powerful impact.

