


How to Use Manual Mode in Photography (Beginner’s Guide)
Unlock the full potential of your camera with this beginner's guide to manual mode. Dive into the basics and take control of your shots like a pro
Learn | By Jeff Collier
This guide will show you how to use manual mode in photography by walking you through everything you need to know about its elements and how to set them properly.
While checking out your camera, you’ve probably stumbled across the manual mode before. This is the manual settings mode professional photographers use to adjust every element of their photos.
While adjusting manual camera settings can be intimidating at first, it can be an incredibly rewarding experience that unlocks new potential in your photography!
If you want to set foot in the world of manual mode photography, this guide will teach you all the basics you need to know to get started.
How Does Manual Camera Mode Work in Photography?
Before diving into the juicy details of this guide, there are some essential points that I need to cover. These points are essential to understand the tutorial and how to use the manual mode properly.
Most cameras nowadays come with an automatic system that lets them optimize a variety of photography elements for the best exposure while capturing images.
That being said, the automatic mode isn’t always reliable at finding the best possible settings for your shot, and that’s where the manual mode comes into play!
As the name suggests, the manual mode allows you to manually control several image settings and optimize them to your liking. This includes shutter speed, ISO, aperture, light meter, and more.
Done right, photos captured in manual mode can be dramatically more impactful and professional looking, as they allow you to translate your artistic point of view exactly how you want it with the correct exposure settings.
That being said, manual mode can be a bit tricky at first, as it has a learning curve and might take a few days of practice before you can fully grasp its potential.
What Are the Camera Settings You Control in the Manual Mode?
Now that you know more about the manual mode, let’s have a deeper look into the most important elements that you get to control with it.
Shutter Speed
Cameras come with light sensors that are protected from light using shutters. These shutters open for a split second during exposure to collect light.
The shutter speed indicates the amount of time (in seconds) the shutter remains open while taking a shot. In auto mode, the shutter speed is adjusted automatically depending on the exposure.
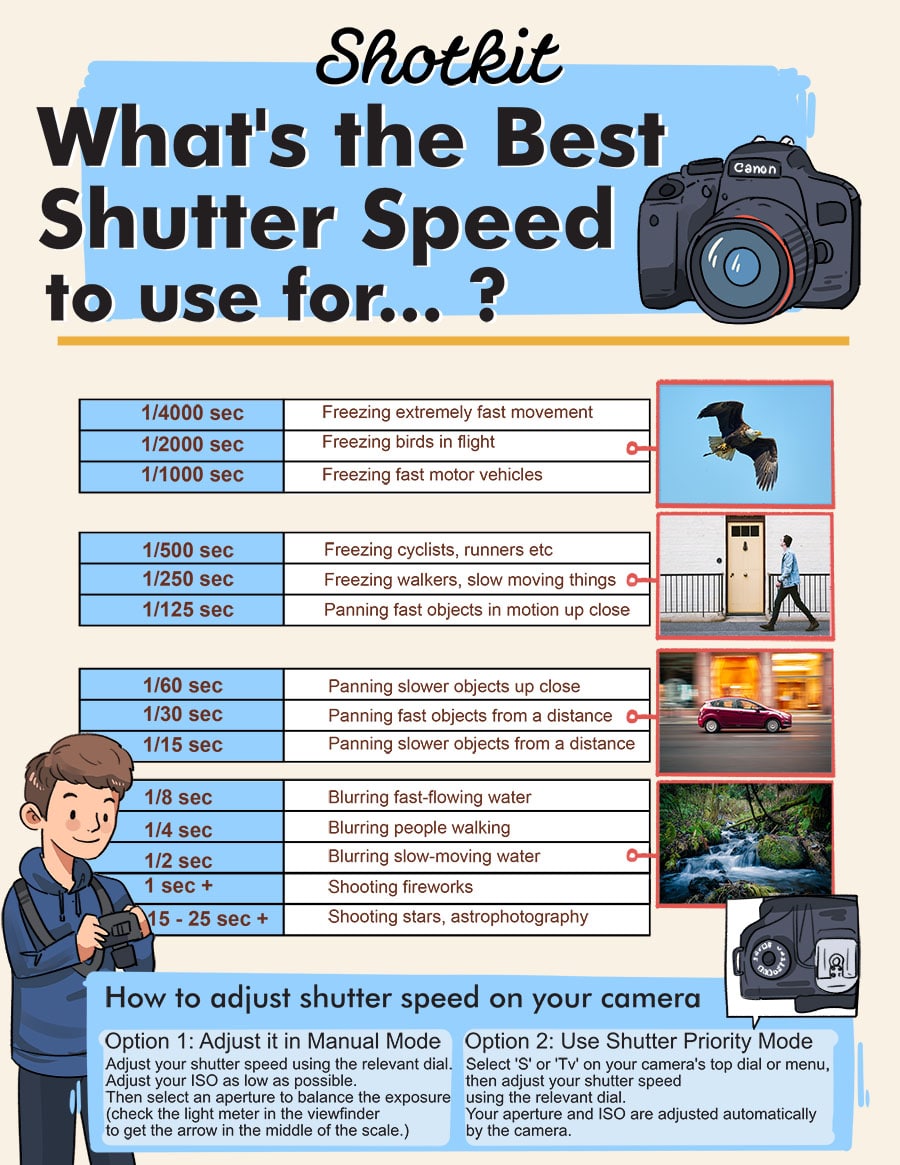
Shutter Speed Chart showing the effects of various shutter speeds.
However, in manual mode, you can adjust that time value yourself. The shutter speed range will vary from one camera to another, but in most cases, it can range from as short as 1/8000 seconds to 30 seconds or more.
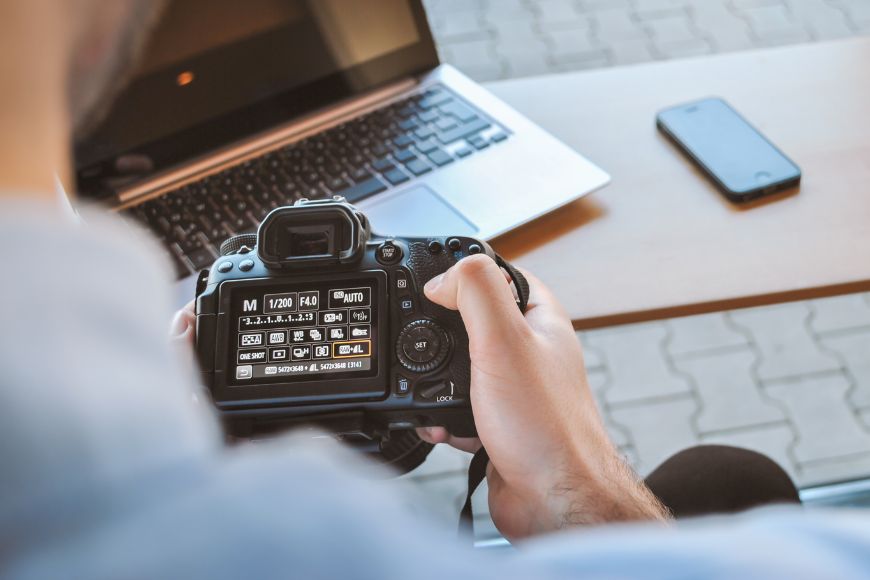
The current shutter speed is usually displayed in the camera’s viewfinder and LCD screen at the top corner, and you can adjust it by rotating the shutter speed knob, usually located at the top right corner.
How to Set Shutter Speed Properly
Slow shutter speed means that you leave the shutter open for longer, and therefore, the sensor will collect more light. This results in higher image brightness.
However, a slower shutter speed may also cause a blurry image if you’re trying to capture a moving object. On the other hand, capturing a static object with a high shutter speed will result in a darker image but with higher sharpness.
So ideally, if you’re trying to shoot a sharper image, especially during daylight, you should go for a faster shutter speed. This includes action shots that involve quick movements like sports.
On the other hand, if you’re shooting at night or in low light settings, especially for static objects, you should opt for a lower shutter speed. You can also use a slower shutter speed to create an artistic blur effect.
ISO
ISO is the manual mode setting that confuses most amateur photographers, although it’s really quite simple.
How Much Do You REALLY Know About Photography?! 🤔
Test your photography knowledge with this quick quiz!
See how much you really know about photography...

To spare you the technical jargon, the ISO number simply allows you to control how sensitive the camera sensor is toward the light. In other words, the higher the camera’s ISO, the brighter the image is going to be.
Similar to shutter speed, cameras will typically have the ISO in the form of a dial knob, located near the top right corner.
The typical range of ISO is between 100 to 1,600. However, some cameras may have a high ISO of up to 3,200 or more.
How to Set ISO Properly
Since the ISO controls the brightness of the image, a higher ISO leads to a brighter image. However, increasing the ISO level unnecessarily can lead to undesirable effects, such as extremely bright, almost washed-up images.
For that reason, you should always optimize the image properly and match it to the surrounding light.
For instance, when you’re shooting during daylight and there’s plenty of direct sunlight around, you should go for the lowest ISO values (100 to 400).
However, when you’re shooting at night, raise your ISO just enough to get a detailed image without creating image noise or film grain effect, which can ruin your photo.
Aperture

Besides shutter speed and ISO, another pillar of manual mode photography is the aperture. It’s also a fairly tricky one to figure out, but you can easily get the hang of it once you experiment with it.
Simply put, the aperture is a property of the lens in your camera that mimics our pupils. In other words, it adjusts the size of the hole where the light enters the lens and reaches the sensor, also known as the focal length.
Similar to shutter speed, the aperture comes in several values, and it’s typically written in the form of “f/ + number” or “f stops”.
The higher the value of the aperture, the tighter the aperture blades close. Therefore, the lower the light exposure is going to be and the darker your final image will get.
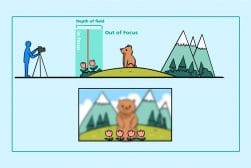
Aperture is also a property that controls the focus level in an image. This means that lenses with lower aperture (smaller f stop), the larger the depth of field will be.
While in manual mode, you can adjust the camera’s aperture using a physical dial. The typical range of f-stop values is quite wide, and you can find lenses at f/2.0 and others at f/22 or more.
How to Set Aperture Properly
Adjusting the aperture allows you to adjust the image’s depth of field to focus on an object while keeping the background slightly blurred. This gives your image a crisp, professional effect, but it’s highly dependent on the camera’s length.
You can create that highly-focused effect by using a manual mode camera, you should opt for a lower f-stop.
On the other hand, if you want the whole image to be focused and sharp throughout, going for a slightly larger f-stop will do the trick.
This is also ideal if you’re shooting an event where you want everyone, whether near or far, to be focused on the image.
White Balance
The white balance is an often-overlooked aspect while using the manual mode in a camera. Despite being quite simple, it’s an essential aspect that heavily impacts the quality of your image, so you might want to test it out while adjusting your manual mode settings.
White balance simply controls the colors of your image, relative to the current lighting. Adjusting this mode helps you achieve “warmer” or “cooler” tones to your images.
This can help you achieve the most accurate coloring in your photos, but you can also use it artistically to produce a certain effect.
How to Set It Properly
Unlike previous manual camera settings, white balance is down to personal preferences and usually comes in the form of presets.
Some models have a dial labeled “WB” on the camera’s body to adjust it, while others can adjust it digitally from the menu screen.
Additionally, white balance is one of the aspects you can easily manipulate post-production using photo editing software.
Beginner’s Guide to Using Manual Mode in Photography

Adjusting shutter speed manually on a Fujifilm camera
Now that you know more about the manual mode settings and how they work, here’s how to use them to take your photography skills to the next level!
Step 1: Choose the Manual Mode in Your Camera
When you hold your camera for the first time, you’ll find plenty of buttons and dials used in the manual mode. However, you first need to switch to the manual mode on your camera.
To do this, you’ll need to rotate the large dial that has various symbols and letters to select the “M”, which of course stands for “manual mode”.
Step 2: Locate the Manual Mode Settings in Your Camera
As previously established, each one of the manual mode settings will have a dedicated dial or knob in your camera, so it’s usually a good step to familiarize yourself with their locations and how to rotate them before you head to the next step.
Keep in mind when you shoot in manual mode, you’ll also control aspects like whether you want to trigger the flash or not, as it won’t fire on its own like in automatic mode.
Step 3: Pick the Suitable Image Format for You
Another aspect you might need to adjust before you shoot in manual mode is the extension you want the photos to be saved in. Many cameras support multiple image formats, but the most popular ones are JPEG and RAW.
The only difference between the two is that JPEG images are compressed, so they take up smaller space on your SD card.
On the other hand, RAW photos are much larger in size because they’re uncompressed, which makes them ideal for editing later using tools like Adobe Photoshop and Lightroom.
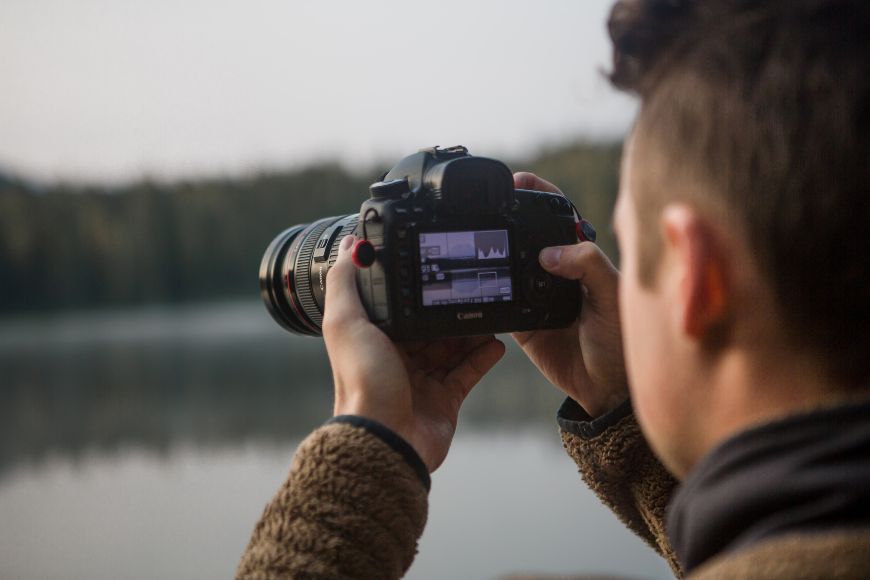
Step 4: Assess the Shot
This step will greatly help you in optimizing your shot because it’ll help you pick the best possible scenario for your shot(s).
This includes evaluating the surroundings to take the ideal shot. During that step, you should take the following aspects into account, which can help you later optimize the settings of your camera:
- Availability of good lighting
- The optimal distance to take your shot
- Whether you need to have a wide or narrow field of view
- The desired color tone
- Whether the object you’re shooting is static or moving
Step 5: Set the White Balance and Focus
The first aspect you should adjust while taking a shot in manual mode is the white balance. This helps you set a consistent base for other settings to adjust.
After that, if your camera’s lens has a manual focus, you should rotate it while remaining steady to get the right level of focus for your shot.
Step 6: Adjust the Shutter Speed
You don’t necessarily have to start with shutter speed while optimizing your camera controls, but it’s usually easier to adjust other settings accordingly.
Unless you’re deliberately looking for an artistic blur, you should set the shutter speed as low as possible, especially in bright daylight. You can increase the shutter speed slightly if you feel the photo is a bit too dark in the viewfinder.
Step 7: Pick the Right Aperture
Since the aperture affects both the brightness and field of view, you have to keep an eye on the two when you start optimizing the aperture dial.
If you want a blurry background, try to keep the aperture around f/2.0 to f/2.8. However, if you’re shooting a landscape and you want to include everything in the frame, you can set your aperture a little higher at around f/11 or f/22.
Step 8: Set the ISO
Lastly, you’ll need to set your camera’s ISO level by rotating its knob. Like shutter speeds, you should typically stick to the lowest ISO setting possible if you’re capturing during bright daylight.
On the other hand, if you’re shooting at night, carefully increase the ISO level to brighten the image without going overboard to avoid image noise and keep your image sharp and properly toned.
Step 9: Take Your Shot!
After adjusting your shutter speed, ISO, and aperture, you might need to optimize them slightly again to compensate for any setting changes, so that they can work well together.
Once you’re ready, you can press the shutter button to take your shot. After that, you can review the image and adjust the settings again accordingly.
FAQs
Is Manual Mode Available in All Cameras?
Most modern cameras, including DSLR and mirrorless options, will have a manual mode. However, the exact level of control may vary from one model to another.
For instance, low-end cameras might have a manual mode with limited controls or virtually assisted controls.
Who Should Use Manual Mode in Photography?
Manual mode can be an excellent solution for a huge variety of people. Here’s a quick look at some people who would benefit the shooting in manual mode:
- Professional or serious photographers who like to control every aspect of their photos
- Passionate amateurs who are curious about photography and want to understand how advanced cameras work
- Photographers who mainly specialize in a specific type of photography. In that case, the manual mode keeps their settings well optimized with easier adjustments
- Photographers who like taking artistic and creative photos, such as light trails and night photography.
What Are the Other Camera Modes Besides Manual Mode?
You can use other modes to gain “semi-control” over your photos if you’re not ready to shoot in manual mode yet.
These include modes that prioritize a certain aspect over the other, and they can be a transitional step towards going fully manual, such as aperture priority mode, shutter priority mode, and program camera mode.

Check out these 8 essential tools to help you succeed as a professional photographer.
Includes limited-time discounts.


Jeff Collier is an experienced film photographer who enjoys experimenting with modern digital photography equipment, software and apps. He’s also an ex-world champion triathlete and avid cyclist, clocking hundreds of km each week in the beautiful Tweed Valley of northern NSW, Australia.

