


Guide to Miniature Photography
Photographing miniatures is fun and rewarding. It's also great practice for your photography! Here are 29 tips to getting creative with a miniature world.
Learn | Photography Guides | By Greg Cromie
If you’re stuck at home or looking for a fun and creative photography project, this ultimate guide to miniature photography is for you.
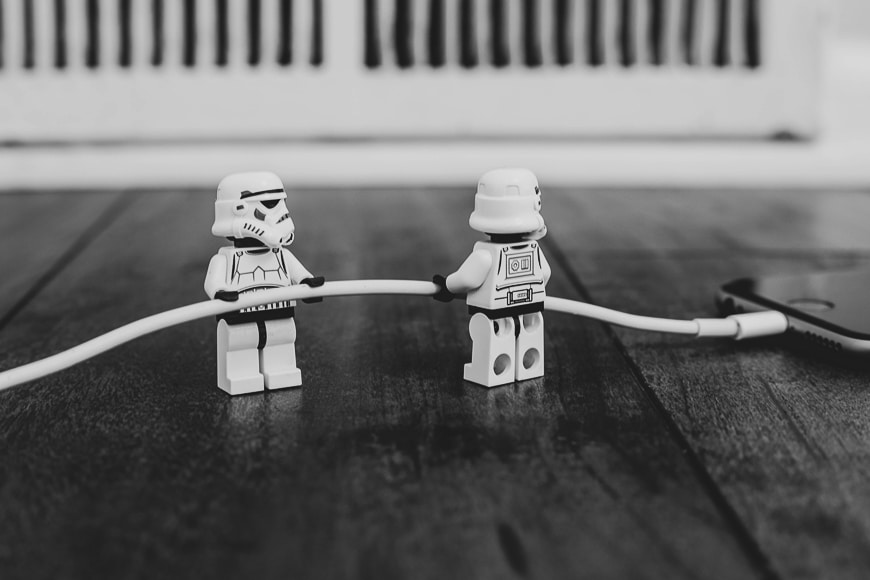
Miniature photography is all about using little figurines set in a scene with real-world objects. The trick is to build an illusion of scale where the figures and the surroundings look life-size.
Imagine a miniature person sailing across the bathtub on a raft made from a Kit-Kat. Or perhaps a mini car half-submerged in the mud with a person and a cow standing on the roof. It’s the kind of miniature photography our guide can help you create.
Fortunately, you don’t need anything special to get started.
Just a quick trip to the local toy, hobby or craft store to pick up some miniatures. If you want to go the extra mile building your macro world, pick up some matching miniature furniture, vehicles and scenery.
Our guide helps those new to photography to pick up a camera and get creative straight away. Seasoned photographers can also take inspiration from our tips, tricks and ideas.
So what are you waiting for? Get your camera out and get cracking taking pictures of your macro models!
What do You Need for Miniature Photography?
There are a few critical things that you’ll need to get started in miniature photography.
Fortunately, as long as you have access to a camera and lens, the rest will be lying around your house. We’ll cover all of these in more detail in our 9 tips for Photographing Miniatures. For now, here’s a summary:
- Figurines – It wouldn’t be miniature photography if your star models were not tiny! Miniatures can be purchased from hobby and toy stores.
- Camera – For miniature photography, an interchangeable lens DSLR or mirrorless camera works best. A DSLR features manual settings to achieve the best outcome for your photos. If you don’t have access to a DSLR or mirrorless cameras with manual controls, use your phone. My tip is to hold the phone upside down to get a closer shot. The benefit of using your phone is that you can edit and post them directly to social media.
- Lens – A wide-angle macro lens is the best for this style of photography – or any macro lens you have access to. If you don’t have a macro lens, use a wide-angle lens with a short minimal focus distance for wider scenes. If you want a more compressed shot, use a longer lens with either a 50mm or 85mm range.
- Tripod – A tripod helps stabilise the camera when using slow shutter speeds, thus avoiding camera shake. Either a full height or tabletop tripod will work for miniature photography.
- Props – Props can be anything from the shrubs in your garden to the fruit and vegetables in your refrigerator.
- Scenery – To build the atmosphere and theme in a miniature photo, you’ll need some form of background elements. These can be indoor spaces, outdoor settings or even painted scenes.
- Glue Stick – As odd as it sounds, depending on the type of miniatures you’re using, you’ll need a glue stick. A glue stick helps to temporarily stick the figures in place. This type of glue is easy to remove and non-permanent.
Now let’s look at some specific tips for taking photos of miniatures at home.
9 Tips for Photographing Miniatures
1. Storyboard Your Miniature Themes

If you’re going to the trouble of setting up your camera, lens, tripod and lighting, you’ll want to make the most of it.
Rather than coming up with a single miniature scene idea, take the time to come up with a number of options to make the most of having all your gear ready to take pictures.
Sit down with a pen and paper and jot down some of the themes you want to explore and images you want to photograph. Then, storyboard them with rough sketches of each scene and pencil in shadows, models and direction of the lights.
Finally, make a list of all the props, scenery and locations.
Once you’ve developed a simple storyboard for each scene, collect the required materials so they’re on-hand for the shoot.
With everything you need, you can build each scene and take the necessary photos one at a time.
2. Dial-In the Best Camera Settings
When taking macro shots of miniatures, you need to control specific camera settings to correct the exposure or amount of light.
You also need to ensure that the parts of your composition that need to be in focus are in sharp focus. Let’s take a look at the best exposure settings for miniature photography.
- Aperture
Aperture is the diameter of the hole that opens inside the lens to allow light into the camera.
A wide aperture (such as f/1.8) creates a wide hole that lets in a lot of light and makes a shallow depth of field. It’s where the subject is in sharp focus, and the background will be blurry.
A narrow aperture (such as f/16) makes the hole narrow to restrict the light and allow a broad depth of field. The entire photo will be in sharp focus, provided you’re not too close to your subject.
How Much Do You REALLY Know About Photography?! 🤔
Test your photography knowledge with this quick quiz!
See how much you really know about photography...

Shooting with a macro lens follows these same rules but it allows you to get super close to your subject to make them appear lifesize in the photograph.
Taking pictures of miniatures with a macro lens and a wide aperture makes too thin a depth of field. Part of your subject may be in focus, but everything else will be blurry.
The best manual aperture setting for miniature photography is around f/5.6.
That way, you’ll have the essential parts of the setup in focus, and the rest is falling into a soft blur. The exposure will also be correct thanks to the use of a mid-range aperture.
- Shutter Speed
To get the best looking miniature photos, you’ll need an adequate amount of lighting to expose the images correctly.
If you don’t have access to a speedlight, flash or LED camera light, rely on the camera to control exposure.
Shutter speed is a setting that controls how quickly the camera sensor receives the light coming in through the lens. A fast shutter speed lets less light in but is excellent for photographing fast-moving subjects to freeze the scene.
A slow shutter speed lets more light in and is ideal for taking photos of a miniature subject.
See more about shutter speed here.
- ISO
The ISO setting on a camera controls how the sensor handles the sensitivity of the incoming light that hits the camera sensor.
Use ISO to compensate for low lighting conditions – but too much ISO compensation can impact picture quality, so use it sparingly when photographing your miniatures, since you don’t want the little fellas looking too grainy!
3. Use Lighting For Correct Exposure

To make your miniature photos pop, use a combination of natural light and light created by a constant LED or a flash.
LED lights are popular and very affordable and can feature colour gels or filters to alter the colour and temperature of the light.
Flash units or speedlights take a bit more work as you have to modify or filter the light, so it’s not so harsh in the photos.
Flash units can be attached to the hotshoe on top of the camera, or they can be placed off the camera and controlled with a remote flash trigger.
Regardless of your choice, make sure that the additional light is not too harsh. You’ll know if it is as there’ll be outline shadows around your miniatures, and some areas will appear too white or overexposed.
One way to modify the light so it’s not too harsh is to use a softbox. It’s a fabric box that the flash sits inside, and an opaque material softens the light.
(You can learn more out some of the best softbox lighting kits here.)
Another solution is to use a light tent (aka light box)- a popular tool for the best macro photographers. These are made of opaque white fabric or plastic and shaped like a box with the front open.
The miniatures, props and scenery sit inside, and the flash or LED is outside. The material softens and spreads the light evenly, so there are no harsh shadows or overexposed areas.
If you don’t have access to a speedlight, flash or LED light, consider making a light box yourself, or setting up your scenes outdoors or next to natural window light.
4. Stabilise the Camera

Given that you may need to go with slower shutter speeds, you’ll need to keep your camera still to prevent shake and blurry images.
There are two ways to stabilise your equipment with the first being to use a tripod. Tripods are a standard photography tool that’s useful for landscape, portrait and macro photography.
The camera attaches to the tripod via a ball-head that can tile, pan and rotate 90-degrees. Tripods are height adjustable, with some allowing you to set the kit as low as 4-5″ or as high as 4-5′.
When shooting, the other way to stabilise your equipment is with Images Stabilisation. Many cameras now feature In Body Image Stabilisation (IBIS) that uses either an electronic or mechanical function to compensate for any shake at slow shutter speeds.
Some lenses also feature Image Stabilisation (IS) that achieves the same outcomes.
The critical takeaway from the use of tripods and stabilisation is that you can never use the two simultaneously.
If using a tripod, don’t use the IBIS or lens IS – this can confuse the camera and cause more shake. If taking handheld shots, use the IBIS and the lens IS to stabilise the shots.
Check out some affordable travel tripods here.
5. Set The Scene
Setting the scene for mini shots is a lot of fun and allows you to be creative, experimental and innovative. It’s similar to setting up for toy photography.
However, in my guide to toy photography, I used complete lego sets, Lego vehicles and Lego buildings to set the scene.
With mini photography, the scenes are usually places around the home – both inside and out. Or, you may head out to a destination such as a beach, forest or local park.
If setting up a photography shoot at home, consider rooms like the bathroom – sinks and tubs make for great swimming pools and lakes in a scaled-down world.
Setting the scene should always come before you place your miniatures or props – chances are you’ll knock your figures over accidentally more than once.
It’s about creating a unique world that appears to be at the correct scale for the figures.
It helps if you also consider the position and angle of the equipment when setting the scene. By strategically placing it and setting the angle, you avoid unwanted background and foreground elements from appearing in the final photo.
Plus, getting down at a low angle to the miniatures helps to make the illusion of it being at a bigger scale than it is.
6. Be Creative With Props
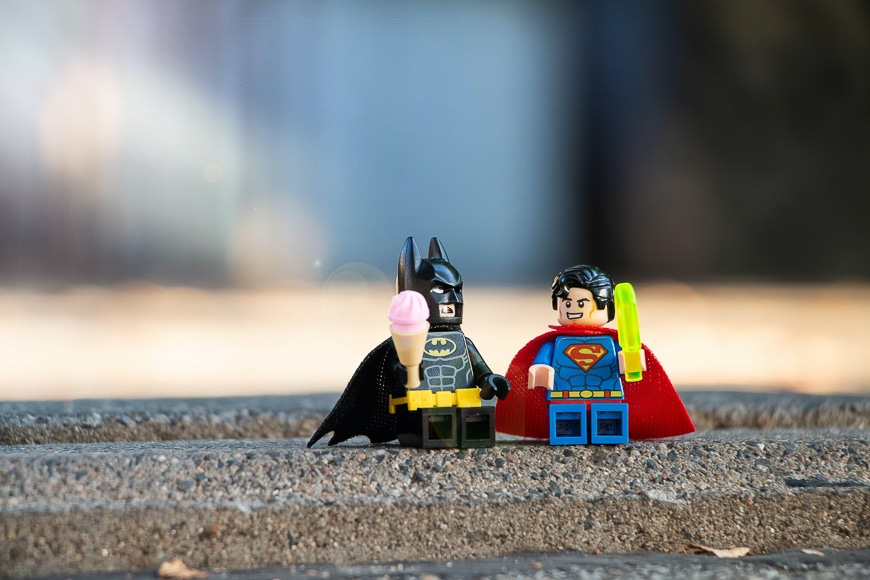
For the best miniature photography results, you want to create fun and exciting scenes.
The easiest way to do this is to use everyday items as props. These props will cause wonder and delight for the viewer when they see items found around the home paired with mini-figures.
There’s a load of great examples of using everyday items as props for your miniature photo.
The trick is to momentarily deceive the viewer with the scale. For example, a figure building a wall with sugar cubes momentarily looks life-like and in scale.
Or a figure paddling a leaf down a gutter (after the rain) looks like someone exploring an urban canal.
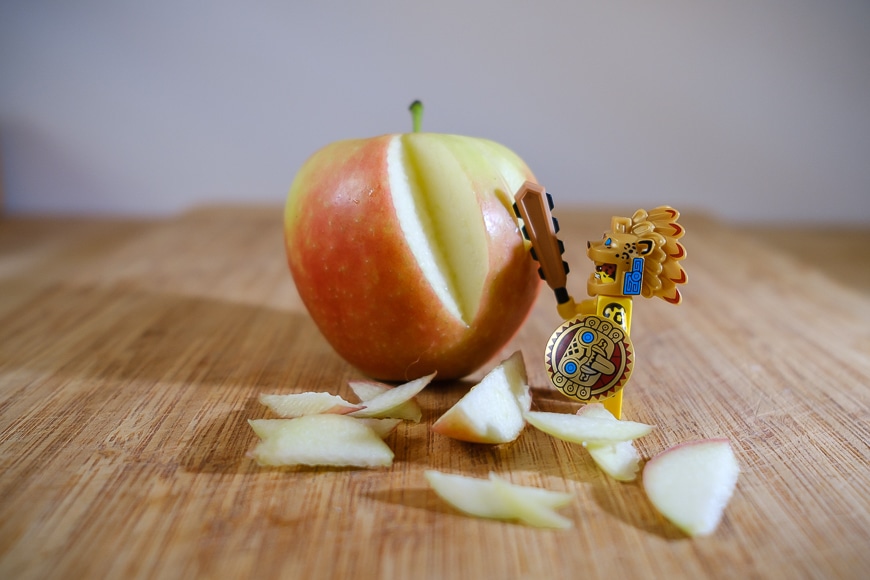
Experiment with lots of different props, including food. A mini-figure holding an axe against the skin of an apple looks good.
However, to take it up a notch carefully cut a triangular piece from the apple and place it; it looks like the character has chopped a part of the apple.
Search your junk draw in the kitchen or the box of odds and ends you have in the garage, and don’t forget to raid the fridge or ice-box for some fun and unique props.
7. Get Crafting

If you’re feeling crafty, turn this into an art project to build and paint your own props or backdrops. There’s no rule that a photographer can’t also be an artist!
As part of the storyboard process, decide if you’ll use the existing backdrop in your photo or if you want to go for a painted backdrop. If there’s a specific look you’re going for, using paint or collage is a simple way to achieve it.
You could even print out interesting scenes from a computer. With a printed or painted backdrop, use a wide aperture to make the figures in focus and the background soft and blurry.
You’ll still get a feel for the detail in the background without taking the viewer’s attention from the star of the show.
When using a painted scene, make sure you use colours that create contrast with the main subject in the shoot.
Here are some other great DIY backdrop ideas.
8. Where To Buy Miniatures
Probably the most challenging part of miniature photography is getting your giant hands on some small figurines.
And even that’s not so hard if you know where to look – it all depends on the style of miniatures you want to use.
Ideally, it helps if you have small enough figures to pair well with everyday objects to build a scene.
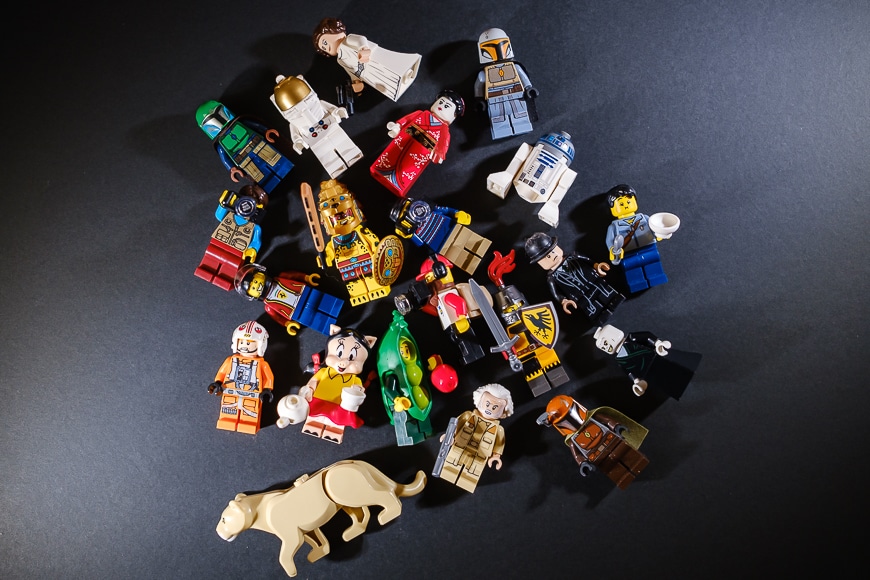
I opted for Lego minifigs for this article as I have an excessive amount of Lego (see my article on toy photography). But there are other options.
If you want to find a range of tiny people, furniture, vehicles and scenery, a hobby store is the best option.
Model train enthusiasts have been using mini-figures, buildings and micro traffic lights for decades. A big part of building a model train track is to also build realistic scenery.
As a result, hobby stores that stock miniature railway products will have a vast range of the kinds of miniatures you’ll need. You can head in-store or check out their websites.
Miniatures are also available from some craft stores and eBay.
While checking out the miniatures used for miniature railways, look at the fantasy figurines used in tabletop games like Warhammer.
If you can’t locate affordable miniatures, trying using Lego – it’s cheaper and easier to find. While the scale is not the same as using truly miniature figures, it’s an excellent place to start.
Lego is readily available from toy stores and supermarkets.
Some miniatures come with a base, so they stand un-aided. Others, like Lego, don’t – but you can attach a small Lego plate and then frame it out of the picture or hide it under sand or gravel.
9. Edit Out The Dust

I’ve photographed a lot of cameras and lenses for my reviews on Shotkit. I’ve also photographed a lot of Lego for toy photography.
A tough lesson I learned shooting these genres is that dust is everywhere, despite my best efforts in keeping my camera and lenses clean!
I do my best to gently brush it from the surfaces of my subjects before I take the shot. But, it’s unavoidable that there’ll be loads of dust when I check the photos on my computer.
Even the cleanest surface will attract dust just from you moving between your miniatures and camera.
Fortunately, you can take care of spots later when using editing software such as Adobe Lightroom or Photoshop.
In the Develop tab of Lightroom, just under the histogram, is the Spot Removal tool. It allows you to place a small circle over the spot and then select a spot-free circle from the image to replace it with.
I recommend changing the radius of the original circle to precisely cover the spot. Also, it’s worth zooming in on the image for accurate dust spot discovery and removal.
20 Miniature Photography Ideas

One of the best things about miniature photography is that there’s no limit to creative possibilities.
You can pack up your mini models and head out into nature or to the local beach for the perfect photo. If you’re housebound, take a look around you for dozens, if not hundreds, of possibilities.
Use generic miniature figures available from hobby stores and online marketplaces. Or, you can purchase themed ones such as cleaners, constructions workers and skiers.
Position the themed miniatures on the stage, such as the mountain climbers scaling a rock.
Here’s a bunch of others to build on:
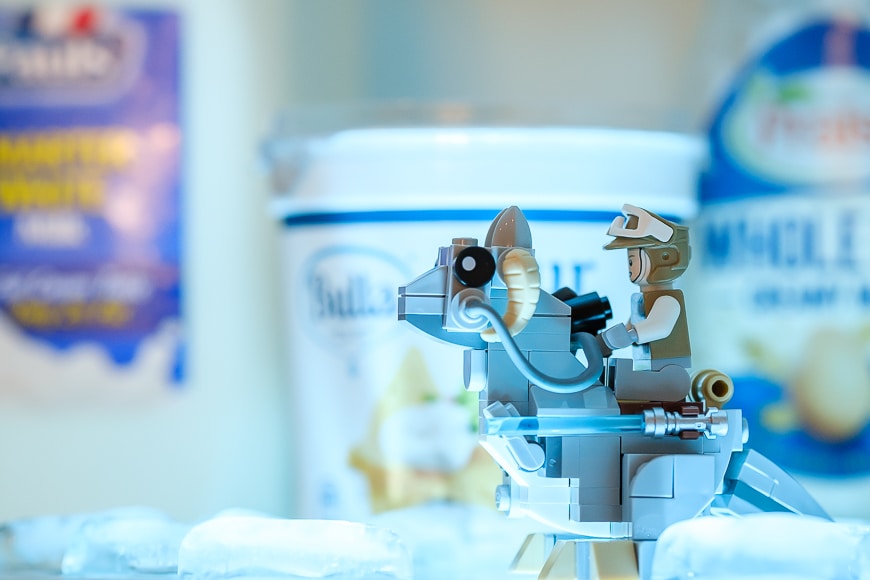
- Figures climbing a mountain of ice cream in single-file with a flag at the top.
- Stand a figure inside the freezer with a shallow depth of field.
- Place a figure on a curled leaf floating on a puddle in the garden.
- Drop a surfing figure in your morning bowl of cereal.
- Position a sitting figure on the edge of a plank of wood – it’ll look like a boardwalk.
- Team up construction workers standing on a computer keyboard.
- Place figures sweeping up spilt salt from an overturned salt shaker.
- Arrange workers to build a wall with sugar cubes.
- Set up construction workers exploring your camera and lenses.
- Arrange clumps of broccoli as trees for a figure to walk under.
- Position a pile of potatoes like giant boulders for your figures to explore.
- Create a horror story by half submerging a figure in a squished tomato.
- Organise cleaning figures placed in a puddle of milk.
- Arrange a pair of figures working on a small weed in the garden.
- Place a figure sitting on the edge of a beer bottle submerged in sand.
- Use a piece of white bread to represent a small island to place your figures on.
- Put a golfer hitting a sprinkle from the top of a doughnut.
- Lay a coffee mug on its side and set up a cafe scene complete with miniature figures and cafe furniture.
- Place snowboarding miniatures using the inside of half a coconut to shred.
- Consider taking a photo of a mini car parked on the beach with the sun setting in the background.
Final Words
The thing I love most about miniature model photography is that it allows you to apply creative methods and take amazing pictures of everyday objects.
You create an illusionary world where the scale is all out of whack!
Macro worlds are a lot of fun to build and fill with intricate details to develop a story for your picture. I guarantee that if you post a macro world picture to social media you’ll get a lot of love.
What’s more, you already have everything you need sitting around the house – especially if you have kids that like little figurines. At most, you’ll make a quick trip to the store to grab a few packets of Lego minifigs.
My tip is that if you’re stuck at home or looking for a fun project to undertake with the kids, miniature photography is the way to go.
Have you ever tried shooting with mini models? Do you have any thoughts on ways to set up fun mini-scenes for a tiny model to occupy? Do you have a favourite photo of a macro world where tiny models live?
Share your methods, comments and questions below and become part of the conversation. Happy shooting!

Check out these 8 essential tools to help you succeed as a professional photographer.
Includes limited-time discounts.


I’m a Melbourne-based street photographer and blogger. I love to travel to Japan to photograph and document its dynamic people and culture.


