Palette Review
An impartial Palette Review by a professional photographer. Learn how the Palette can speed up your photo editing workflow in this review for Shotkit.
If you’re a professional photographer, you couldn’t have avoided noticing the number of studios that will do your editing for you that cropped up recently. Why? It’s simple. Most of us love shooting, but are less enthusiastic when the time comes to sit down and start editing.
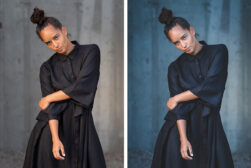
I actually like editing. Shooting is a great adventure, but that’s only one part of telling the story. The other part is interpreting your RAW photo so that the viewer looking at it will feel what you felt while shooting it.
Editing a photo is like a great chef seasoning the raw food with his signature herbs. It’s like the opera singer interpreting the raw notes and lyrics of the composer.
As you can tell, I like editing. However, I may not be particularly objective though, since I have this little gizmo that actually makes editing joyful. It’s almost like playing a game in which the final reward is the tear of joy in your bride’s eye at the moment she first sees her beautiful wedding photos.
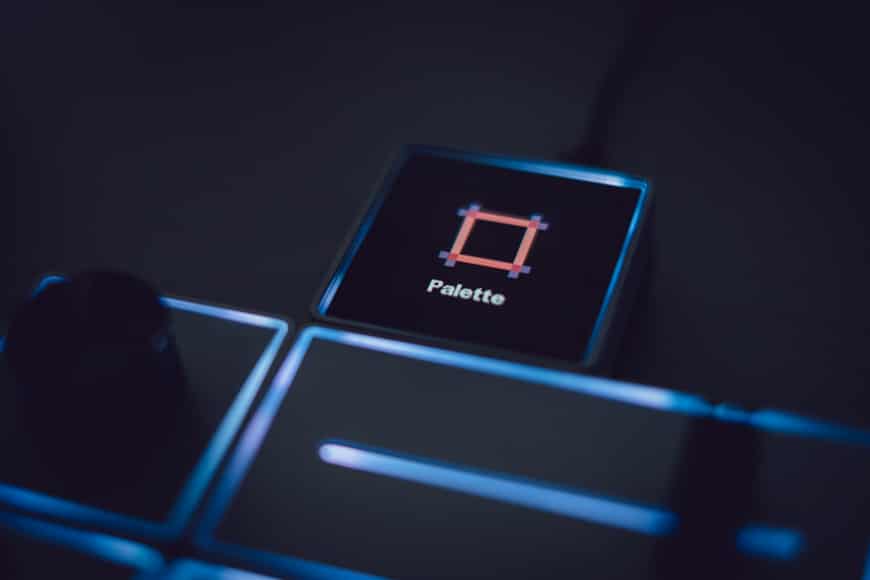
The gizmo? Meet the Palette.
What is the Palette?
The Palette is a modular analog/digital customizable controller aimed primarily (but not exclusively) at the Adobe application suite, on Mac or Windows.
Let’s break that down.
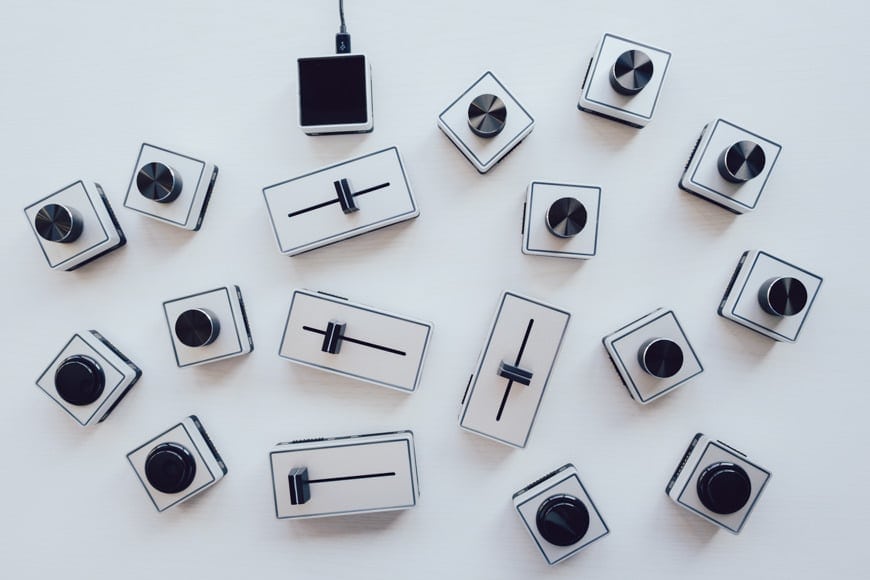
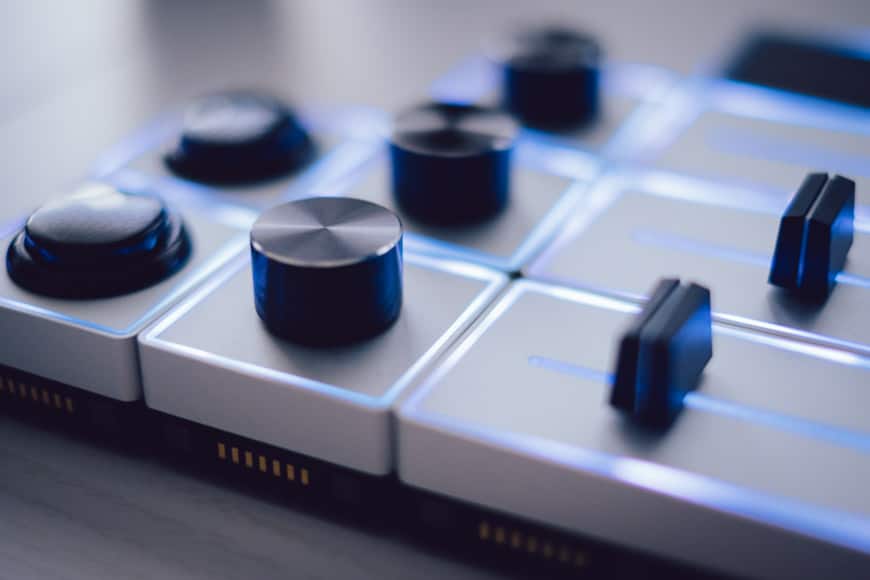
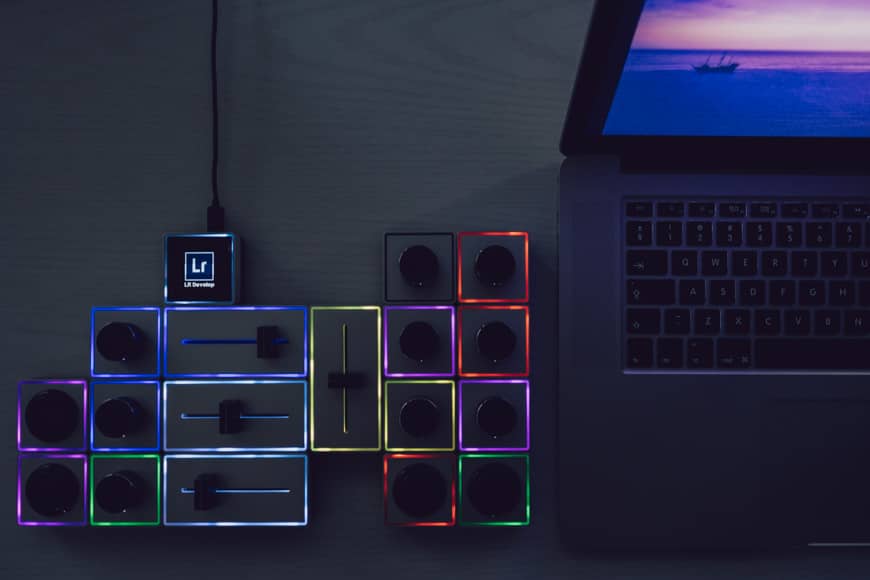
Modular. First of all you need the brains of the unit, aptly named the Palette Core. Everything else is optional and comes in the form of little modules that have a beautifully satisfying magnetic snap when you get them close to each other. You can connect them in virtually any shape or form, up to a maximum of 18 pieces.
Palette Gear offers kits (Starter, Expert and Professional) which contain predetermined combinations of modules, but you can also get them individually… as long as you don’t forget the Core.
Analog/digital. The modules are dials, sliders and buttons. The buttons are digital, and the former two are analog, offering a finely grained control.
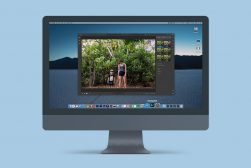
Customizable. Each module can control one of many supported functions. I have yet to find a function I use often which isn’t supported in Lightroom’s Develop module.
Of course, you need to take into account what makes sense for a particular type of module, which means that you can’t assign exposure control to a button or undo to a slider for example.
Even better still, you can assign the same function to two different modules. For example, I assigned white balance to a slider and to a dial. If it isn’t intuitively clear why this makes sense, read on.
Adobe application suite, but not exclusively. The Palette was invented for Lightroom, but the software supports Adobe Creative Suite 2014 and later.
When I say “supports”, I mean that it recognizes your application and offers many of its functions from a list, which you then assign to modules: it can be anything from setting brush size in Photoshop to adjusting clip volume in Premiere. It’s a very simple and quick process.
You’ll also find support for Final Cut Pro X, Capture One, MIDI and even a joystick simulation. Furthermore, it actually supports any application that can use keyboard shortcuts, which you then assign manually.
An SDK is planned for deeper support of a wider range of apps, but that’s still brewing.
Palette app supports multiple profiles and it’s easy to switch between them, so you can set it up for multiple applications. You can also have multiple profiles for the same app: one profile for culling and the other for editing in Lightroom, for example.
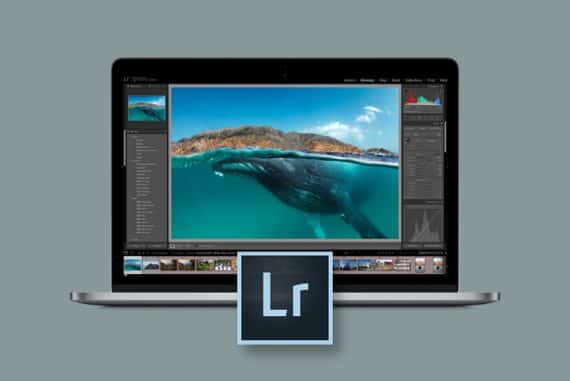
I use it exclusively for Lightroom editing and that’s what I’ll be focusing on in the rest of this review.
What are the Modules?
Let’s dig deeper into the 4 types of module that make up the Palette:
1. The Core
This is the brains of the operation. It connects to your computer via USB and provides power and communication to the rest of the controller.
It features an OLED screen that displays the currently active profile, which quickly switches to the current function when you use one of the modules (Lightroom also displays a non-intrusive info banner with the name of the function you’re currently using).
2. The Dials
The Dials offer analog rotary relative controls with a vertical click as a reset. What this means is that it will detect the direction and amount of change you want and apply it to anything that’s already set in Lightroom.
For example, turning the dial assigned to exposure clockwise by half a turn will increase the exposure by 1/2 EV above whatever was previously set. (We’ll contrast this to how sliders work next.)
The vertical click, i.e. pressing the whole dial, resets the adjustment.
(Note: reset is available in the current beta software, as of December 2016. At the moment, the vertical click in public stable version is actually a modifier which multiplies the dial action when held down and rotated.)
3. The Sliders
The Sliders have analog and absolute control of the assigned function. What this means is that each position of the slider corresponds permanently to a certain value of a function in Lightroom. Moving it to this position will always set a certain value.
For example, a slider assigned to white balance will correspond to 2000K at one extreme of its range, and to 50000K at the other extreme. Sliders aren’t motorized (which is actually a good thing in my opinion), which lets you do interesting things.
Let’s expand on this a bit. Let’s say that you set a white balance of 6500K for one photo and then advance to the next. The Slider will remain in it’s position, but won’t influence the default WB until you move it again. If you decide that the following photo also needs the same adjustment, it’s enough to just touch the slider so it registers a minute change and your last setting will instantly be set.
(If they were motorized, they would automatically move to reflect the current setting, thereby “overwriting” your last setting.)
4. The Buttons
There’s really not much to be said about these. The buttons on the Palette are big, arcade-style buttons with a satisfying click when you hit them.
Buttons are ideal for simple functions like next/previous photo, undo, paste previous edits, sync edits, toggle functions like brushes and spot removal, change LR modules or Palette profiles etc.
All these modules have another cool feature – each module has independent LED lighting on the outer edge with a color you can customize (6 colors or turned off). This makes it easier to remember which module does what, especially when you use multiple profiles.
The Palette App
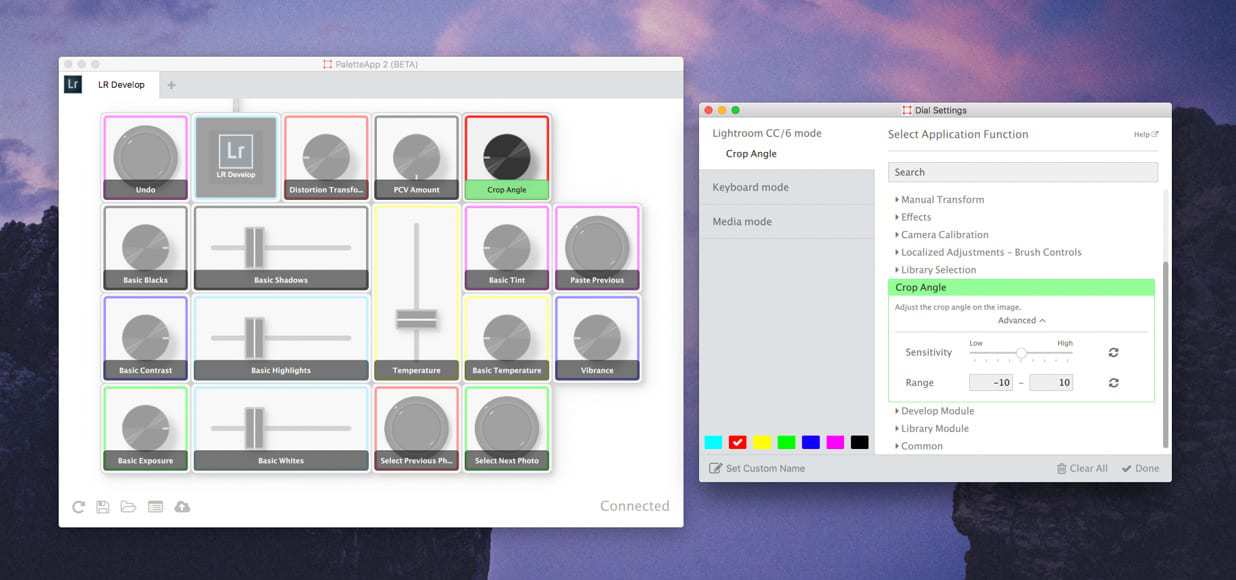
The management software on Mac or Windows is pretty straightforward. It installs a Lightroom plugin, recognizes the connected modules, instantly displaying their interactive map, and allows you to assign the functions and LED colors to each one.
You use it to create multiple profiles and update the firmware when necessary. The best thing is that you can save your profiles to be used across different platforms. I keep mine on Dropbox since I’m always fiddling with the profiles, so when I switch from Mac to PC I don’t need to reconfigure anything.
Palette Software customization
Certain functions in certain applications (Premiere, Lightroom and soon Photoshop) can be further customized. For dials you can set sensitivities and available range; for sliders you can remap the range.
For example, I find the contrast (and white balance, vignette, vibrance…) assigned to a dial are too slow to adjust – it takes too many rotations to influence the photo significantly. In this case I can modify the sensitivity and decide how fast the adjustment can be.
Range adjustment works similarly for dials and sliders. You can simply set a minimum and maximum value available when using the physical controller (you can still manually override this in Lightroom, of course).
For example, you will rarely need a white balance setting of 30000K or exposure adjustment of -4EV, so you can simply narrow the available range. This is especially useful for sliders to remap their two extreme positions to some less extreme settings, and also gain precision in the available range along the way.
(Note: this is a beta feature as of December 2016. You need to download publicly available beta software to access these functions at the moment of writing this)
Workflow with the Palette
We now come to the fun part — the workflow itself. I bought the Palette Professional kit since I use a whole bunch of functions in Lightroom fairly regularly.
The smaller kits are okay only if you don’t use a large number of functions that often, because as soon as you need something that isn’t mapped to your Palette, you’re wasting time relocating to the mouse and/or keyboard.
When I get down to serious editing, the Palette is in front of the monitor, my Wacom tablet to the right and the keyboard to the left.
The rest is actually pretty self-evident, because in essence, the Palette is a simple device. You just need to think about the functions you use the most and then figure out a module layout that makes sense for you.
It’s actually a really fun process and it took me about 6 iterations over a few weeks to really dial it in to a point where I don’t even think about it while editing. And just like with touch-typing, this is when you get the business done seriously quickly.
One thing I promised to clarify is why I sometimes assign two modules to the same function. The reason is due to how dials and sliders work — dials are relative and sliders are absolute.
For example, I always assign white balance to one dial and one slider. When I need to make coarse changes, the slider is very quick. A jump of 10000K takes just a fraction of the second. But even more importantly, when I repeatedly need to apply a WB edit to many images in close sequence, I’ll use the slider to set the WB initially and then just touch it on each following photo to repeat this edit.
The Palette registers the movement, but because it’s so small, it effectively sets the same temperature to the current photo (plus or minus a few kelvins).
On the other hand, when the WB just needs to be slightly shifted, I’ll use the dial – it will add my edit to whatever was already set instead of “overwriting” it completely like a slider would. This also works great for sequences of images of varying color temperatures (or exposures or something else), where every image needs a different treatment.
All of this is very useful in variable lighting conditions (e.g. mixed tungsten and daylight or a colorful light-show at the reception).
For example, when the bride gets ready, part of the room can be under tungsten light while daylight dominates the part of the room closer to the windows. I can then ‘set’ tungsten WB to the slider and just touch it for applicable photos, while the rest of the mixed and window shots may just require a slight dial adjustment.
This is something that just syncing the edits can’t do when the WB varies from shot to shot.
When to use which module
This is largely down to personal preference, but a few rules can still be noted when using the Palette.
Whenever you feel you may need a huge range of adjustment for a certain function, it makes sense to use the slider. For example, reception shots from a dark venue dominated by a colorful light-show are perfect candidates to have your white balance and tint assigned to sliders, since you may often need to set both to their extremes.
I also like having whites, highlights and shadows assigned to sliders since I push or pull them to their extremes fairly often in contrasty environments.
Then there are functions which you adjust your settings only slightly or rarely – these are perfect for assigning to dials. In my case these are crop angle, vignette, geometric distortion, contrast, vibrance and again white balance.
I also assigned exposure to a dial ever since I switched to shooting Fuji (it has excellent light metering, so photos require only modest exposure adjustments).
I reserve buttons for previous/next photo, undo and paste previous. Other popular candidates would be brush, spot removal and crop.
Efficiency using Palette
…And now we come to the real kicker. You may think that some practice is necessary to properly use the Palette, and you’d probably be right.
However, I actually measured my performance just before and after getting Palette with a stopwatch on a sample of 700 shots. It turns out that the very first time I used it I was 2.5 times more efficient! Using the Palette is so natural that you’ll feel right at home after a very short time.
Not only that, but I found myself editing the photos in even more detail since all the usual functions are so accessible. It also needs to be said that you can perform multiple edits at the same time (which is kind of mind-bending to watch yourself do)!
For really problematic shots I always reach for exposure and WB simultaneously and finish the edit in half the time.
Drawbacks of using Palette
So everything is rosy-perfect, right? Not quite.
My biggest grievance is with the dial build quality. While all the modules have premium looks, feel amazingly robust in their aluminium casings and their magnetic linking works perfectly, the dial mechanism by itself leaves a lot to be desired.
Out of 12 dials I own, there’s only one which rotates as it should! The rest of them exhibit tilted rotation axes, slight wobbliness and/or precession when rotating. They just don’t feel robust or reliable.
You quickly forget about this while editing though since they still offer precise control despite the build issues, but it’s not the feeling you imagined when paying the not-insignificant price of the professional kit.
I contacted the support to sort this out, which brings us to the next drawback.
Support I’ve gotten from Palette Gear is a (very) mixed bag. It took me months of unanswered emails (to various addresses) until I decided to post publicly and talk about dials on their Facebook page. At that point someone reached out to me and sent me a new set of dials free of charge.
This was very nice of them, but I can’t help but feel I’d be ignored forever if I hadn’t called them out publicly.
In a pretty ironic twist, all the new dials had the exact same problems. Even so, it was a really nice gesture on their part and it solved my main concern: a dial dying on me in the middle of the wedding season without a replacement ready, so I let it go.
I am willing to ascribe these dial build and support issues to teething problems of a fresh startup that’s doing amazing things in changing the way we interact with our applications. Hopefully next revisions of the controller will have sturdier rotation axes.
Generally, the rest of the Palette controls are solidly built, the packaging is amazing and everything works as advertised.
Conclusion
The Palette Gear products are somewhat expensive and the dials are a bit wonky, but the amount of time it saves and the amount of fun it affords while editing make it a must-have for serious photographers.
If you want more time away from your computer while delivering even better images, I can’t recommend the Palette enough. It will pay for itself sooner than you realize.
Guest review by Croatia Wedding Photographer Matija Kljunak | www.matijakljunakweddings.com