


12 Essential Photography Tips & Techniques
Stick to the essentials with these 12 top photography techniques that will improve your skills as a photographer in 2024. (Easy to follow guide for beginners.)
Learn | Photography Guides | By Ana Mireles
If you love taking photos and want to continue improving in 2024, this article on photography techniques is a must-read!
We’ll reveal 12 essential photography tips for beginners that will help you improve your images regardless of what equipment you own.
Whether you’re just getting started in digital photography or need some new inspiration, have a play around with these new techniques and level up your skills today.
Let’s get stuck in!
1. Less is more

Credit: Wendy Wei
You’ve probably heard about this advice for minimalist photography, but it’s actually good practice for all photographers.
Think about someone who talks too much; at some point, you lose interest and stop listening – the same can happen with visual information! When your image is too busy, you won’t be able to communicate the message.
For example, if you’re doing street photography, you wouldn’t want to just shoot at a random crowd. It’s better to identify an interesting subject or element in the scene and focus on that one thing.
Instead, if you’re doing portrait photography, look for a solid color or a neutral background to make the subject stand out.
If it’s not possible to do that, then blur the background by narrowing the depth of field…. or blur the background using Lightroom after the fact.
Reducing the amount of visual clutter in your images is one of those photography techniques that sounds simple enough, but actually requires dedicated practice to pull off well.
2. Try different angles

Credit: Anna Shvets
One of the biggest mistakes as a beginner is to photograph everything at eye level. When you do this, you’ll never find anything original or surprising because it’s the way we all see it all the time.
Moving around and finding a different position shows a different angle of a given object and changes the perspective and composition of your picture.
For example, you can crouch and photograph from a lower level tilting up the camera. When it’s a subtle change, it’s known as low level. When you go all the way down to the floor, it’s known as worm’s eye view.
In the opposite direction, you can photograph your subject from a high level. This is commonly used for children or pets because it makes their eyes look bigger. If you go really high up, it’s known as the bird’s eye view.
A type of high-level angle often used for food photography or still life is called a flat-lay. In this case, the camera is parallel to the composition. You can learn more about flat-lay photography here.
Another fun one is the Dutch angle. To do this, you should tilt your camera sideways – to have the horizon in a diagonal. Try experimenting with all of them.
3. Improve your composition

Credit: Jimmy Chan
Learning composition is essential to every type of photography – and it’s great because you can do it with any camera; you don’t need one with manual modes or interchangeable lenses.
It doesn’t matter if you’re using a camera phone, a toy camera, or the most expensive full-frame on the market. You can always improve your photography by mastering composition.
This refers to the way you place the objects inside the frame. It might sound like nothing, but it can be the difference between a scroll-stopping photo and a meh-photo.
The first composition rule every photographer learns is the rule of thirds. It states that you should divide your frame into nine equal sections tracing two vertical lines and two horizontal ones.
Then, you need to place the most important subjects where the lines intersect. Most cameras and smartphones have a grid with the rule of thirds.
There are many other composition rules aside from that one. Some of them even contradict each other – that’s why it’s more accurate to call them guidelines. So, take it slow and learn which ones work best for your style and your subjects.
4. Step out of auto-mode

Credit: Artem Beliaikin
Take control of your camera to achieve the results that you want. When you shoot in auto-mode, you’re letting the camera decide everything for you.
How Much Do You REALLY Know About Photography?! 🤔
Test your photography knowledge with this quick quiz!
See how much you really know about photography...

Yes, it will probably get correct exposure (on average – not contrasted situations). Still, you won’t know how it happened, and you won’t be able to reproduce it or modify it to give it your personal style.
Jumping from Auto to Manual can be very difficult, so try using the semi-automatic modes to make the transition easier.
The aperture will define how much of your image is in focus – this is called depth of field. Use the aperture priority mode to master this camera setting before moving on to the next.
The shutter speed has an impact on moving subjects. With it, you can either freeze something or capture a motion blur. Use shutter priority mode to practice without having to worry about the other settings, and you should also read our guide on what shutter speed will blur motion.
You should also learn about the exposure modes for high contrast scenes or specific lighting techniques such as high key and low key.
5. Don’t underestimate the ISO

Credit: Edward Eyer
The ISO is the most ignored setting from the exposure triangle. When there’s enough light, it’s easy to forget it exists, even if you left it in a high number on a previous photoshoot. If instead, it’s dark, people tend to crank it up to the camera’s maximum value. Both of these things are bad practice.
The ISO determines how sensitive is the sensor on your digital camera. This gives you a lot of flexibility to shoot under very different light conditions. However, like anything else you adjust, it will have an impact on the final result. In this case, it will add digital noise.
The ISO should be at the lowest possible value. When there’s enough light to control the exposure with the shutter speed and the aperture, you should keep it at 50, 100 or 200 – depending on your camera.
Although, you shouldn’t be afraid to raise the value if you have to. For example, in night photography. Manufacturers have increased the sensors’ sensitivity amazingly; this doesn’t mean that you’ll get a high-quality image using such high ISO values.
(You can also use specialist software for reducing noise in images.)
Do some trials using your camera to determine how far you can go with an acceptable result.
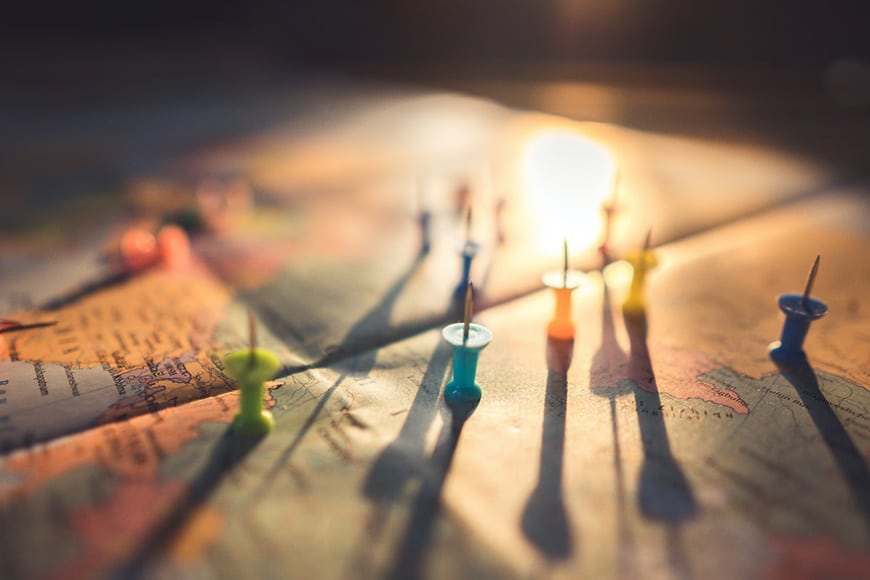
6. Accessorize

Credit: Pixabay
Buying newer and more expensive equipment won’t make you a better photographer. Instead, if you have the budget for it, start buying some camera accessories that are much more likely to help you improve as a beginner photographer.
Filters are an important part of the photographic gear. Many people think that by having Photoshop, you don’t need to use lens filters anymore – that’s not true. For example, a neutral density filter is key for doing long exposure photography during the day. There’s a huge variety of filters for different effects and circumstances.
A flash unit is another accessory worth having. With it, you can photograph in darker situations; or you can use it as a fill light.
(If you think you can do that already with the pop-up flash on your camera, let me give you an extra tip: avoid using any built-in flashes of your camera or smartphone.)
7. Start using a tripod
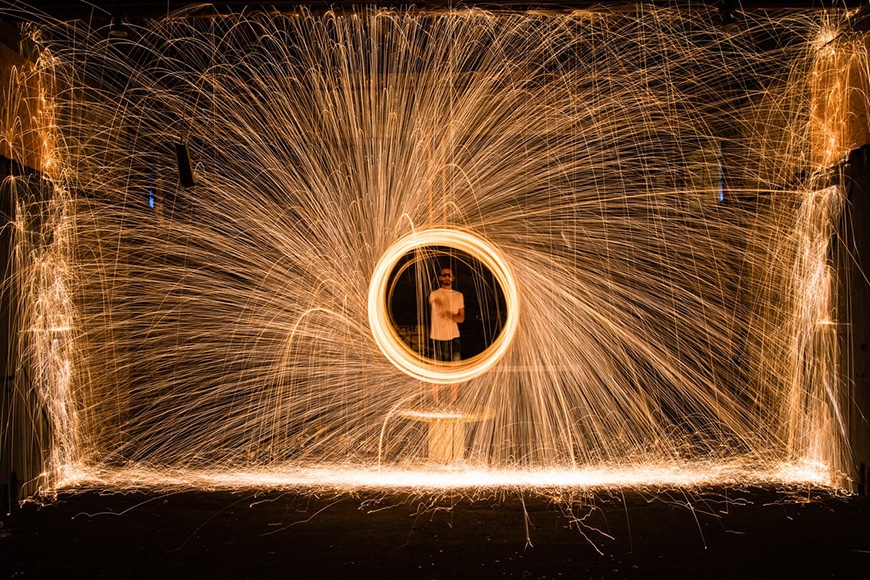
Credit: Ioannis Ritos
A tripod is an essential tool for any photographer. You might think it’s going to limit you because you won’t have the same freedom of movement. However, it opens up a world of possibilities.
When you use a tripod, you can do night photography without compromising with the camera setting to avoid camera shake. Also, you can do long exposure photography by using slow shutter speeds.
Another fun technique that you can try is light painting. You can do this by leaving the shutter open, and you ain’t, write, or move a source of light. See our guide to light painting here.
You also need a tripod if you want to experiment with self-portraits or to do macro photography. Overall, a tripod allows you to do different types of photography that you couldn’t do otherwise.
Plus, it will help you improve your composition and focus because you’ll have the camera steady from one picture to the next.
8. Understand light
Credit: Aksonsat Uanthoeng
Light is the raw material of photography, so understanding how it works is key. This is an extensive topic which, of course, you’re welcome to deepen. However, I’ll give you a couple of basic principles to get you started.
In photography, you need to consider the intensity of the light – in other words, how bright or dim it is. Then, consider its directionality: where is it coming from? This will tell you where are the highlights and the shadows.
The third thing that you need to analyse is the quality of light. A hard light will create strong shadows with well-defined edges. A soft light will have very light shadows that blend with the surrounding area.
Finally, consider the color temperature. Light has different colors that are measured with something called Kelvin degrees.
In the middle of the scale, there’s white-neutral light which is the one from the middle of the day. From there to one side of the scale, you’ll find warmer tones, such as the light from a table lamp – on the other side; there are cool colors like the ones from an overcast sky.
To control this, you use the White Balance in your camera or post-production.
9. Experiment
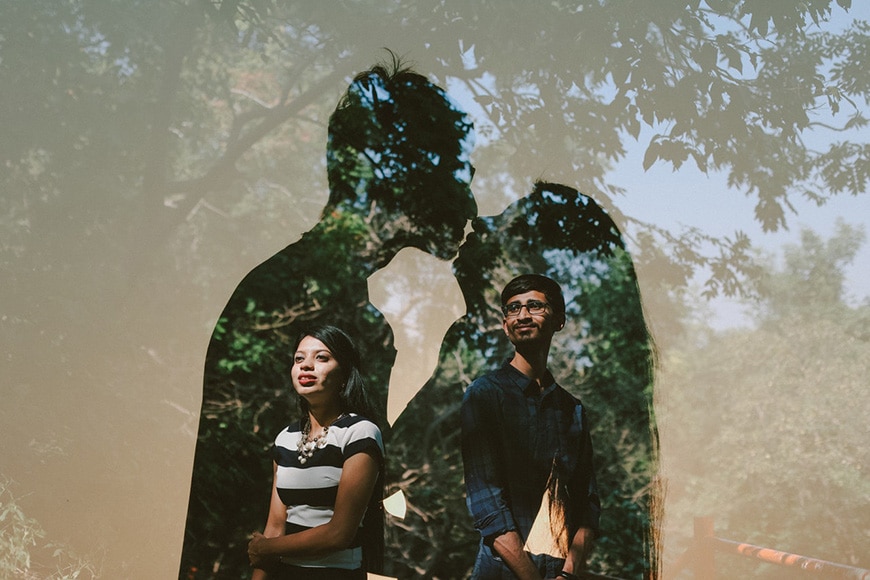
Credit: Krishna Studio
Once you get to know your camera and feel comfortable with certain types of photography, start experimenting. There’s no better way to grow than trying new photography techniques or a different style than the one you’re used to.
It’s also great fun – take the photography technique known as double exposures, such as in the image above. Most modern cameras allow you to do this, and it can produce effects that will leave the viewer scratching their heads in amazement!
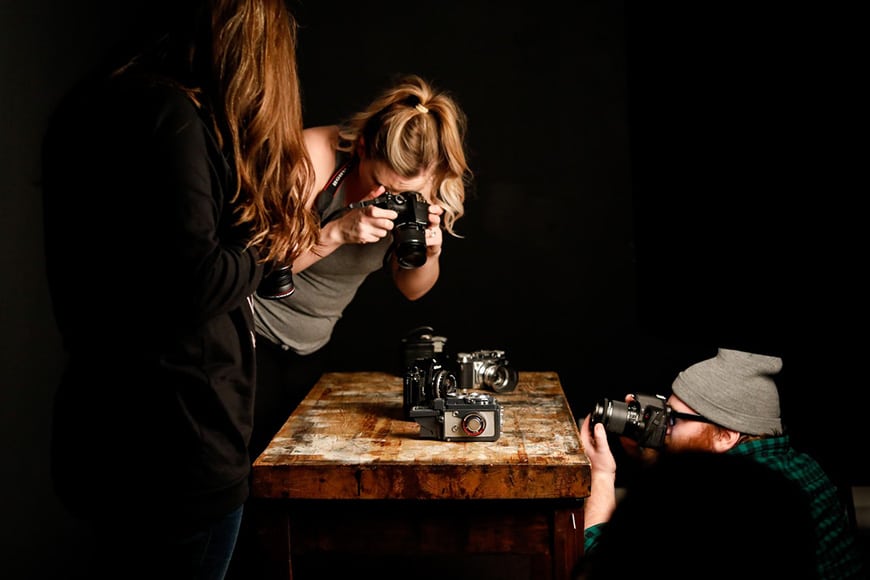
10. Learn post-processing

Credit: Isaac Pollock
Before digital photography, there was film photography. After you took the pictures, you needed to develop the film and print the photos. You could do it by yourself, or you could send it to a lab.
Learning to work your image in post-production is like learning to develop your own film and print your own images – it gives you control of the full process.
You can edit your images to make the necessary adjustments to finish up your photo, or you can get into the creative process and do photo composites or otherwise alter the original shot.
A piece of extra advice here: you should always shoot in RAW – if your camera supports it. This will keep extra information to give you more flexibility when you edit.
The best photo editing software also allows you to stay on top of your photo storage and organization – here’s a great guide on how to organize your digital photos.
11. Keep yourself inspired

Credit: Adrianna Calvo
Knowing how to shoot is different from knowing what to shoot. Sometimes it’s difficult to get out of a creative block or start a project.
Especially when you start to learn the rules and techniques in photography, it can be difficult. You were used to carrying around your camera and shoot everything that captured your eye.
Now, you possibly overthink everything because you’re focusing on composition, concept, settings, and so on.
Searching for inspiration in other photographers is always a good way to overcome these creative dry spells. Attend exhibitions, browse photography books, and of course, keep reading everything online to do with digital photography.
12. Practice
Credit: Jordan Benton
The most important tip of all is to practice. As much as reading, watching tutorials, going to photography schools and attending webinars can help you – there’s nothing like actually taking the photo and learn from the errors and success.
You can know all the photography techniques known to man, but if you don’t put them into practice, you’ll never be able to execute them well.
The beauty of digital photography is that you often have unlimited chances to get a shot – if you mess something up, simply take another photo. It doesn’t cost anything, other than your time!
From slow shutter speed photography to high-speed photography, experimenting with a different focal length, motion blur, long exposure and everything in between, get your camera out and simply start taking photos!
Final Words
I hope you liked these photography tips and you’re ready to take the next step.
If you have any questions or find any more photography tricks you’d like to share, we’d love to hear from you.

Check out these 8 essential tools to help you succeed as a professional photographer.
Includes limited-time discounts.
 22 Essential Photography Composition Techniques for Better Photos
 122 Photography Tricks & Camera Special Effects to Try Today
 Guide to Shutter Speed for Beginners
 Mastering Fast Shutter Speed in Photography
 Guide to Slow Shutter Speed Photography
 Guide to the Camera Shutter (Function, Types & More)

Ana Mireles is a Mexican researcher that specializes in photography and communications for the arts and culture sector.


