


How to become a professional photographer
We interviewed professional photographers from various genres to put together this ultimate guide to becoming a successful professional photographer.
Learn | Photography Guides | By Mark Condon | Last Updated: March 19, 2024
By the end of this guide, you’ll know how to become a professional photographer in any genre in 2024.
I’ve been a professional wedding photographer since 2012.
I’ve also shot portraits, events, real estate and lifestyle photography professionally too.
The thing is, once you can charge money for one specific type of photography, it’s relatively easy to apply the skills to other varieties of photography work too.
In this article, you’ll learn the key things you’ll need to do to become a professional photographer who can handle most tasks.
If you’re more interested in earning money via a specific type of professional photography, make sure to scroll down as I’ve included tips and insights from various other pro photographers too.
This article is ever-evolving – when I come across new tips, I’ll update it, so be sure to bookmark it and share it with a friend who wants to become a pro too.
One last thing I should add – becoming a professional photographer can allow you to create a great lifestyle.
I’ve travelled around the world shooting weddings, earning a decent living and making people happy.
Whatever genre of professional photography you choose to focus on, stick at it!
With that, let’s look at the tips.
17 Tips to Become a Professional Photographer in 2024
- Master the basics: You need a solid understanding of photography fundamentals such as composition, lighting, exposure, and post-processing techniques. Familiarize yourself with different camera settings and equipment.
- Invest in quality gear: While a great photograph can be taken with any camera, having a good-quality camera and lenses suited to your desired genre of photography can significantly enhance your work. Research and invest in the appropriate equipment for your needs and budget. Rent it if you need to. You’ll also need backups of every main item for professional photography assignments – yes, that means 2 cameras!
- Practice regularly: The key to improving your photography skills is to practice consistently. Take your camera wherever you go and make it a habit to capture images regularly. Experiment with different techniques, subjects, and lighting conditions to expand your capabilities.
- Study the work of others: Look for inspiration in the work of other photographers you admire. Study their portfolios, understand their techniques, and analyze what makes their images stand out. This can help you develop your own unique style before turning professional.
- Take courses and workshops: Consider enrolling in online photography courses or attending workshops for photographers to learn from professionals in the field. These opportunities can provide valuable insights, hands-on experience, and networking opportunities.
- Build a diverse portfolio: As you practice and refine your skills, curate a photography portfolio that showcases your best work. Aim to include a variety of subjects and genres to demonstrate your versatility and range as a photographer.
- Find your niche: While it’s important to have a broad foundation in photography, specializing in a particular genre or style can help you stand out. Determine your area of interest—such as landscape, portrait, wedding, fashion, wildlife, or documentary photography—and focus on developing expertise in that field.
- Offer free or discounted services: This tip is a polarizing one, but it helped me get my first paid photography gigs, which is why I’m including it. As you’re starting out, consider offering your photography services for free or at a discounted rate to gain experience and build your portfolio. This can be done by volunteering for events, reaching out to local businesses or nonprofits, or offering your services to friends and acquaintances. Just make sure to communicate your intentions and set clear expectations.
- Network and collaborate: Engage with other photographers, join photography groups, and participate in local events. Networking can lead to collaborations, mentorship or internship opportunities, and exposure for your work. Connect with potential clients, models, and industry professionals to expand your reach.
- Develop an online presence: Create a photography website or portfolio to showcase your work online. Use social media platforms like Instagram or Facebook to share your images and engage with a wider audience. Online platforms also provide an avenue for potential clients to discover and hire you.
- Understand the business side: Being a professional photographer involves more than just taking great photos. Familiarize yourself with contracts, licensing, pricing, marketing, and copyright laws. Develop strong communication and negotiation skills to effectively interact with clients and secure paid assignments.
- Assist experienced photographers: Working as an assistant for established photographers can provide invaluable hands-on experience and insight into the industry. Assistants often learn technical skills, gain exposure to professional workflows, and build connections along the way.
- Personal projects: While client work is important, don’t forget to pursue personal projects that fuel your creativity and allow you to explore new ideas. These projects can help you push boundaries, experiment with different techniques, and showcase your unique vision.
- Develop post-processing skills: Post-processing is an essential part of digital photography. Mastering editing software like Adobe Lightroom or Photoshop can significantly enhance your images and give them a professional touch. Experiment with different editing techniques and find a style that complements your work. Consider using AI-powered software for culling pictures to save time.
- Develop your own style: While it’s important to learn from others, aim to develop your own signature style. Find ways to incorporate your personality, interests, and unique perspective into your work. This can help you stand out and attract clients who resonate with your vision.
- Create a consistent brand: Establish a consistent brand identity that reflects your style and values. From your website to your social media presence, ensure that your visual aesthetic, messaging, and tone of voice are cohesive. This helps create a memorable and professional impression.
- Build relationships with clients: Beyond delivering great photographs, focus on building strong relationships with your clients. Understand their needs, communicate effectively, and provide exceptional customer service. Satisfied clients are more likely to recommend you and hire you for future projects.
Remember, the journey to becoming a professional photographer requires persistence, dedication, and patience.
Keep refining your skills, taking on new challenges, and learning from every experience.
With time, practice, and a passion for photography, you can turn your passion into a successful profession.
Now, let’s look at some tips on how to become a professional photographer in various popular genres.
Tips & Insights from a Professional Concert Photographer

Til Jentzsch
So you want to take photos of concerts and live events and get paid for it? Sounds pretty cool to me…
Til Jentzsch has been a professional concert photographer for over 35 years. He has been on the road as a freelance music photographer since 2008.
He’s not only in front of the stage but also accompanies artists before and after their performances, documenting their everyday life.
Here are his tips for becoming a professional live event and concert photographer:
- Start in small, local clubs
Start in small, local clubs. This is the easiest way to gain experience, as you can almost always take your camera equipment with you without restrictions.
How Much Do You REALLY Know About Photography?! 🤔
Test your photography knowledge with this quick quiz!
See how much you really know about photography...

Another advantage is that you usually don’t need press accreditation for these concerts.
Just search the local paper, blogs or event sites for bands you want to photograph and you’re good to go.
- Use fast lenses
When deciding which lenses are best for concert photography, one always comes to the same conclusion: fast lenses with the smallest possible f-stops (wide open aperture).
What does that mean?
The larger the opening of the aperture (low f-number), the faster the lens and the more light can enter at a fast shutter speed and reach the sensor. The maximum aperture can be seen on the lens itself, e.g. f/1.8, f/2.8.
Why is this important?
In concert photography, you are often exposed to the situation that there is only little light, especially if you are photographing in small clubs.
Less fast lenses cannot keep up. “Compensating” with slower shutter speeds is usually not possible, because you want to “freeze” the scenes and movements on stage and in the audience, otherwise you end up with unsightly, blurred and out-of-focus pictures.
Lenses with such low f-numbers, i.e. very fast models, can be very expensive. It is therefore worth buying the “right” from the beginning, but there are exceptions.
For example, you don’t have to get a 24-70mm with f/2.8 from the start. You can easily start with a 28mm, 35mm, or 50 mm lens with f/1.8 or f/2. These lenses make it easy to get started as a concert photographer and a more than sufficient if you shoot in smaller clubs or venues.
- Use a camera with high ISO capability
Another important setting on the camera is the ISO value. ISO refers to the sensitivity of your camera sensor (for analogue film, the ASA value).
The higher the ISO setting, the less light is needed to achieve correct exposure. However, the higher the ISO, the warmer the sensor becomes, resulting in more image noise.
Due to the rather poor light situations in concert photography, ISO values of 1600 ISO or higher are necessary in order to be able to work with a reasonably low shutter speed (1/125 or faster).
- Learn the “best” camera settings for concert photography
Choosing the right camera settings is the key to great photos in concert photography. In often poor light conditions, the automatic mode does not help or is not sufficient. You have to tell the camera what to do and how to do it.
The most important settings at a glance:
Manual mode:
Short stroboscopic flashes and other very short lighting effects at the concerts unfortunately do not contribute very much to better lighting or more optimal lighting conditions. So the automatic mode can’t keep up. Shooting in manual mode is the easiest way to control your exposure and get good results.
ISO value + shutter speed:
An ISO setting from ISO 1600 is a good choice in most situations. Try to keep the light sensitivity as low as possible to avoid image noise. The shutter speed should be at least 1/125 sec. or faster. If the pictures are still too dark, you should choose a higher ISO value.
The smallest f-number of the lens:
As a general rule, always work with the largest possible aperture (low f-number). This way, not only does the largest possible amount of light hit the camera sensor, but you also get a blurred background and can thus “free up” the main subject in the foreground.
Autofocus point:
It is best to set the autofocus to the single autofocus point in the centre of the viewfinder and enlarge it to the biggest size possible. Usually, you can change the focus area, depending on your camera brand, easily by using a joystick, the touch screen or the arrow buttons.
Auto white balance:
For most indoor concerts, you can get the “right” balance with the help of auto white balance. However, there is always the rare exception where mono-colour LED lighting or mixed-source lighting is used at concerts.
Since you should shoot in RAW format anyway, you can still correct the white balance or colour temperature afterwards in such cases.
- Shoot in RAW
Shooting in “RAW” gives you the most flexibility in post-processing your concert images. With JPEG images, the settings such as saturation, contrast, sharpness, etc. are applied to your images by the internal camera processor.
These files might look initially great on the monitor of your camera or even on the computer but don’t leave much room in post-processing.
For the first concerts, JPEG is perhaps still a good compromise, as you tend to concentrate on other things and, above all, simply want to gain experience.
After the first experiences, however, one realises that it is almost a must to switch to RAW format in order to get the most out of the photos afterwards.
Most cameras offer the possibility to shoot in JPEG and RAW at the same time. If you shoot in RAW format, you can change any parameter with image editing programmes. The disadvantages, however, are that the files are much larger and you have to learn how to “develop” your digital files.
- Bonus Tip: Wear earplugs
Concerts are a noisy affair, even though the limit at most concerts is now 100 db, and sometimes even lower. Sooner or later, however, regular exposure still damages the ears, as regular noise above 80 dB leads to irreversible hearing damage.
That is why it is important to have proper earplugs if you are in the front row. If necessary, even have some fitted to your ears. This way you can enjoy the concerts and photograph the events for a long time.
It will all be new and scary at first, so just go for it and don’t get frustrated if it doesn’t work out the way you want in the beginning – that’s perfectly normal.
Soon you will master this interesting photographic topic and learn to enjoy the music and document the performance at the same time.
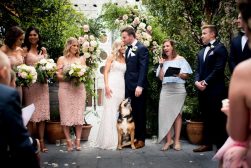
Tips & Insights from Professional Wedding Photographers
Miles Witt Boyer
Every wedding photographer has their own unique story of how they got there.
However, there’s one thing all the best and most successful wedding photographers have in common: they love what they do, and get to make a living doing it.
So, how can you get started in the world of wedding photography? To help you along, we gathered tips from two top professionals – Miles Witt Boyer and Nathan Walker.
Our first set of tips comes from Miles Witt Boyer, Arkansas-based wedding photographer, founder of the Photographic Collective, podcast host, and Fujifilm Global Ambassador.
Here are four tips from Miles – do check out his Shotkit feature to read his story in full and collect many more nuggets of wisdom.
- Be there to serve
Here’s my first little nugget of advice for you, the aspiring wedding photographer or perhaps the seasoned pro, or maybe even just the curious hobbyist: If you want to be in the service industry, you have to serve.
For me, it was learning everything I could about the traditions and history of the events I was shooting; for you, it may be something different.
But there is one thing that I know for a fact. At every single wedding I’ve been to, perhaps 90% of the people there will never see the full set of images I deliver.
They’ll never see the photography, but they will see the photographer. My composure, my tact, my attire, my relationship with the clients, and my joy will be something that will either build me a room filled with free marketing and beautiful friendships week after week or will leave a sour taste in the mouths of potentially hundreds of guests who see an anxious, dishevelled, unorganized, self-absorbed, panicked human holding the camera at their friend’s most important day.
How you act and how you hold yourself matters.
- Dress like you’re a guest
The first time I wore a suit to shoot a wedding, everything changed. I wandered through the dance floor with a camera in my hands and realized that people weren’t dancing near me; they were dancing for me. I had total access and total acceptance, and I was hooked.
From that moment on, I became obsessed with proximity, even selling off those long 70-200mm lenses and finding myself rarely shooting with anything longer than 50mm.
I had found the golden ticket into the inner circles of these amazingly beautiful days and I realized something so profound. I had spent years shooting the ripples because I wasn’t close enough to see the splash.
After that day, my photos became more cinematic, more exciting, and more dynamic. My couples brought me in as a member of their families, bridal parties included me in every moment as one of them and what had I changed? My clothes. Well – and my perspective.
- Develop your style – but keep evolving
Most of the world, and certainly most of your industry, wants to quickly ask you to niche yourself into a box. Are you bright and airy or dark and moody? Canon or Sony? Editorial or documentary? Lightroom or Capture1?
But the beauty of art is that there are a lot more than simply two colors to choose from.
You can carve your own style, your own lane, your own rabid client base filled with people who would do anything, pay anything, and change anything to simply have you at their event, but long before you can develop a style, you have to come to one simple realization: The moment you stop evolving is the very moment your business starts to suffocate.
No matter what your style is, be willing to always learn and evolve.
- Connect with other photographers
When I completely changed camera systems to one that just felt right (read more about that here), I stumbled into a beautiful truth: we are better together. Community is where creativity flourishes.
With a whole community of other photographers as well as the brand itself behind me, I learned to listen, to absorb the sheer power of another creative’s perspective. I learned maybe the most important mantra in business I could ever share with my training groups, my mentees, and my friends: “The more you give away, the more you have to give.”
- Summing up
So, here’s my advice. Serve people first. Learn to listen. Don’t take photos that other photographers take out of fear of not being as good as them.
Don’t buy gear because a social media ad makes you feel less than you are. Don’t be afraid to dress up, to dance a little, to feel the feelings of the people on the other side of your lens.
Capture from a posture of abundance, grace, and joy, and let the negativity of a world filled with too many opinions and too many insecurities fade into the background.
And perhaps most importantly, find yourself a community of like-minded people to help keep your head on straight.
Nathan Walker
Our next set of tips on becoming a wedding photographer comes from Nottingham-based wedding photographer Nathan Walker.
Check out Nathan’s Shotkit feature to read about how he went from doing a PhD in stem cell research to becoming a successful wedding photographer all in the space of a few short years!
And now, here are his 8 tips for breaking into wedding photography.
- Don’t second shoot
A lot of aspiring photographers second shoot for other photographers. But after shooting a full wedding by myself, I didn’t see the point in taking photos for someone else and then also not being able to use them for an extended period (if at all, depending on the terms of the arrangement).
I didn’t think that shooting a limited portion of a wedding day would help me to develop my style in the long run.
- Get involved in the wedding photography community
One thing that I began to miss was the office banter. When you work from home, it can feel a little isolating at times because there’s no one around to instantly bounce ideas off or just vent to.
Fortunately, I’m part of serval networks of like-minded photographers through online communities. But it doesn’t stop there: some of the groups that I’m part of meet up every few months too. It’s a great way to stay inspired.
- Choose carefully who you follow on social media
One of the hard things was stirring away from the influence of social media. When I was starting, I thought that wedding photography had to look a certain way based on the images that I would see on various platforms.
I was convinced that to be successful, I needed to create work that looked that all the other photographers that appeared successful in the social media sphere.
However, this just led me to feel continually unsatisfied because I was trying to imitate other people, and that never works out.
It took a few years to find my style, and one thing that was helpful in this was to stop following photographers whom I was constantly comparing myself to.
Also, don’t believe the ‘likes’. It can seem by a follower count for the number of like that a person is smashing it. However, the reality might be different. I don’t have a great following on social compared to others, but I know that my business is doing well regardless.
- Enter photo competitions
Entering photo competitions has helped me improve my photography and hone my style. Winning images are awarded by much more established photographers, so there’s a sense of validation that comes from winning an award.
“Is my work good? Yes because other great photographers have told me.” That can be a real confidence booster because, other than your couples who are always going to think you’re amazing, there’s not much feedback to be had about your skillfulness.
Also, exposing myself to a wide variety of different styles of wedding photography from around the world has helped me to learn more about what makes a great photo, and this has enabled me to become better at curating my photos.
- Attend wedding photography workshops
One of the best investments that I’ve made in my business is to get training from other photographers. In my old job, I did various bits of training so that I could learn new skills and improve.
Being in my own business is no different. I’ve learnt so much from being prepared to listen to photographers that I admire and putting it into practice.
After attending one particular workshop last year, I decided to make a few changes to my approach to shooting on the wedding day and work on them consistently over the season.
I can say that the results have been amazing because I can see that the work I was producing by the end of the year was much more interesting and personally satisfying than earlier in the season.
This year I will be running my own wedding photography workshop.
- Get business and sales training
As photographers, we are flying solo most of the time. We have to wear so many hats to run our business.
The single best investment that I have made in my business is to get sales training. Sales aren’t naturally what I thought about when I dreamed of becoming a photographer, but I’m running a business, and without sales, well, you know how that one goes.
I learnt how to present myself on Zoom calls and how to make it easy for people to buy from me.
- Decide what you can / and want to outsource
You don’t have to do everything yourself. Yes, there is an investment that needs to be made. But it’s not an expense if you think of the age-old ‘time is money’.
Offloading something easy for others to do, or they can do it better than you (more competent), frees you up to spend time on your business, making you more productive in the long run.
What I outsource in my business: editing, accounting, blogging weddings (just started this) and I’ve also considered social media too.
- Have a financial buffer
If you’re thinking of going full-time, it’s wise to have a financial buffer. Ask yourself how much money you need to cover your outgoings each month and then multiply that by a period of 6-12 months.
This will provide your security net if the work doesn’t come in as readily as you need it to cover your first year in business.
How to Become a Professional Corporate Photographer
Douglas Fry
Interested in shooting corporate portraits for a living? You might just meet some pretty interesting people.
“Corporate photography is often seen as the more formal, dare I suggest boring, side of photography but the opposite is true,” says seasoned corporate photographer Douglas Fry.
“I’ve met and photographed presidents, prime ministers, rock stars including the Rolling Stones and Pink Floyd and many actors and celebrities. I’ve also photographed industry leaders and CEOs of major companies.
The joy of the work is that I never know who is going to ring me next, and it’s the surprise and the variety that keeps me interested.”
Here are his tips on going pro as a corporate portrait photographer.
- Start local
I recommend starting with local companies – you’ll be surprised at how many there are. Try and arrange to go see them in person where you can show your work on a laptop or tablet during the meeting.
You’ll need a decent business card, with your own domain address, and a professionally presented website.
- Have something to show
If you’re very new to the work, initially populate your website with “corporate” portraits of friends or family members.
Produce a decent mix of clean, well-lit portraits with plain backgrounds or office/work backdrops.
Once you start getting clients, you can update your work samples with photos from real jobs.
- Learn how to work with lighting
Do not use natural light as it will always vary over the course of a shoot and all clients like a consistent look – especially if they book you the first time in summer and then again in November.
Portraits with plain backgrounds will be your “bread and butter” standard shoots but must not have a shadow behind them.
I’d recommend lots of practice with flash before your first official paid shoot because if you mess it up you won’t get a second chance.
- Own the space
Inevitably, there will be many times when the room set aside for you is too small or too dark. Again, you have to be very confident with your kit and lighting.
You have to “own” the space, making sure it’s properly lit and that you know your camera settings and where to set up your tripod before you start hitting the shutter.
- Use manual mode
Speaking of cameras, make sure it’s switched to manual – that means everything!
Consistency is paramount, especially in things like colour balance. Never go Auto on anything as the camera will make an assessment of the subject each and every time you press the shutter which means every image will vary.
I prefer manual focus for everything too, to prevent focus hunting when the subject has low contrast or in gloomy lighting.
Then practice, and practice again.
- Invest in the right lens
Funnily enough, the camera itself is less important as long as you have a good 50mm lens (ideally f/1.4 aperture).
There are good quality lenses at affordable prices, but make sure it can be set to manual, otherwise, you’ll be committing yourself to hours in post-production trying to match everything up.
- Be confident
This last tip is tricky as you can’t practice it. You will need to be confident about your own ability and confident in front of your subjects, even if they are awkward, famous or rude.
I have seen assistants almost seize up when a famous personality walks in the room, but my advice is to walk tall and fake it til you make it.
Tips & Insights from Professional Fashion Photographers
Pablo Wilson
Fancy the idea of snapping away at beautiful people wearing beautiful clothes? Then it’s time to break into the world of fashion photography.
For that, we’ve got some must-read tips from two different fashion photographers: Pablo Wilson and Kajal Krishna.
First up, six key tips from Pablo, who has shot over 150 editorials for every magazine that has existed in Chile over the last 15 years.
- Remember that it’s all about selling clothes
I firmly believe that as a fashion photographer, you’re more of an artisan than you are an artist. This means that you’re there to translate the stylist’s vision and the clothes you’re photographing into something that is aesthetically pleasing while being commercially attractive.
You need to sell the clothes! There’s no way around that.
Every choice you make should ultimately be focused on that. Model, lighting, location, focal distances, camera, developing, everything is there to make the clothes look good.
The trick is to keep this working as a fashion editorial and not a catalog. That’s when you really have to prove yourself.
The direction you give on the set is crucial. It could just be a face, a pose, your composition, or maybe a tiny detail that makes all the difference.
- Choose the right people to work with
Surround yourself with talented, selfless people. You’ll learn so much from them!
Listen to what every team member has to say; a breakthrough could come from any of them. I’ve had shoots be completely elevated by the makeup artist or the model. Anybody can have a great idea.
You lead the shoot, but you have to be a gentle leader. Let everyone do their best work and contribute. I don’t believe being in charge has to translate into being unpleasant.
- Deliver consistently, regardless of the circumstances
You have to be able to work consistently and effectively time and time again. This means being in a good mood after waking up at 5 am 5 days in a row in some exotic location to take advantage of the morning light.
Extreme temperatures, uncomfortable situations, bad models, weird clothes, annoying art directors, you name it. There are a million things that can throw you off, and you have to be ready for it.
You won’t be there again to re-shoot, so it’s just a matter of being able to manage things and get it done.
Ultimately, what your client sees is the final product, not what you went through to deliver it.
- Educate yourself
Look at other photographers’ work, watch movies, read, travel, and learn about your craft. Learn about fashion, designers, campaigns, current affairs – anything that can inform your work.
We live in a hyper-connected world, and you have to be very aware of what you are communicating with your photography. You have to be conscious about the rules you break and the ones you shouldn’t, when you should provoke, and when you’re just being disrespectful or harmful.
- Be conscious of your responsibilities
Fashion is frequently disregarded as a lesser cultural vehicle. Nevertheless, I would dare to say that more people know Claudia Schiffer and Gisele Bündchen than Noam Chomsky or Daniel Dennett… (present-day, ultra-influential philosophers).
That’s why it matters.
What you do influences people in a great way, and you have a great responsibility with that. It may not be an obvious one, but it’s there.
Be responsible, be respectful, deliver on time and always try to over deliver.
- Enjoy it!
Last but not least, enjoy your work!
We work with beautiful, talented people trying to create beautiful photos in beautiful places… That’s better than what 99.9% of people can say they do for work.
We are extremely fortunate, so enjoy and do the best work you can do!
Kajal Krishna
The next insights come from Kajal Krishna, a self-taught fashion and portrait photographer originally from New Zealand, living in Melbourne.
Says Kajal, “Before doing fashion photography I really had no idea about the elements involved in getting a great shot. Fashion and portrait photography has taught me so much about lighting and composition, styling, communication, and of course working with a team to create a shared vision.”
Here are her tips.
- Study, study, study
Self-teaching photographers have more resources available than ever (often free).
We are lucky enough to have access to videos and information from some of the best photographers and teachers in the world. YouTube has an unlimited number of videos on just about everything you can imagine.
I also recommend doing online courses. I’m currently loving some of the online courses through Domestika.
- Do it consistently
Consistency is the key when learning any new craft. I encourage you to do at least one thing photography related a day – whether this be doing a photography walk, spending 30 minutes working on a course, or looking at and reviewing inspirational images or learning about posing or tutorials on lighting.
If you can’t dedicate yourself to it daily, at least create a sustainable plan for you to do something regularly.
- Get out there and just shoot
If you’re new to photography in general, get out there and shoot as much as possible, anything and everything.
You may not think that shooting a flower or a building will help you with fashion, but it will allow you to see light, shapes and colour around you; this can be applied practically to fashion photography.
- Seek out inspiration
Look at images, whether in magazines or online.
However, inspiration doesn’t always need to stem from photography. It could come from film, music or any other form of art.
I encourage you to write down things or ideas that appeal to you or to use sites like Pinterest to create mood boards. This is also a great way to share ideas once you start working with models.
- Start shooting people
Enlist anyone that will let you photograph them. Get comfortable with having someone in your frame. It helps if you have a friend or someone who is comfortable in front of the camera.
Keep a record of poses on your phone, so you can direct your model if you need to. It’s very easy to get overwhelmed if you haven’t prepared.
There are a number of Facebook groups that hold portrait meet-ups. This is a great opportunity to pick up tips from fellow photographers as well as having an opportunity to photograph models.
There are other groups on Facebook where you can advertise for a model in exchange for your photographs. This is known as TFP (Time for Prints) – it’s a great way for beginner photographers and beginner models to team up.
You get an opportunity to take some images, and they get an opportunity to practice modelling as well as some images for their portfolio – a win-win. Do a Facebook search for these groups in your local area.
- Learn about lighting
The word photography translated means light drawing. Your camera is what a paintbrush is to an artist.
Second to knowing how to use your camera is your knowledge of light.
Lighting is one of the most important elements in producing a beautiful image. When shooting a model in natural light, move them around and see how light works on their skin, and look at the shadows the light casts.
If you’re shooting in a studio environment, it’s helpful to have at least a basic understanding of the inverse square law. I’ve found the photographer Lindsay Adler does very easy-to-understand tutorials on lighting.
- Go your own way
Your photography journey is yours and yours alone, so whilst it’s important to seek inspiration, try not to compare yourself to others. This will only discourage you, especially early on.
Remember, everyone’s experience in life is different, and like with anything in life, you will only get out of it what you put in.
Happy shooting.
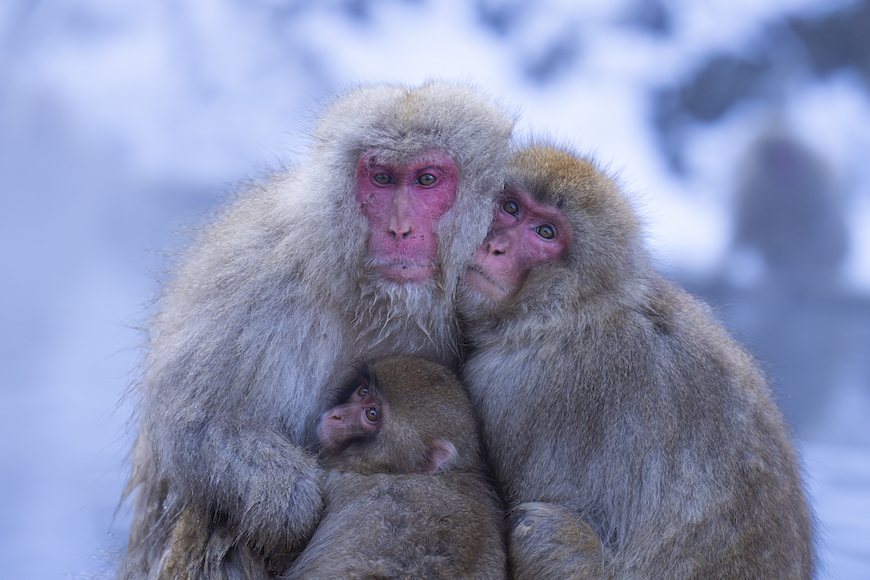
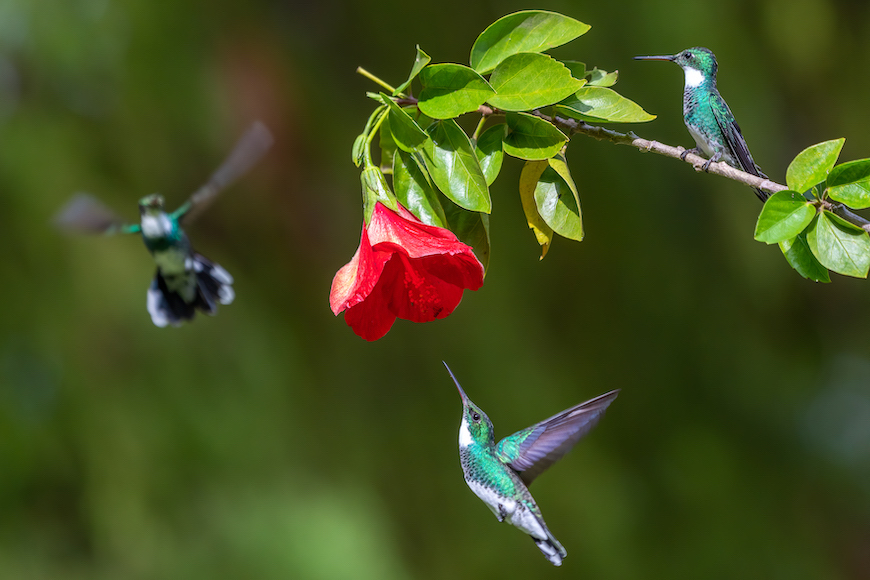
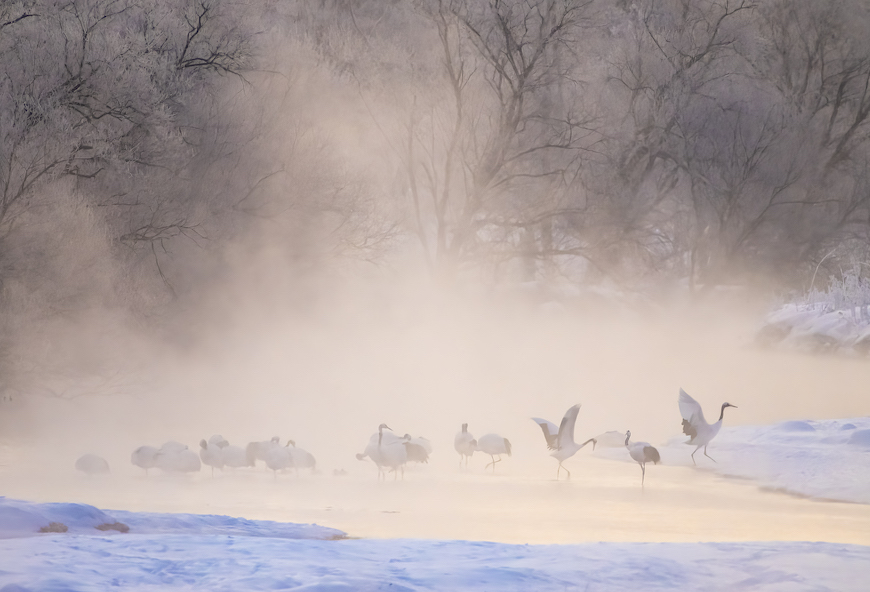
Tips & Insights from Professional Wildlife Photographers
Lucca Amorim
As a job, wildlife photography is challenging. It can even be dangerous. In spite of that (or perhaps because of it), it’s also a highly rewarding genre to get into.
Says Lucca Amorim:
Wildlife photography offers photographers the unique chance to immortalize natural phenomena, capture unseen wild animals, show the development of special conservation initiatives, and even showcase human impact to create awareness while changing mindsets.
Lucca is one of the esteemed professionals providing our tips in this section, along with Leo Cavazzana, Darran & Frazer Leal and Richard Barrett.
Yep, that’s a lot of valuable pro tips coming your way on how to break into wildlife photography, so buckle in and let’s get started.
Says Lucca Amorim, wildlife photography is perhaps one of the most demanding and challenging niches photographers can specialize in.
“Aside from having to gather extensive knowledge on each subject, photographers must also endure mentally while exerting patience to get the desired shot,” he says. “In fact, some images take months to achieve, if not years, depending on the species depicted.”
According to Lucca, becoming a wildlife photographer takes dedication, practice, knowledge, and patience. Here are his top 5 tips.
- Study and know your subject
A critical skill to have within wildlife photography is wildlife knowledge. This not only helps the photographer to identify the species’ behaviour but also provokes the photographer to look for unique moments in nature.
Escaping a narrow idea of animals in nature allows the photographer to look at their subjects on a broad canvas as they explore wider themes such as socio-ecological conflict, behaviour, or artistry.
Considering that, the best way to acquire wildlife knowledge is to pursue time in the wild. Train your eye to notice things that are not commonly noticeable, spend time observing a specific species, and learn to identify animals in their habitat.
This will open a world of possibilities, enabling you to locate subjects more efficiently while also connecting with judges, editors and agencies looking for new or exciting finds.
- Be persistent and patient
Wildlife photography is a skill that takes a lot of persistence and patience. Some photographers may spend a lifetime perfecting it until they reach the desired level.
It also may depend on luck to get the perfect shot, mainly due to wild animals being uncontrollable and, often, elusive.
So, being patient with yourself while building a portfolio, working on projects, and even creating a name as a photographer is essential.
It’s also essential to be persistent and push forward on many occasions. Some animals may take forever to be photographed in the perfect light.
However, the wildlife photographer’s job is to wake up early or work well into the night to depict a story. Therefore, putting that extra effort into a project may be the succeeding factor in a story.
- Problem-solving and adapting to different situations
Like all things in life, wildlife photography involves problem-solving and adapting. In many cases, problems are compositions that need to be developed to show the viewer an angle of the story.
Creatively, the photographer must overcome limitations and adapt to succeed in capturing a unique shot to transmit the story.
A good example of exceptional problem-solving, in this case, is the use of camera traps, remote control rigs, and even the odd camera hide.
In these scenarios, the techniques employed by the photographer will not only allow them to get a more intimate shot but also perhaps photograph something from an entirely new angle or even photograph something never seen before.
- Connect with fellow photographers and biologists
Unlike some other photography niches, wildlife photography is a very individualistic field. Sometimes this turns production days into an endurance exercise or a lonesome activity.
Nevertheless, mental health-wise, it’s a good idea to connect with fellow animal workers or industry colleagues to mix things up and keep you motivated.
One of the most significant benefits of connecting with other people interested in the same area is exploring projects together or working for someone doing an ongoing initiative.
This is crucial as it can lead the photographer into more paid roles and establish a path forward while building the initial steps of a photographic career.
- Follow your passion and be creative
A wildlife photographer’s most significant source of inspiration is passion and responsibility towards animals. This is important, as it motivates you to push through while working on challenging projects.
It’s also the key to developing photographic inspiration, leading you to better compositions and gradually to producing at a higher level.
You also need to break down pre-conceived ideas, photographic rules, and barriers while producing. Follow your own rules and explore themes in your own way.
What makes your vision unique apart from everyone else’s? That’s the central question behind every wildlife photographer’s portfolio and identity within the industry.
Nevertheless, it’s easier to develop something unique and different once the photographer focuses on expanding their work rather than following the work of others.
- Enjoy the moments
Lastly, remember to have fun and enjoy the small moments. Wild animals are amazing to encounter and even more fantastic to observe. All of them are unique in their own way and represent our natural companions on earth, which sustain the ecological balance of things while enabling all life on our planet.
Wildlife photographers are lucky as we not only get to witness some of the most significant moments in natural history but also to capture them through our lenses.
Follow Lucca on Instagram or visit his website.
Leo Cavazzana
“One thing I’ve come to learn about wildlife photography is that you either do it because you absolutely love it, or you just don’t do it at all,” says Leo Cavazzana (@leocavazzana).
As a wildlife photographer for the past seven years, he’s built projects for the UN, NatGeo, BBC, private reserves around the planet and various conservation initiatives.
Here are 5 tips from Leo.
- Volunteer and gain experience
The road to making a living out of wildlife photography is often blurry, and the efforts to take stunning photographs of animals are often unrewarded. That’s why it’s so fulfilling when we actually make it.
For me personally, wildlife is the very reason I started photography.
I’ve always been passionate about our natural planet ever since I was a kid, and being raised in the countryside, watching animals has always been something I was naturally drawn to. Now, I knew I loved photographing animals, but I needed access to the places animals live and to somehow make a living out of it.
I started volunteering at any conservation organization that would have me. I would expect nothing in return other than food and a place to sleep. In exchange, I would create all the photographs and videos they needed. That gave me access to wildlife, allowed me to learn and gain experience and built my own portfolio. I did that in Asia and Scandinavia until I eventually made my way to Africa and South America, when everything clicked and things started gaining momentum.
So, don’t be afraid to volunteer your services. Volunteering can give you the start you need to get that initial experience.
- Build relationships and network
As well as volunteering, you need to build relationships and create networks that can support your professional efforts.
After gaining some experience, I was accepted by my first Rhino-protecting organization in Namibia, and from there, I built relationships with NatGeo, the UN and other private reserves. That kept my job rolling and I was visiting the African continent twice per semester.
So, it took a bit of hustling and being uncomfortable to make it to the point I could actually charge for what I do, but I wouldn’t have done it any different.
- Develop a deep understanding of animal behavior
Wildlife photography requires you to really know and understand your subject.
Even though we might feel comfortable with our camera in hand, the journey to learn animal behavior is never ending, for there is an infinity to be witnessed in nature.
- Be prepared and know your equipment
Photography itself can be a challenging process. Not only do we have to happen to be in the same place as wildlife, but there are several variables we don’t fully control. What is our view like? How is the light? Are the animals active? Can I get close enough without disturbing them?
90% of the time, we won’t get the pictures we dream about, but this is why it’s magical when we finally get them.
I do my best to have up-to-date camera equipment. Today I shoot with the Sony a1 and have a range of lenses. But I also do my part to always have my camera ready and set to the environment I’m shooting and to know my gear inside out.
If you know your gear like the back of your hand and keep it at the ready, you can quickly adapt to whatever comes your way.
- Be patient and follow your instincts
My tip is ultimately to follow your instinct and try to gather as much experience as possible in your first years. Do not try to rush things.
You can’t rush things with nature – all you can do it to show up and be patient. When you go out in the bush with an open heart, magical encounters are bound to happen.
Frazer Leal
Our next set of tips comes from father and son duo Darran & Frazer Leal.
Says Frazer, “My dad would say wildlife photography has changed in some areas but not others since he started as a professional over 40 years ago. He constantly tells me it’s still a tough gig to make a living in. However, you can be successful through dedication, savvy business moves and luck. Hard work can bring it all together for a successful career as a wildlife photographer.”
So, how do you become a wildlife photographer, and what are the critical steps to reaching your interests and goals? According to Frazer, anyone starting and those a bit more experienced need to consider the following:
- Have I got the right kit to do the job?
- Have I got the right skills?
- Where should I start my wildlife photography interests?
- How do I improve?
- Should I set goals or projects?
- What can give me an X-Factor to my style?
- Technology – can it help?
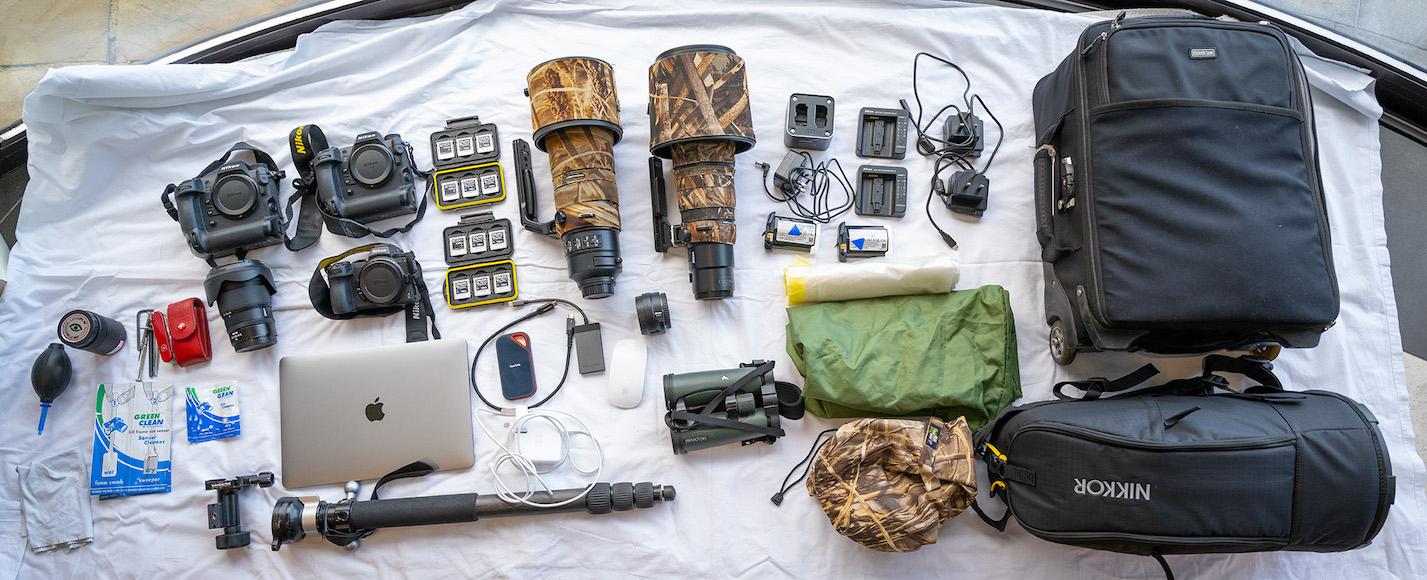
- Build your wildlife kit
This has always had variables and will still be based on a few finer points. For example, would my 200-600mm Sony lens be any good for macro Photography? The answer is no, as it offers a poor close focus (magnifying) ability.
However, the 100-400mm Sony offers a fantastic close-focus feature. I own both and use these lenses for different targeted trips. Of course, the best lens in this example would be an actual macro lens.
I use the Sony a1 body because the sensor is 51MP and offers excellent file quality. This provides a lot of information, so I can easily crop when needed. However, a smaller sensor will still allow anyone to reach their goals, if used correctly. Let’s break down a few more points to your kit.
Budget:
If you have an open budget to buy the best gear, then you have an excellent starting point for success. This is especially true with today’s unique technology. However, not everyone has a limitless budget. Another issue is that you can have the best kit, but can you “see” a great image? This is the difference between all photographers and something we cover further in X-factor.
Target subjects:
Credit: Darran Leal
Do I need a 400mm or 600mm lens? Should it be a prime lens or a zoom? Should I buy the camera brand lens or a third-party lens? This all comes down to style, preferences, budget and technique.
However, it can directly affect your targeting of a subject. Another vital point to targeting is knowing your subject. Where to find them, the best timing, and whether they are shy or secretive. We love to target a subject or opportunity as it clarifies the techniques we will use and how we will go about capturing successful images.
Weight:
I love Sony’s 200-600mm lens (2.115kg), but what if you compare it to the Sony 100-400mm (1.395kg) – which one is better for you? The 200-600mm is heavier, larger and does not offer as good a close focus feature (2.4m for the 200-600mm and .98m for the 100-400mm).
The 100-400mm is also more expensive as it has more built-in motors for speed and is a top-line GM lens. Yet we love the 200-600mm for that extra reach! So, the 100-400mm gets packed into the bag when less wildlife is offered and a lighter bag is preferred. Heading to Africa, I would take the 200-600mm.
The biggest lens in a group of photographers does not necessarily equate to the best results. For example, my dad has owned Canon and Nikon 500mm and 600mm prime lenses. He loved them, but they were so difficult to travel with and at times limited due to that fixed focal length. So, he sold them and bought a boat.
Plus, we have a couple of other great tools today that may help with limiting weight. The modern 1.4X and 2X converters work very well on both lenses.
Check out the recent example image from the famous Otowa Bridge in Japan, shot by my dad. It was taken before sunrise, with a 200-600mm lens @ 600mm with 2X converter (1200mm) on the Sony a1 camera (3200 ISO, 640th of a second at f/13). All hand-held! Then processed with Adobe Lightroom Classic and Topaz Photo AI. Is it perfect – well, maybe not, but would it look great up on the wall? You bet!
Goal: Your kit may depend on your photographic goals and what locations you want to explore. My main lens is a long telephoto for most of my wildlife work, but I also love to use a 24-70mm f/2.8 GMII lens and 70-200mm f/2.8 GMII. It depends on a few points, mainly the goal I am keen to achieve.
- Your skill level
Obviously, if you are starting out, you don’t know enough about some photography techniques and the best results for some subjects.
This can be frustrating, and for some, it leads to putting the camera in a cupboard for too long. A couple of more complex example subjects are macro and birds. On the other hand, I have seen photographers with a basic kit, at the right opportunity, shoot great images using simple techniques.
We teach KISS (Keep It Simple Shooter) techniques at our events. Dad has a great eBook to that name (in its 11th run) that we give to those joining us.
It is vital that you understand early what works and doesn’t work. I can say that if you overcomplicate your photography, it will hinder your results. Wildlife photography is a long, windy road, but you can cut across the country to reach your goals faster with KISS techniques.
I am still trying to improve my macro photography. I had a successful image used in 2021 by Sony USA. I photographed a grass head with the setting sun as a backdrop and used the Sony 70-200mm f/2.8 GMII. While this lens offers a very good close focus ability, to improve this facet of my photography, my next purchase will be the Sony 90mm macro lens.
Correct tools make the job much easier!
A recent shoot at Lamington National Park in Queensland was a challenge for even the most advanced photographer! We were photographing one of the world’s most beautiful birds, the Regent Bower Bird.
Combining simple techniques, modern equipment and trial and error led to lots of magic results. My skills were pushed to the max! I also must thank my Sony kit. So, combining skills and great tools resulted in very pleasing results.
- Starting your wildlife interests
Credit: Frazer Leal
Anywhere close to you is a great starting point to take wildlife images. Your garden can offer birds, insects and flowers. A local park or beach is always worth a walk.
Take time to explore with your camera out and ready and return a few times each month. Wildlife can be prominent and everywhere one day and offer little or nothing the next at the same location. You need to put in the time!
I spend hours in several locations at Hervey Bay in Queensland, targeting Osprey and rainbow bee-eaters. After a couple of trips, I return with very little, but then suddenly, it is full-on with fish in talons or big insects in beaks.
I have learnt so much more than a textbook can help me with by simply spending time in the field and understanding subjects’ behaviour.
- How do I improve?
The above facets are great starting points. As well as reviewing your work, reading and listening to others will help you better understand your mistakes. Just be careful what the internet offers; there are so many experts today. They might mean well, but misinformation can harm your future. Time in the field will help you to improve your photography.
While this may sound biased, I can also say that a good photo educator can leap-frog you out of problems and help you understand photography’s complexities. Nothing like a professional photo educator helping you in the field and allowing the “pennies to drop into place, on the spot.” We get great satisfaction watching the eyes open, big smiles, and then the cheers of success.
And repeat – yes, do the same subject again and again. If you enjoy a workshop or tour, do it again. Each time, the light will be different, and the angle will be different. You are guaranteed different results.
- Goals and projects
This is very important! Each Christmas, I review my years’ work and set new goals. I might even change my camera kit with a new lens, filter, or thought pattern. I will also definitely look at projects. My next project is a book of my favourite bird images. I need to start… LOL.
I wanted to be published for the first time, so I contacted the editor of Australian Photography and asked for an outline to get a cover image. I tried twice with no success, and then out of the blue months later, I was contacted – “Frazer, I like this image in your Facebook post. Can you send it to me for cover consideration?” Wow, nothing like being published!
- X-Factor
Visualisation is the X-factor of photography. You can have the most expensive camera kit, the most prominent lens and spend buckets of money on travelling to the most amazing places. Still, if you can’t visualise (see) a result, then you are doomed to take mediocre images.
I take time as often as possible with a subject to visualise, especially after a few shots. Even when shooting extreme action, I have a concept in my mind’s eye of a result. It is so satisfying when I achieve it!
- Game-changing tech
A couple of recent new tools have come on the market. They are important for every wildlife photographer.
I like to review my images on my Gigabyte 32″ monitor (well priced and good for gaming as well), taking time to sort, process and re-evaluate images.
I love my Apple 14″ MacBookPro with M1 chip. I use this as a field computer and link to the monitor as a desktop computer. This is fast, great quality and affordable!
Topaz Photo AI. This program can help cheaper lenses look sharper and upsize small files. It can even fix accidental blur. We still use Adobe Lightroom for most of our downloading, sorting and processing, but when an image comes along that is not as sharp as we’d like or cropped too much due to the subject being so far away or small, out comes Photo AI. The results are so exciting!
I know Dad is using this tool on some of his old Nikon D1X files (5.3MP) from over 20 years ago and updating them to look modern and to larger file sizes. The noise reduction is also scarily good. We now shoot 12800 ISO for sharp, no-grain results!
AI focusing is currently in the best expensive cameras. This is already starting to change, and soon all cameras will offer this amazing technology to its full potential.
The ability to lock focus on a bird’s eye, a butterfly in mid-air, or a cheetah in full flight… these are just a few examples. It can allow a beginner to shoot a competition-winning image!
I often shoot action subjects at 20-30 frames per second. The AI focus keeps up. So, often, I capture an image that I didn’t even see with the naked eye.
- Finally…
Credit: Darran Leal
I love my wildlife photography, and I know my dad still gets a buzz out of capturing an eagle on the wing with a fish or a lion on the plains of the Serengeti.
I can’t recommend highly enough that the best results come from targeting a good location, ideally at the best time, and then spending quality time there.
Combined with a good kit and the right techniques, you will only get better and better until one day, you say, “Gee, I’m happy with my photography at the moment.”
FAVOURITE BIRD SETTINGS (Set as Custom Setting 1)
- Manual Mode – 1/2000th of a second at f8
- Continuous focusing
- AI bird tracking
- Auto ISO – this limited to a preset in the camera
FAVOURITE GENERAL SETTINGS (Set as Custom Setting 2)
- Aperture Priority
- Continuous focusing
- AI tracking to subject type
- 400ISO default, happy to increase as needed. I use lower ISO settings for some waterfall/landscape shoots.
Darran & Frazer Leal offer Australian and worldwide photo adventures for small groups. From Africa to Antarctica, beginners to advanced, you can join them in the field for life-changing photography adventures.
Richard Barrett
The journey to becoming a successful wildlife photographer is not easy. You need patience, skill, and a plan of action when it comes to deciding where and when to go, and how to compose your photograph to capture wildlife in situ.
Here, Richard Barrett shares his advice to anyone looking to become a wildlife photographer and how his book Wild World: Photographing Iconic Wildlife, which shares his tips, experiences and photography advice, came about.
- Passion for photography
The first piece of advice to impart to anyone looking to become a wildlife photographer is that it’s never too late to start.
Over a decade ago, in early retirement, I revived my interest in photography and booked a photographic tour to Kenya’s Masai Mara. I have been hooked ever since.
There is undoubtedly an element of luck involved in photography, especially when the object of your attention is a living, breathing, sentient animal… prone to wandering off, turning its head, or dipping below the surface of the water with the flick of a fin at the critical moment.
Yes, not every day will go your way, but there are steps you can take; equipment you can use; and advice you can follow that will prepare you, and I hope to reward you, with an album of beautiful photographs.
There has never been a better time to be an amateur wildlife photographer. Modern digital camera equipment is superb, and for modest costs, you can buy a camera better than the top-end gear of only a few years ago. In addition, the tourist infrastructure of air travel and eco-tourism facilities has made many of the remote corners of the world accessible for the first time.
- Solo travel or photography tours
In the early days, I often booked wildlife photography tours, and I found that travelling in small groups was an education. Many of the other guests had been on previous tours and I would enjoy discovering lots of ideas for future trips from them.
Nowadays, having been fortunate enough to visit many of the world’s wildlife hotspots, I found that people would approach me with their questions, which is how my book Wild World came about.
In some instances, you can plan a solo trip to the more accessible destinations, but I always recommend that you have an experienced guide to get you to the wildlife hotspots so that you can focus on the photography.
I recommend booking all trips with a responsible and experienced operator — one who ensures that local staff are employed, tourist dollars are retained in local communities, and tourist operations are done in a sustainable manner without over-exploiting the habitat.
In this way, eco-tourism ensures that the economic gains outweigh any perceived benefits from poaching and habitat encroachment, thereby preserving the wildlife for future generations.
- Communication with your guide
Our needs as photographers differ greatly from the needs of most tourists. They normally want to get as close as possible to the animal, and unless you explain this to the driver, he will assume you want him to drive up right alongside it.
The necessary manoeuvring of the vehicle for wildlife photography requires excellent communication between you and the guide and driver. The guide needs to be really experienced, not only very familiar with the location but with a good understanding of wildlife behaviour to be able to anticipate the animal’s next move.
- Photograph composition – Elephants in Kenya and Tigers in India
Taking wildlife photos can require fast reactions and often meticulous planning. Take the challenge of capturing an elephant on camera. If you want to convey its vastness, for example, I suggest getting low to take the shot: ground-level by a waterhole is ideal, and some parks even have special semi-underground constructions for this purpose.
Another alternative that I particularly recommend is Kitirua Conservancy. This is a conservancy adjacent to Amboseli National Park in Kenya, where you are permitted to get out of the vehicle and lie low on the ground for these low camera angle shots – great for photography and certainly an exhilarating experience!
For an animal like a tiger, getting at eye level, or even a bit below, is almost always the best for photography. Looking down doesn’t often work well, as you want the photo to engage through eye contact with the subject.
On vehicle-based safaris, this can be difficult to achieve, but it’s surprising how often there’s an opportunity to position the vehicle on lower ground. With long lenses, you don’t need to be particularly close, and a bit of extra distance also helps minimise the feeling of looking down on an animal.
- When to visit Kenya to see Elephants
There is a lot of flexibility in when to visit. If you want elephants with open, relatively grass-free plains, kicking up clouds of dust, then the dry seasons are best (August, October, February-March). If you want moody, cloudy skies, then the short rainy period would be better (November). However, at this time, you do run the risk of losing some game drives due to heavy rain or impassable roads.
- Shooting in very low light
In very low light, such as dawn or twilight, it can be difficult to get a clean sharp shot.
Firstly, the lens needs to be set to its widest aperture to let in the maximum amount of light. Then, you would ideally set a fast enough shutter speed to freeze the movement of the animal and avoid camera shake while also using an ISO setting that doesn’t produce too much noise.
However, if the light is very low, you will have to compromise on both these numbers. I generally start with a high ISO and fast shutter speed just to ensure there is no camera shake and blur from the animal’s movement – an “insurance” shot if you like. But then I progressively move to slower and slower shutter speeds and hence lower (and thus less noisy) ISO settings.
In each case, I take multiple images with the motor drive, hoping that in some, the animal will be sharp. With high ISOs, the images will need careful noise reduction in post-processing.
- Taking camera gear on light aircraft
Many African safaris involve a light aircraft to fly you to the lodge or camp. They often have very strict luggage weight limits, which could result in you not being able to take all the camera gear you would like.
I recommend booking an extra ‘freight seat’ (sometimes also called a ‘child seat’), which effectively gives you a bigger weight allowance, and can be shared out between those travelling.
- High-speed hunts
When photographing any animal hunting, lens selection is crucial. You need to use a lens that you are comfortable hand-holding, one that you can swing smoothly to follow the action.
Be careful not to use too long a lens, as this will make tracking the encounter very difficult. Position the vehicle to try and get the clearest unobstructed view of the area. I find it best to put the main focus point right in the centre, and to enable tracking on the focus points adjacent to it.
I hope this advice inspires you. There are loads more tips like this in my book Wild World: Photographing Iconic Wildlife. I hope you will have the opportunity to get out there and visit these wild and wonderful places for yourself, and to take your best experiences home with you by photographing some spectacular wildlife.
Tips & Insights from a Professional Pet Photographer

Charlotte Reeves
“As well as being the spice of life, variety is also what you should be aiming to achieve in your dog photography sessions to wow your clients and increase sales,” says pro pet photographer Charlotte Reeves.
Here, she takes us through a real-life session and explains how she created variety using a wide range of different techniques.
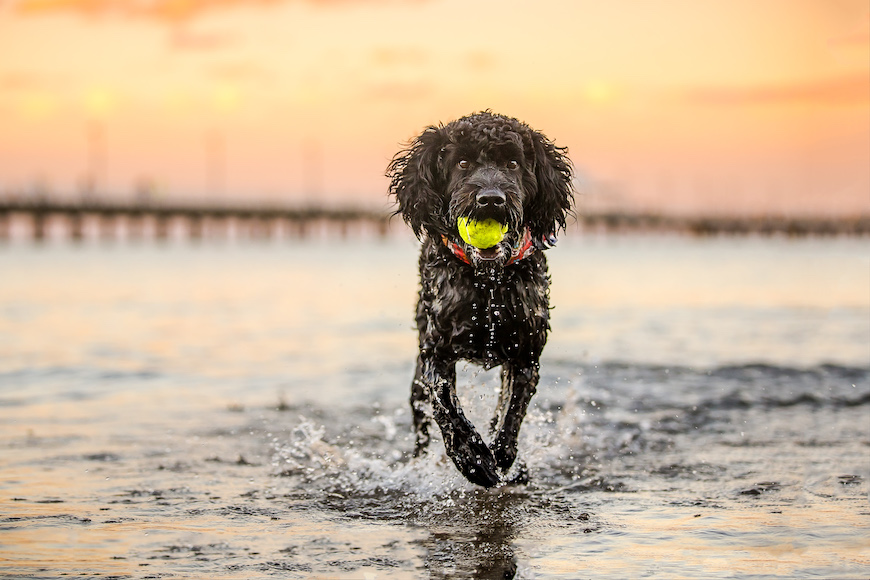
- Capture candid action
Billy’s afternoon session took place at a seaside location with a jetty, small sandy beach and a rocky headland. We started off going for a walk around the rocky headland as it was completely in open shade – so there was nice soft, even light, but it was still fairly bright.
To let Billy run off some steam, we let him off lead so he could scope out the path ahead of us. When he got far enough ahead, I had his owner call him back while I photographed him running towards us.
This can be a nice easy way of obtaining a natural action shot in an outdoor setting.
Canon EOS 1D X, Canon EF 70-200mm f/2.8L IS II @ 200mm, ISO 1000, 1/1000 sec, f/2.8
- Look down
The seaside headland where I was shooting Billy’s session has some really cool rocky features – pink and red and rose-coloured rocks – and grainy yellow coral sand.
I thought these colours in the background would work really well to offset Billy’s black fur, so I switched to my 35mm lens and set it to f/1.8 for a super shallow depth of field. This helped blur the background details.
Billy loves his tennis ball, so I grabbed it and used it to help focus his attention towards the camera, with the wide open sky behind me to help create big catchlights in his dark eyes.
I made sure I rewarded his attention by throwing the ball frequently – always remember to pay your models!
Canon EOS 1D X, Canon EF 35mm f/1.4L, ISO 500, 1/1250 sec, f/1.8
- Small scale
Changing the size of the dog in the frame is a good way to create very different-looking images in the same location.
My favourite way to do this is to shoot from a long way back, zooming in all the way with a long lens and using a shallow depth of field.
When combined with shooting from a low angle, this gives a narrow plane of focus, making the subject very sharp and the foreground and background blurry. This helps the small subject to stand out in the location.
Canon EOS 1D X, Canon EF 70-200mm f/2.8L IS II @ 200mm, ISO 800, 1/1000 sec, f/2.8
- Include the owner
One of the main reasons people shy away from being in photos with their pets is because they don’t like the idea of sitting still, looking at the camera and saying “cheese”. If you can find creative (and candid) ways to incorporate the owner, they’ll often be pleasantly surprised with the resulting images.
They may just find themselves falling in love with one of the shots that shows their special relationship with their pet.
Canon EOS 1D X, Canon EF 70-200mm f/2.8L IS II @ 130mm, ISO 640, 1/800 sec, f/2.8
- Shoot after sunset
Credit: Charlotte Reeves
Twilight is one of my favourite times to shoot, and it works best in open locations under large expanses of sky.
In the minutes after the sun goes down on a mostly clear or cloudless day, you’ll have a small window of time where the light is soft and the sky (and water below, if you’re shooting around water) comes alive with pastel colours.
You have to work very quickly, though, as depending on where you are in the world, it can be a very short amount of time.
Always plan your session so you end up in the best possible spot for the sunset. Having managed to keep Billy dry for most of the session, when the sun went down we let him loose in the water with his ball, where he splashed and ran and played to his heart’s content.
Careful exposure was necessary – I knew these would need some serious editing to bring out the detail in the dark shadows of Billy’s fur and keep the pretty pastel colours in the sky.
A fairly fast shutter speed was required to freeze the action, while a low ISO is preferable when you know you’re going to be editing heavily to retain image quality.
Canon EOS 1D X, Canon EF 70-200mm f/2.8L IS II @ 88mm, ISO 640, 1/800 sec, f/2.8
FAQs About Becoming a Professional Photographer
- How do I get started in professional photography?
To get started in professional photography, you can begin by investing in a good camera and lenses suited to your interests, learning the technical aspects of photography through online resources or workshops, practicing extensively to improve your skills, building a portfolio of your best work, and networking with other photographers or potential clients.
- What qualifications do I need to be a photographer?
There are no specific formal qualifications required to be a photographer. However, many photographers pursue education in photography or related fields to gain technical knowledge and artistic skills. Additionally, having a strong portfolio showcasing your work and experience is often more important in the photography industry.
- Do photographers make much money?
The income of photographers can vary significantly depending on various factors such as their specialization, experience, location, and client base. While some photographers may earn a substantial income, others may face more financial challenges. It’s important to consider the market demand for your type of photography and establish a solid business strategy to increase your earning potential.
- Is it hard to be a photographer?
Becoming a photographer requires dedication, creativity, and continuous learning. It can be challenging to establish yourself in a competitive industry and build a sustainable career. Success often comes from a combination of technical skills, artistic vision, marketing abilities, and perseverance. With passion and persistence, it is possible to overcome the challenges and find fulfillment as a photographer.
- How do I get into photography with no experience?
If you have no prior experience in photography, you can start by learning the fundamentals through online tutorials, books, or photography classes. Practice taking photos regularly to improve your skills and experiment with different techniques. Joining photography communities or assisting established photographers can also provide valuable learning opportunities and help you gain practical experience.
- What genre of photography makes the most money?
The genre of photography that can potentially make the most money varies depending on factors such as market demand, client base, and individual success. Some genres that often have commercial value include wedding photography, fashion photography, commercial/product photography, and corporate event photography. However, it’s important to choose a genre that aligns with your interests and skills for long-term satisfaction and success.
- Is it hard to start a photography business?
Starting a photography business can be challenging, as it requires not only photography skills but also business acumen. You need to develop a solid business plan, establish your target market, build a client base, handle finances, and market your services effectively. Additionally, you may face competition and need to differentiate yourself to attract clients. With careful planning, hard work, and a strong entrepreneurial spirit, it is possible to start a successful photography business.
- What does a professional photographer do on a daily basis?
A professional photographer’s daily activities can vary depending on their specialization and current projects. Common tasks include preparing and organizing equipment, scouting locations, conducting photoshoots, editing and retouching photos, communicating with clients, marketing and promoting their work, managing administrative tasks, and staying up-to-date with industry trends and techniques.
- Why is photography a good career?
Photography can be a fulfilling career for those who have a passion for capturing moments, expressing creativity, and telling stories through visuals. It allows you to explore various subjects and genres, work independently or with clients, and potentially travel to different locations. Photography also provides opportunities for personal and professional growth, constant learning, and the ability to create meaningful connections through visual communication.
- Can you have a career as a photographer?
Yes, it is possible to have a career as a photographer. Many individuals pursue photography as their primary source of income and establish successful businesses or work as freelancers. However, it requires dedication, continuous improvement, and a proactive approach to building a client base, marketing, and adapting to the evolving industry trends.
- Is photography a stressful career?
Like any career, photography can have its stressful aspects. Deadlines, demanding clients, irregular work hours, and the pressure to consistently produce high-quality work can contribute to stress. However, the level of stress can vary depending on individual preferences, work style, and the ability to effectively manage time and expectations. Developing good organizational skills, setting boundaries, and finding ways to balance work and personal life can help mitigate stress.
- Am I too old to be a professional photographer?
There is no age limit to pursue a career in photography. People of all ages can become professional photographers if they have the passion, drive, and willingness to learn and adapt. Experience and a unique perspective can be valuable assets in the industry, and there are opportunities for photographers at any stage of life. That said, for some forms of photography, you must be physically capable to stand on your feet all day, or keep up with your subject’s physical pusuits.
- Can an introvert become a professional photographer?
Yes, being an introvert doesn’t prevent someone from becoming a professional photographer. In fact, photography can be a suitable career for introverts as it often allows for solitary work during the creative process. While some genres of photography may require more social interaction, such as portrait photography or event coverage, there are also opportunities to specialize in areas that align with an introvert’s preferences, such as landscape, nature, or product photography. Introverts can excel in photography by leveraging their ability to observe and capture unique perspectives.

Check out these 8 essential tools to help you succeed as a professional photographer.
Includes limited-time discounts.
 Best Wedding Photography Gear
 Comprehensive Guide to Wedding Photography in 2024
 67 Best Photography Books of 2024 for All Levels
 Best Camera for Wildlife Photography to Capture Nature, Birds & Animals
 Wedding Photography Tips: How to Photograph a Wedding in 2024
 How to Master Auto ISO on All Cameras

Mark Condon is a British wedding photographer and editor of Shotkit. When he’s not taking photos or reviewing the latest camera gear and software, Mark can be found cycling around the northern rivers.


