


Guide to Reflection Photography
Using a reflective surface to create an artistic 'echo' of a scene is a great creative tool. Check out these 22 tips for reflection photography in our guide.
Learn | Photography Guides | By Ana Mireles
Shotkit may earn a commission on affiliate links. Learn more.
You’ve probably heard that photographers try to avoid reflections by using polarizing filters and such, but did you know there is something called reflection photography?
Of course, it doesn’t refer to the horrible hot spots that ruin your image; it’s about finding the beauty in mirroring reality.
Introducing reflections in photography will take you on a journey to a completely different dimension. I
n this guide, you’ll find information, ideas and examples to see the world differently.
22 Tips for Mesmerising Reflection Photography
Finding and creating reflections in photography doesn’t have to be complicated; you just need to get your imagination going. Here are some tips for you to try.
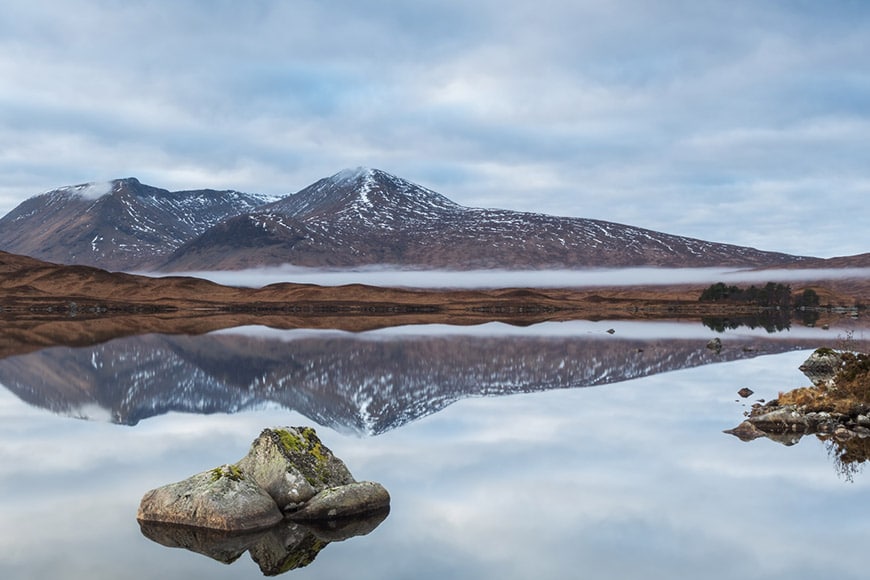
1. Use water
One of the most commonly used elements for reflection photography is a body of water. That’s because it’s easy to find and it works wonders.
You can use a lake or a river for landscape photography; a puddle or a fountain when you’re in an urban location; and even use the tub for some creative portraits.
It doesn’t matter what’s your area of expertise; water can always work out as a surface to make reflection photos.
If you’re out to create water reflections, bring a bottle with you – this way you can make a puddle wherever you need one!
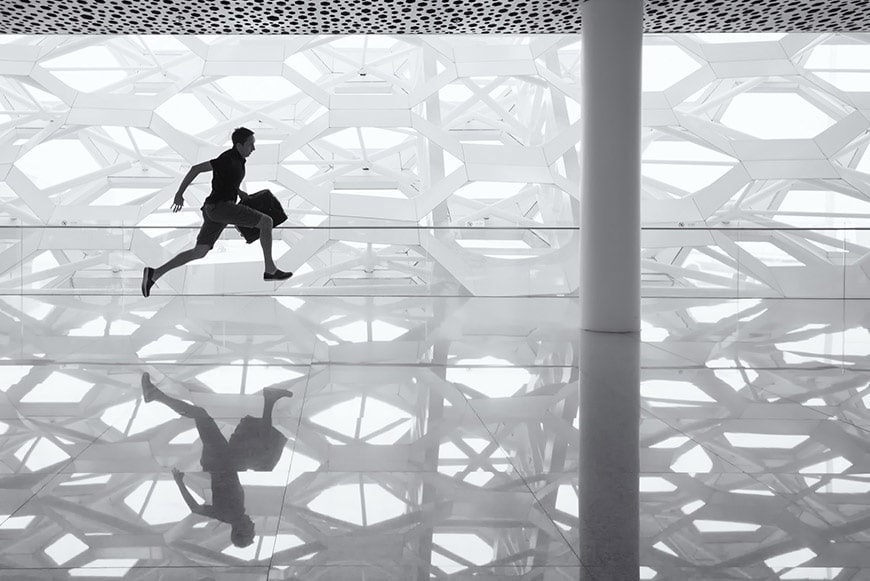
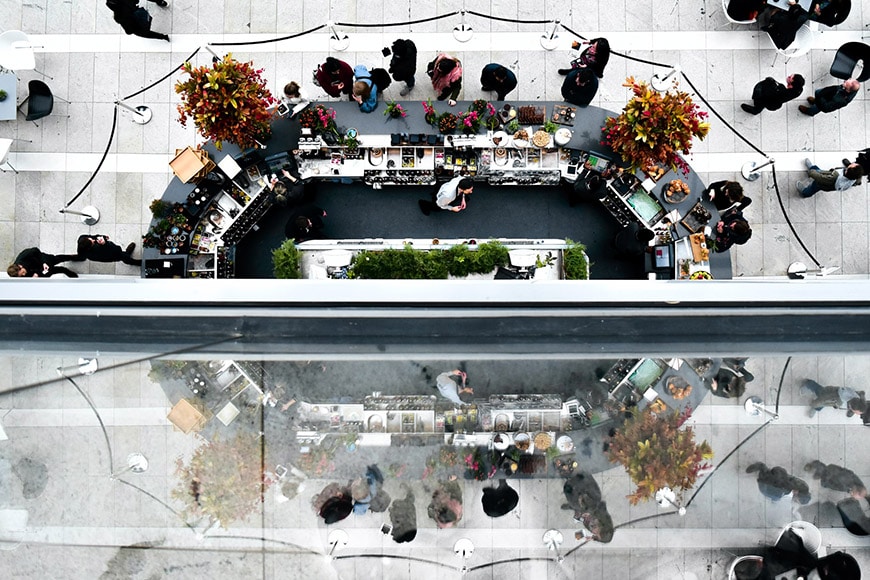
2. Glossy surfaces can be reflective
Credit: Andy Beales
When you’re planning reflection photographs, your mind immediately goes to water, crystal balls, metals and mirrors. However, there are many other materials and finishings that work well too.
Think about the floor in public buildings (i.e. an airport), the glossy countertop in your kitchen, or even your washed and polished car.
Using unexpected reflective surfaces can spark your imagination for better images.
3. Shoot through windows
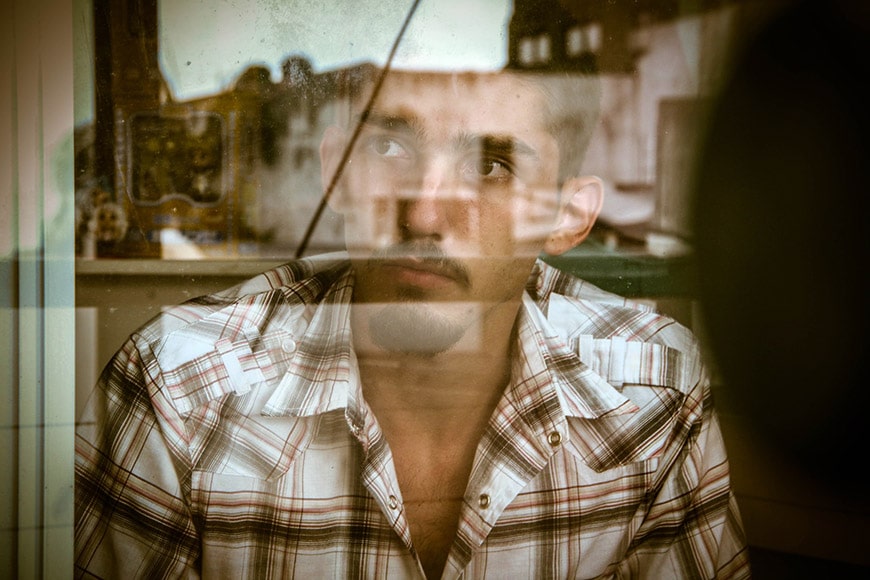
Credit: Sebastian Mena
Windows are another source for good reflection photography because glass objects are reflective surfaces.
When you photograph through a window, you’re blending the reflection with the scene from inside – this creates an effect similar to double exposure photography.
Take a walk around the neighbourhood and keep an eye out for the reflections in the windows. Make sure you’re not violating anyone’s privacy though – remember that the inside of the house or shop is private property.
You might also find this guide useful: how do you take pictures of glass without glare?
4. Composition matters
Credit: Skylar Kang
You’ve probably read this in every article about photographic tips you’ve ever seen – that’s because it is one of the most important things to make a good photo.
Deciding where you place the objects inside the frame determines how a person will look at your photo. With the composition, you’re telling the viewer where to look.
There are many different ways to compose a photo; you can use colours or shapes to achieve balance. You can also follow the rule of thirds or the golden ratio to place the subjects.
The idea is that you have a world of possibilities to express your point of view, but they have to convey the message.
5. Use ripples for abstract photography
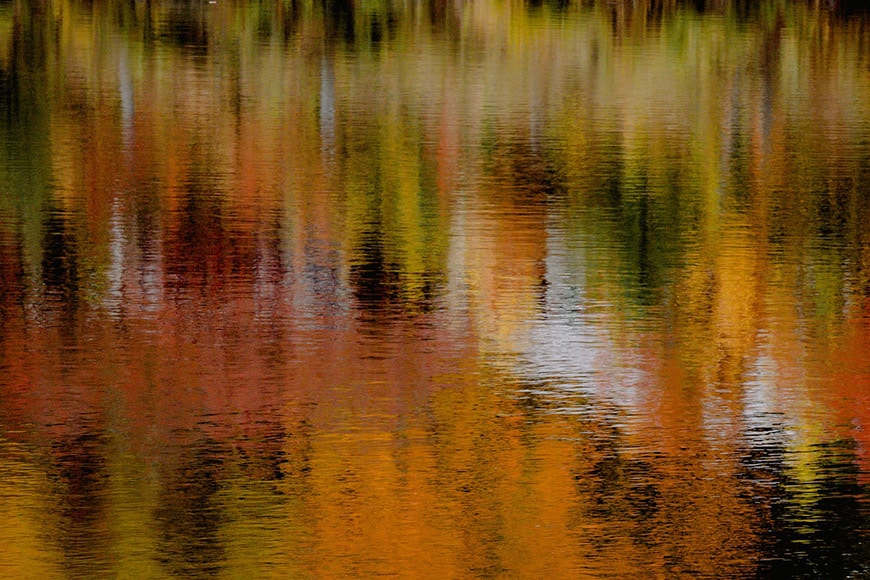
Credit: Harrison Haines
If you’re using a body of water for your reflection, you can choose between a calm surface that reflects like a mirror, or an unstable one that creates texture.
Photographing during a windy day that causes waves, or throwing a pebble in the water to make ripples are excellent ways to make creative abstracts.
Of course, you can combine the moving water with different shutter speeds to create various effects.
For example, use a slow shutter speed if you want to smooth out the water and create an impressionistic look. Otherwise, use a fast one to freeze movement and create texture.
Who are some abstract photographers to help you get inspired? Andrew S. Grey uses motion to create his images, Ola Kolehmainen turns architecture into abstract photographs, and Frances Seward works with landscapes.
6. Try different angles
Credit: Julia Sabiniarz
Good reflections are as much about the angle of view as they are about the angle of the light. Just coming back to the scene at various times of the day will give you different shots.
Also, change perspective to capture unconventional reflections. You can get lower or higher, closer or further away from the reflections, and capture it in many different ways.
7. Use a deep depth of field
Credit: Tyler Hendy
Depth of field (DoF) is the area of the photo that’s in focus. Naturally, the focus plane runs parallel to the sensor plane – unless you alter it with a tilt-shift lens like one of these. This means that everything that’s at the same distance from the sensor as your focal point, will be in focus.
Since reflections are often created on a surface that is perpendicular to the subject – for example, a standing person makes a reflection in a puddle – you need to use a deep depth of field to have both things in focus.
To widen the DoF, you can balance different factors. First, stand further away from your subject. Then, use a short focal length, as telephotos tend to narrow the DoF. Finally, use a narrow aperture such as f/8 or f/11.
You can use DoF calculators to get more precise results. Otherwise, you can experiment in the field.
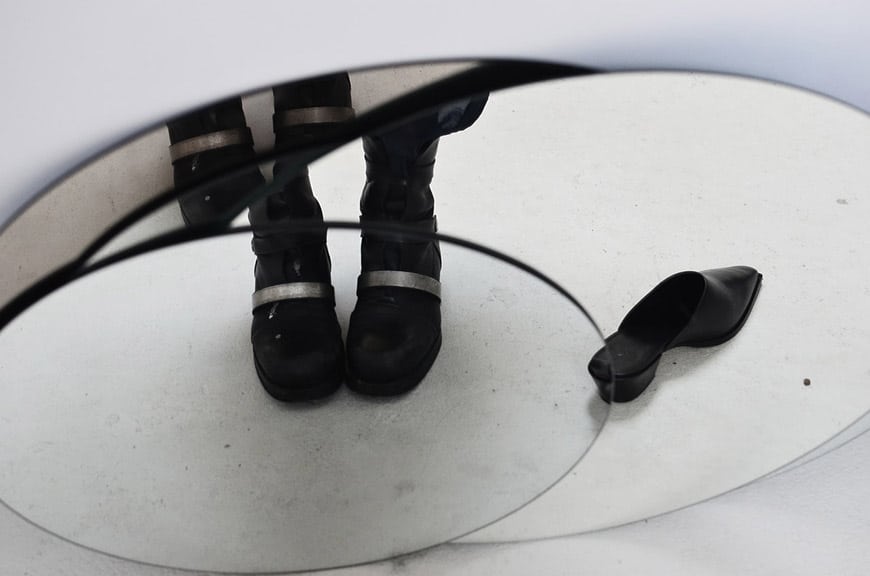
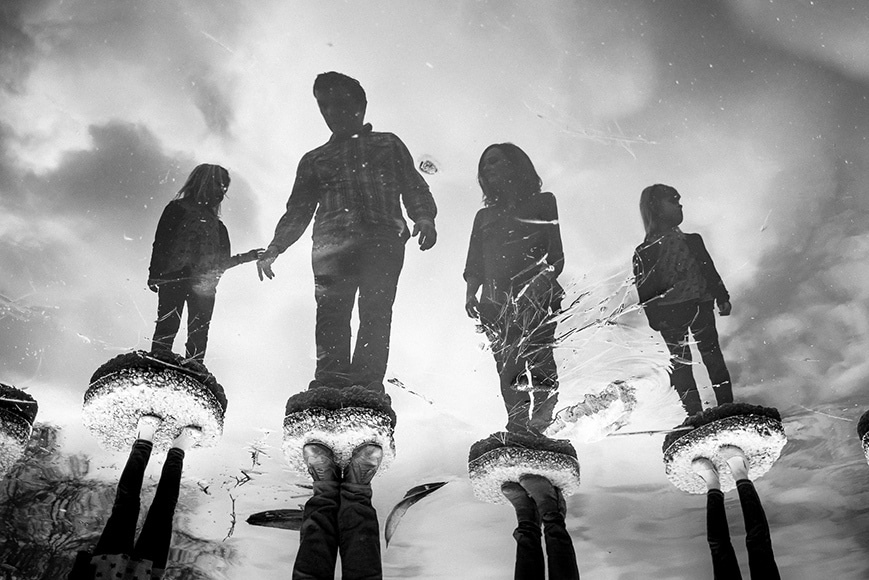
8. Capture the reflection of the invisible man for a surreal reflection
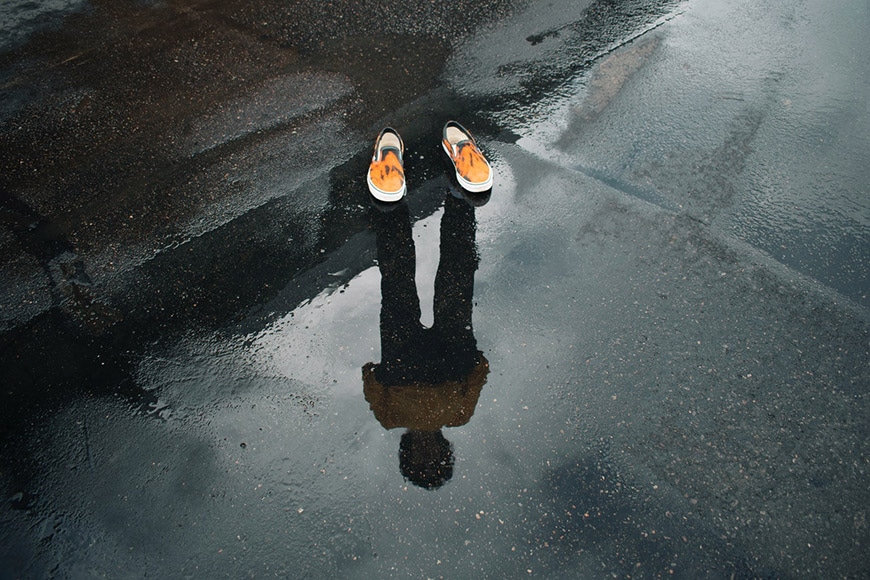
Credit: Aidan Roof
Have you seen images where you see the reflection of a person in a puddle, but on top of the puddle, there are only the shoes and not the person – like the example image I shared above.
To do this, you need to take two images and blend them in Photoshop. First, place your camera on a tripod because you need both images to be framed exactly the same.
Then, position the person and take the first photograph. Ideally, both photographs need to have the same exposure and focal point. To do that, it’s best if you have your camera in manual mode so that you can maintain the same camera settings. Also, use manual focus and set the focal point to the shoes.
Once you shoot the first image, carefully have the person step out of their shoes (or reposition them in the same point) and do a second photo.
Later in Photoshop, open both photos in the same document as separate layers – make sure the second photo is on top. They should be lined up because you used a tripod, but the shoes might need some adjustment. So, move the layer to have them match perfectly – zoom in if you have to.
Then, create a layer mask and paint black the puddle to give visibility to the puddle with the reflection from the bottom layer. That’s it, have fun making surreal reflections in puddles.
9. Turn the world upside down
Sometimes by changing one small thing, you completely change its perception. To trick the mind and make your reflection photographs more interesting, try flipping them upside down.
You can do this with the flip or rotate function in any app or editing software.
10. Night photography
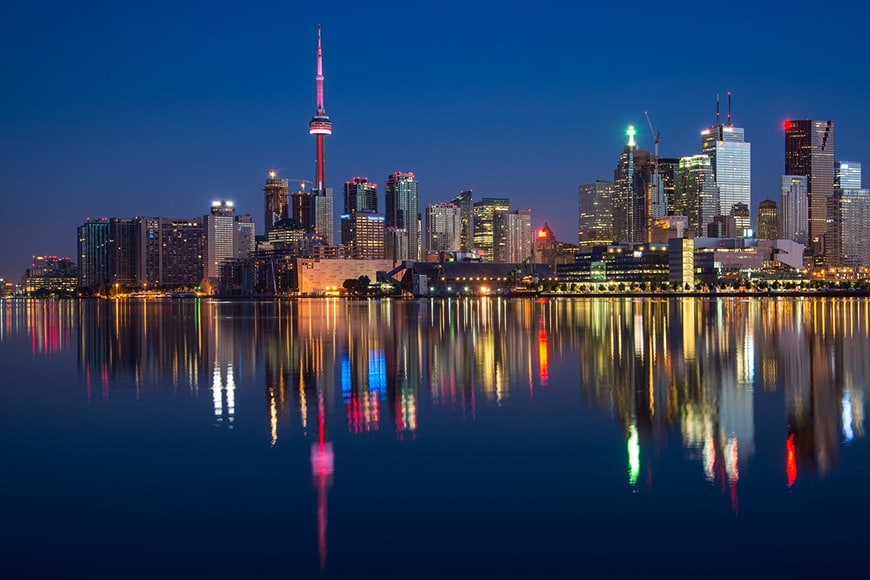
Credit: James Wheeler
If you want to create mesmerizing reflections in photography, you should definitely try to take your pictures during the night-time.
Keep into account that you’ll have to use a tripod. Photographing at night means that you have to use a slow shutter speed, especially if you have to use a small aperture to keep things in focus. That’s why you’ll need the tripod to avoid any camera shake.
As for the common question: what is the best setting for night photography?… there’s no hard and fast answer. I’d recommend experimenting in manual mode, keeping your ISO as low as possible, then slowing down your shutter speed and opening your aperture, taking test shots and reviewing them until you get your desired look.
Have a go at capturing urban scenes or skylines to photograph light reflections in puddles, fountains, windows or any other creative ideas that you can think of.
11. Use reflections in product photography

Credit: Omid Armin
Product photography can sometimes look dull because it has to be descriptive and as objective as possible. This can become a problem for your creativity and your personal style.
A creative way to enhance these types of shots is by introducing a reflection. To do this, you can place the product on a reflective surface; it can be a piece of glass on top of your normal background or use a sheet of plexiglass.
This technique is popular on the fancy webpages of modern product brands, such as Apple.
12. Make creative portrait shots
If you’re a portrait or wedding photographer, you can develop a creative style by introducing reflections into your images. Experiment with leaving the subject out of the frame and only capture their reflection.
To make a more complex composition, you can introduce the borders of the mirror or fountain that you’re using as a reflective surface; or you can place other objects to be reflected in the scene.
13. Use your phone
Credit: Carson Arias
Taking reflection photos is something you can easily do with your phone because it doesn’t require any specific gear – it’s more about the subject, the lighting and the camera angle.
Some subgenres have become particularly popular, for example photographing reflections in puddles – or #puddlegrams as they are known in social media jargon – see above for one example.
This has to do – amongst other things – with the fact that using a phone you can turn it upside down and have the camera at the lowest possible angle.
Just because you can get so low, it doesn’t mean that you have to, so instead, experiment with different angles to find the perfect reflection.
A fun tip is to use one phone to capture the photo, and a second phone to create the reflection. To do this, you need the second phone to be off, or on stand by because you need the black screen.
Then, hold it just below the lens of the camera phone you’re using to take the picture. Slowly change the angle of the second phone to find the perfect reflection.
14. Go minimal
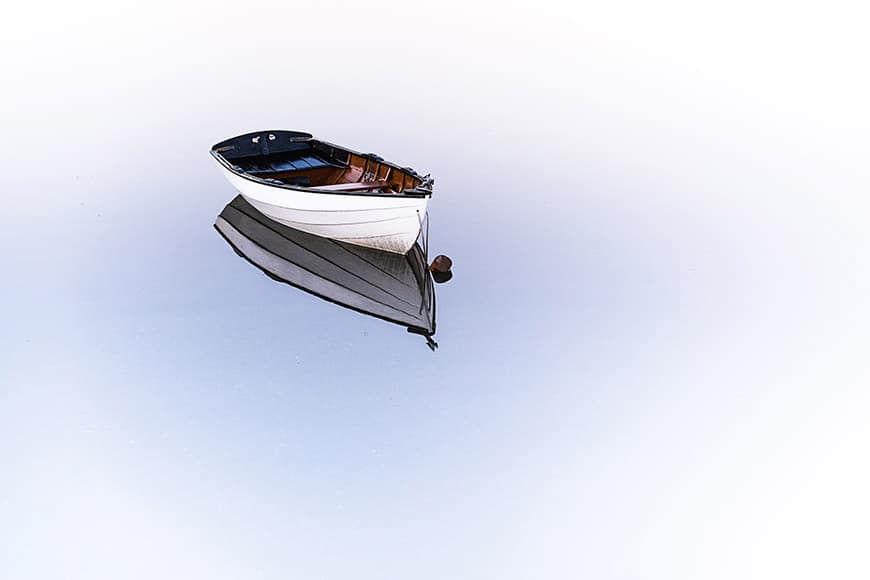
Credit: Osman Rana
Minimalism is an art movement formed in the second half of the 20th century. It was picked up by photography and aims to use the minimum necessary to communicate through the image.
The keyword in minimalist photography is simplicity. Focus on just one or two subjects and use the negative space as part of the composition to enhance it.
With the approach of ‘less is more’ you can do architecture, landscape, still-life, aerial and basically any photographic genre – including reflection photography.
If you’re looking for inspiration, look at the gallery of finalist and winners from the Minimalist Photography Awards.
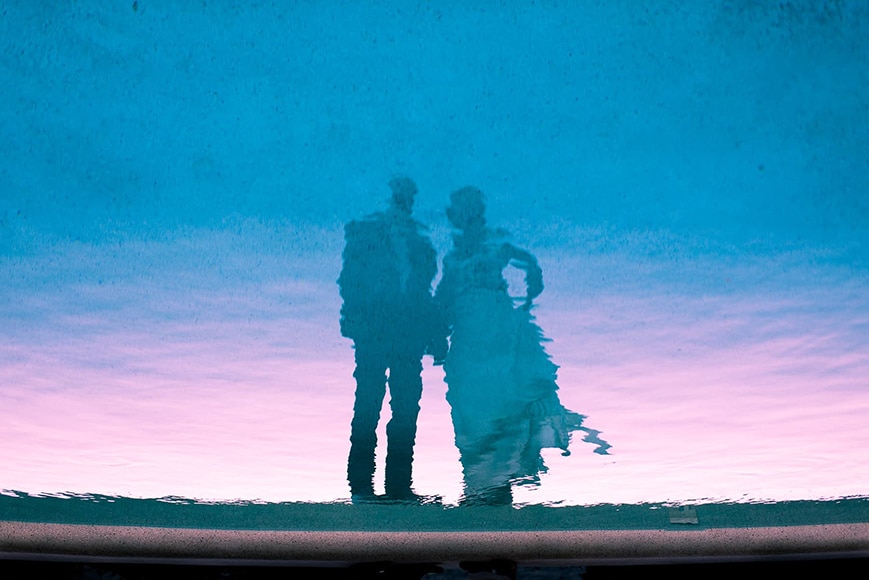
15. Photograph silhouettes
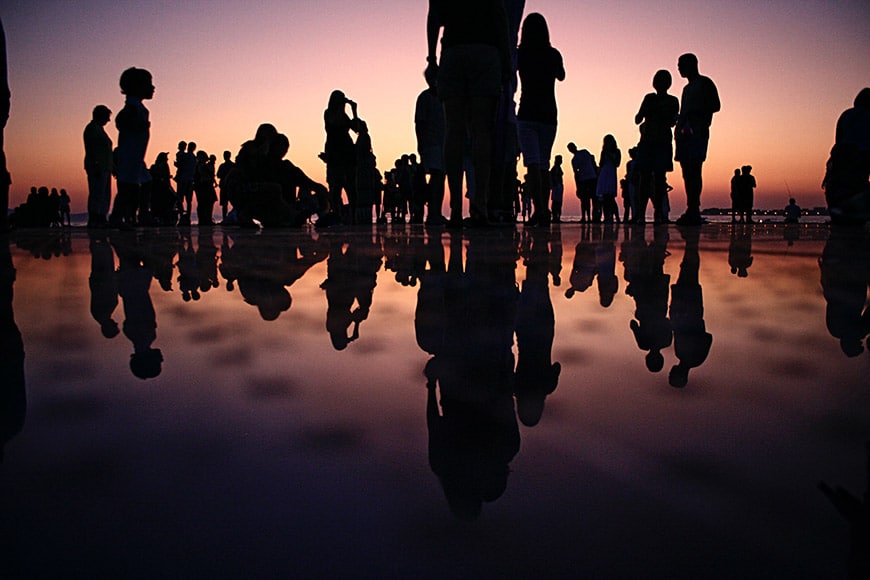
Credit: Mario Purisic
Reflection silhouette photography is done in the same way as other silhouettes photos, except that you need to have a reflective surface between the subject and you.
The first thing you need to do is shoot against the light source – typically the sun. The best time of day to take photos outside is during the golden hour because the sun will be close to the horizon and then it’s easier to have it behind your subject.
To measure the light, use spot measuring mode, this way, you can point at the background to calculate the exposure – darkening the subject. This is better achieved by using manual mode to adjust the settings.
If you’re not comfortable using manual, you can use a semi-automatic mode and adjust it using exposure compensation.
You can always tweak things in post-processing, but try to get the best possible result from the beginning.
16. Use a dark surface

Credit: Pixabay
While you can create reflection photos on any coloured background – provided it’s made with reflective material – using black gives a touch of elegance to the image.
Professional photographers commonly use sheets of black acrylic glass. However, a common hack for small objects is to use your smartphone or tablet’s black screen – it creates a good reflection.
Take into account that scratches and smudges can be very noticeable, so, clean the surface before the shots.
17. Do vertical reflections
Credit: Chuttersnap
Usually, when we think of reflections showing under the subject because we imagine a person standing in a puddle, a landscape photograph reflected in the lake, or an object placed on a reflective surface.
This means that the subject is on top and the reflection is on the bottom or the other way around if you followed the tip of flipping the photo upside down.
However, reflecting your subject from left to right (or vice versa) can create interesting effects. Try using mirrors, windows or anything metallic.
Another creative effect is to photograph a horizontal photo and then rotate it 90 degrees. This creates a scroll-stopping photo because it tricks the eye and your mind wants to understand what’s happening.
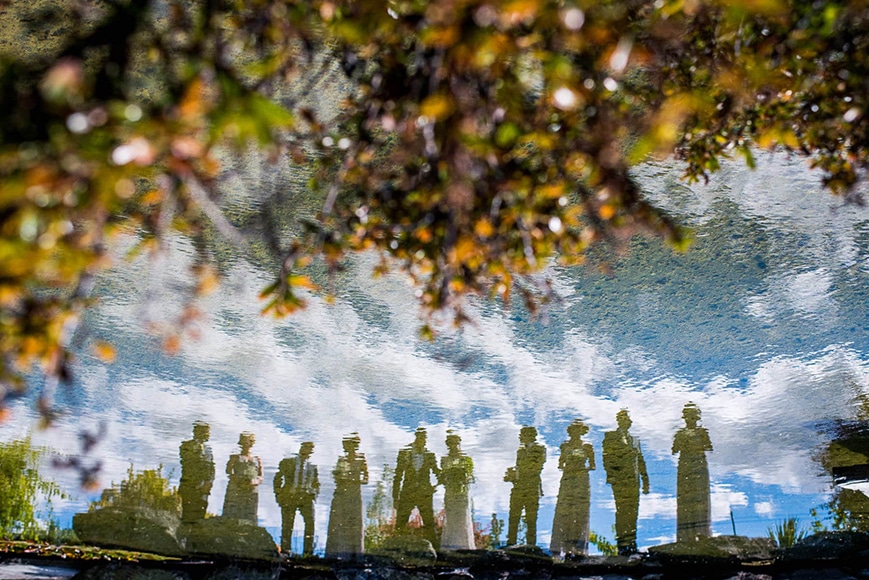
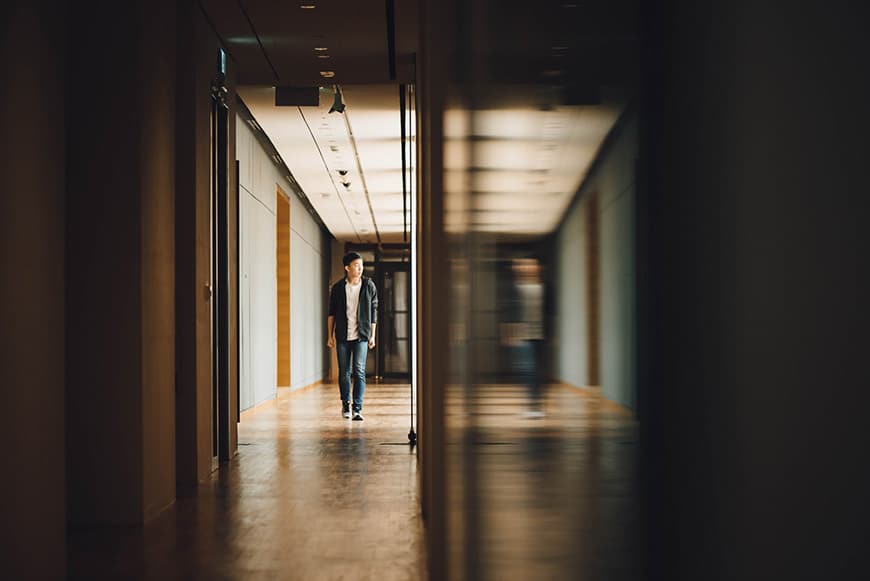
18. Fill the empty space
Credit: James Barrett
Reflections can be a good compositional element in your image when there’s a big gap between two objects. For example, when you have a scene that includes a foreground element and another in the background but nothing in the middle.
If you introduce a reflection from the background element to fill the space, you’ll create a more interesting image that will connect the elements to guide the viewer’s eye.
19. Choose your subject wisely

Credit: Andrew Wulf
If you intend to duplicate your subject via reflection, it better be a good one. There are two ways to approach it: to find it or to create it.
You can find the subject by chance or patiently waiting for the perfect one, as you do in street photography. If not, you can create it, for example, doing still-life or posing someone for a portrait.
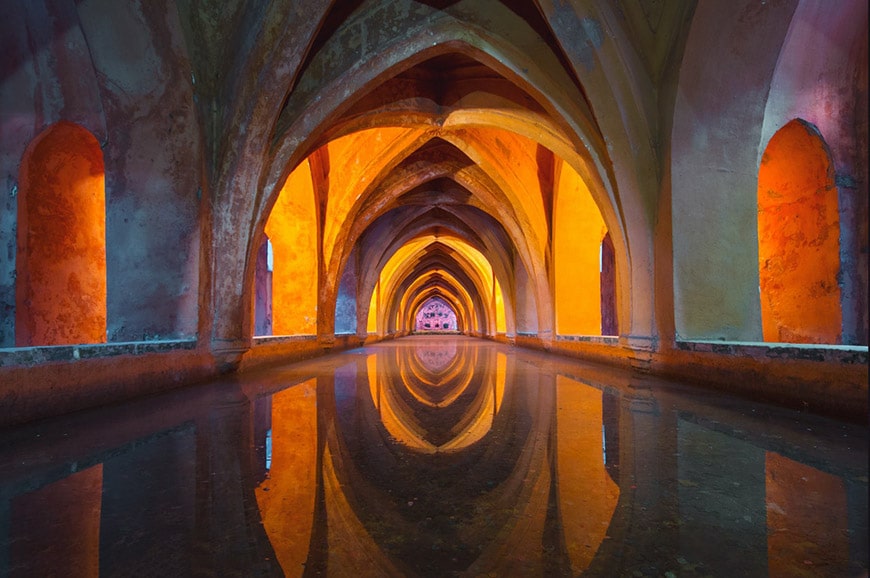
20. Use reflections to capture landmarks
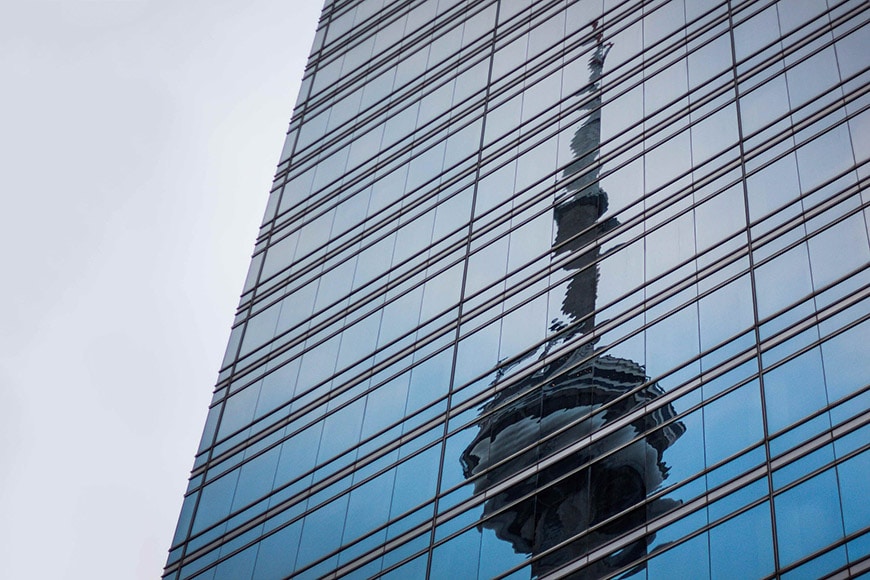
Credit: Ferdinand Stohr
Capturing landmarks without doing a photographic cliche is a big challenge in travel (or tourism) photography. These places have been photographs by millions of people every day, so how can you shine new light on them?
One way of doing it is by looking the other way. While everyone else is looking and photographing the landmark, you can turn around or look down to find something with a reflective surface to capture it.
21. Get close

Credit: Jane Ackerley
It’s easy to forget that small objects can also be reflective. You can get fascinating reflections by doing close-up or even macro photography.
Think about cutlery, small purse mirrors, sunglasses, metal jewellery and so on. The good thing about these objects is that you can manipulate them easier to place them in the right angle and position to create the most striking reflections.
22. Photo-editing

Credit: Ramakant Sharda
To create a reflection in photo-editing, you need to mirror the image. For this, use a program that allows you to work with layers.
I use Photoshop, but feel free to use the software of your preference – there are plenty to choose from!
First, once you’ve opened your image, you need to duplicate it on a second layer. Then, open the Edit menu and go to Transform, Flip Vertical – or horizontal, depending on which direction you want to create the reflection.
Now use the Move tool to align the layer in a way that the second one looks like a reflection from the first one. Then use a layer mask to perfect the effect. You can also lower the Opacity to make it more subtle.
Final Words
With all these ideas and examples, you’re all set to capture some mesmerizing reflections in photography.
Leave a comment to share with us your experience or ask any questions.
…and if you want to avoid glare when taking pictures of pictures, make sure to read our article on that topics too.

Check out these 8 essential tools to help you succeed as a professional photographer.
Includes limited-time discounts.

Ana Mireles is a Mexican researcher that specializes in photography and communications for the arts and culture sector.
4 Comments
Leave a Comment

👋 WELCOME TO SHOTKIT!
🔥 Popular NOW:

Thanks for sharing. Very inspirational!
I’m glad you liked it Laura, thanks for your comment :)
Great tips! Thanks for sharing!
Thanks Michael, I’m happy to read your comment!