


Snow Photography Tips
Ever wondered how to capture the perfect photograph in snowy conditions? This guide has 15 insider tips to help you capture the perfect shot!
If you’ve ever wondered how to photograph snow or how to photograph snow falling, this is the guide for you!
As snowflakes fall – whether you are young or old – there is a natural inclination to go outside and enjoy the beautiful scenes they create. However, if you have ever taken your camera with you, you may have found capturing pictures with snow tricky.
Cold weather can cause problems as can getting your camera settings just right so you don’t produce grey images.
So in this guide, we’ll give you all the tips you need to take beautiful snow pictures.
15 Snow Photography Tips
Our tips will help you take beautiful images in the soft white snow while giving you some advice on how you can keep you and your camera equipment safe in cold conditions.
1. Prepare Your Camera Gear
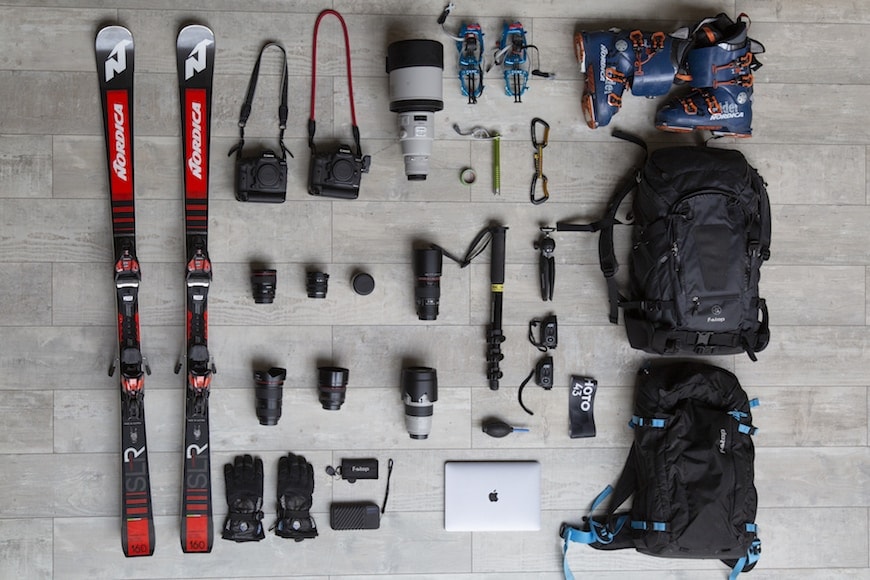
Protect your camera with a good quality waterproof camera case (see guide). Credit: Gabriele Facciotti
Before you rush out into a snowstorm, camera in hand, there are a few things to consider!
You really do need to ensure you and your camera gear are safe before shooting in the snow. So, please take the following advice – but take extra steps if needed.
- Camera – we would recommend using a weather-sealed camera, if possible. Also, it’s worth bringing a backup camera too, if you can.
- Lens choice – you need to avoid getting moisture into your camera and lenses. So it’s not recommended to be changing lenses a lot (with condensation being an issue). With this in mind, we recommend using a zoom – this way, you’re not limited to one focal length as you would be with a prime. Again, weather-sealed lenses are best if you have them.
- Camera and lens cover – we recommend you use a rain cover with a drawstring that will cover not only your camera but your lens too. If you don’t have one, you could make one with a rubber band and a plastic bag! But that’s not as effective, and you can buy a decent rain cover like the Vortex Storm Jacket fairly inexpensively. They are useful for shooting in all adverse weather conditions.
- Cleaning cloths – your lenses may fog up regularly, so make sure you have plenty of microfibre cloths.
- Camera bag – many camera bags these days come with a protective rain cover that you can fasten on when needed; this is ideal for keeping things as dry as possible. See our full guide to the best camera bags.
2. Prepare Your Camera Settings
Credit: Aleksandra Rupar
Once you have your gear safely set up, think about your camera settings. Below are some tips to make getting your camera settings just right for effective snow photography.
- Set camera to shoot in RAW – getting everything right in camera at the best of times is not always possible; add snowfall into the mix and things can get tricky! So, ensure you shoot in raw to allow you the greatest options to adjust WB, levels and exposure when editing your images.
- Use aperture priority – we recommend starting with aperture priority mode. This way, you have fewer things to adjust – less time with your fingers exposed to the cold, while still being in control of your depth of field.
- Use exposure compensation – as you are in aperture priority mode, you have less control of the exposure. So use exposure compensation for when you need to overexpose or underexpose – crucial for snow photography, as we’ll look at more below.
- White balance – auto white balance can lead to very blue or very grey snow photography. Your camera doesn’t read the bright white scene properly, and thinks the world should be grey! If you want to set your WB manually, try it at about 6500k, then make small adjustments as necessary. You can also use the ‘flash’ setting on your WB presets, if you’d rather not set manual.
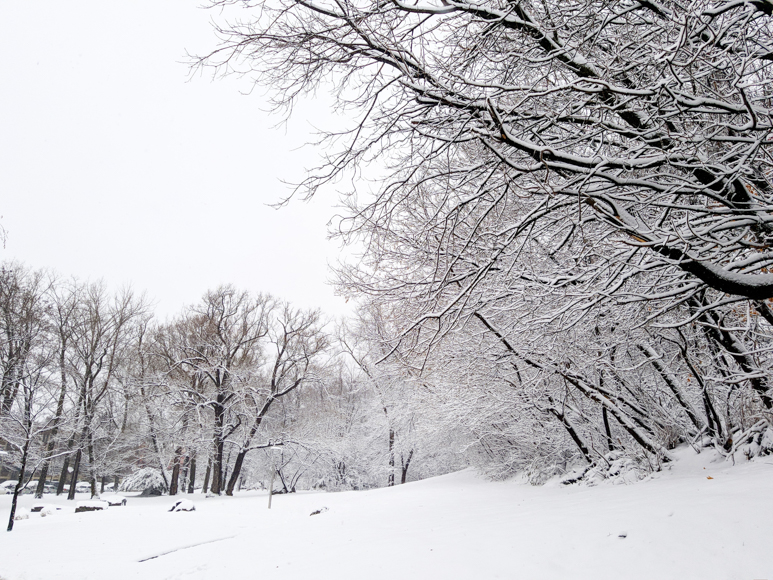
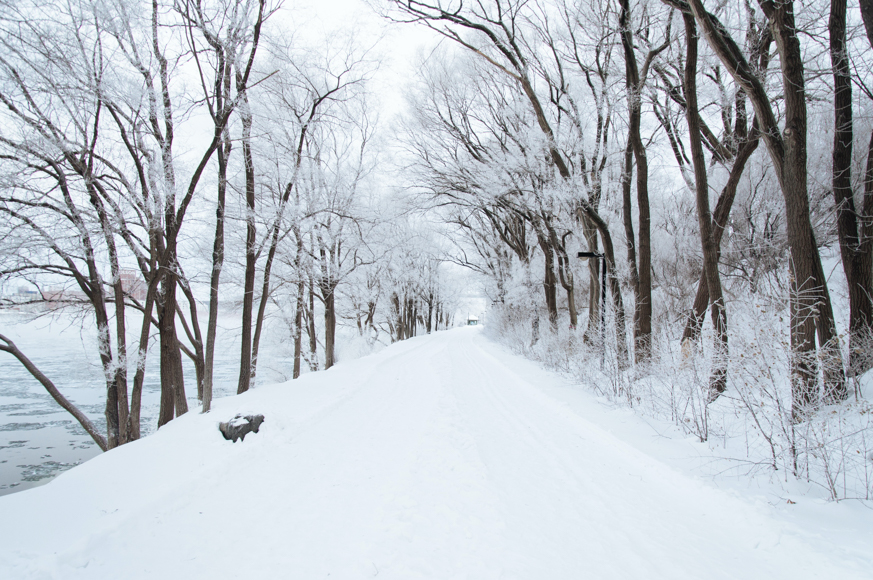
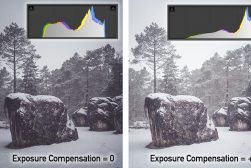
3. Over Expose to Avoid Grey Snow Photography

Forest photography in winter | Credit: Fabian Mardi
Now, you have your camera as safe as possible with your settings ready – but your images still come out grey! Why is this? How do you take pictures in the winter?
The meter in your camera is actually set up to expose for a ‘middle grey’ image, which is great for most conditions – but not the ones we’re dealing with here. Your meter may be saying your exposure is spot on – but your images may tell a different story.
So to really render that startling bright white look of snow, try overexposing, by 0.7 or +1. Over exposing is a simple tip that can lead to beautifully white, natural-looking winter photos.
Please note, even when overexposing, a slight blue cast to your images is to be expected, and by shooting in RAW you may be tempted to get rid of all the blue in your images – but be warned, this can lead to very unnatural looking snow photography.
If your image is blue or very blue, it is because the snow is reflecting the blue sky. If there is direct sunlight on the snow, it should be less blue and should be easier to get that ‘bright white’ look in your images.
4. How to Photograph Falling Snow
Credit: Sora Sagano
Now, we’ve already recommended aperture priority to shoot snow photography. However, this is a starting point for snowy scenes. What happens if you want to photograph the dreamy white flakes as they fall?
If you’re photographing falling snow, you may want to switch to manual mode so you can control your shutter speed. Now, you can decide whether to capture the snow as individual flakes – or capture the movement of snow as it falls, showing at as streaks/lines.
A longer exposure (less than 1/100) will begin to show movement. Longer exposures will show flakes or specks of snow – push the shutter speed even faster, and these may even begin to disappear from view.
So experiment, depending on the mood you want to evoke. If you’re shooting handheld with your zoom at its widest, say 24mm, you should be able to get away with a 1/30 exposure.
However, a faster shutter speed may better evoke that feeling of falling snow, because if the shutter is too slow, it can begin to create a foggy or blurry looking image. So try 1/250 or above to freeze snowflakes in the air, while still retaining a slight sense of movement.
5. Try Black and White Conversions for a Stunning Snow Photo
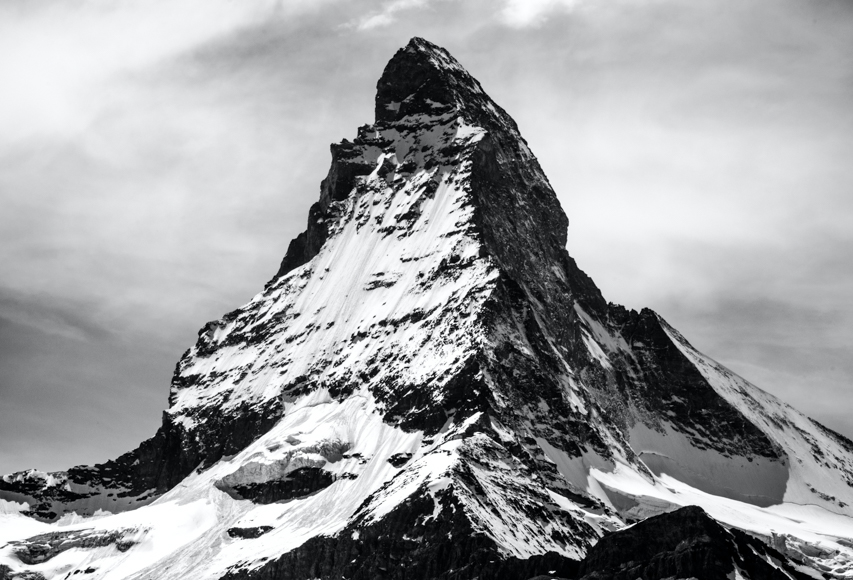
Credit: Kristina Schmid
Snowy photos can look great in black and white or monochromatic, as well as colour! Just up the contrast and the whites and watch your tone curve.
It’s easy to make a very grey image if you’re not careful, as we’ve already discovered.
6. Consider Your Subject for Your Snow Photography
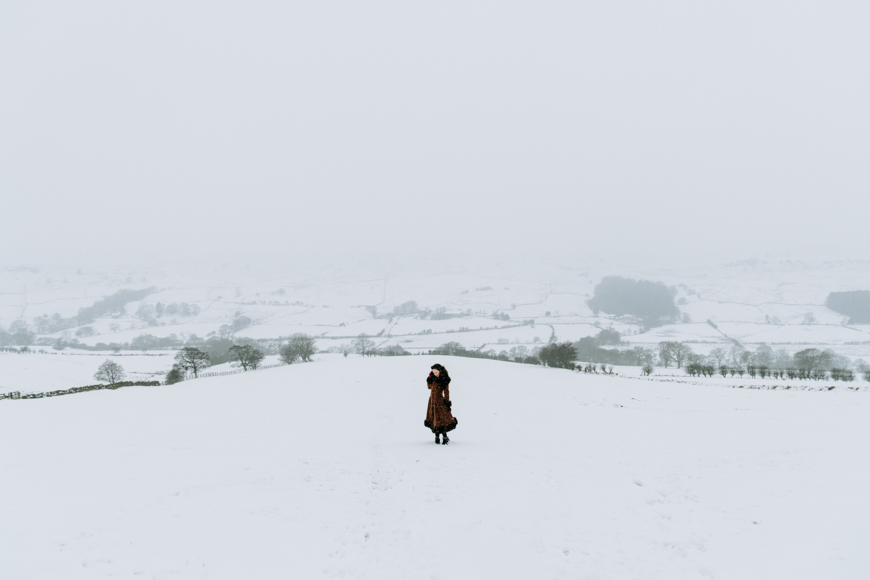
Credit: Patrick Mateer
When you’re thinking about how to take pictures in the snow, you’ll want to think about what you want to shoot!
A cityscape or busy street can be very effective, as can a snowy landscape. You can also introduce figures into your landscapes.
How Much Do You REALLY Know About Photography?! 🤔
Test your photography knowledge with this quick quiz!
See how much you really know about photography...

The bright white contrasting with a figure or figures within the landscape can look really effective.
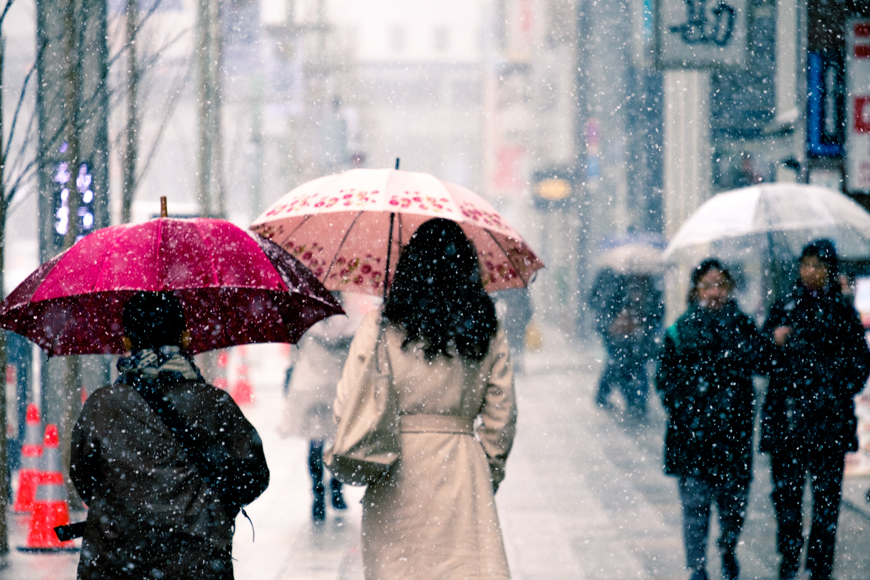
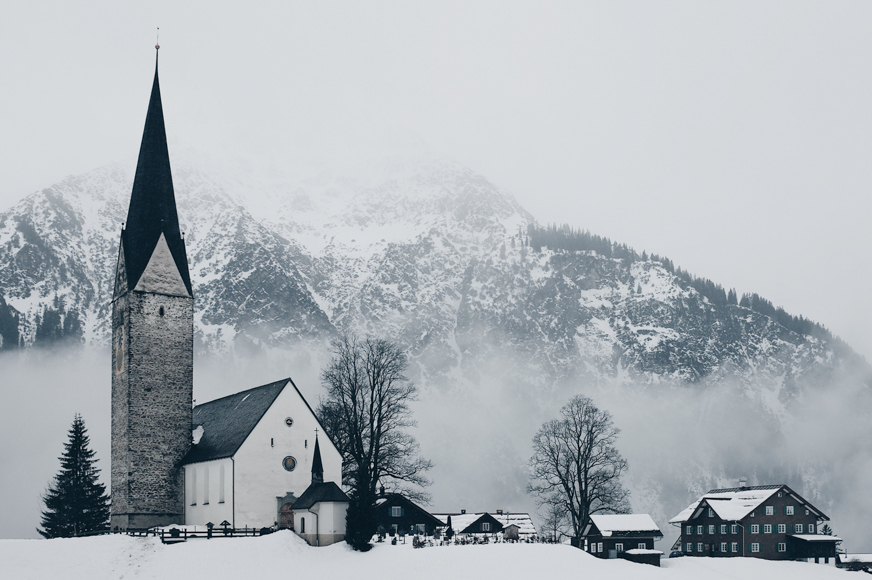
7. Go out and Shoot in Snowy Conditions

Credit: Jeffrey Blum
Now, heavy rain is not much fun to photograph in at all (see our tips on rain photography). However, that can’t be said for shooting in falling snow.
So as people run for cover, why not go boldly out and photograph it! Don’t be put off by ‘bad’ weather.
We’ve given you the tools to photograph falling snow above, so go out and try and capture that unique atmosphere. You can capture moody landscapes or cityscapes as the snow falls – or you can seek people out to add an extra element to your images.
People pulling their coats around them, putting up umbrellas… There’s a whole world of atmospheric possibility to capture as the snow starts to fall.
Of course, be careful when photographing in falling snow. If it’s a real snowstorm, at dangerous levels, it’s best to watch from a window with a hot drink and then capture the crisp snowy surfaces left behind, when it is safe to do so.
8. Use Manual Focus for Sharp Images
Credit: Mike Kotsch
A really white, snowy scene can be difficult to focus on, particularly with autofocus. You can find your autofocus searching forever! So use manual focus.
You can use live view and zoom in on the image to check your focus is accurate.
9. The Right Clothing to Keep Yourself Safe
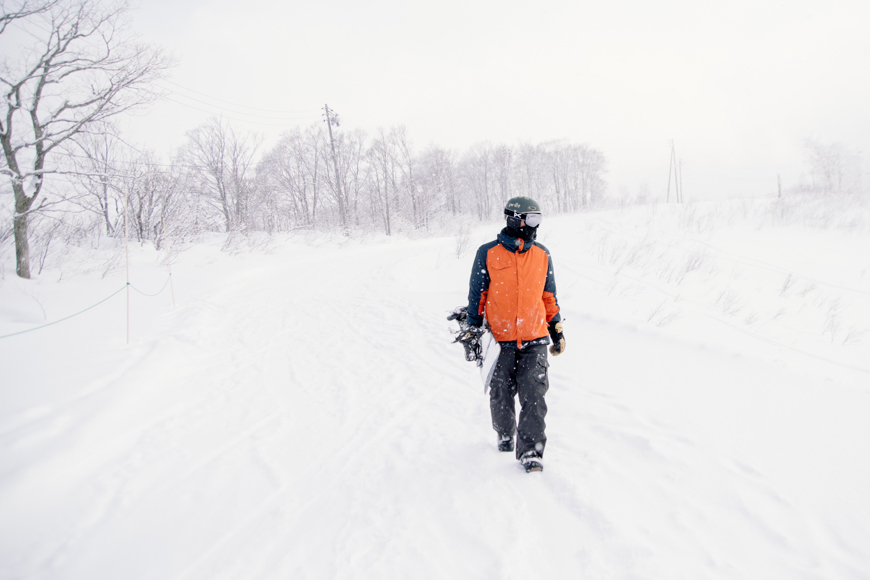
Credit: Delphine Ducaruge
It’s not just your camera you need to keep safe – make sure you keep yourself safe and warm too. So check the forecast before shooting – if there are weather warnings, as we’ve already touched on, we recommend waiting until this dangerous weather passes.
But if you feel it’s safe to go out and start photographing snow (and of course you need to make this judgement yourself, taking the best advice available on the weather conditions where you are) make sure you are prepared.
First of all – dress warmly! Layer up and wear waterproof top layers if you can. You may need a jumper, coat, gloves, hat and scarf. Maybe even a second jumper if you’re in a very cold location. Again, this is your judgement call – just ensure you’re safe and warm before you start photographing snow.
Also, in terms of gloves, you can get specialist winter gloves for photography that allow you to work cameras and smartphones while wearing them.
These are highly recommended – you’ll need your fingers, and you don’t want to be taking your gloves off all the time to adjust settings and click your shutter in the cold.
Lastly, don’t forget to wear appropriate footwear and be aware of your surrounding (like slippery surfaces and ice).
Again, it’s up to you to make the judgement call for all clothing and footwear to suit your environment – these are just general tips.
10. Use On-Camera Flash to Illuminate Snow Flakes

Credit: Chandler Cruttenden
If you’re shooting falling snow at night, you can try putting a flash on your camera and pointing it ahead. Or, you can even use your built-in flash, if your camera has one and you don’t have a speedlight.
Set your camera to manual with matrix metering set. Then take an exposure reading without the flash turned on, so you are exposing for the overall scene.
Keep your settings on Manual – so it keeps that same metering – then turn your flash on. You’ll then be left with overexposed snowflakes in the foreground, with a well-exposed background and overall scene.
11. Use Lens Hoods and Filters to Protect Your Lenses
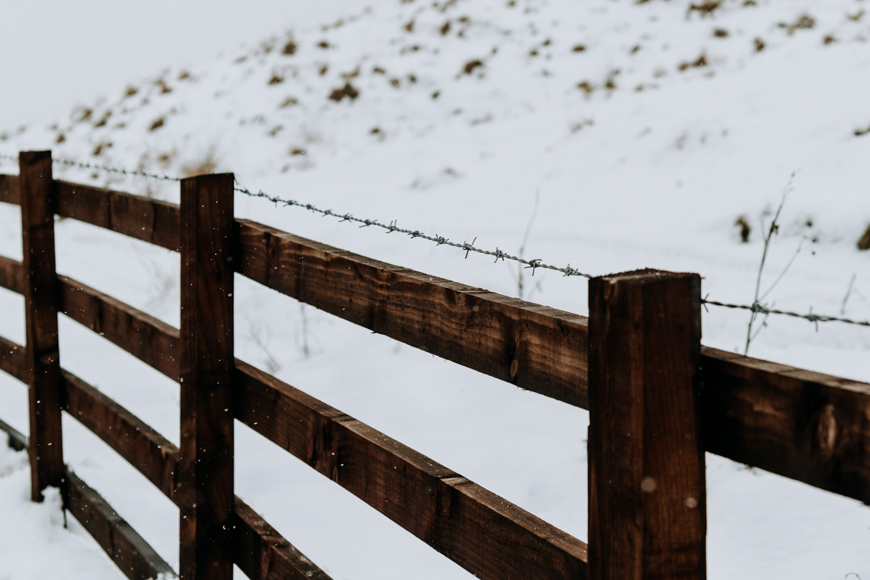
Credit: Patrick Mateer
Most lenses come with lens hoods, but you may not use one often. But photographing snow is one situation when lens hoods are really useful.
Not only will they help stop falling snow getting onto your lens, but they will also act as a slight barrier to the cold. This will help cut down on condensation on your lens.
You should also use a filter on your lens to protect it.
12. Use Your Histogram to Check Exposures

Credit: Alberto Restifo
Viewing your images on your LCD screen on your camera can lead to inaccuracies, particularly when out in bright white conditions.
So, use your histogram to more accurately check your exposure, so you don’t completely blow out the scene and lose detail that can’t be retrieved, even in Raw. However, as we’ve already discussed – sometimes you may want to be overexposing your image.
But it is definitely worth knowing how to access your histogram on your camera for an image before you go out and start shooting in the snow.
13. Keep Your Batteries Warm!
Credit: Ali Inay
Batteries can be tricky to keep warm in the wintery temperatures. If they get too cold, they may stop functioning altogether.
So, keep a fully charged spare battery or even two or three spares – and keep them warm, too. Keep your spare batteries in an inside pocket of your jacket – not only will this keep them warm, but it will also keep them dry.
Then if your battery suddenly drains or goes flat, don’t panic! Take out a spare and keep on shooting.
14. Try Snow Photography at Sunrise or Sunset

Credit: Samuel Ferrara
Adding a sunset or sunrise to your snow photography can be a really effective addition. As we’ve already mentioned, for really bright white snow photography, sunlight shining directly onto the snow is a big help.
So, when shooting a sunrise or sunset, expect a more warm or blue hue to your images. Don’t fight against it too much, go with it and take a natural image of the sun rising or setting, with the addition of a stunning snowy landscape.
Check our guide to sunrise photography for more tips.
15. Take Your Camera Back into the Warm Safely

When it’s time to go in and get warm, moisture and condensation will have collected on your equipment, so please consider this when going back indoors.
If your camera has snow on it, brush it off with a glove, don’t leave it on the camera – it will just turn to water as soon as it gets warm.
Then when inside, don’t just leave your gear in your bag, put it on a table and let it slowly return to room temperature. Lastly, don’t take the lens off until it’s fully dry – otherwise, you are giving moisture an extra opportunity to get into the camera’s workings.
Snow Photography FAQs
What settings should I use for snow photography?
We recommend using aperture priority mode, in conjunction with exposure compensation for when you need to overexpose or underexpose. Set your white balance manually, and shoot in RAW so you have more flexibility with post-processing.
What is the white balance for snow?
The exact setting will depend on the situation, but you can try starting at about 6500k and adjusting from there until you achieve a white colour.
Should I use a polarizing filter for snow?
A polarizing filter can cut through the glare from snow and ice, adding detail and saturation to your shots. If you’re a serious winter photographer, it’s worth having one in your camera bag.
Final Words
We hope you’ve enjoyed reading through our 15 must-read snow photography tips.
Photographing snow can be a bit daunting at first – but follow our advice, and you should be able to photograph snow in a variety of different scenarios and create some really striking imagery.
So, with winter just around the corner, use any falling snow as an opportunity to get out there and start shooting! If you have any questions at all, please just leave them as a comment below, and I will get back to you.

Check out these 8 essential tools to help you succeed as a professional photographer.
Includes limited-time discounts.
 How to Shoot in the Winter (Photography Tips for Snowscapes)
 123 Different Styles & Types of Photography To Try in 2024
 122 Photography Tricks & Camera Special Effects to Try Today
 Best Sony Lenses in 2024: Ultimate E-Mount Guide
 What is Exposure Compensation (and How to Use it)

Patrick Mateer is an award-winning photographer who lives in Yorkshire, England with his wife (wedding photographer Hollie Mateer) and two children.


