


How to make sun rays in Photoshop
Ever wondered how to make sun rays in Photoshop? This is the guide that will show you how + learn a method that's 10x easier AND faster too!
Photoshop | Software | By Usnea Lebendig
If you’re wondering how to make sun rays in Photoshop, this is the guide that lays out the process.
Sun rays can add an extra layer of interest and depth to an image, but if you weren’t lucky enough to capture them in camera, don’t despair – adding them in with Adobe Photoshop or an alternative image editor is fairly easy.

Download the latest version of Adobe Photoshop to follow along with this simple tutorial.
Start a free 7-day trial today
Of course, as with just about everything in Photoshop, there are numerous ways to do it. This article will explore the method that’s been most commonly used with Photoshop version 6 through CC.
There’s a quicker way with the most current version of Photoshop CC, but since there are a number of folks using older versions, this post will focus on what will work for everyone.
Creating Sun Rays in Photoshop
Difficulty Level: Medium | Required Software: Adobe Photoshop (Buy here)
Like with everything else in Photoshop, there are a number of different ways to do things. That’s especially true of the different versions – see how to remove blemishes in Photoshop as an example.
Until recently, what I’m calling the “Classic Method” was the technique most often used in Photoshop 6 through CC, until the Adobe updated the radial filter with more special effects.
I’ll start with this method first, as many of us are still using older versions of Photoshop, and this method, while hard to nail in just right, works on every version PS6 and up.
You should also check our guide to adding lighting effects in Photoshop for a broad overview of what’s possible.
1. Choose an appropriate image
Not all images are good candidates for sun rays. Ideally, the sun will be visible and have some other foreground or mid ground element in front of it to logically explain to our eyes why the rays are there.
At the very least, the light source needs to be coming from somewhere in the front of the image, i.e. not from behind the photographer’s back.
The sun’s position in the sky and the trees in front of it make the photo below a great candidate. There’s even some rays already in the shot.
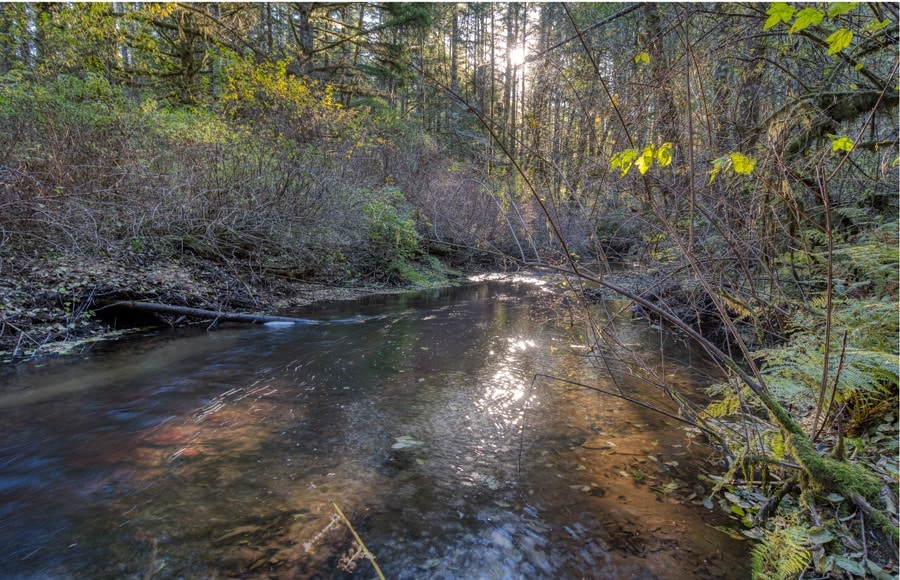
This photo is a good candidate because it has a visible sun and foreground elements (trees) that would be logically creating the rays.
Once you’ve chosen your photo, the Photoshop magic begins…
2. Create a blank layer
You can do this by clicking on the new layer icon at the bottom of your layers panel or by going up to the Layer menu and selecting New.
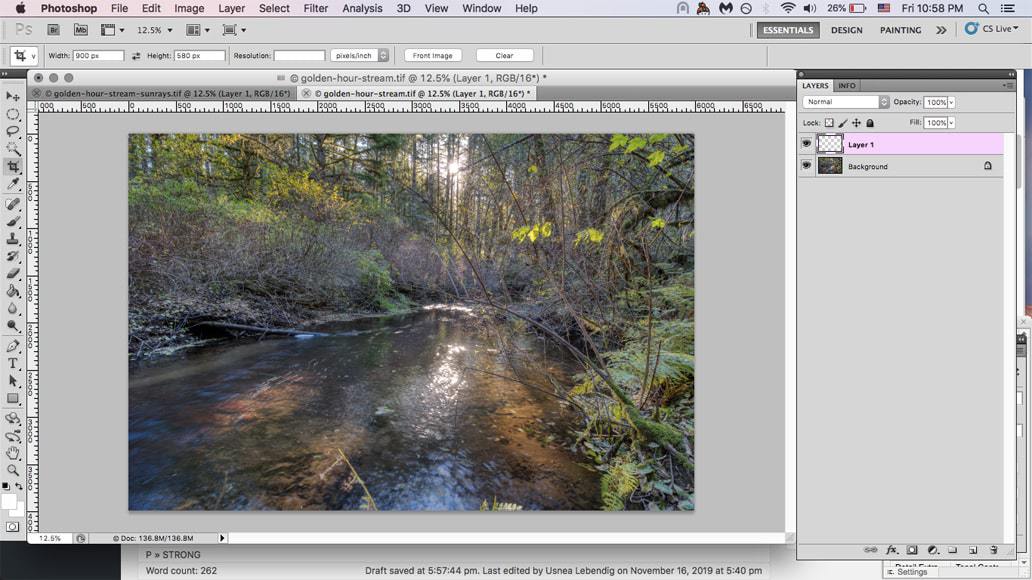
First, create a new layer.
3. Select the Brush tool (B)
You can do this by pressing “B” or selecting it from the toolbar on the left.
4. Sample a color for the rays
This should be something nice and warm from the sun or surrounding rays in your pic. To do this place the cursor over the color in your photo you’d like and then hold down alt or option to sample.
The farther away you take your color sample from your sun, the darker the color will be. I’ve chosen the light salmon color right at my sun’s point.
5. Create Lots of Light Spots
The next part of creating sunrays with Photoshop is to create multiple random points of light will be transformed into light rays. The more random, the more natural it will look. We’ll do this with our brush tool.
First, we need to change our brush type.
- Open a new Brush window via the Window menu.
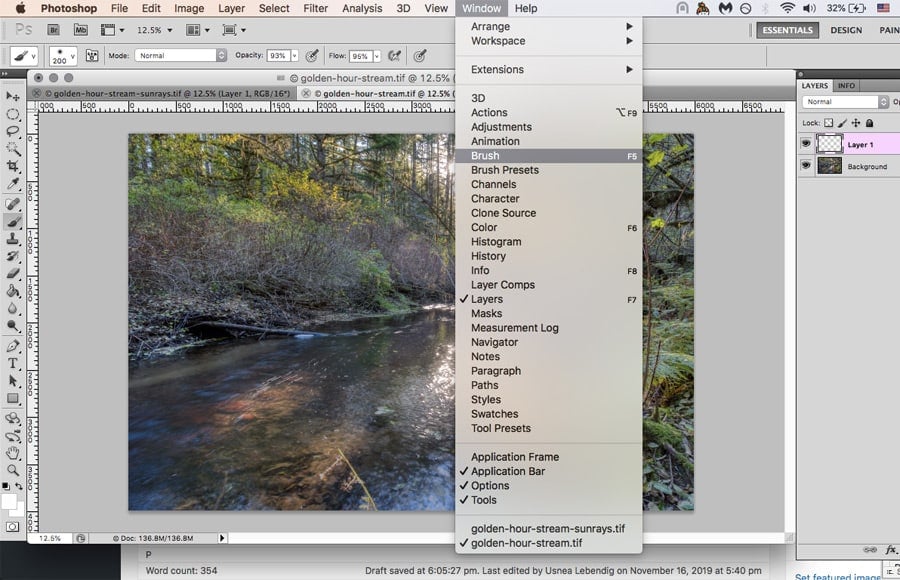
You should get a window that looks similar to this:
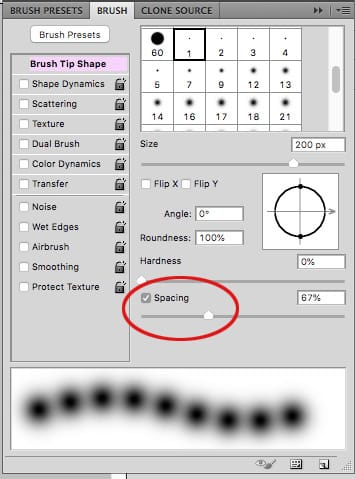
Adjust the brush spacing slider to about 67% or so. Most of the time the brushes we use yield continuous lines, like the one you see above.
We’re going to change that first by changing the spacing setting in the panel above.
2. Change the “Spacing” setting to around 67%. That will give you separate points instead of a solid line.
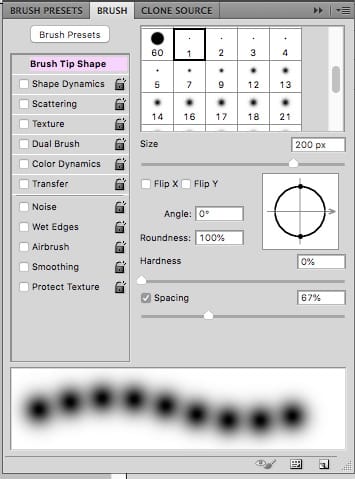
As you can see, we now have separates points instead of a solid line. That’s a start.
3. Adjust the “Shape Dynamics”
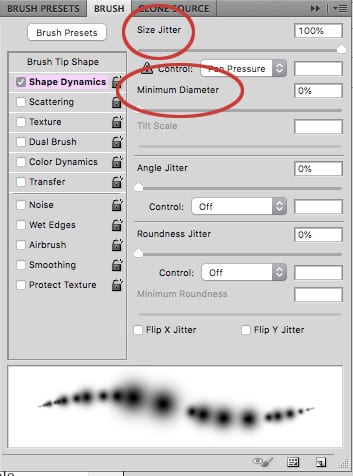
Clicking on the Shape Dynamics box to the left will open a new dialog box. Here we’ll change both size jitter minimum diameter.
The size jitter means the variation in size of our points. You’ll want to move that slider all the way up for maximum variety in size, as there needs to be an element of randomness to make the rays look naturally created.
Next, bring the minimum diameter all the way down to allow the brush to use all the diameters possible.
4. Adjust the Scattering
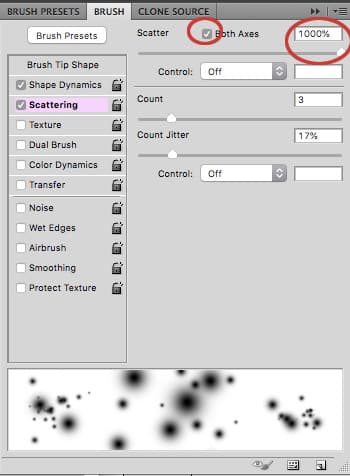
Adjusting the scattering will also help the points look random. First, click on the Scattering check box. Once there, click Both Axes. Then move the Scatter Slider all the way up.
Ignore the other settings in this box for now or copy mine. Once you’ve played around with this technique a bit you’ll have a better idea of whether and how you want to adjust them.
5. Now we’re ready to paint
The smaller your tip, the smaller the balls of light (obviously), so if you want larger rays increase your tip size.
Or, if you want a greater variety, create two layers – one with larger balls of light and one with smaller balls of light.
You’ll want the greatest concentration of light to be around the light source to create realistic sun rayws with Photoshop, so put a cluster of dots around the sun. This is where the strongest effect should be.

6. Turn this layer into a smart object
Since it’s likely that you’re going to playing around with the next filter a number of times, turning this layer into a smart object will save you the hassle of having to undo everything each time.
There are a number of ways to do this, but I generally just right-click on the layer and select Convert to Smart Object.

One easy way to turn this layer into a smart object is to right-click and then select “Convert to Smart Object.”
7. Use the Radial Blur
Now the transformation begins.
Go to Filter -> Blur -> Radial
You should see a dialog box that looks like this:

Change the Blur Method to “zoom” and the Quality to “good.”
The dialog box should now look like this:

Now, take the center of the cross and place it roughly where your light source in your photos is (i.e. the sun).
This doesn’t have to be exact, as you can move the rays around later with the Move tool or with Free Transform.
In this photo, the sun happens to be roughly where the sun already is, so I didn’t move it. But if your sun is off to one side, moving the cross here will help the rays radiate out in the correct direction.
Once you done that, hit OK and your image will now have a rough version of sunrays.
8. Fine tune the position of the rays

Since the placement of the cross is just an estimation of where the light source is, you now need to fine tune things.
The Move tool (V) is a quick fix for placing the center of the rays over the sun. If you’d like to change how far the rays radiate, you’ll need to use the Free Transform tool (Command-T).
If things just don’t look right at all, simply double-click on the radial blur layer (we made a smart object, remember?) and redo things.
To use Free Transform, Photoshop will briefly deactivate the smart object features of your layer. Don’t worry, they’ll come back.
9. Delete any rays you don’t want
To make the sun rays look realistic, it may be necessary to erase some of the rays that in places it’s clear the light would not normally shine.
The easiest way to do this is by creating a layer mask, setting your paint color to black, and painting over the rays you want to remove (with black). You’ll need to reset your brush to a standard flow, though.
10. Adjust the Blending Mode and/or the Opacity
Once you have the rays right where you want them, your final step is to adjust the blending mode and/or the opacity level on your sun rays layer.
If you’re going for subtle effect, Overlay or Soft Light are good options for your blending mode. For a stronger effect try Hard Light or Color Dodge.
For this photo I settled on Vivid Light and an Opacity of 45%.

Creating Sun Rays in Luminar
Difficulty Level: Easy | Required Software: Skylum Luminar (Buy here)
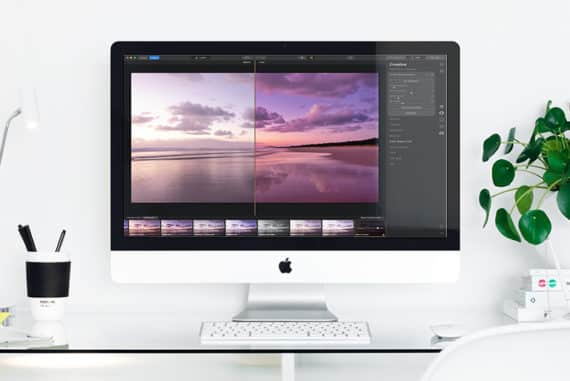
Since the release of Skylum Luminar 3, every photographer has access to an incredibly simple way to create realistic sun rays, no matter their previous editing skill ability.
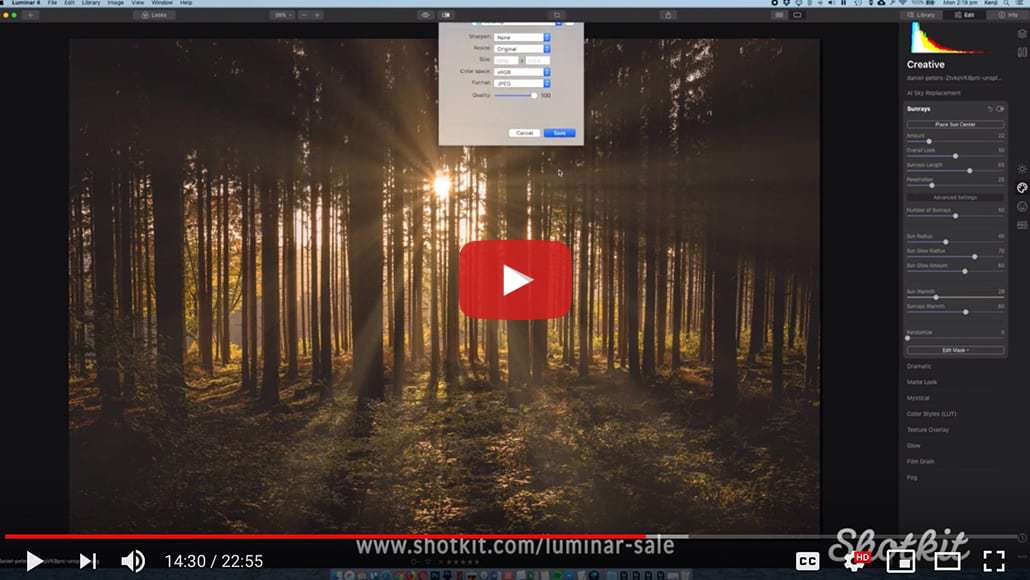
In my recent Luminar 4 review, I filmed the video shown below which shows in real time just how easily sun rays could be placed on a free image I found online.
Here in 2024, I’d go as far as to say that there really isn’t any need to learn how to use Photoshop to add sun rays to your photos – Luminar 4 makes it so much easier. Here’s how:
1. Choose an appropriate image
This step is important no matter what software you are using. You need to select an image that you could realistically imagine having sun rays in it.
The effect will always be best when choosing an image where the sun is in front of the photographer (as opposed to coming from behind where he/she is shooting), and preferably, there’s some foreground element to allow the sun’s light to ‘filter’ through.
If the scene has some mist or dust in the air, the sun rays will look even more realistic.
2. Find the ‘Creative’ tab in Luminar 4
Luminar 4 has consolidated tools into handy short cuts on the right of the develop module. Click on the ‘Creative’ tab (shown by an icon of a palette), then select ‘Sun Rays’.
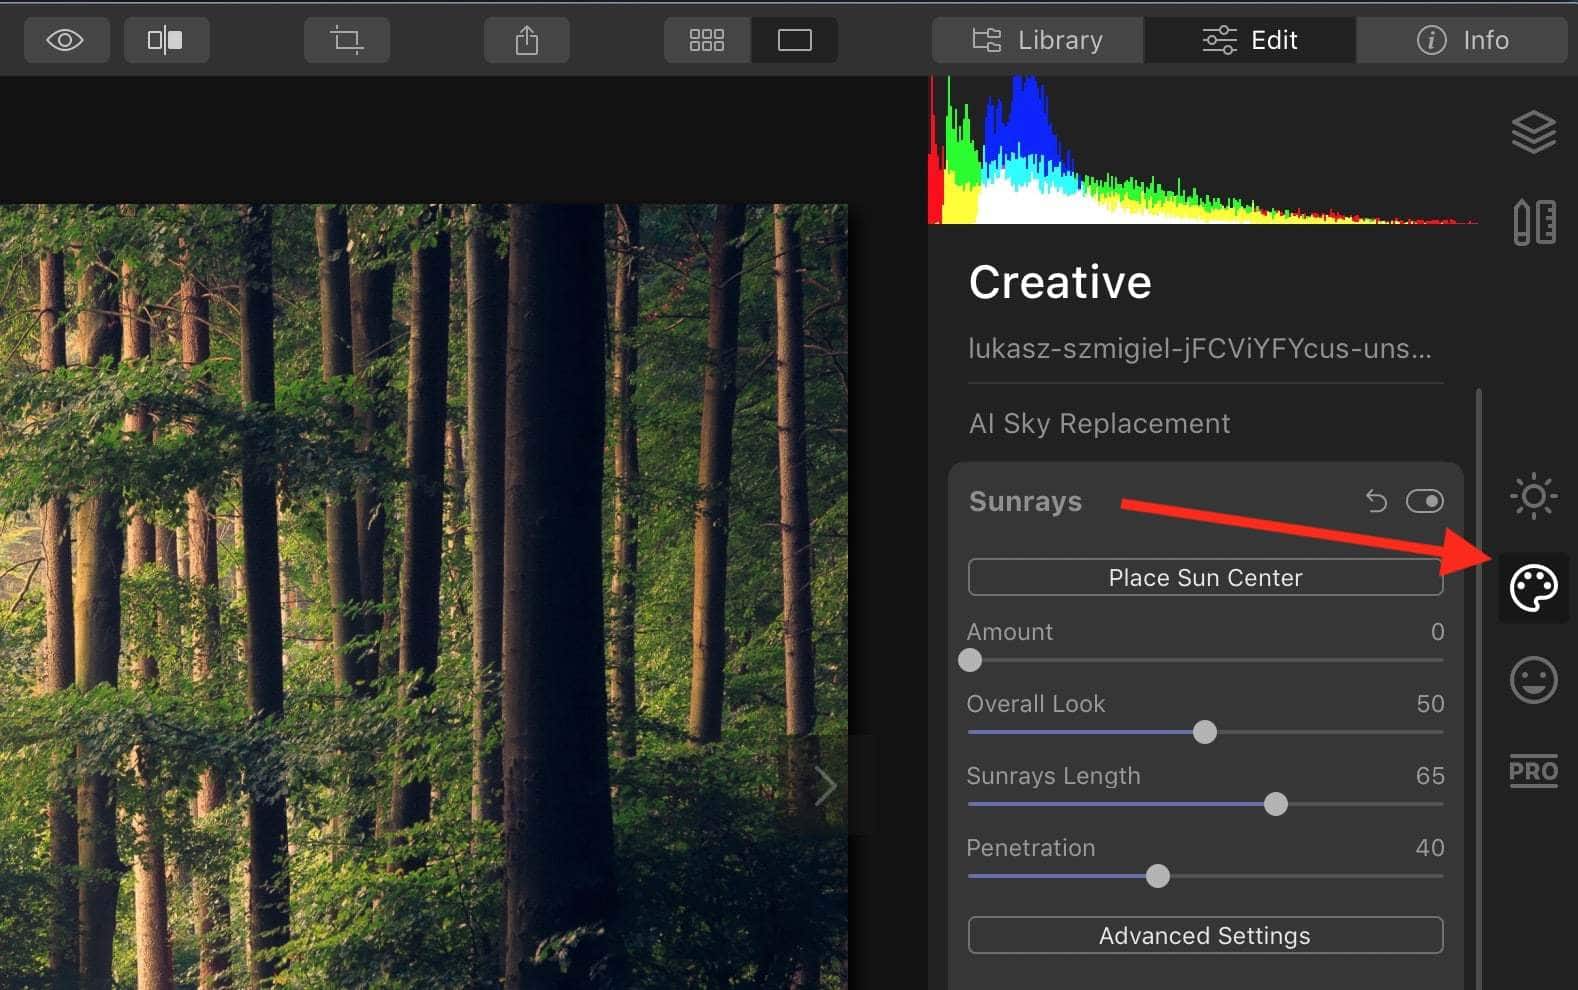
3. Add the sun and experiment with placement
This is where it gets really mind-blowing – Click the button ‘Place Sun Center’, then adjust the ‘Amount’ slider so you can see the initial effect.
Next, click the source of the sun (marked with a white circle), and drag it around your image, with the sun’s rays wrapping around foreground objects, seeping through gaps and being blocked by impassable objects.
Check out the video below which shows how amazing this effect can be:
From there you can play around with the other sliders to your heart’s content. Don’t forget to click ‘Advanced Settings’ to show even more options – you can even choose the number of sun rays!
Creating Sunrays | Final Words
Like any effect, adding sun rays to your image will likely take a lot of experimentation to get the rays to look exactly the way you like them to. Still, it’ll be well worth it for images that lend themselves to the effect.
The latest version of Photoshop CC has a new and improved Radial Blur filter that make the whole process slightly quicker, but we have a clear winner here by far.
Download the latest version of Adobe Photoshop to follow along with this simple tutorial.
Start a free 7-day trial today


Usnea Lebendig is an experienced photographer and reviewer who loves to photograph professionally and in moments where the world’s beauty and/or strangeness leaps in front of the lens.


