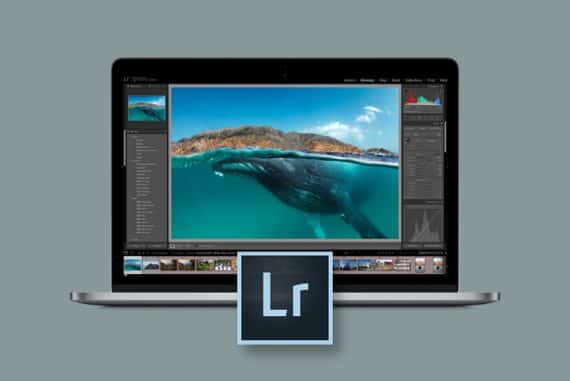
Guide to Moving from Lightroom to Capture One
Not sure how to switch from Lightroom to Capture One? This guide covers steps for importing your Lightroom catalog, tips for using Capture One and more.
Capture One | Software | By Kishore Sawh
Considering a switch from Lightroom to Capture One, but not sure how to go about it?
Maybe you’re looking for an alternative to Lightroom because Adobe’s subscription model is too complicated or too expensive. Or maybe you just want to try your hand at something new.
That’s up to you. The purpose of this article is not to persuade anyone to change software, but rather to make the process of switching from Lightroom to Capture One easy for you if you’ve already made up your mind to do it.
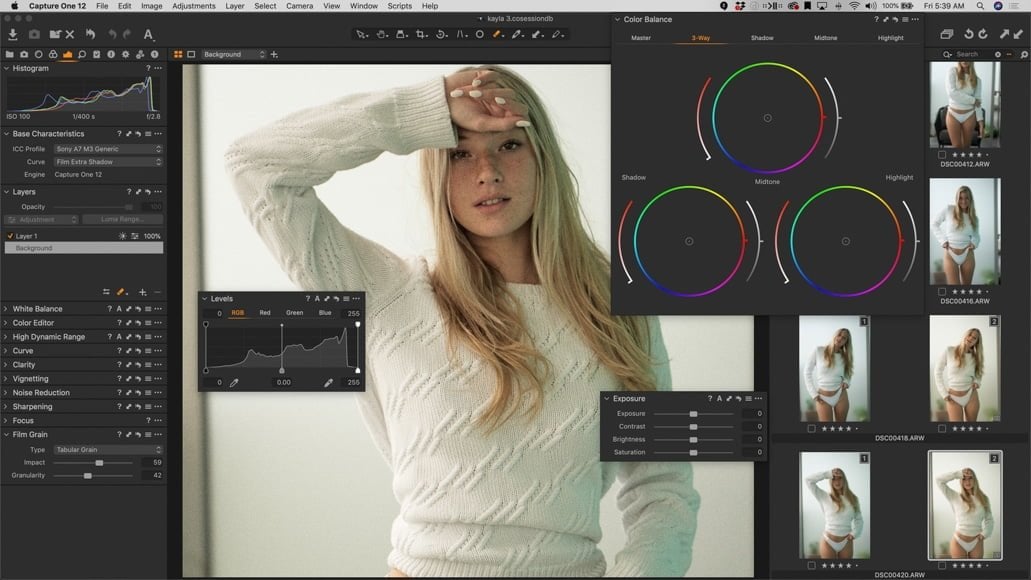
Photo editing software solution with powerful tools for organizing, colour grading, layer editing & more. Use code SHOTKIT10 for a discount.
Switching from one primary software to another can be a challenge for a myriad of reasons, and the more demanding one is of their software, how integrated it is in a workflow, and how much time is spent in it all play a role.
However, it needn’t be painful – especially if what’s on the other side of the learning curve is a better final process and final product.
If you’ve read the Capture One review and are keen to get stuck in, I recommend downloading the 30-day free trial so you can follow along. (You won’t need to input a credit card or worry about being charged once the trial ends.)
*To immediately answer the most common question for those switching or considering: yes, you can move your Lightroom catalogs directly into Capture One, retaining ratings, exposure values etc., and it’s easy. We’ll go through it below.
Moving to Capture One Pro
Even though Capture One has been around as long as Lightroom, Adobe’s initial drive for mass market share has helped them achieve it, and so most of us have ingrained ourselves in their way of doing things.
The level of familiarity with Lightroom can make it seem as though learning anything else is arduous, even if it’s not.
So the first step in the process of switching is to be open to a new way of doing things.
Here’s the kicker: if you want to take advantage of all the benefits of Capture One Pro but want to keep the layout looking similar to Lightroom, there’s a one-click setting to do that. We’ll take you through it below.
The Interface
Capture One’s interface sets the tone for the user experience, and where Lightroom requires switching between modules (which can take time and also changes the layouts), Capture One uses a single window.
This means everything is in front of you or in tabs.
One of the huge benefits of Capture One 21 is that, unlike Lightroom, it’s highly customizable. You can create a tool tab with as many or as few of the tools as you want and have it accessible all the time.
You can also separate them by genre or function.
You can even scale the size of the tool tabs to be larger or smaller, separate them from the menus, and even move them to secondary monitors.
Effectively, you can manipulate them to be totally unique to you, therefore creating custom workspaces with a single click. This means you can immediately transform the appearance and flow of the software to suit your needs or mood.
And the movement, scaling, adding or removing of tools and menus is done mostly via drag and drop or right-clicking – very intuitive.
The basic layout is as below:

The layout is logical, clear and highly customizable.
How To Make Capture One Look Like Lightroom
Capture One’s workspace can be easily transformed into one that will feel familiar to Lightroom users.
As noted above, Capture One has built in a Workspace for those who like the way Lightroom is organized. You can apply this layout with a single click.
Simply go to Window > Workspace > Migration and Capture One will immediately rearrange the workspace to look more like what you are used to in Lightroom.
This is a great way to experience all of Capture One’s features without having to endure a super-steep learning curve, as the interface will already feel somewhat familiar.
Catalogs & Sessions
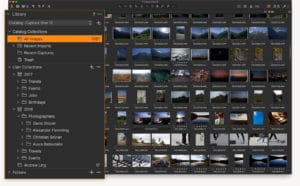
Capture One uses a system of Catalogs and Sessions to organize your images.
A significant differentiator between Capture One and Lightroom is how users are able to organize their images.
In Lightroom you create catalogs, and in Capture One you can do the same or you can use Sessions. You can even use a blend of both.
What’s the difference between a Catalog and a Session in Capture One?
Think of both options in terms of use-case scenarios.
In Capture One, a Catalog would generally be used for all your images, while Sessions are more tightly organized for a particular individual photo session.
For example, whereas you might have a Catalog set up to cover an entire calendar year of weddings or family vacation photos, a Session would be used to keep all the assets of one wedding or one vacation in their own separate, safe, and organized world.
Sessions have been the default method of organizing images with Capture One since inception, and they remain the go-to method used by nearly all pro-production, studio and commissioned photographers.
Catalogs only came about in Version 6 (and we are on 12 at the moment of this writing here in 2024).
When a new Session is created, Capture One automatically creates a folder structure that will have the parent folder (maybe the name of your shoot) and, within that, four sub-folders: Capture (where all images are copied/imported into), Selects, Output, and Trash.
And should you want more folders so you can organize your photos even more distinctly, you can create them and they will be reflected in the Capture One menus.
See how the various folders are set-up in the application and your OS in the images below.
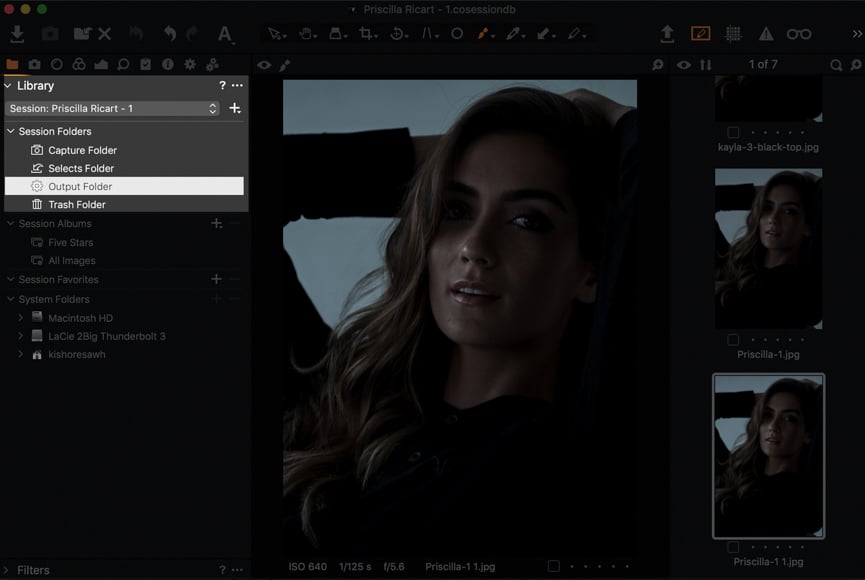
Capture One folder structure as displayed in the app’s sidebar.
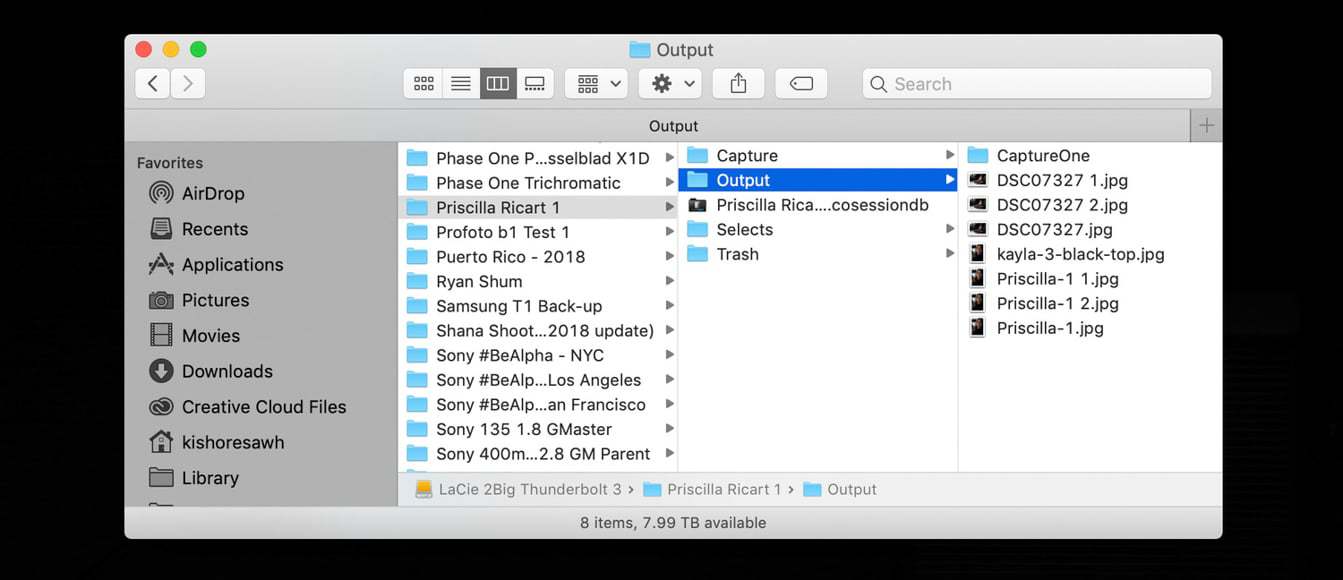
Capture One’s folder structure as viewed from within the OS.
So what are the benefits of using Sessions?
You’ll actually find there are many. We won’t go into them all here, but here are a few of the main ones to take away:
- They are easier and cleaner for organization;
- They offer greater security of images in case of corruption of a drive;
- They are easily portable between computers or locations;
- They provide better image privacy and cleaner file management between teams, and
- They offer simple adjustment backups.
Once you switch from Lightroom to Capture One and get used to this system of Catalogs and Sessions, you might find it hard to ever go back.
How to Import a Lightroom Catalog Into Capture One
It warrants stating that it’s not recommended to move a massive catalog of some 500,000+ images into Capture One – at least not at first.
If you would like to test the import ability it’s recommended to create a collection in Lightroom with some edited, color-labeled and rated images and import that catalog into Capture One. You’ll see that edits, labels, and ratings will remain intact.
*Please note: not everything will be carried over, and you’ll see that primarily with color adjustment.
To do this you simply follow these steps (you can also watch this video):

1. Click on File > New Catalog.

2. Click on Import Catalog > Lightroom Catalog.

Click on the Continue button (you can also tick the box for “Don’t show this again” if you want to avoid doing this every time).

Navigate to the location of your Lightroom catalog, highlight it, and click Open.
That’s it: simply navigate to and select your Ligthroom catalog file and Capture One will import your library.
Presets or Styles? How About Both?

Mastin Labs are now making presets for Capture One as well as Lightroom.
Moving to Capture One and like to use Lightroom Presets? No problem, Capture One has them but they’re called Styles.
Much like in Lightroom, Styles are easily added and easily adjusted after application.
Unlike Lightroom, however, Capture One has fully-fledged layers (which we’ll address next), and Styles can be applied as a layer, which means you can work on the style alone, adjust opacity, etc.
Capture One has Presets as well as Styles. Where a Style is applying adjustments of multiple tools, in the world of C1 ‘Presets’ are for a single tool, so you can access them and apply them from right within the tool.
You may also be happy to know that many of your favorite Lightroom Preset companies, like Mastin Labs, are now making Styles for Capture One!
If you want a detailed description of Styles & Presets you can find one here.
Real Layers

Layer functionality in Capture One is unique and efficient.
Lightroom gives you the ability to use multiple local adjustments and refine certain parameters of them, which leads some people to think it has layer functionality.
In fact, it does not – it uses a single layer with multiple applications of single or multiple local adjustments.
Capture One layers are much closer to what you would find in Photoshop, in that each layer can be its own entity, have its own mask, and thus allow for a much higher level of refinement to each local or global adjustment.
You are able to add a New Empty Layer on which you can draw a mask and adjust that, or create a New Filled Layer which has a global mask on it which you can erase, refine, et cetera.
Color Adjustment

How color adjustment looks in Capture One.
Lightroom users who are fond of color adjustment and color grading will be all too familiar with the HSL (Hue, Saturation, Lightness) panel, but in Capture One you don’t have it laid out the same.
Instead, there exists the Color Editor and the Color Balance Tool.
The Color Editor is most closely related to the HSL panel in Lightroom, but broken into three sections (Basic, Advanced, Skin Tone) for more refined adjustment ability.
The Basic part will initially appear to display the same color ranges as Lightroom, but they aren’t quite the same.
If you want, however, you can download a Color Editor Preset which will give the same 8 color ranges you are familiar with from Lightroom.
Both the Color Editor and Color Balance Tools are far more robust for color adjustment than anything in Lightroom, and one of the reasons much color grading is done in Capture One. It’s fast, easy, and very powerful.
Export & Process Recipes

Capture One lets you export multiple versions of an image at once using Process Recipes.
Capture One’s export abilities are incredibly powerful and expansive, and can be the source of some intimidation at first.
That said, the upside is that there is so much that can be done with them, and that leads us to “Process Recipes”.
Coming from Lightroom it may be best to think of Capture One’s Process Recipes as similar to Lightroom’s export presets, but you can also export multiple versions of your images simultaneously, and use metadata to generate subfolders.
Here’s an example of how this would look in practice:
With an image ready for export, you can set it to export a full TIFF or even PSD file to store in your back-ups, as well as a smaller JPEG with metadata and watermark for publishing, and a version that is perfectly scaled for Instagram – all at once.
Furthermore, you can also set metadata-specific parameters such as camera model/body, keywords, or subject, so Capture One will create sub-folders for each or all of them upon export.
This is a huge boon for those looking to save time and stay super organized.
Camera Calibration & Profiles
Lightroom operates by providing several different Profiles for Camera Calibration and each renders raw files in their own unique way.
The Capture One approach is different.
In C1 there are typically one or two ICC Profiles in the Base Characteristics Tool tab, and the colors have been made to look great regardless of subject. It’s why files in C1 from any camera tend to look great straight out of camera.
That said, you can still choose from various Curves in the Base Characteristics which can have a profound effect on the starting point of your image.
Myth Busted: Capture One Does Have a Gallery/Library View

Capture One does have a library view – and it’s easy to switch in and out of.
Without question, one of the most pervasive myths about Capture One is that it doesn’t have a viewer mode akin to Lightroom’s Library Module, where many images can be seen and scanned at a glance.
But it does, and it couldn’t be easier to get to.
Instead of constantly switching modules as in Lightroom, you can either go to View > Viewer or hit Alt/Opt+Command+V to toggle the “viewer” on and off.
Toggling this on and off will switch between the single image view or the Lightroom-esque Library style view. It’s that simple.
Switching From Lightroom To Capture One | Conclusion
What we have addressed here is just the tip of the proverbial iceberg in terms of the things to keep in mind when you switch from Lightroom to Capture One, and the things that will make it easier to do so.
Switching post-processing software is rarely a spontaneous decision, and a little playing around can go a long way – as will these pointers hopefully go a long way in helping you in your first moments with Capture One.
If you do seek that trial time, I recommend clicking here to download the free trial of Capture One Pro and messing around with it, checking off the list above and getting familiar.
Hopefully you’ll see that the process doesn’t have to be difficult, and perhaps find in Capture One a software that satisfies the things you knew you needed, as well as the things you didn’t know you wanted.
We will be covering more Capture One tips and tutorials here at Shotkit, but in the meantime, Capture One’s own YouTube channel is a venerable cornucopia of tutorials and tips.
It’s almost like getting a masterclass for free, mostly led by David Grover, and is highly recommended if you want to learn at speed.
Leave me any questions you have regarding this guide, and I wish you all the success with your post-production workflow.
Photo editing software solution with powerful tools for organizing, colour grading, layer editing & more