


How to Photograph Textures
One way to really elevate a photo is by including textures, but do you know how the pros do it? Check out this helpful guide to learn some handy tips & tricks!
Texture in photography is important because it gives the viewer a sense of what something feels like – even though they can’t touch it with their own two hands.
So how do you show texture in a photo? How do you convey something three-dimensional in a flat, two-dimensional image?
That’s what we’re about to find out as we dive into 11 texture photography tips and how you can use them to nail eye-catching images.
What is Texture in Photography?
Texture is all around us. Think about surfaces you encounter daily: they can be rough, smooth, slippery, fluffy, grainy – you name it.
Now here’s something really interesting…
There are three dimensions to how we perceive color: hue, saturation, and brightness. Studies on texture show that our perception of it is incredibly complex. In fact, there are at least twenty different dimensions to how we experience texture!
And yet, we rarely think as much about texture in our photography.
Of course, we can’t feel textures through a photograph. Texture in images is conveyed by patterns, variations in tone and color, and contrast of light and shadow.
- Why do photographers use texture?
Texture in photography adds depth and interest to an image. It engages the viewer more deeply by allowing them to imagine what something feels like. Texture can also be used as a strong compositional element.
- What are the 4 types of texture?
In art theory, there are actual, simulated, abstract, and invented textures. Another way to categorise textures is tactile (how a thing actually feels) and visual (an artistic representation of texture).
11 Texture Photography Tips for Eye-Catching Images
Now onto what we all want to know: How do you create texture in photography? Let’s delve into some tips & tutorials to help you create a powerful image.
1. Get the right camera equipment
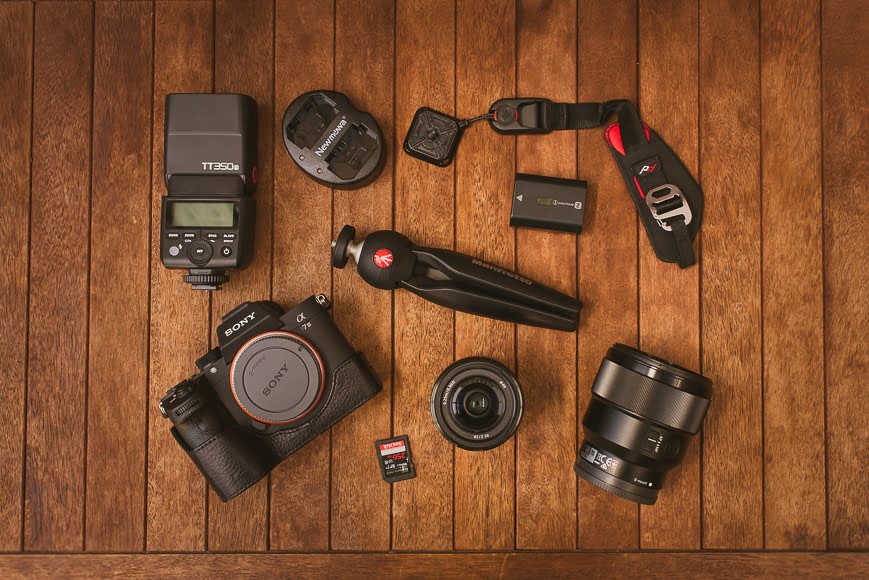
The gear you need for texture photography mostly comes down to how and where you want to use your photos.
A smartphone camera will suffice for capturing texture if you want to use your photos for web and social media.
A digital camera (DSLR or mirrorless) with a reasonable sensor size will allow you to capture more detail in better resolution. A high-resolution sensor is particularly important if you want to print your photos.
There are no set rules on lenses; though if you want to capture minute textures of small objects, opt for a macro lens.
If you want to make texture the sole subject of your photography – for example, by filling your frame with a textured pattern – avoid using a wide angle lens as it can cause the pattern to distort.
Beyond that, you may want to invest in some lighting gear and a tripod, for reasons we’ll get into below.
2. Nail your lighting

Credit: Tim Mossholder
The appearance of texture in your photos comes down to two main things: the quality of light, and its position.
- Quality of light
Light can be soft or hard. Hard light creates strong, well-defined shadows; as a result, textures are more pronounced. This is exactly the reason why portrait photographers tend to prefer soft lighting: hard light draws attention to skin textures – including imperfections.
If you want to enhance texture in your images, try shooting in bright sunlight or with a high-power flash.
- Position of light
The position of the light source also matters when it comes to texture photography. A front-on light source will create very little shadow, thus flattening the appearance of textures.
How Much Do You REALLY Know About Photography?! 🤔
Test your photography knowledge with this quick quiz!
See how much you really know about photography...

Using side lighting – e.g., holding a light off to a 90-degree angle – will create more shadows and thus enhance the textures in whatever object you’re capturing.
If you’re shooting in natural light, try the golden hour. The low position of the sun will create longer shadows and bring out the detail of textures.
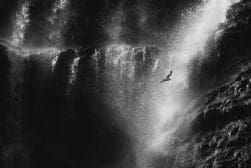
3. Get the right exposure
Credit: Paul Ijsendoorn
Getting your exposure right is critical to texture photography. Overexpose, and you’ll blow out details in the highlights. Underexpose, and you’ll lose texture detail in the shadows.
Your camera settings will depend on factors like how much light is available, but just be aware that you’ll need to balance your ISO, shutter speed and aperture so as to capture as much detail as possible.
Try to avoid using a very high ISO as that will introduce noise into your photo (if you’re shooting in low light, you may need a tripod so you can slow your shutter speed).
If you can’t avoid a noisy photo, here are some tools to help you remove the grain in post-production (i.e. photo editing).
4. Experiment with depth of field
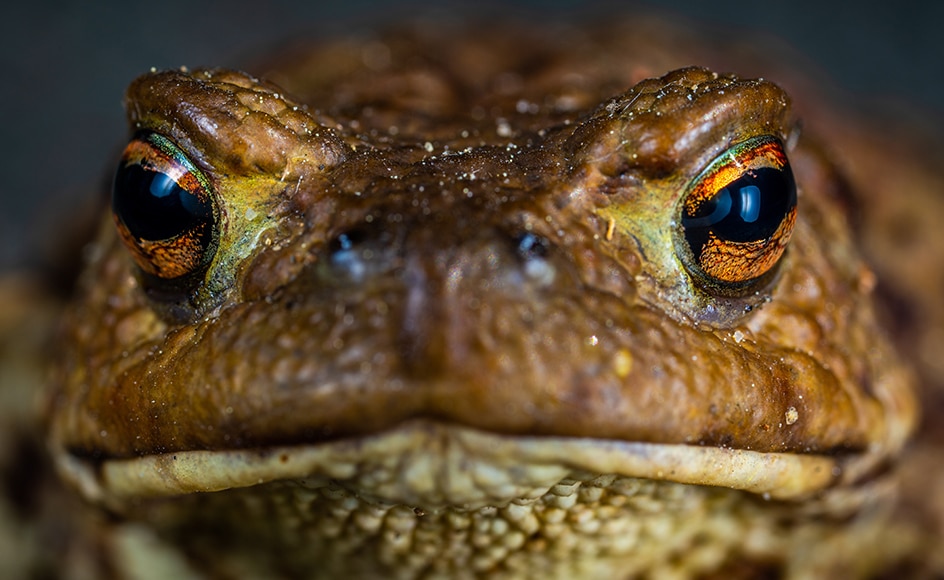
Credit: Egor Kamelev
Your aperture setting will determine how much of your image is in focus (also known as depth of field, or DOF).
Let’s say you’re shooting a landscape, or want to fill your frame with the texture of tree bark or peeling paint. You can use a narrow aperture (e.g. f/8) to make sure you capture all the textured details in focus.
A narrow aperture is also useful if you want to clearly show the background texture behind a subject.
On the other hand, you might want to use a wide aperture (e.g. f/2.8) to produce a shallow depth of field. This way, you can highlight a particular part of a surface while leaving the rest of the image blurred.
This can draw attention to interesting textured elements, as in the example of the frog’s eyes above.
5. Keep it sharp
Credit: Martins Krastins
The sharpness of your images is important in texture photography; unwanted motion blur can distort the texture detail of an object.
Your camera settings can help you here. A fast shutter speed will freeze your subject quickly, helping to keep camera shake and motion blur at bay.
If you need to use a slower shutter speed, use a tripod to avoid camera shake in your images.
If all else fails, you can try sharpening your image using Topaz Sharpen AI or Photoshop – here’s a tutorial.
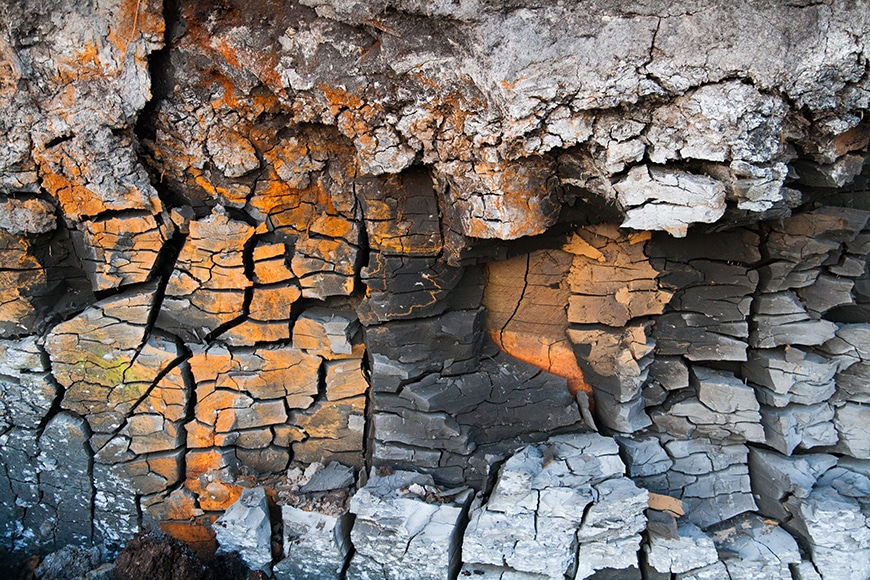
6. Where to find textures
Credit: Lukas
There’s an incredible world of textures out there just waiting to be discovered. The more you look for them, the more ideas you’ll have for creative texture photography.
- Nature is filled will beautiful patterns and textures. Find them in everything from craggy rockfaces to tree rings to the dizzying fractals of romanesco broccoli.
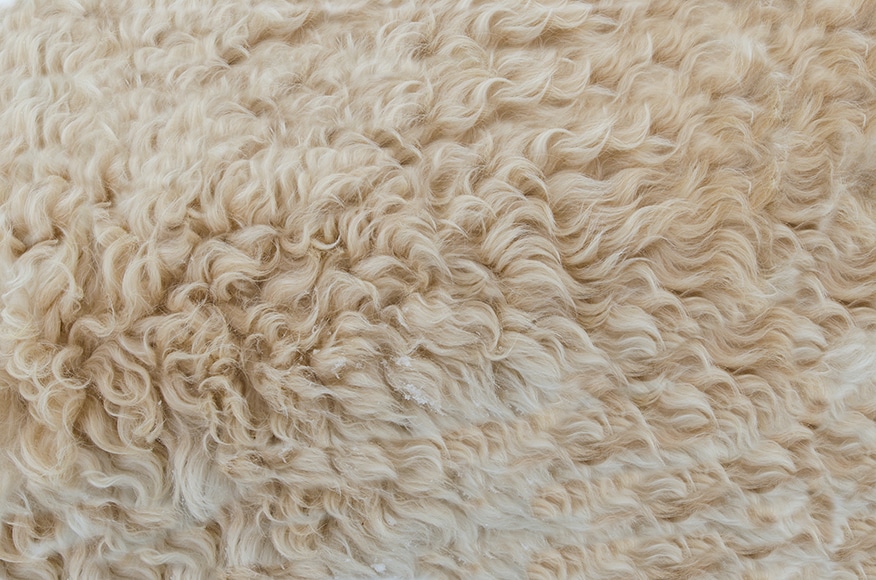
- Animals and wildlife. Fur, feathers, scales… enough said.
- Textiles. Look for fabrics in any shape and color that have interesting textures: knitted sweaters, velvet curtains, woven rugs, even smooth silk.
- Urban settings. Take a walk around your local neighbourhood and you’re bound to find numerous types of textured objects and surfaces. Make sure you look in all directions: down at the pavement, up the side of buildings, and in parks, playgrounds, train stations, etc.
Photography texture done right will almost leap off the screen at you – try and master the art of capturing something that makes viewers want to reach out and touch it!
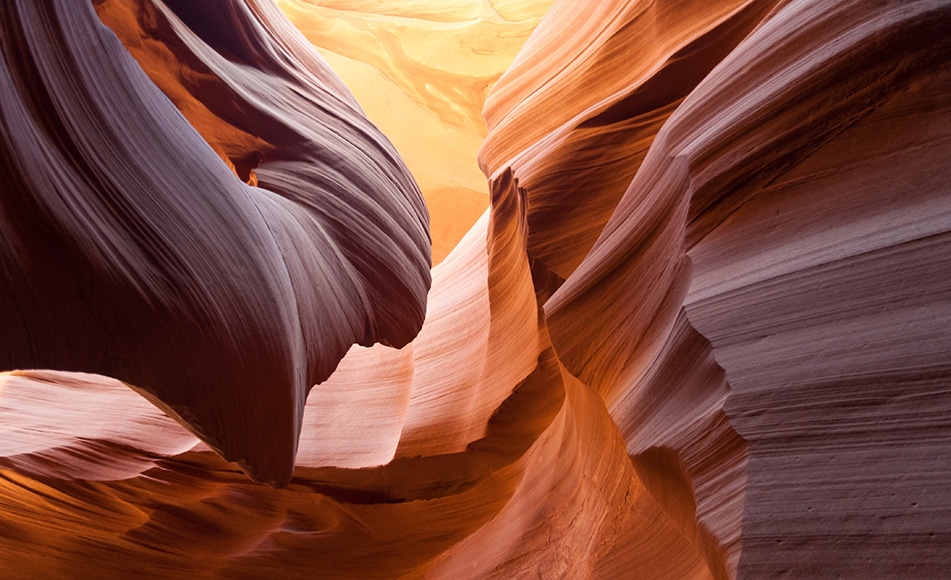
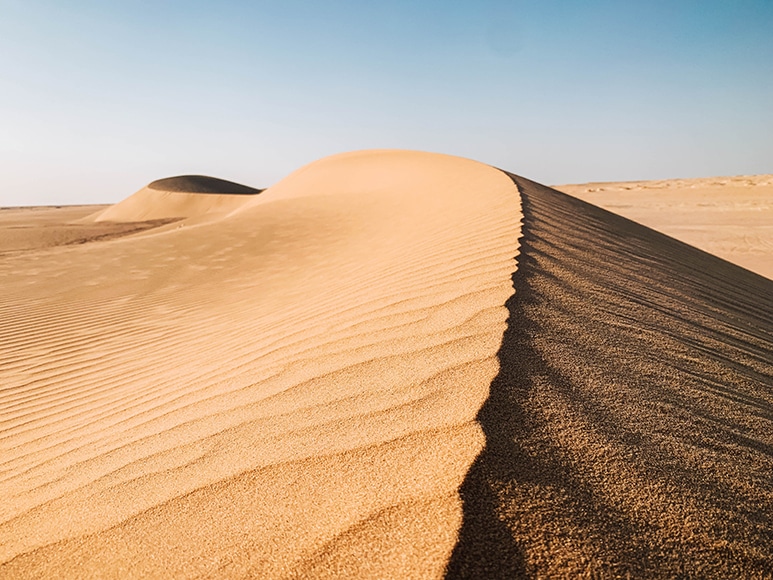
7. Play with distance

Credit: Tomáš Malík
Texture in photography doesn’t have to be limited to brick walls and still life photos of citrus fruits. Consider how texture appears both from a distance and up close, and a new world of possibility will open up to you.
You could capture the surface of tiny objects in macro, focusing on the minute textured details. Or photograph curves and patterns in natural landscapes, using their textures as a focal point of your composition.
You can even try aerial images from way up above. Using a drone for texture photography is a bit like creating an impressionist painting: you can capture a big picture view that only becomes apparent after moving away from the finer detail of the textured elements.
8. Try creating your own texture
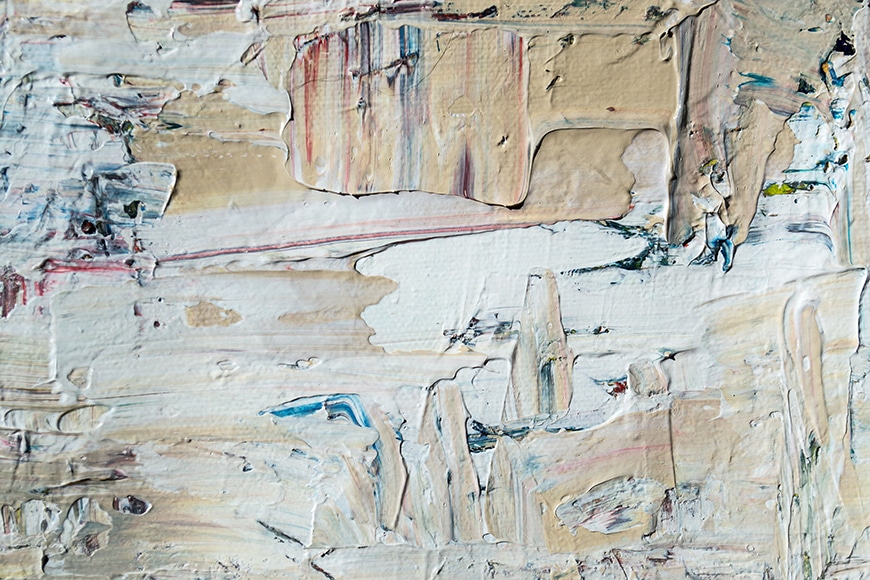
Credit: Steve Johnson
If you want to take texture photos where you have complete control over the final composition, you can also create the textures yourself.
Become both photographer and artist by layering oil paints onto a wall or canvas, then photographing your newly textured surface from different angles.
Or, find some textured objects and arrange them into a composition as a way to experiment and develop your texture photography and incorporate creative pattern photography too.
9. Use texture for creative double exposures
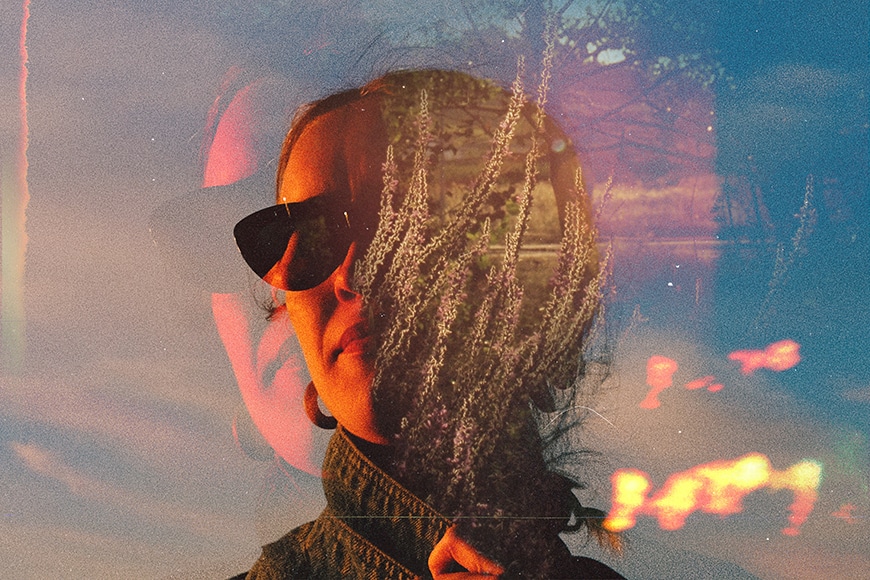
Credit: Luke Moss
Once you’ve collected some beautiful texture images, why not use them as part of some other creative techniques as well?
Double exposures are brilliant for this. Use a photo of an interesting texture as a design element to compliment or contrast the main subject of your double exposure.
10. Use texture in portrait photography

If you’re a photographer who shoots portraits, it’s worth being aware of how texture can make or break your photograph.
As mentioned above, hard light in portraits can be unflattering because it accentuates skin texture (like bumps). If you’re shooting a beauty portrait, soft light will enhance your photos.
That said, not all skin texture is bad!
Skin texture includes freckles, smile lines, dimples, the history of someone’s life etched onto their weathered brow… all things that are well-worth capturing in a photo.
You can also use texture to highlight your subject. For example, using a textured backdrop, or using different textures (in clothing, hair, etc) to add contrasting elements within the composition.
Converting portrait images to black and white can also help to enhance texture, especially when it comes to facial hair and wrinkles… which leads me on to the final tip…
11. Enhance texture in post-processing
Credit: Layla Yehia
There’s plenty you can do in post-processing to enhance your texture photography – especially if you shoot in RAW format so you have maximum information to work with.
- Crop and straighten. This is particularly useful if your texture fills the entire frame. Here’s how to crop in Lightroom.
- Fix your exposure and adjust contrast and highlights/shadows to bring out texture information in your photo.
- Adjust the sharpness and clarity. The clarity tool (you can find this in Lightroom and other post-processing software) brings out mid-tones, enhancing texture detail and adding drama to your photo.
As with any photo editing, just be wary of not going overboard. Sometimes less is more, and it’s easy to get carried away when dealing with texture photography.
Final Words
I hope these tips on photographing texture have given you a new appreciation of how we can make our images more three-dimensional.
All that’s left to do is to go out and use the techniques to practice your craft and build your texture photography skills.
If you have comments, questions, or want to share your own thoughts about texture, do join the discussion below.

Check out these 8 essential tools to help you succeed as a professional photographer.
Includes limited-time discounts.
 15 Tips for Creative Shadow Photography in 2024
 122 Photography Tricks & Camera Special Effects to Try Today
 How to use MidJourney to Create Amazing AI Images
 Guide to Using Contrast in Photography
 How to Use Light and Shadow in Photography
 What is Monochrome Photography? (+Examples & How to Shoot it)

Tania Braukamper is an Australian-born writer who also loves to take pictures on her banged-up (yet surprisingly resilient) Canon 5D Mark III. She currently lives in Portugal.


