


Product Photography: Home & Studio Ideas, Technique & Equipment
Looking to improve your product photography? Whether for social media or e-commerce, learn how to take killer product shots – on a budget!
Learn | Photography Guides | By Ana Mireles
More and more professionals are facing the need to take product shots on a regular basis.
Maybe you’re the social media manager for a brand, or maybe you want to start an eCommerce store from home.
Whatever the case, this article should help you improve your product images while staying within budget.
It will also be helpful if you’re a beginner wanting to specialize in professional product photography. You can follow these tips to get your portfolio started without the need to spend big.
Do be aware that these product photography tips have their limits – you’ll need to invest in some professional equipment if you want to establish yourself in the business.
Once you have some gear and a bit of know-how, however, you’ll be well on your way to shooting beautiful product photos.
So, let’s get started!
What is Product Photography?
Product photography is a specific branch of commercial photography. Its end goal is to showcase a product to the client.
These images display the characteristics of the product and can be used in online stores, social media marketing campaigns, posters, catalogs, business brochures, and so on.
Unlike advertising photography, product photography very straight forward – it doesn’t sell an idea or a concept, but the product itself.
How Do You Shoot Product Photos?
If you’re unsure of how to do your first product photo session – whether it’s for an eCommerce store, an Amazon photoshoot, or anything else – this simple guide can get you started.
For a very basic setup, you just need a camera and a tripod. Needless to say that you should get the best that you can afford.
If you use natural lighting, you just need to spend a few dollars on different types of papers for the backdrop and foamboards to use as reflectors.
1. Gather all the necessary items
The first thing you need to do is come up with an idea and be very clear about what you want to do with your images.
This will make it easier to decide if you’re going to use natural light or artificial light, if you want a white seamless background or colored/textured backdrop, etc.
(See: what kind of backdrops do professional photographers use?)
You should decide on the angle as well, to find a good place to set up. Also think about the props, if you want to use any.
Then gather everything you need for the execution of that idea. If you have a low budget, or you’re just starting out, be sure to keep it simple.
2. Prepare the set
Find a table where you can build your set, or use the floor if you want to do a flat lay (a trendy style for product and food photography).
You may also want to try to build a DIY light box or just buy a photo light box.
How Much Do You REALLY Know About Photography?! 🤔
Test your photography knowledge with this quick quiz!
See how much you really know about photography...

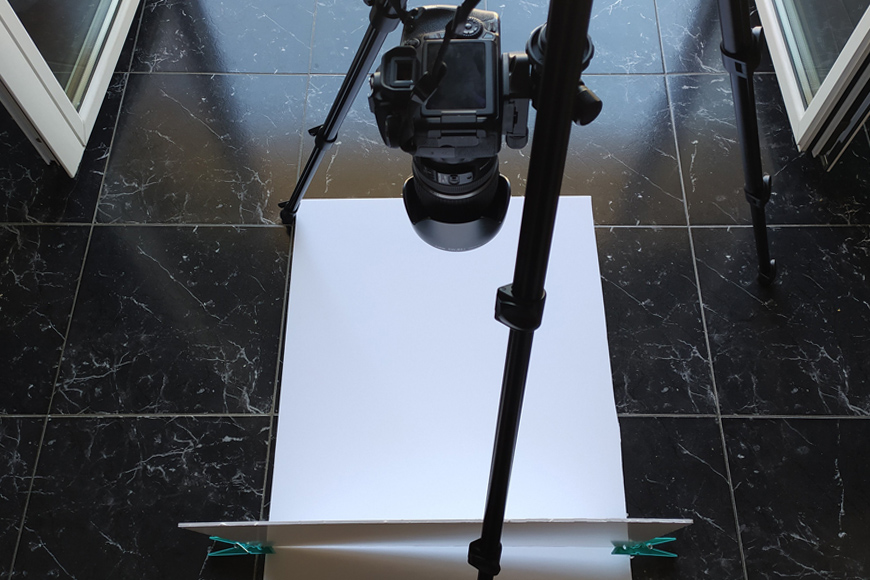
If you want to use natural light, make sure you’re close to a window. Open the window or find a spot where the window frame won’t cast any unwanted shadows on the product.
Place a whiteboard as a reflector on the opposite side of the window. This will bounce some of the light back to the product to soften the shadows instead of using a fill light.
Set up the tripod and the camera to the desired angle and framing.
3. Set the scene
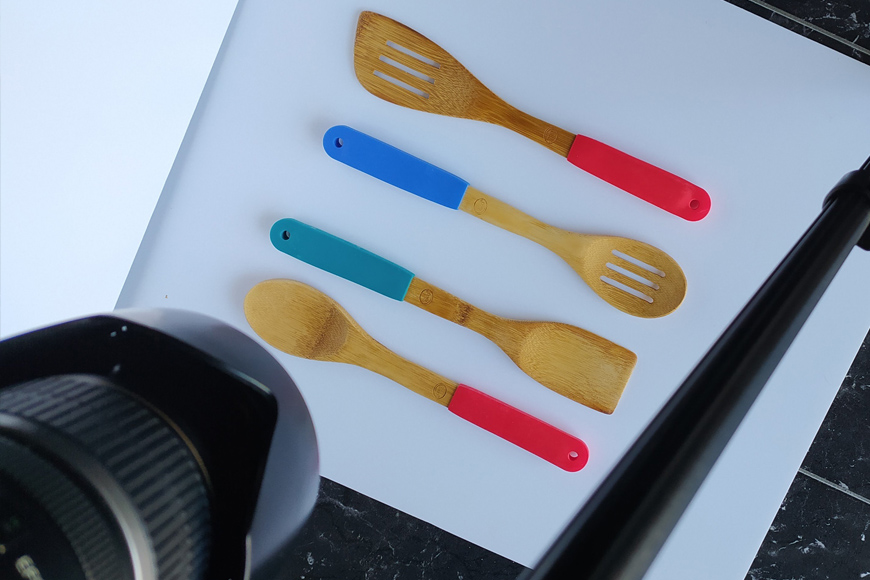
Place the product on the backdrop and start arranging the composition. Find the right placement by following the rule of thirds or the golden rule.
Decorate with the props if you’re using them. Always keep in mind the rules of composition and the color scheme for a harmonious and eye-catching result.
If you’re doing something that requires a miniature set like toy photography (see guide), you’ll want to spend a lot more time in scene preparation.
4. Find the right camera settings

Now that your set and scene are ready, it’s time to take care of the camera. Make sure the composition looks good with the placement you did.
You can do this through the viewfinder or by using Live View. You can make use of the grid to ensure everything is in the right place.
Then, measure the exposure and adjust the camera settings. If you’re comfortable using the camera in manual mode, you’ll have better control over the results.
If not, you can use semi-automatic modes. The right one will depend on what you want to achieve.
When the priority is the depth of field, you can use aperture priority. With this, you can open or close the aperture depending on how much of your scene you want in focus and how blurry you want the background.
If you’re using Live View, you can see the changes live and it will be easier for you to decide. Once you choose the right f-number, the camera takes care of the rest.
When you have something in motion, you should use shutter priority mode. With it, you can control the motion blur of the moving object.
For example, if you’re pouring coffee into a mug, or the product has a moving part that you want to show in motion.
Don’t forget to set the white balance: while the auto modes can give good results, it’s better if you set it manually.
5. Check your results
Always evaluate your results before dismantling the set. If you were shooting tethered, you’ll be able to see the photos directly on the computer, which is ideal.
If for some reason you can’t open the images on the computer right away, review them in-camera but zoom in to check the focus.
Evaluate the overall composition and lighting. Looking at the photo is, of course, necessary, but don’t just trust what you see, often things look different on a small screen or seem more vibrant and light than they really are. You should check that everything is technically correct.
If your camera allows it, check the histogram and see that you have all the tonal values. Unless you were doing a high key or low key lighting setup, it should look like a mountain with most of the details within the mid-tones.
(See more low key product photography examples.)
If you’re not convinced that you have great product photos in hand, take more shots with different camera settings.
The good thing about digital photography is that you can shoot as many photos as you like without spending your budget.
6. Do some post-processing
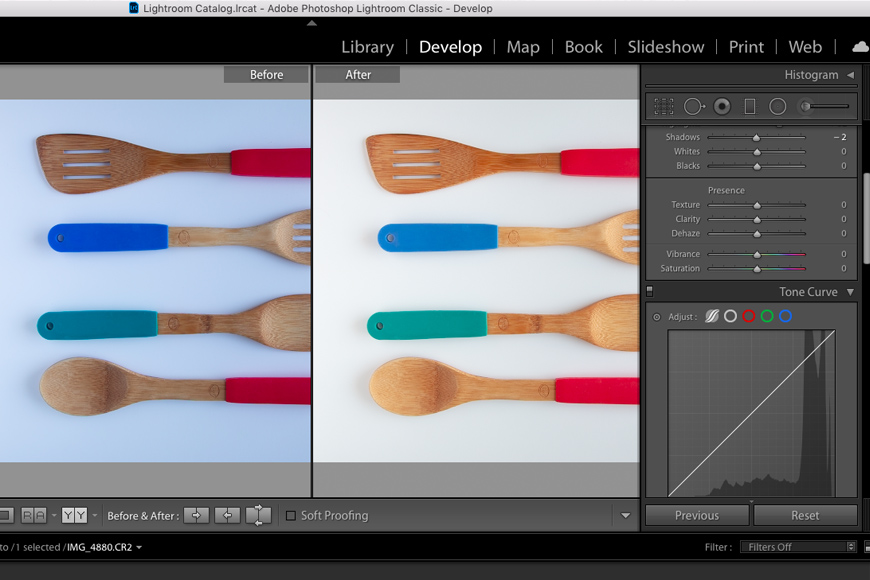
Even if your images are going on social media, that doesn’t mean that they should go directly from the camera.
At least a little editing is always needed to give your product photos a more professional look. Make sure that the white background is actually white, clean any spots or dust that could be distracting, make sure there’s detail in highlights and shadows, etc.
Those are all things that you need to check before publishing a product photo, regardless of the channel the image is being uploaded to.
Then, you need to optimize your product photos for each platform. You need different sizes and formats for Facebook, Etsy, Pinterest, Instagram, eCommerce product pages, and so on.
Check the requirements for each one and set it up yourself before posting. If you leave it to the uploading algorithm, you might not get the desired quality.
10 Product Photography Tips for Beginners
Now that you know the basic steps to shoot quality product photos, here are some tips to improve the results and maybe do more complex images or lighting setups each time.
1. Pick the correct equipment
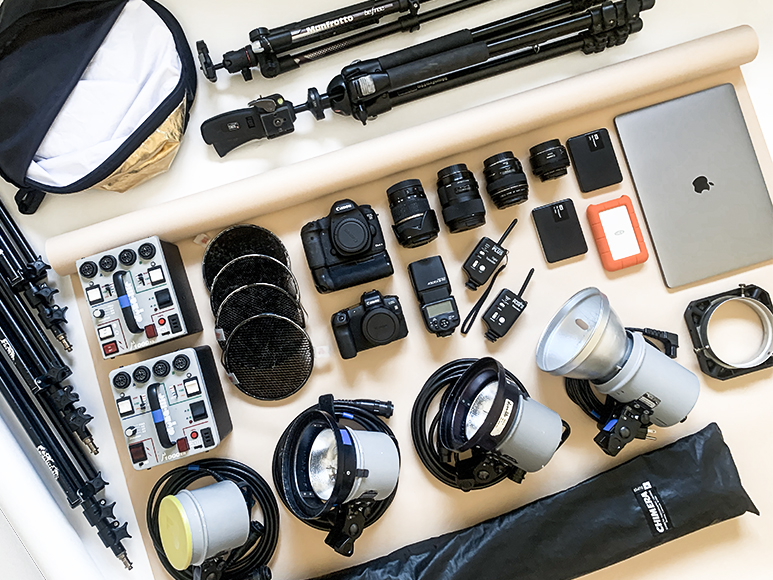
Credit: Natalie Thomas
When you want to produce quality product images on a budget, you need to find a balance between what you need and what you can afford. Here’s a guide to help you out with this difficult task.
- Camera
Obviously one thing that you can’t miss in a photoshoot is the camera. Ideally, you need a DSLR or a mirrorless camera. With those, you can choose the right lens and ensure more resolution and quality.
You can read our guide to choosing the best camera for product photography. In any case, the most important feature in a camera for product photography is the sensor.
You want your camera to have enough resolution so that the product’s details can be clearly seen and appreciated in each image.
Put yourself in the shoes of the customer. Imagine you’re window-shopping online and you see two similar products: one of them has a photo where you can appreciate the material and finishing, and the other looks blurry and sketchy… which one would you pick?
If you don’t own a high-quality camera, remember that you can always rent one by the day. If you can plan to photograph many products in a single day, you can get your money’s worth out of this investment.
If you don’t have the budget or enough products to make this worthwhile, then you can always use a smartphone. See tip #2 for advice on how to make the most of your mobile if this is what you’re going to use.
- Lenses
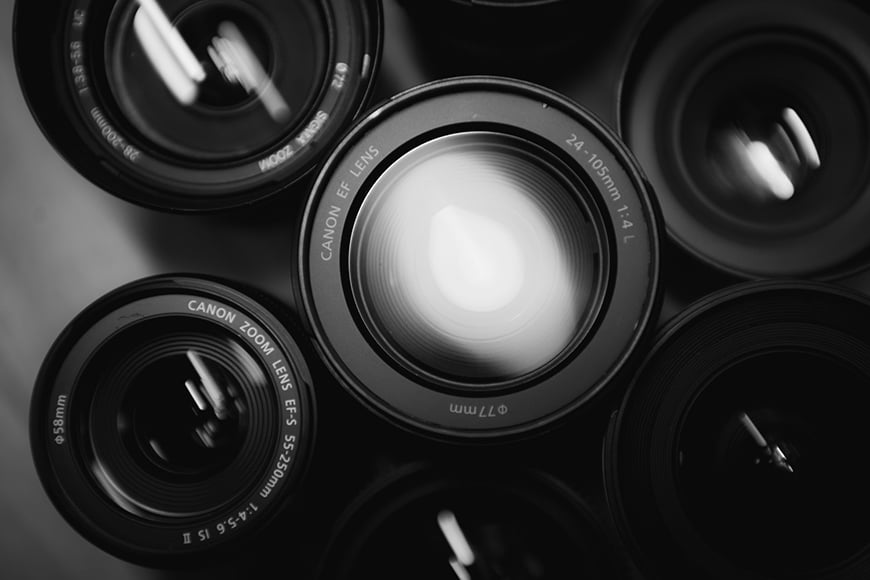
Credit: Hunter Moranville
If you’re photographing a pair of earrings, you need a lens that gets you closer than the one you would need for a pair of shoes.
Also, it will be different if you have to work in a small corner or if you have rented a photo studio. So, the best lens depends on the size of the product, the space that you have available, and your budget.
This in mind, a zoom lens can give you more flexibility, especially if you have to deal with different types of products on a regular basis.
If you can get one with macro capabilities, you’ll be able to take even better close-ups to show every detail of the product.
If you don’t want to buy extra lenses at the beginning, you can start with the zoom kit lens that came with your camera. This can get you a long way in budget product photography. However, they do have limitations.
The aperture won’t be wide enough for a narrow depth of field, and you can’t do macro photography. So, if you can upgrade your zoom, you’ll have better results. To do that on a budget you can turn to third-party manufacturers.
For example, a common kit lens for Canon enthusiast cameras is the EF-S 18-55mm f/3.5-5.6. A good upgrade could be the Sigma 17-50mm f/2.8 for Canon.
- Tripod

Some people underestimate the use of a tripod, especially when using a smartphone camera. However, it’s extremely useful for two reasons.
The first one is stability. Often when you’re working with natural light, desk lamps, or other light sources that are not professional, the intensity is very low.
Since you want to keep the ISO values low to avoid noise and ensure high quality, a slower shutter speed might be useful.
In this case, you need a tripod to avoid any camera shake that would make your images look amateurish.
The second function of the tripod is to ensure consistency in framing and composition. There’s a huge range of tripods out there covering any budget. It’s an investment you won’t regret.
- Lighting
The right lighting can make the difference between a casual snapshot and a professional-looking product photo.
For natural light, you can work close to a window. Cloudy days are good because overcast skies keep the light even and the shadows soft.
If the days are bright, try to do your product photography early in the morning or late in the afternoon, thus avoiding the strong midday sun. You can also use light modifiers.
If you decide to use artificial light, you can use torches, desk lamps, LED lamps or speedlights to stay within budget – see our guide to types of studio lights here.
Remember that each one of those will have a different light temperature, so make sure you set the right white balance in the camera settings. Otherwise, you’ll have to correct it in post-production.
Speedlights are calibrated to white light, but desk lights will be more yellow. You can always include a grey card in the photos to find the correct white balance in your images.
Whichever source of light you choose, try to avoid mixing it with a different one. So, if you’re using a cold lamp as the main light, don’t use a warm one as a fill light. There’s nothing more difficult than trying to fix a mix of different color temperatures.
- Light modifiers

Credit: Pat Barlow
These will depend on each scene and setup, but there are some basics that will come in handy for most product photography photoshoots.
A softbox, tent or any kind of light diffuser is a must-have. Other than in some very specific situations, you don’t want to have hard, dark shadows in product photography.
Reflectors are also useful to soften the shadows without having to add another source of light. You can just place them on the opposite side, and the light will bounce back to fill in some of the darker areas.
Flags will direct the light wherever you want it. For example, let’s say you’re shooting a product photo against a black background. You can use flags to keep the light from spilling behind the product – see more tips on creating a black background here.
The right background is very important when you want the product in your image to stand out.
Many platforms only accept white background images; it’s also the standard for eCommerce product photos. For this, you’ll need a sweep, but some variety can be good for other types of images. For example, you might change up the backdrop when shooting product photos for social media.
Depending on your product, you can use a variety of backdrops made from everyday objects. If you’re going to photograph kitchen supplies, for example, you could use a table cloth or a wooden table. For other products, a simple poster board will do the trick.
See our guide to the best photo backdrop stand.
2. Make the most out of a smartphone camera
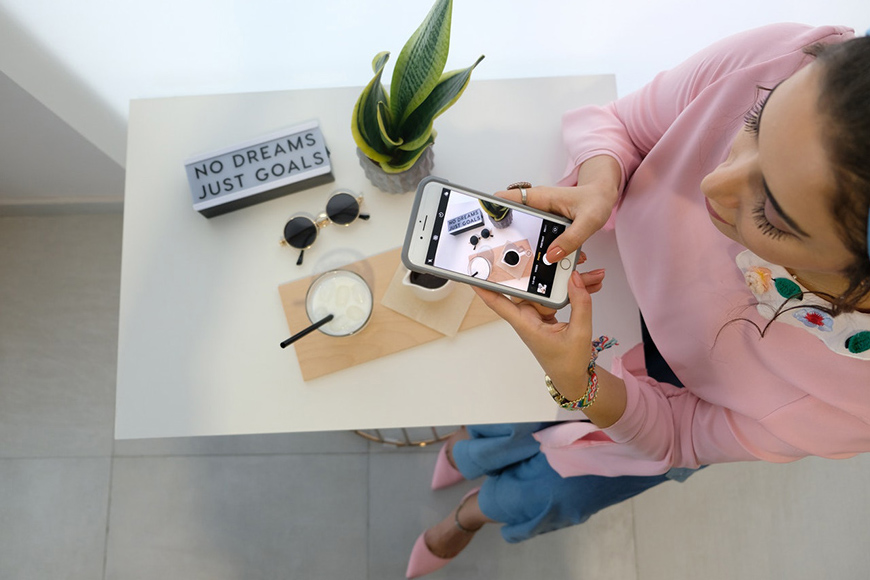
Credit: The Lazy Artist Gallery
While digital cameras will give you the best results, smartphone cameras have come a long way, and you can get some amazing looking product photos with them.
The quality of mobile images depends greatly on the phone, even more so than the difference between cameras. In other words, an enthusiast cropped sensor camera will give you decent enough images for your product photography on a budget.
However, low-cost smartphones might not give you acceptable pictures for this type of work. You might have to focus on mid-range to high-level smartphones if you want to use them for product photography.
If you’re using the default camera app from your phone, you can use the portrait mode to blur the background and make the product stand out.
However, I do recommend you use camera apps that allow you to choose the camera settings and give you more control.
Also, use post-production apps to edit your photographs. There are some excellent options for free. Snapseed, Photoshop, and a limited version of Lightroom are great choices.
Check out our review of the iPhone Photo Academy if you want to improve your smartphone photography.
3. Natural light vs. artificial light
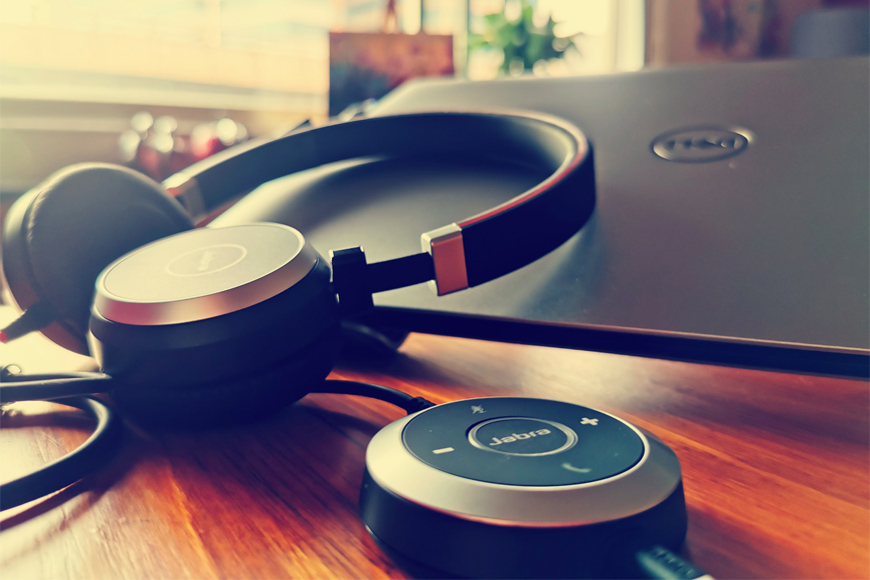
Credit: Marco Murakami
When it comes to product photography, lighting is crucial to making your images look professional. Understanding the type of lighting you need will improve your product photography without impacting your budget.
Natural light works great for lifestyle images that show your product being used in a real-life situation. Obviously, this depends on the type of product, but this is a general guideline that you can adjust to your needs.
Another style that benefits from natural light is still-life photography. If your product is a household item, something related to food or cooking, decorations, etc, this is a great option.
Artificial light is better when you have to photograph the product on a white background. It’s also useful for certain types of materials, for example, glass, metal, or mirror-like objects are easier to photograph with artificial light.
With artificial light, you can have better control of reflections.
4. Take a variety of photos
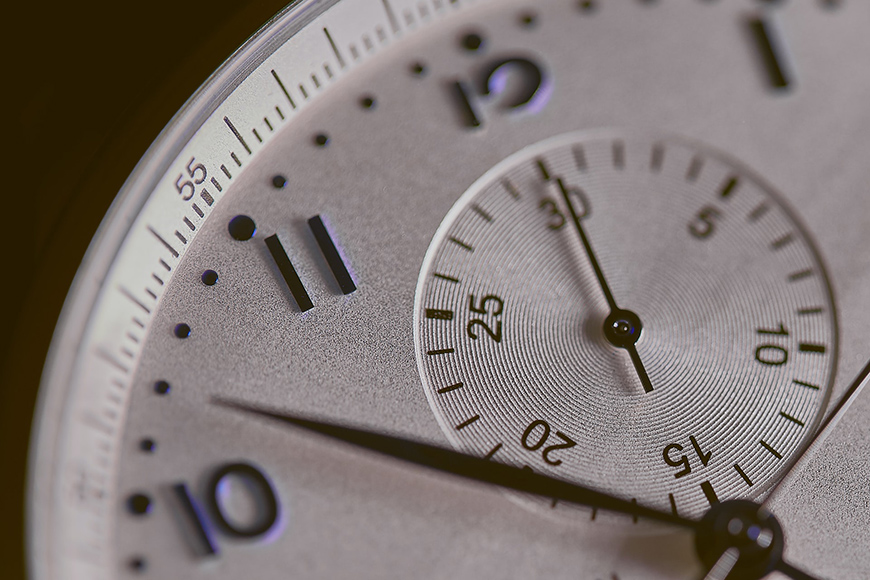
Credit: Age Barros
Once you’ve dedicated the time to photograph your products, use it to the fullest. For every scene or lighting setup that you use, photograph it from different angles, get closer and step away, etc.
Then start changing little things like the color of the background or the arrangement of the props and items. Sometimes the first idea you had is good, but the second one is better.
From each photoshoot, you can extract a variety of photos that will go further in your marketing strategy.
You can create some images for your Instagram feed and others for Instagram Stories and Reels. Other images can be dedicated to your website, while the traditional white background can be used in an Amazon or Google Shopping eCommerce store.
Even those that seem very straightforward can show some diversity. Keep in mind that your photos will substitute the actual experience of the client holding the product in their hands.
So, the more information you can give them the better. Try including something in your image that demonstrates scale – i.e., allows the viewer to understand the size of your product. Let’s say you photograph a spoon: the client needs to know if it’s a serving spoon or a teaspoon.
Make another image a close-up to show the details and material. Yet another one can be the product next to the packaging, etc.
Sometimes the type and amount of images are not up to you, and you have to follow the requirements of each website or platform. Make sure you check them before you do your product photography shoot so that you don’t miss anything.
5. Ask friends to model for you
Credit: Joseph Barrientos
Adding a model to your product photography can be very useful. Seeing someone holding the product can give a better idea about the scale.
If the product is something you wear, it’s extremely important to see it on someone else to have an idea of the fit, how the material falls, and so on.
In essence, adding a human touch inspires confidence and helps people relate and imagine themselves using or having that product.
Since you’re on a budget, you probably won’t be able to hire professional models, but you can always ask friends, colleagues, and family members for help.
More times than not, you can avoid photographing the face – this way even your shy friends can help you out.
If you do show someone’s face though, make sure you get a model release. Even among friends, it’s always better to have things in writing, and often the websites or companies will ask for it to avoid potential lawsuits.
Otherwise, you can set everything up and be the model yourself. In this case, you can also ask for help for someone to take the photo once you’re in position or use a remote shutter release.
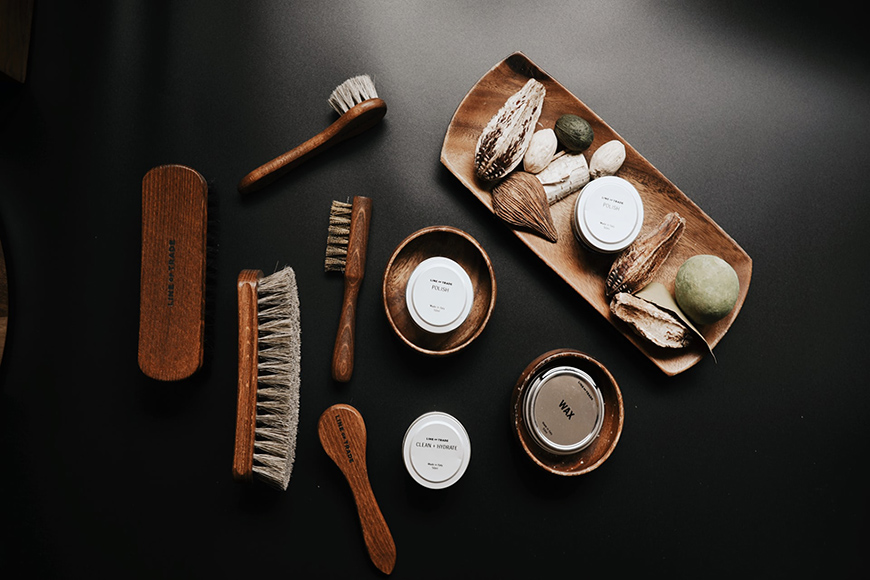
6. DIY as much as you can

Credit: Kal Visuals
A great tip to save money is to DIY. There are some things that you can’t avoid paying for to get the real deal, but everything that can be done or crafted by you, do it.
This can apply to some of the equipment, but most of all, to props and backdrops. For example, you can use a chair to set up your scene.
Clamp your seamless backdrop to a piece of furniture and use the seat to arrange your product. You can use all sorts of papers and fabrics for backdrops without buying a professional one.
For a white background you can use the wall, but make sure that you’re using a narrow depth of field. If you want to add some texture, you can use tissue paper or wrinkle any fabric.
As for the light modifiers, you can make your own softbox out of a cardboard box and some tracing paper.
To make flags or fashion a snoot, you can use opaque black paper – for example, Fabriano. And for reflectors, you can use a poster board or any surface covered with aluminum foil.
The props, of course, are the easiest part to DIY or you can use anything that you already own.
7. Choose a color palette
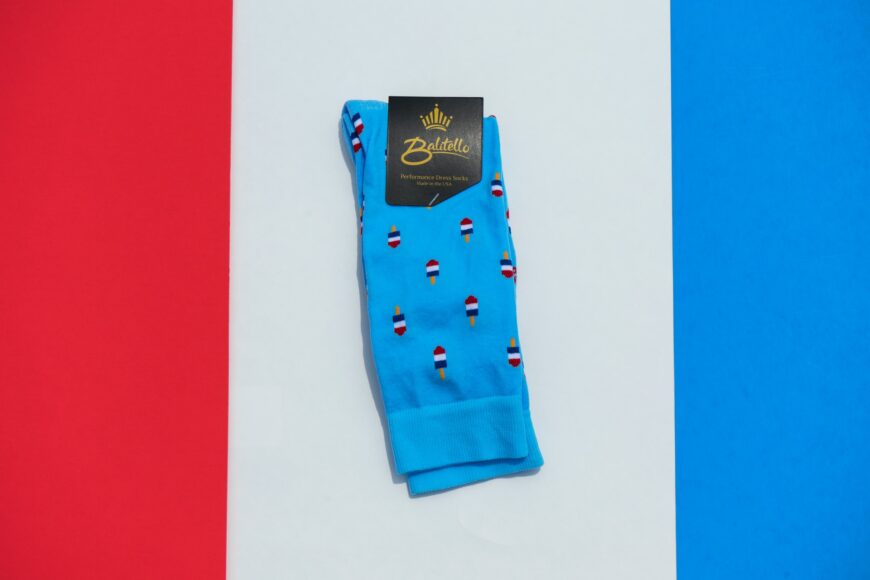
Credit: Vincent Branciforti
Most brands have a specific color palette that makes them recognizable and consistent. These colors are reflected in the logo, web design, and product photographs.
If the brand you work for already has a marketing strategy and personality, make sure you ask for the color palette and follow their briefing.
If, instead, you’re building your own brand, start by choosing the color palette that you want to use.
The colors aren’t random or decided on a whim. All brands choose their color palette based on their ideas, values, and the concept they want to communicate.
Look at Google, for example: their letters are all in primary colors except for the L because the designer, Ruth Kedar, wanted to show that they don’t always follow the rules.
You can easily create your own color scheme using Adobe Color. Here you can start with one color and create the palette using different color theories.
You can also start by using a word or a concept, finding inspiration from other brands and designers, or extracting the color palette from a photo.
Check out our full guide to Adobe Color to learn more about how it can help you.
8. Be consistent

Credit: Photomix Company
The best way to develop loyalty in your followers and clients is to show consistency. If people see that one of your products is well represented, but another one has an underexposed picture, and a third one is blurry, they won’t come back.
The best way to be consistent is to create a photograph checklist, a style guide, and a publication calendar.
You can use the checklist to make sure that you don’t forget to photograph all the angles and presentations you want to show in each product.
The style guide will keep things visually recognizable and maintain a high-quality standard. You can write down the lighting setup and camera settings from each photo shoot to make sure that the results are consistent.
Finally, the calendar can help with your social media feed. This way, your followers will know what to expect from your accounts and will be more likely to follow you.
9. Be honest

Credit: Geert Pieters
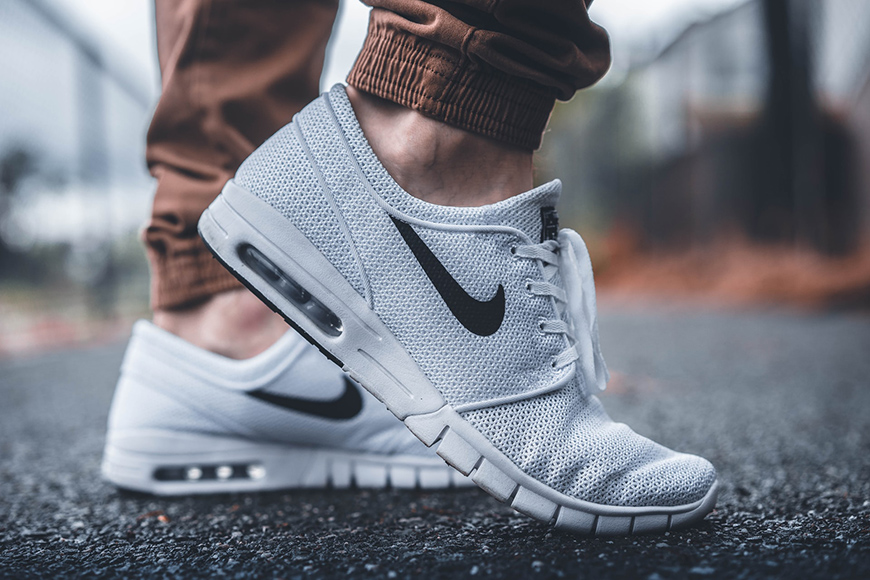
You want to be concise, clear, and honest. While an advertising photograph can take some creative license, product photography is more descriptive.
The product should look the way it is – this refers to the size, colors, and materials. When you show it in the context being used, it needs to demonstrate how it can be used in real-life.
For example, if you’re selling a pair of sneakers, you want to show them in the box or against a white background. Otherwise, a model can be wearing them while standing still or walking down the street.
There’s a code of ethics, and depending on where you live also a number of legal guidelines, to avoid misleading the customer.
You want your products to look good but always true to what they are. This is the best way to get the client to come back and buy more.
10. Post-process
Credit: Lina Verovaya
Last but not least, editing your photos before publishing them is essential to giving a professional look to your online store.
From optimizing for the web to correcting the white balance or background removal, there are many things that you can edit without doing anything unethical.
The apps from Adobe Cloud are the industry standard for photo editing, but you have to pay a membership to use them.
Adobe Lightroom is good for batch editing, which will save you a lot of time if you have to work on many photos taken under the same lighting conditions.
Adobe Photoshop gives you much more freedom to edit. It’s great if you want to change the background, eliminate dust or spots from the product, or create photo composites, amongst other things.
Adobe Illustrator is used for graphic design if you want to use your product photos in a brochure, or Adobe InDesign if you’re making a catalog.
There are other excellent choices outside Adobe too, like Skylum Luminar, and also some free options like GIMP – see here for more alternatives to Photoshop.
Taking some basic editing classes will be a smart investment, and if you can’t afford them yet, there are many free tutorials that you can check out for free. With practice, you’ll improve your product photography very quickly.
Product Photography FAQs
What is product photography?
It’s is a type of commercial photography that deals with capturing images of products. These images are then used by the client in marketing campaigns, e-commerce, social media, etc.
What do you need for product photography?
The exact equipment will depend on the product you’re shooting, but basic gear will include a DSLR or mirrorless camera, suitable lens and tripod. Often, some artificial light source or light modifiers will also be needed.
How can I do product photography at home?
A great way to capture photos of products at home is to use a light box. You can buy one or make one yourself – either way, it will help you control the lighting and backdrops in your images.
Final Words
To summarize, doing great product photography on a budget is possible. Whether it’s for an online store or business social media account, all you need is some gear and a bit of practice.
While the results might not be the same as the ones from a professional product photographer, these tips will definitely improve the quality of your photos.
If you have any questions or some product photography tips of your own that you want to share, feel free to leave a comment below.

Check out these 8 essential tools to help you succeed as a professional photographer.
Includes limited-time discounts.
 122 Photography Tricks & Camera Special Effects to Try Today
 26 Famous Car Photographers to Follow in 2024
 33 Most Famous Film Photographers in 2024
 33 Most Famous Architecture Photographers in 2024
 31 Most Famous Travel Photographers to Follow in 2024

Ana Mireles is a Mexican researcher that specializes in photography and communications for the arts and culture sector.


