


Topaz Denoise AI Review: Noise Reduction App
Topaz Denoise AI is an incredible tool that helps eliminate noise from high ISO photos while enhancing details. Read our review to see if it's worth the money.
Software | Software Reviews | Topaz | By Greg Cromie | Last Updated: January 22, 2024
In this Topaz DeNoise AI Review, I’ll be testing the most popular photo noise reduction software made by Topaz Studios.
If you’ve ever wished your images shot at high ISO were a little less noisy (grainy), this might be the noise reduction tool for you.
Invaluable tool to remove noise and extract lost details from previously unrecoverable images.
I use an APS-C sensor Fujifilm camera, and although images shot at ISO800 look good, pushing the ISO beyond 1,000 can introduce a fair amount of noise.
Even the cheapest full-frame cameras can shoot images up to 12,800, but even then, there’s a lot of sensor noise that creeps in.
Being able to denoise your photos after you’ve taken them without losing image quality may seem farfetched, but fortunately, here in 2024 there are a couple of good solutions.
Today I’ll be taking a look at what I consider to be the best noise reduction tool of the lot – Topaz DeNoise AI.
Topaz DeNoise AI Review Summary
Pulling from machine learning and millions of images, it uses artificial intelligence to reduce the noise in low-quality images or those shot at high ISO, while preserving impressive amounts of detail and clarity. The interface is simple and uncluttered, but processing speed is dependent on your computer’s performance.
What is Topaz DeNoise AI?
- Excellent noise reduction
- Excellent sharpening
- Great batch function
- Simple user-interface
- Easy to use
- Good value for money
- Higher system requirements
- Unable to preview Chroma Noise Reduction
- Slow exports
Topaz DeNoise AI is a revolutionary image editing app which can remove noise, enhance sharpness and recover crisp detail from RAW or JPG images, all by using the latest Artificial Intelligence technology.
It is available as standalone software, or as a plugin for Photoshop, Lightroom Classic, or Topaz Studio.
(See our Topaz Studio review for a deeper dive into this useful piece of software.)
To achieve the seemingly impossible, Topaz fed millions of noise impacted and perfectly clear images to the software, then used machine learning to help it identify and reduce noise in jpeg and raw files.
Via machine-learning, Topaz ‘taught’ DeNoise AI how to recognise and remove noise, then restore previously unavailable detail in a matter of seconds. It’s the kind of software that makes you want to re-edit all your old images!
We’ve all had the experience of shooting at night and being forced to use high ISOs in order to get the image, knowing full well we’ll suffer the consequences of noise and lack of detail when editing in post.
With Topaz Labs DeNoise AI, you can happily take those night shots knowing that there is a solution to editing crystal clear images.
The software is able to differentiate between fine grain noise and fine detail without losing any image detail. This is critical especially when you have a highly detailed image.
Regardless of your skill level, it is an amazing software solution that should be in every photographer’s toolkit.
Topaz Labs offer a whole range of photo editing tools which you can purchase separately, or follow our recommendation and buy the Utility bundle, which includes DeNoise AI and various powerful image editing software: DeNoise AI, Sharpen AI, JPEGtoRAW AI and Gigapixel AI.
The Bundle is frequently on discount – you can check here.
DeNoise 3.6.0 (April 13, 2022)
- More settings in save dialog are now sticky
- Make overwrite wording more clear
- Added link to online tutorials in help menu
- Validate makernotes and white balance to have less problems opening enhanced images in PS,LR, etc
- Auto model is now sticky in plugin mode
- Removed ‘Preserve Source Format’ image format option in save dialog as it’s redundant with the ‘Preserve Input Settings’ toggle
- Model values in file list view now spaced out evenly
(Source: Topaz)
- Processor: Intel multi-core or better, Xeon or AMD equivalent.
- Operating system: Windows 7, 8, 10 (64-bit only); macOS version 10.12 (Sierra) and above
- RAM: 8 GB of RAM (16 GB recommended, 32 GB Optimal)
- Hard disk space: 4 GB pr more recommended
- Monitor resolution: 1024 x 768 display
- Graphics Drivers and OpenGL version 3.3 or later
- Intel: i5 or equivalent (3.0GHz and above). Intel i7 or greater (4GHz and above) is recommended.
- AMD: Ryzen 5 or equivalent (3.0GHz and above). Ryzen 7 or greater (4GHz and above) is recommended.
- NVIDIA: Minimum requirement of 2GB of dedicated VRAM (GT 740 or greater); A recommended requirement of 4GB of dedicated VRAM (GTX 970 or greater); An optimal requirement of 8GB of dedicated VRAM (GTX 1080 or greater)
Topaz DeNoise AI Review
Access and Support

DeNoise can also be used as a Lightroom Plugin, handy for those ingrained in existing workflows.
Locating and accessing the DeNoise AI software could not be easier thanks to Topaz Labs’ great online site.
Topaz Labs develop a whole range of photo editing software and their site has a page dedicated to each.
In the online store, you can purchase any standalone product, or you can buy the Utility bundle, which includes various powerful image editing software: DeNoise AI, Sharpen AI, JPEGtoRAW AI and Gigapixel AI.
(There’s a 50% sale on right now, which makes buying the entire Utility Bundle very attractive – click here to learn more.)
Topaz Labs has a fantastic support page that includes tutorial videos, community forums, blogs and FAQs, although it has to be said – their software is surprisingly simple to use, despite being very powerful.
Downloading Topaz DeNoise AI was quick and simple and only took a matter of minutes with a healthy internet connection.
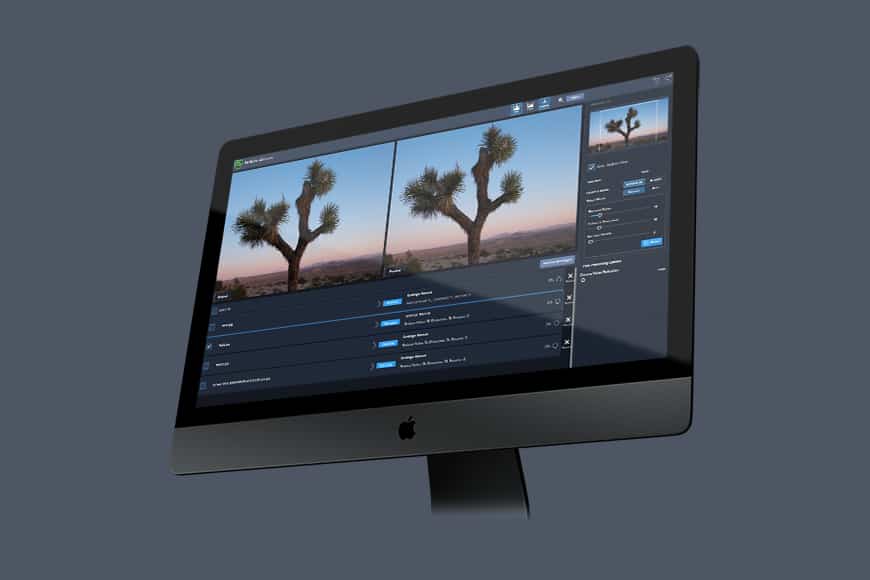
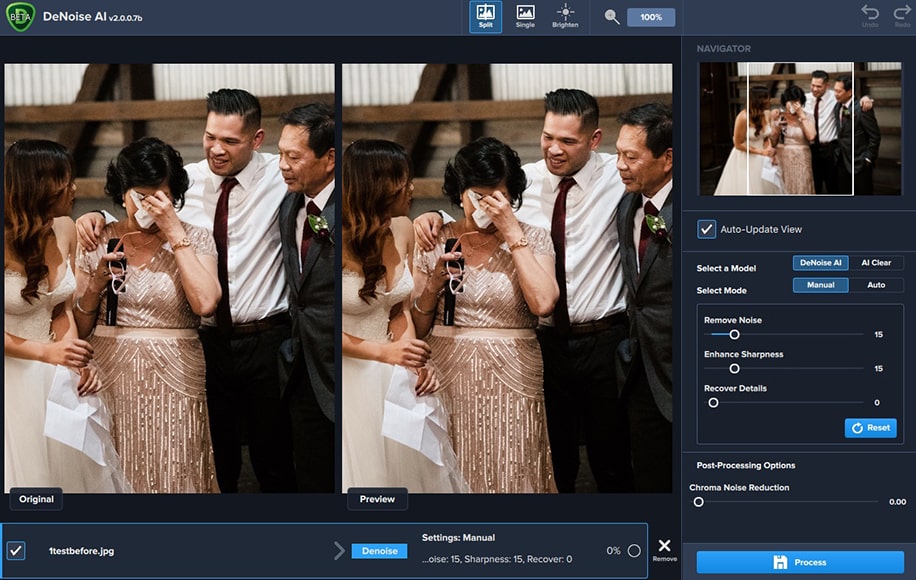
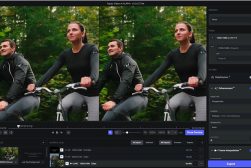
Interface
The interface is incredibly simple and intuitive to use. As mentioned, this is a standalone software solution for effectively managing noise.
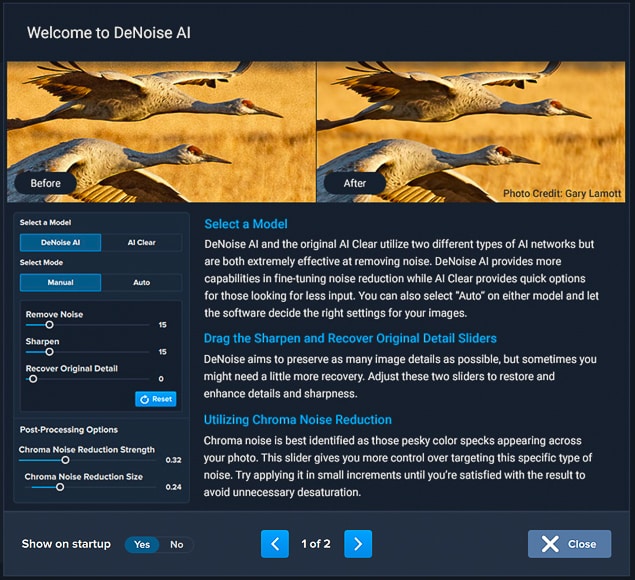
When you first open it, you have a two page tutorial on how to manage the software and achieve the image results you desire.
To being with, you can Open a single or Batch of images to edit. The loading and preview creation of the images takes as little as 3 seconds and for a batch of five images, it took about 10 seconds.
For reference, I am using a 2017 21.5″ iMac with Retina 4K display, running a 3.4GHz Quad-Core Intel Core i5, Radeon Pro 560 4 GB graphics card and 16GB of memory… so not the latest spec computer by any means.
Once you have an image loaded you have two main choices on the right-hand control panel. The first is to use the DeNoise AI and the second is to use the original software, AI Clear.
AI Clear is a simpler version of the software with far less ability to finely control the noise reduction and sharpening.
Topaz DeNoise AI is the far more advanced version and allows for greater control of noise reduction. You can really fine-tune each image with this model.
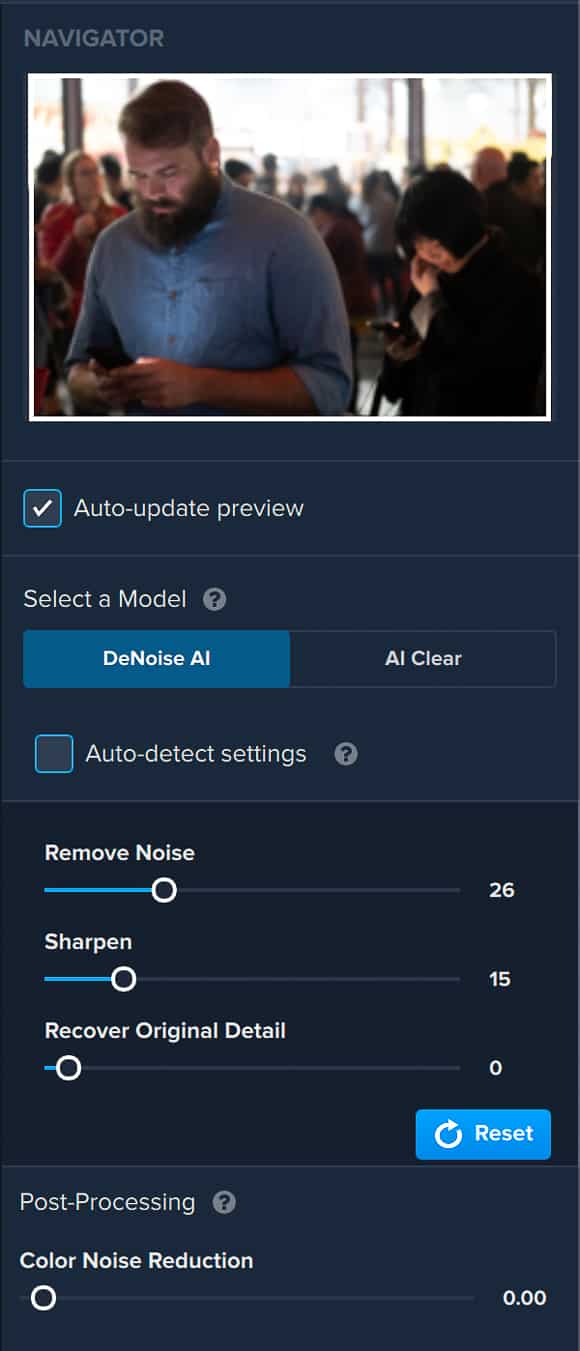
Under the later model, you have the ability to simply tick for Auto and the software will do what it does best and will remove the noise for you.
This is a pretty amazing feat as it accurately removes the noise and sharpens the image without tremendous loss of fine detail.
Under Manual, you have sliders to finely adjust Remove Noise, Sharpen and Recover Original Detail. Then there is the fourth slider for Colour Noise Reduction.
And that is it! The last step of the processing function is to press the Save Image Button.
This will bring up a Save As menu where you can select the file format, including being able to save the image as a RAW – a great feature, in case you want to delve deeper into the file using your favourite image editing software.
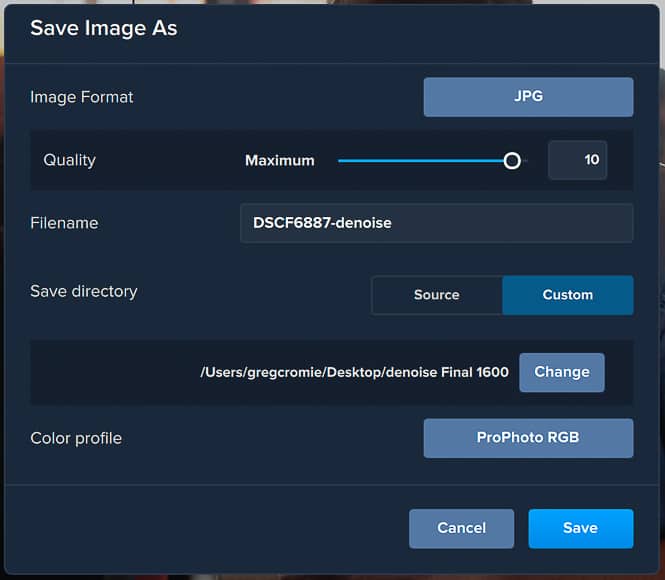
You can then choose Image Quality, File Name and Save Directory or where you want to save it to.
You can also choose to preserve your original RGB colour profile. Then all you have to do is hit the Save button and your image or images are saved to your intended destination.
If you’re an Adobe Lightroom Classic user, you simply load the photo in the Develop Module, then in the menus, head to Photo > Edit In > Topaz DeNoise AI.
This provides a seamless image retouching experience, allowing you to take full advantage of this powerful software while preserving your existing workflow.
Performance
You don’t need a powerful computer to run DeNoise AI, but it certainly helps.
As mentioned earlier, the uploading of a single image and generating its preview is quick – like 3 seconds quick!
Even when doing a batch of five images it took no longer than 10 seconds, which is impressive on my ageing iMac with 16GB of RAM.
(If you’re lucky enough to have a computer with more 32GB of RAM, you can assume even faster performance.)
Once I made my selections in either Auto or Manual, DeNoise AI refreshed the preview with the new changes in less than a second. It really was that quick!
Tests Using Topaz Denoise AI
I went through some of my older images where I was using a Fujifilm X-T1 and a Fujifilm X70, i.e. two older APS-C sensor cameras.
The X-T1 has decent low light performance for a mirrorless camera, but my high ISO images still had a lot of noise.
The X70 was pretty lousy in low light and this resulted in a lot of images with thick noise, that, for the most part, were unusable.
The first two test images were photographed in Japan during one of my trips when I would often be out day and night with the X-T1.
The final image was at a friend’s wedding, where I used the Fuji X70 as a kind of informal ‘pocket’ camera, once my ‘official duties were over.
Again, this camera really struggled with low light and most of the images from that night were unusable.
Remember that it’s notoriously hard to show real-world before/afters when uploading and compressing JPGs to display on the web – if you want a closer look at the results from the original images, you can download them here.
DeNoise Example #1 – Landscape
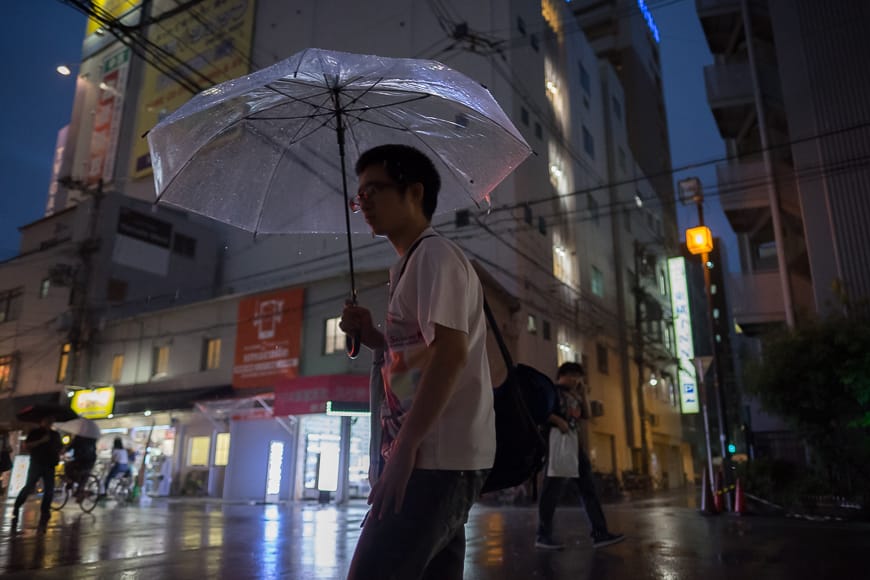
Before (Original dimensions:1600 × 1067)
After (zoomed to 100%)
I shot this image late at night on the streets of Osaka, Japan.
There was very little light other than that spilling from a convenience store across the street. I was actually sitting on the curb taking a break and this man walked into my view.
I quickly tilted my camera up and took the shot. I was disappointed later that the image was so noisy – not that I was surprised.
Using the DeNoise AI software has helped to peel back a layer of noise and also sharpen the image a little. There are some distortion artefacts on hard edges but I can live with that.
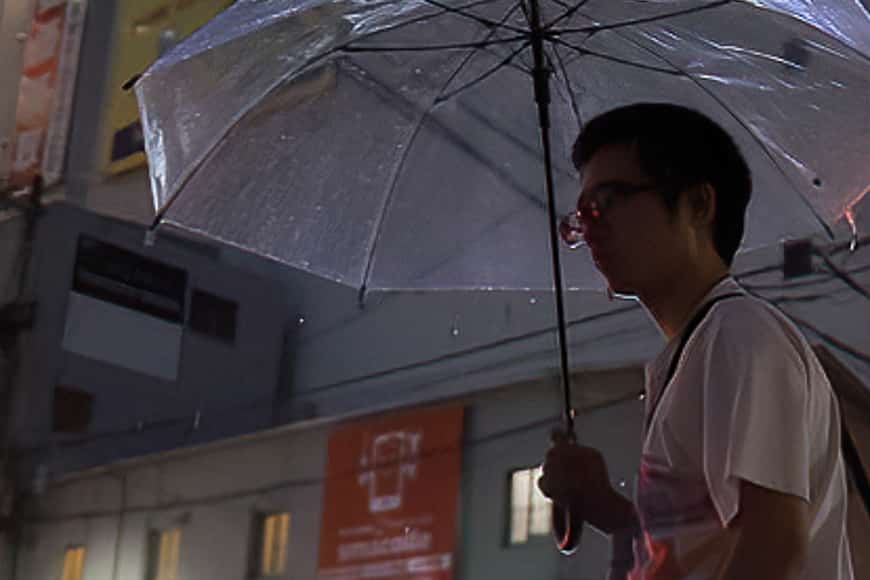
Denoise Example #2 – Portrait

Before (Original dimensions:1600 × 1067)

After (zoomed to 100%)
I captured this image of the man in the blue shirt at a night market in Melbourne, Australia.
It was after dark with very little light as they kept the main indoor space underlit so that the food vendors could light up their stalls.
I like the way that in dark situations people provide unintentional light for street photographers with their phones. I liked how this mini-spotlight case a glow on the man’s shirt and face.
It provided a nice contrast to the darkness of the space. The noise on this image was not too bad however as I did shoot at a high ISO there was some evidence.
The software completely cleaned up the noise and provide greater sharpness to the man without detriment to the background subjects.
DeNoise Example #3 – Wedding
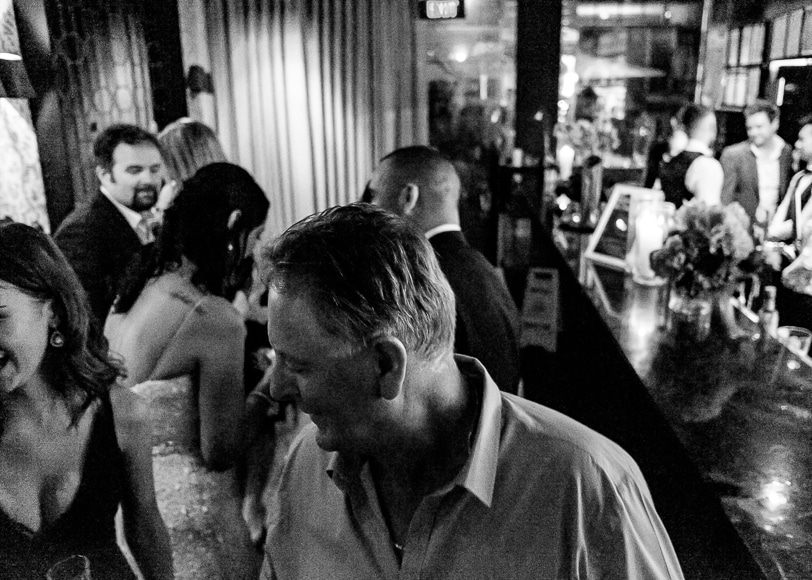
Before (Original dimensions:1600 × 1067)
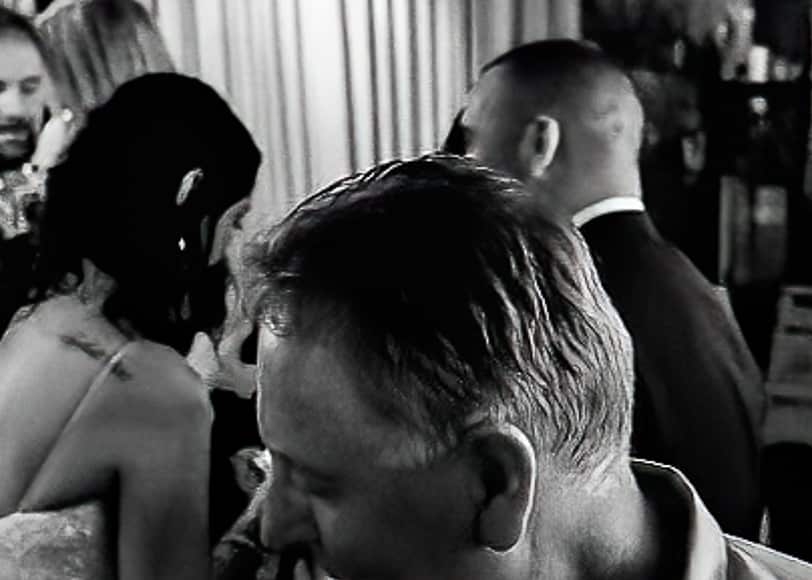
After (zoomed to 100%)
This was taken at a friend’s wedding in Melbourne, Australia.
My friend had asked me to do all the photography. Once all the official stuff was over and we were getting into the loose party mode, I put my X-T2 away and just shot with the Fuji X70.
The X70 is notorious for poor low-light images even with higher ISO. The noise was pretty bad as you can see.
Once I ran this through DeNoise AI I was amazed at the difference it made. Suddenly the image was clear and usable where before I had discarded it.
DeNoise Example #4 – Wedding 2
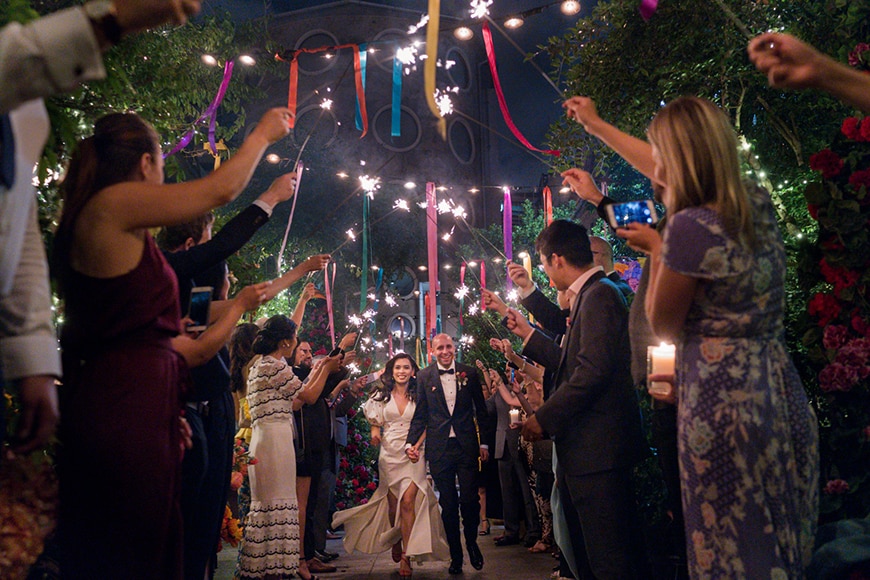
Before (Original dimensions:1600 × 1067)
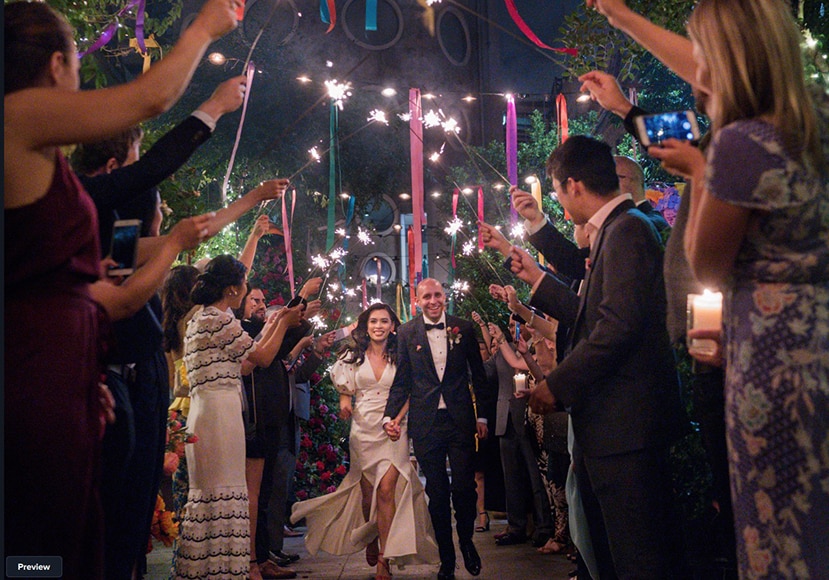
After (zoomed to 100%)
Editor’s comment: This being such a useful tool for wedding photographers, I felt it necessary to include one of my own photos, taken at ISO12,800 on a Sony a7III at the end of a wedding in Sydney.
This was one of the images where my flash failed to fire, but it was my favourite of the set, so I needed to squeeze as much as possible out of the available light in the photo.
It’s hard to tell when resizing a JPG, and then having it compressed severely by WordPress for online use, but take my word for it – Topaz DeNoise AI has done a great job at reducing the noise and enhancing the detail.
Topaz DeNoise vs Other Noise Reduction Software
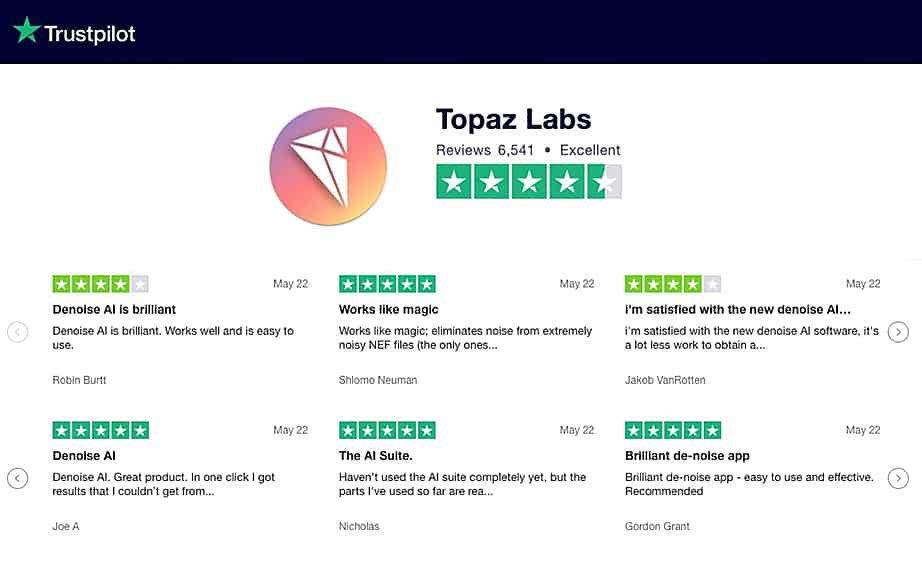
DeNoise AI has plenty of happy users – a testament to the power and simplicity of the software.
Most of the best image editing software solutions in 2024 include a basic noise reduction tool.
Among the most popular, Adobe Photoshop, Adobe Lightroom, DxO Prime and Nik Dfine2 are all ok at reducing noise.
If you’ve never used a standalone software specifically built for the sole task of reducing noise, you’ll likely have never known any better.
I won’t pretend to have tested all the above software against Topaz AI DeNoise, but I know from using Lightroom for over 10 years that there’s plenty of room for improvement.
The benefit of DeNoise AI is that unlike other programs, its strength is in its singular task: reducing noise and maintaining detail better than any other program.
I’d recommend you to try DeNoise AI out for yourself and compare it with the image editor you’re currently using.
I’m willing to bet that with all the years of Artificial Intelligence machine-learning, there’ll be one clear winner (no pun intended…)
Either way, you can take advantage of the Topaz 30-day money-back guarantee, if you find otherwise.
Topaz DeNoise AI vs Lightroom
Lightroom is a great image editing and management software, and for most purposes, it’s a jack of all trades.
However, what I found in this Topaz Denoise AI review is that a dedicated software like this can do an even better job to reduce noise.
The Denoise AI model uses machine learning in its noise reduction processes – something that Lightroom does not do.
If you’re already a Lightroom or Photoshop user, you can also use the DeNoise AI plugin to get the best of both worlds. This means you can still use LR or PS to do all your main image editing, then call up the DeNoise AI plugin to reduce noise before exporting.
Topaz Denoise AI may only be able to do one task (reduce noise!), but it does it better than Lightroom. This is most noticeable when performing noise reduction on a high ISO shot in low light, where Lightroom tends to over-compensate with softer, blurry details.
Who is Topaz DeNoise AI for?

It is especially useful for wedding and event photographers who shoot in low light without flash.
I’ve identified a few usage cases for the software, for professional photographers, amateurs, and even non-photographers.
- For owners of APS-C sensor cameras
- For owners of 1″ sensor compact cameras
- For owners of Micro 4/3 sensor cameras
- For ALL smartphone users (iPhone/Pixel night mode is good but only for static subjects)
- For event photographers working in low light
- For wedding photographers who need to capture dance-floor photos without flash
- For street photographers doing night work without using a flash
Clearly, it is useful for anyone who wants noise reduction in their images after they’ve been taken.
Modern cameras can only do so much when images are shot at high ISOs.
In addition, you’ll always be limited by the size of your camera sensor – cameras with larger sensors can handle higher ISOs better in general (which means less image noise), but they are also more expensive.
Topaz DeNoise is an affordable way to deal with noisy images, no matter your camera.
Pricing
If you are in the market for a single solution noise reduction software to help reduce digital noise in your pictures, then Topaz DeNoise AI is excellent value for money.
This is especially the case if you want to go through your older digital image library. All of those images you shot on a 2MP camera twenty years ago can be given new life!
This is one of the greatest assets a photographer can invest in – it’s surprising that Topaz Labs Denoise AI is available for just under $80.
Topaz frequently discounts their Utility Bundle, which includes 4 powerful photo editing tools including DeNoise AI, so I recommend you take a closer look at that here.
(Topaz also offers a handy 30 day, no-questions-asked refund policy, meaning that if for whatever reason you’re unsatisfied with your purchase, you can get all your money back.)
Topaz DeNoise AI Free Download
You can grab a free trial download of DeNoise AI from the Topaz website by clicking the button below.
Frequently Asked Questions
- How do you use Topaz DeNoise AI?
Drag your image(s) into the editing interface to get started. Then adjust the settings manually, or use Auto to allow the software to choose the best settings for your image.
- Is Topaz DeNoise AI a plugin?
It’s a plugin for Photoshop, Lightroom Classic and Topaz Studios. It’s also a standalone application, which can be downloaded on its own or part of the Utility Bundle.
- How do I update Topaz DeNoise AI?
Manually uninstall the current version from your computer and reinstall the latest version using the appropriate installer, available on the Topaz Labs website.
- Is there a Topaz DeNoise AI alternative?
Adobe Photoshop, Lightroom, Noise Ninja, Super Denoising, Luminar Neo and DxO Pure RAW all do adequate jobs at reducing image noise. However, Topaz Denoise AI is still our choice as the best noise-reduction software.
Topaz DeNoise Review: Final Recommendations
If you’re new to photography and shooting with a smartphone or camera with a smaller sensor and poor low-light performance, Topaz DeNoise AI is definitely for you.
This simple editing solution can be your one-stop fix for noise reduction and extract lost details from past images that you thought were unrecoverable.
If you’re an event photographer, it can effectively remove chroma noise from your photos – those annoying colour specks that tend to creep into images shot in low light.
I couldn’t really find any negatives about this software, as it does exactly what it promises to do.
However, if I were to choose something, I imagine that those with much older computers would have a slow time processing several images – I recommend you download the trial and have a play around.
Also, it’s worth noting that the new Topaz Photo AI (review) includes all the technology of DeNoise, as well as the two other main Topaz tools, all rolled into one, so if you have the need for everything, that might be the better value option for you.
In summary, DeNoise AI is a simple and elegant solution to resolving long-standing issues photographers have had with managing noise. Is it the best noise reduction software of 2024? I certainly think so.
Sure there are other high-end software solutions out there, but if all you need to do is sharpen your images and decude noise, this is the app for you.
Invaluable tool to remove noise and extract lost details from previously unrecoverable images.
Resources & References


I’m a Melbourne-based street photographer and blogger. I love to travel to Japan to photograph and document its dynamic people and culture.


