


Guide to Underwater Photography
Want to learn about underwater photography? Check out this guide! We cover photography styles, what gear you need, safety tips and more. Dive in!
Learn | Photography Guides | By Greg Cromie
In this guide to underwater photography, we’ll explore all there is to know about this fascinating genre.
What’s more, we’ll take you through the practicalities of selecting and operating the right kind of gear and essential equipment.
There’s a lot more involved in this than a quick dip with a point and shoot – it takes a considerable effort and investment to make it work.
By navigating and mastering this challenging photographic experience, you’ll soon be showing off stunning underwater shots.
If you’re eager to take a plunge, navigate down to our underwater photography tips for a quick summary of the most important advice.
Let’s dive right in!
Types of Underwater Photography
Underwater photographers can specialise in any number of different genres when shooting marine life, the environment in which they live, or underwater images in general.
Here are a few of the most common types of underwater photos:
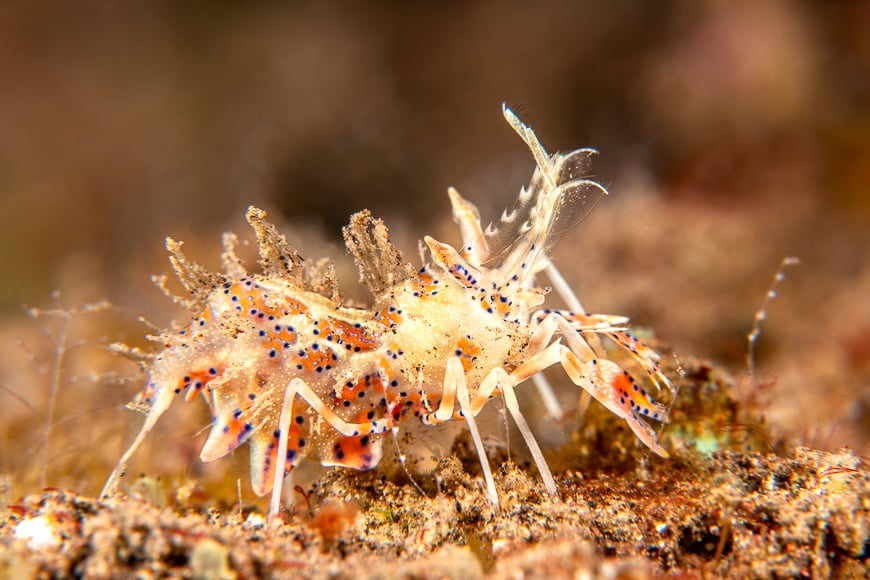
Shooting macro photography underwater can be just as challenging and rewarding as shooting it on the surface.
As it turns out, in most underwater photography, you end up close to your subjects. With a dedicated macro lens and the right amount of lighting, you can capture stunning and detailed shots of the tiniest of sea creatures.
- Underwater Fashion Photography
This fascinating style of underwater photography involves a fashion model floating or swimming in a body of water. The model often wears a swimsuit or some form of clothing that’s not usually worn underwater.
The water pulls at the fabric and scatters the model’s hair in an ethereal way that can result in stunning underwater photos.
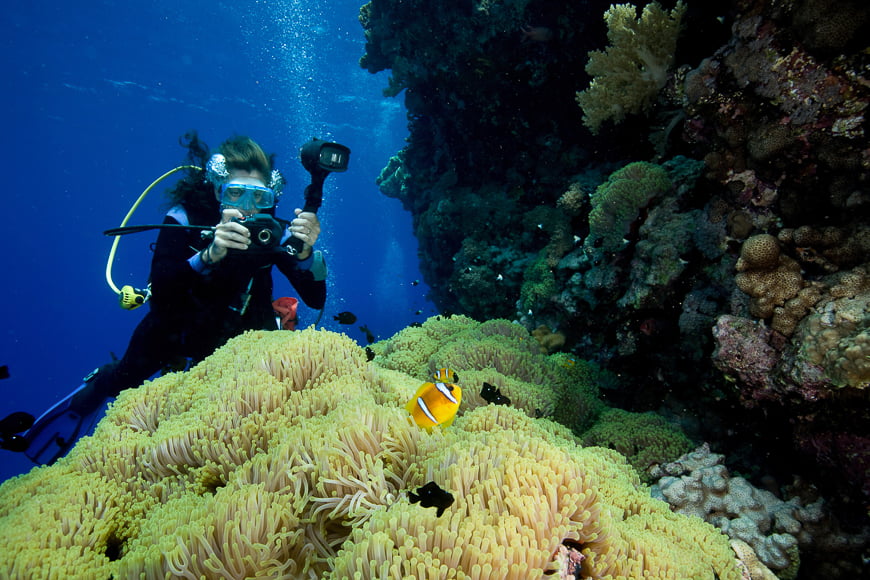
- Scenics and Wide-Angle Shots
This is one of the most popular forms of underwater photography as the images are packed with narrative and wonder. These shots generally include wide underwater scenes – captured with a wide-angle lens – and feature outcroppings, corral and even shipwrecks.
- Over/Under Images
You’ll have seen images where half the scene is under the water and the other half is above.
Over/Under images are very challenging to get right due to water drops on the ‘over’ half of the lens. Plus, exposing the scene for both the bright sky and dark sea is tricky.
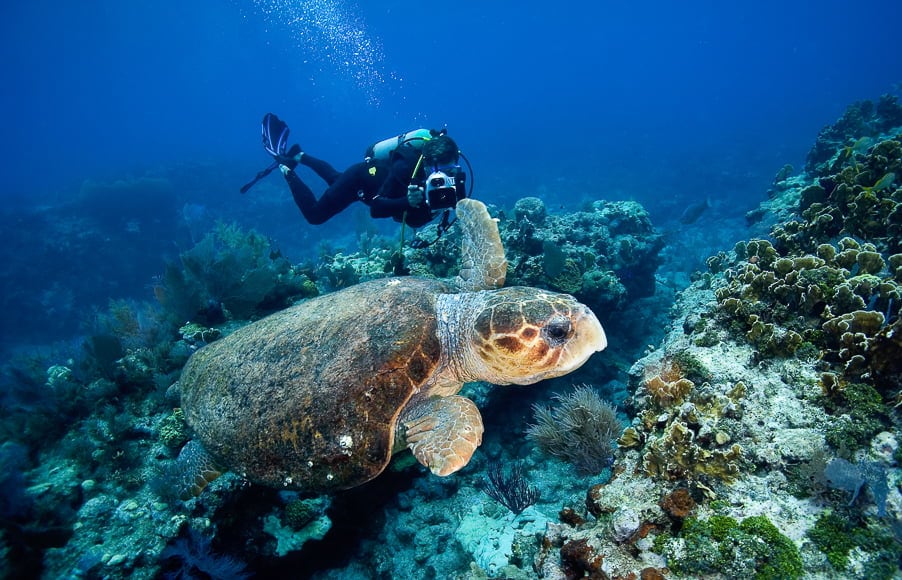
- Wildlife
The oceans and waterways of the world are teeming with wildlife and much of it we never get to see. However, aquatic wildlife can be photographed in a dramatic and elegant fashion. Tropical fish, whale sharks and seals make the ideal subjects in an underwater photo.
- Technical/Scientific/Survey
Most underwater photography is conducted for pleasure, but some styles have a more serious nature. Underwater photography can be employed for reasons including technical, scientific and surveying.
Work of this nature is especially essential in documenting the impacts of climate change.
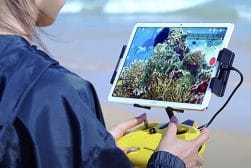
- Underwater Drone Photography
Definitely a niche pursuit but nevertheless gaining in popularity, specialist underwater drones are tethered to a remote control to allow photos and videos to be captured at depths of up to 100m. See our guide: Are underwater drones worth it?
How Much Money Does an Underwater Photographer Make?
Working out the earning potential of an underwater photographer is tricky.
How Much Do You REALLY Know About Photography?! 🤔
Test your photography knowledge with this quick quiz!
See how much you really know about photography...

For those that have diving skills and qualifications, you may consider specializing in a subcategory. Being an underwater photographer (as a sideline to scuba diving) for a survey company could prove a rewarding choice. For example, your brief may be to capture images for the construction of a deep-sea oil rig.
Alternatively, you could take a purely artistic approach and capture macro or scenic underwater images to then sell as stock photography. These images could be used in print and online publications such as the one you’re reading right now.
Your best work may be purchased by a gallery or you could hold an exhibition of photographs for sale. People with an affiliation with the ocean or local waterways are willing to spend money on images for their homes and workplaces.
As a rough estimate, Marine Insight revealed in 2011 that a professional photographer shooting underwater images could expect between $35,000 and $60,000 for their work.
Fundamentals of Underwater Photography

It’s essential to point out that while anyone can purchase an underwater camera and take a dip, you need some important skills to really get started in the genre.
For shallow work, you should at the very least have good swimming skills and some experience in snorkeling.
For those that want to go into deeper waters or even further out to sea, you need a little more than a good camera. It’s critical to your safety to first invest in dive training and adequate equipment. This must take place before you consider buying an underwater camera or stepping foot in the ocean.
Aside from knowing the skills of the best scuba divers, there are some other fundamentals involved in planning an underwater photography experience.
It’s surprising just how dark it can get underwater – so the clearer the water, the more visibility you’re going to have and the more light that’ll filter down from the surface.
Saltwater is often best, as is the need for calm waters so that ground elements are not churned up.
It’s critical to know how different surface water can be to varying depths. Currents can be swift and deceiving and a pain to work with when shooting over/under shots. Use local weather sources to understand the tides and currents.
The underwater world is home to some of the most feared creatures on earth. That’s one of the reasons why research is so important.
Personally I don’t know what compels anyone to go looking for sharks intentionally. Regardless, you should do your research on what species you’re likely to encounter on your dive trips.
On top of that, consider how to actually manage encounters with any unexpected sea life. And don’t forget that some dangers can lie underfoot or take the form of shells and coral.
As with land-based wildlife photography, be careful not to impact the natural environment. Keep a respectful distance and don’t disrupt a habitat. Above all else, do your research on the environment, inhabitants and how to manage them.
Next: how to operate your camera properly. Once you put a camera in an underwater housing and put on diving gloves, it’s impossible to change some of your settings. So take the time to fix your camera settings first.
The last fundamental is understanding where and when to dive and get optimal shots. You’re going to need as much light down there as possible, so shooting at midday will help illuminate your subjects. If not, then you’re going to need additional lighting.
After all of the above, it’s finally ok for you to get in the water with an actual camera! At the end of the day, the most important fundamental to underwater shooting is to know your limits.
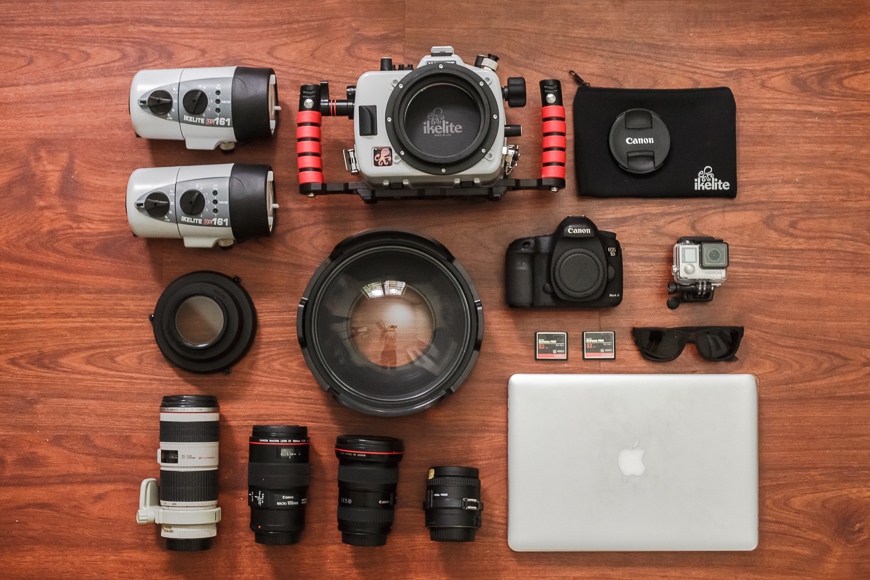
What Equipment Do You Need for Underwater Photography?

Gear used by Kurt Arrigo on Shotkit.
Aside from the safety gear required for diving and snorkeling, you’re going to need some essential photography gear to get that stunning shot.
As with any genre of photography, the basics remain unchanged – camera, lenses and lighting. You’ll also need an underwater housing if you’re serious about joining the other successful underwater photographers.
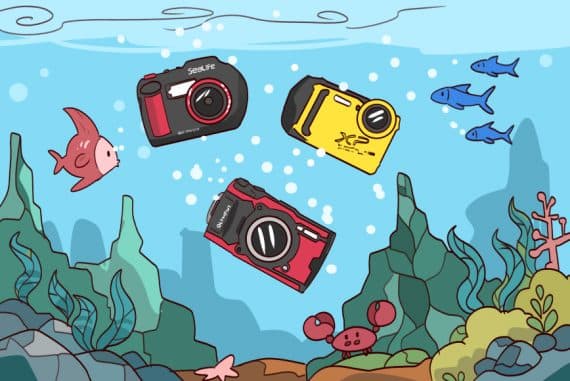
Camera
If you’ve spent any time on our site you’ll have noticed that there’s a huge range of cameras available for beginners and pros.
When it comes to underwater photography, though, you’ll need something that’s a little more than splash-proof.
While some basic point-and-shoot camera claim to be suitable for underwater photography, you’re better off investing in a dedicated kit.
Shooting on the surface is much different from shooting underwater – for starters, being able to change settings and control the camera is complicated when underwater.
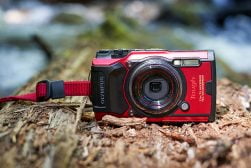
A purpose-built underwater point and shoot such as the Olympus Tough TG-6 is ideal. It’s waterproof to 50 feet (15 meters) and goes deeper with the additional waterproof housing.
The controls are designed with a diver in mind as they’re easier to manipulate. Also, if you want to branch out into underwater video, it shoots in 4K and Full HD.
Most professional underwater photographers will opt for a DSLR or mirrorless cameras. These generally have far greater low light and focus performance resulting in brighter and crisper images at deeper depths.
(You can read more about it in our full Olympus Tough TG-6 review.)
But using one of these cameras, you must have a specialty underwater housing that can cope with the pressure. Also, you can’t use the viewfinder so you have to shoot from the rear LCD screen.
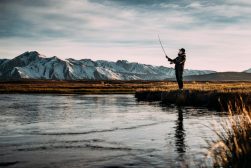
If you want to keep your feet dry while examining the underwater world, you may also find our guide on the best underwater fishing camera useful too.
An excellent choice is the Sony a7R Mark IV – a 60MP full-frame mirrorless camera perfect for underwater work. Of course, it’s going to need a good quality lens and housing – we’ll cover those in a minute.
If you’re looking to turn pro, it’s also worth considering some dedicated underwater cameras, although these can be rather expensive.
Before we move on to lens choices, let’s take a quick look at the best camera settings:
Aperture: To capture all elements of a scene in full focus, you need an aperture of around f/8. If you want to let in more light and obtain a strong subject separation, you should go with f/2.8 to f/4.
Shutter speed: Regardless of being on the surface or deep underwater, you’re constantly moving. You need a faster shutter speed and I would recommend starting at around 1/250.
ISO: Cranking up the ISO to combat low light when underwater is going to result in image noise and loss of quality. Try to keep this as low as possible and invest in additional lighting instead.
Autofocus: As there’s a lot of movement and your subjects are likely zippy, go with a continuous AF or tracking mode to nail image sharpness.
Burst mode: Using the continuous shooting mode will go a long way to ensuring you capture at least one great shot of a shark just before it eats you. As your subjects are moving fast you can select the best shot from a range of shots.
Shoot in RAW: The most important settings is to shoot in RAW. This way you’ll have all the image data captured by the sensor for post-processing. The more data, the more likely you’ll extract details from over and underexposed areas.
Lenses
If shooting with a DSLR or mirrorless camera, you’re going to want a good quality lens for underwater photography.
One of the most important considerations is the aperture of the lens. The wider the aperture, the more light is permitted to pass through the lens and hit the image sensor.
What’s more, shooting with a wide aperture results in gorgeous subject separation.
If you’re shooting macro images, then you need a macro lens that fits your camera and the underwater housing. 1:1 ratio macro lenses are best as you’ll be sure to capture all of the amazing detail of your subject.
Also, a longer macro lens gives you a little more working distance between you and the subject.
As for general underwater photography such as capturing scenes and wildlife, a general wide-angle lens is ideal. Nothing too wide as your images will have distorted subjects. With a suitable wide-angle lens, you can capture enough of the subject and background to form a unique composition.
Something like a 24mm f/1.4 is often considered the best lens for underwater photography, although a zoom can be flexible too – something like the Sony FE 16-35mm f/4 which works well on the aforementioned Sony a7R Mark IV.
Being a short zoom, there’s both a wide-angle for larger scenes and a little zoom reach for more compressed compositions. Plus, being an f/4 allows a wide enough aperture without creating too fine a focal plane.
Underwater Housings
Gear used by Grant Thomas on Shotkit.
If you’ve spent a small fortune on a camera and lens, or want to use the gear you already have, you have to keep it dry.
Like most camera accessories, underwater housings come in a range of styles and from a range of manufacturers. I would always recommend to go with the best brand and model – do your research.
Make sure that the housing is specifically designed to fit your camera and lens and also check the depth rating.
The housing doesn’t only have to keep your gear dry, it also has to grant access to essential camera and lens controls. Buttons and dials that interact directly with your system while inside the housing are a must.
Ikelite offers a great set of reliable underwater housings for digital cameras. They’re a company that manufactures precision underwater photography gear including housings, lighting and much more.
Going back to our Sony camera example, Ikelite make the 200DL Underwater Housing for Sony Alpha a7R IV. Plus, they offer a range of accessories just for this housing to optimise your experience.
Lighting

The final gear consideration is additional lighting. Keep in mind that while it may be full daylight on the surface, the instant you enter the water the light begins to fade. The deeper you go, the darker it will get, so you won’t be able to rely on natural light like you would on the surface.
For incredible underwater shots among the coral reefs, you’re going to need additional lighting.
Fortunately, there’s a range of lighting kits available just for underwater photography. You could use the built-in flash or LED panel on your camera, but this can cause water particles to flash and ruin your image.
The best solution is to purchase lighting that sits outside of the housing. These lights can be strobes or even constant light sources that are also waterproof, triggered by your camera and connect to the housing.
Once you have your kit assembled, you must take the time to get to know it out of the water. Actually, you want to know it backwards and almost be able to control it blindfolded.
Remember, being underwater is dark plus you’ll be wearing a bulky mask and breathing apparatus – shooting is complicated enough without trying to work out your settings.
15 Tips for Better Underwater Photography

Now that we’ve looked at the specifics of this exciting genre, here’s a selection of underwater photography tips that will get you diving from the surface to the depths in no time – just don’t forget your camera!
1. Find the Best Camera for Underwater
The one you choose is up to you. If you want to use the one you have then check if there’s an underwater housing to suit your camera and lens.
For beginners, I would recommend getting an action camera like a GoPro or the point-and-shoot camera described earlier.
If you’re considering starting from scratch with a brand new camera and lens, my best tip is to do your research and invest wisely to suit your skill level.
2. Master the Water
Before you pick up a camera, ensure you master your level of diving or snorkeling. Work with a skilled instructor, mentor or diving buddy to build up your skill-set and experience.
Clock up some hours – by the time you’re ready to take your gear into the water, you can focus on the photography on top of not drowning.
3. Study the Marine Environment
If you’re heading to an unknown diving location, take the time to study it in depth (pardon the pun).
This is essential not just for your own safety and experience, but also to be aware of what you can photograph. Understand the environment, wildlife and their habitats. That way you can plan for safety as well as an enjoyable shooting experience.
4. Use Natural Lighting

While using additional lighting is necessary, be sure to optimise the lighting conditions with sunlight. It can add a lot of depth and narrative to your composition.
5. Shoot Black and White
Even though the ocean is packed with colourful and vivid specimens, give black and white photography a shot. Underwater compositions can have a lot of powerful contrast and nothing brings that out better than black and white or monochrome images.
6. Understand Bubbles
Air bubbles can be both a hindrance and an interesting addition in underwater photography. They can be a distraction to an photo featuring sealife or they can add drama and story to see them floating up into the distance. The trick is to be aware of them and try to use them to your advantage.
7. Know the Conditions
Do your homework thoroughly and know the weather conditions as well as the water conditions for your location. Understand the key differences between the experience on the surface of the water versus the depths of the ocean.
8. Stay Safe
Only work within your skill level and comfort zone – going beyond that opens you up to risk, injury or worse. Plus, it’s a sure way to ruin an underwater photography adventure.
9. Enjoy the Experience
Once you’re comfortable with the genre, and you have the necessary diving skills, make the most of the experience. You’re undertaking a photography experience that most of us don’t ever get to enjoy.
Slow it down and take in all that’s on offer – you’ll also be more likely to see interesting composition and subjects. Watch how marine life interacts with their environments and try to predict behaviour to gain a great shot.
10. Get Up Close And Personal
While macro photography requires you to get up close, you should also try to get close to your other subjects. It’s especially important when using a wide-angle lens. The closer you are, the more likely you are to get an interesting and detail-rich shot.
Remember that water filters the quality of the image when shooting from a distance.
11. Compose Your Shot
Consider getting above or below your subjects and be mindful of surrounding and background elements. A photo of a school of fish or sharks shot from underneath delivers amazing silhouette-style shots. Equally, a tropical fish in front of a reef is more interesting.
12. Choose The Right Lighting

Natural light from the sun will only cut it for a few meters down. Be prepared to dive deeper and have your external lighting set up and ready to fire with the camera on the forced flash setting.
Even a diving light can add essential light to a subject or scene, though be mindful not to overexpose your photos with excess lighting. Depending on the lighting you use, you’ll also need to check your white balance settings.
Lastly, with the use of connective arms, you should keep the flash away from the housing so as not to cause light to reflect inside the housing.
13. Get the Correct Exposure
While it’ll take some time to get right, learn how to correctly expose photos while underwater.
Even though it may be tricky to view, enable the in-camera histogram so you can correctly expose your photo to prevent highlights and ultra-dark shadows.
While you can correct some of these in editing software, some details can never be recovered. Also, don’t be afraid of using contrasting elements in your images, as they’re often the most striking.
14. Build Up Your Experience
When starting off, work at a local beach, watering hole or even the local pool – plenty of dive classes start off in a pool. That way you can get accustomed to the diving process and using photo equipment while underwater before you have to contest with sharks and currents.
15. Practice Makes Perfect
Take the time to set up all of your gear and practice all of the necessary functions with your diving gloves on.
Practice how to power on your gear, change settings, operate lighting and compose images while wearing a mask. If you want to really nail it down, do it all blindfolded again and again so you don’t even have to look at your camera to operate it.
Underwater Photography FAQs
How do you start underwater photography?
Start by getting some basic equipment (like a waterproof camera or camera housing) and practicing in shallow waters. Experiment with different settings and photography techniques to get comfortable under the water. Be sure to do your research and read up about safety and what’s required for deeper diving.
Is underwater photography safe?
Shooting underwater has its dangers, so always put safety first. Invest in dive training and adequate equipment. If working with models for underwater shoots, consider their safety as well: plan carefully and ensure you have help available in case of any sticky situations.
Can I use DSLR underwater?
Yes, but you’ll need to buy a special underwater housing to protect it. An advantage of an underwater housing is that you can use your existing camera and lenses and not have to invest in a different camera system.
Final Thoughts
I applaud both your lack of fear and your determination to participate in underwater photography. As I said, it’s a genre that only a few of us get to experience.
I hope you’ve found this underwater photography guide useful in your journey. With the right skills, equipment and knowledge, you’ll be capturing awe-inspiring underwater photography before long.

Check out these 8 essential tools to help you succeed as a professional photographer.
Includes limited-time discounts.


I’m a Melbourne-based street photographer and blogger. I love to travel to Japan to photograph and document its dynamic people and culture.


