


Wedding Photography Lighting Techniques
Among all the various wedding photography lighting techniques at our disposal, learn how to add and subtract light to create mind-blowing photos.
Learn | Lighting Guides | Wedding Photography | Last Updated: September 20, 2023
The mastery of various wedding photography lighting techniques is essential to our progression as wedding photographers.
Whether we use natural light or artificial light to highlight the subject of our photo, having a grasp of the lighting techniques available to us will quickly elevate our wedding work.
In this post, rather than skimming over several different wedding photography lighting techniques, I’ve chosen to focus on one that I use most often in my own work.
It’s also a lighting technique used by many of the world’s most creative wedding photographers.
In fact, whether you’re a wedding photographer or not, I believe you can use this simple technique to create interesting photos in any situation.
After reading the lighting technique described below, you’ll start seeing wedding venues in a whole different way.
Even a drab venue can be transformed into something mysterious or spectacular.
How to Use Light Creatively as a Wedding Photographer
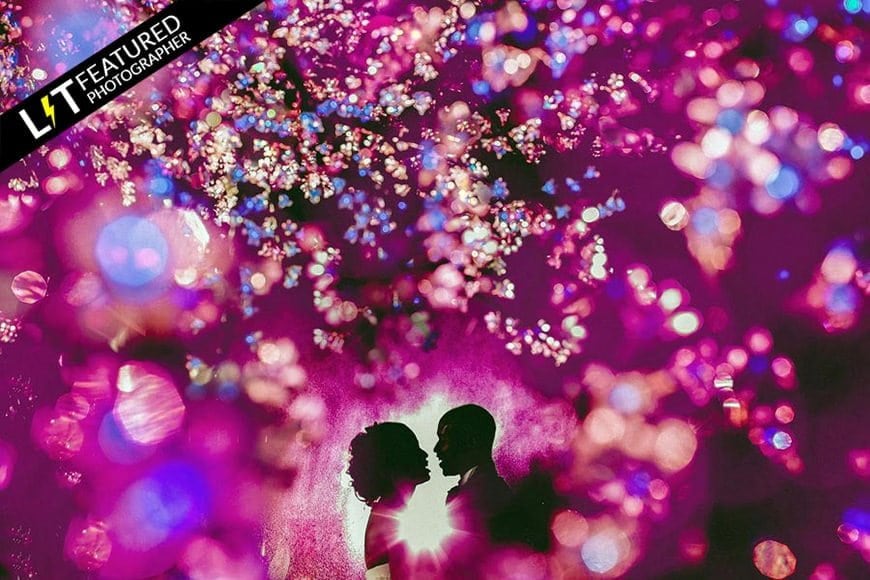
Image by LIT featured photographer Steve Rooney.
Using lights creatively in wedding photography is a huge topic and one that usually confuses most people.
Even if you have a good understanding of photography and how your camera functions, using supplementary lights brings with it a whole host of new terminology, techniques and variables. Not to mention the added complexity of lighting photography during a busy wedding!
You can spend all the time you want reading about the inverse square law, lighting ratios and everything else that goes into creating a correct exposure using flash, but I recommend you start by following my simple guide below.
There are a wide array of wedding photography lighting techniques at your disposal, but I’ve chosen to talk about just one method that I use at every wedding.
I’ve distilled the process of creatively lighting an image into 2 simple steps which should help get you close to producing something similar to the images you see produced by the world’s top wedding photographers.
Step 1 is about subtracting light and step 2 is about adding light.
No matter how complex your lighting scenario is, these 2 steps are all that you need to think about in order to control the light and produce something that natural light just can’t reproduce.
All you need is a camera, an additional light source (flash, LED panel, torch…etc), and a subject. You also may need a way to trigger your flash remotely.
Whether you have the best light for wedding photography or a beginner wedding photography lighting kit, I’ll show you how to light wedding photography like a pro!
Wedding Photography Lighting Example
Step 1 | Subtracting the Light
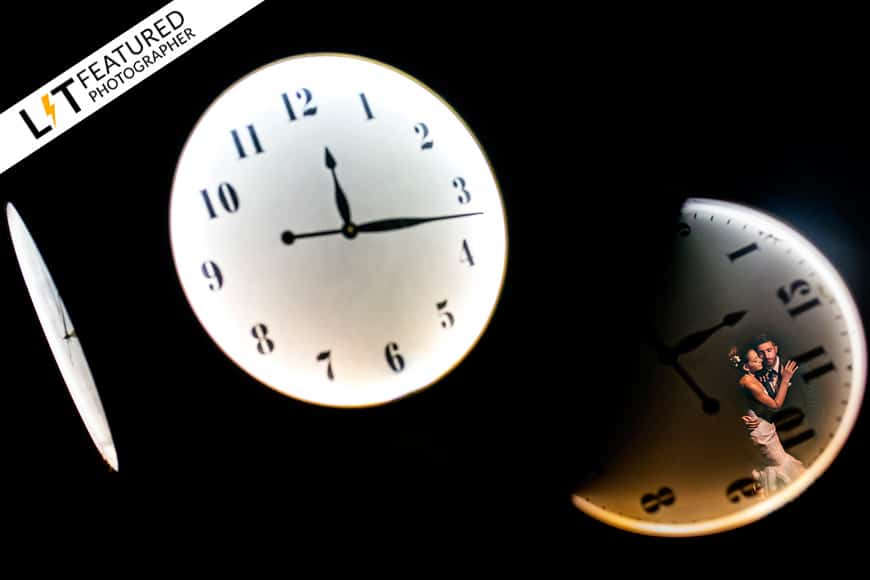
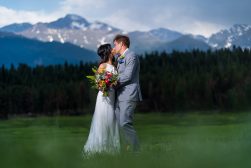
Image by LIT featured photographer Maurizio Arias.
In order to replicate this wedding photography lighting technique, first you need to underexpose the scene with your eyes. I do this by squinting my eyes until they’re almost closed, and seeing what objects in the scene are still emitting enough light to register in my vision.
You’ll see me walking around a wedding venue at some point near the end of the reception looking like I’m sleep-walking. People probably think I’m drunk…
In doing this, I’m quickly scanning the scene for (illuminated) objects I may like to include in the composition, or ones that I’d prefer to remove.
When I’ve found a scene that interests me, I’ll move on to the second part of the technique – using Live View to confirm the underexposure.
How Much Do You REALLY Know About Photography?! 🤔
Test your photography knowledge with this quick quiz!
See how much you really know about photography...

If you’ve got a mirrorless camera, then you can use your EVF, but for the rest of us dSLR dinosaurs, we’ll be resorting to the Live View of our camera’s LCD. (Check out ‘Mirrorless vs dSLR’ for more reasons you may want to ditch your dSLR!)
Live View is a hugely underrated functionality in our cameras. We can take advantage of Live View to preview the exposure of a scene, before taking the photo.
Live View effectively does away with chimping, getting us to our desired exposure much faster and more accurately than ever before.
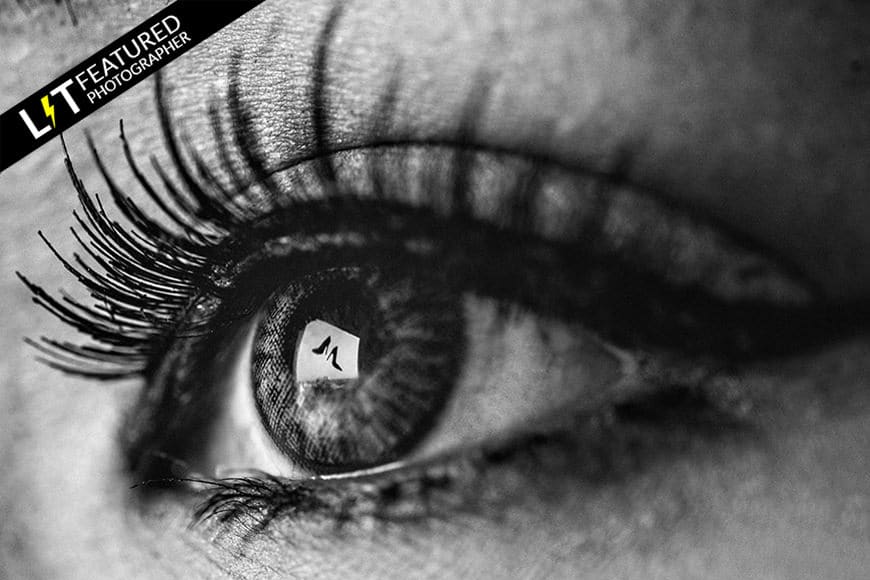
Image by LIT featured photographer Hendra Lesmana.
With Live View (and exposure preview) turned on, I’ll switch the camera to Manual mode, and start underexposing the image by adjusting my camera settings.
The key here is to use your shutter speed and aperture to decrease light in the exposure, whilst keeping the ISO as low as possible (similar to the process for chiaroscuro lighting). Shooting at a lower ISO will give you more leeway in your post production, most notably in recovering lost shadow detail.
Once you’ve underexposed your image sufficiently so that the illuminated areas are appearing as you wish, now you need to work on your composition.
Even though we’re learning how to work with wedding photography lighting equipment, composition is still key to a good shot.
Since any horizontal and vertical lines such as walls, floors or horizons will now be lost in the darkness, you’re free to twist and rotate your camera as you wish, using the illuminated objects to frame your subject, guide the viewer’s eye, or simply to be used as compositional elements.
Before you bring your subject into the frame, you have the option of attaching your camera to a tripod to ‘fix’ the composition, or you can just try and remember your composition to be used later. I prefer the second option since it gives me the flexibility to tweak my composition if I’ve got something slightly wrong.
If you plan to return to the shot later, another tip here is to utilize your camera’s custom settings. By saving the camera’s exact settings to one of the ‘custom banks’, you can switch back to whatever usual mode you shoot in, in order to re-join the wedding action, safe in the knowledge that you can return to your ‘LIT’ photo settings in an instant.
Step 2 | Adding the Light
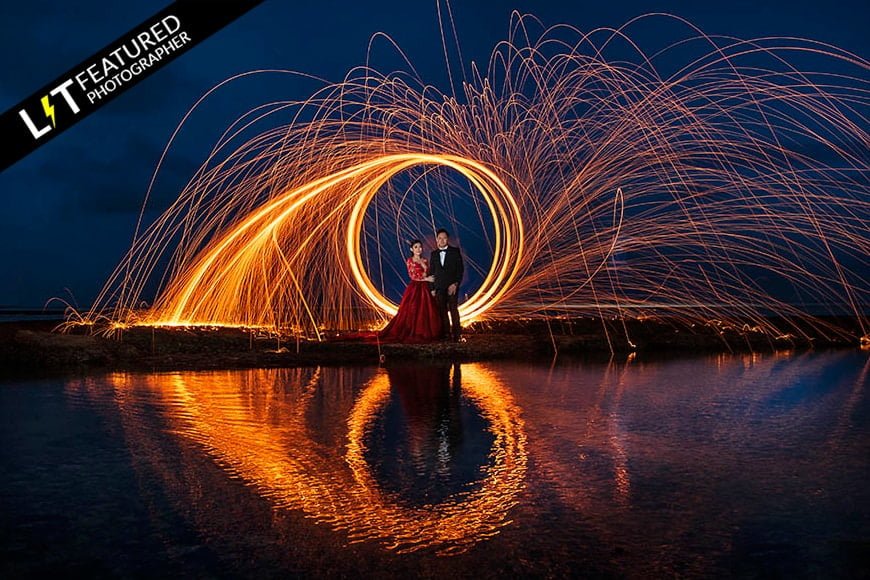
Image by LIT featured photographer Sigit Prasetio.
With your settings saved, or your camera in manual mode, you’ve just dealt with one big variable of the puzzle – the ambient exposure.
If you’ve fixed your camera on a tripod, you’ve also dealt with another variable – the composition.
Now it’s time to deal with the next variable – the additional light.
At this stage, it’s worth noting that the more experienced you are with using flashes or other lights, the quicker you’ll be able to estimate things like light distance and light output.
However, as this is a cheat’s guide to getting the photo, we’ll be resorting to a bit of light-chimping. You can do this with any lighting gear from LED lights for wedding photography to more old-school lights.
So, place your flash (or alternative light source) in whatever location you’ve chosen to light your subject:
– Perhaps you want a rim light, so position the flash to the rear of the subject.
– Maybe you want to rim light the couple, but include some of the background too, in which case you can point the flash towards a wall behind the couple, still keeping them close to the flash.
– Or perhaps you just want to light the subject properly, in which case you can point the flash at the subject from whatever frontal angle you choose.
At this stage, I’ll usually grab a member of the bridal party to use as my subject – they’re usually drunk enough to oblige!
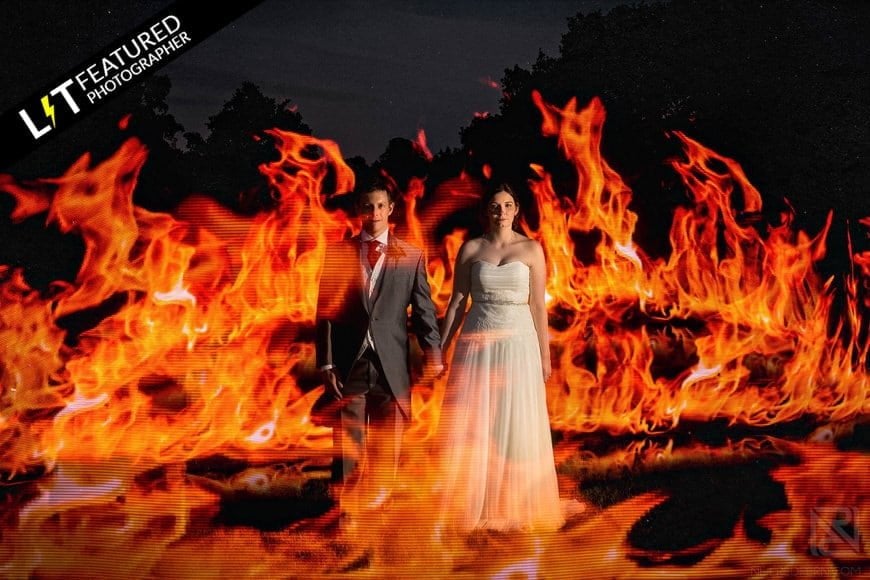
Image by LIT featured photographer Neil Redfern.
Depending on your scene, you’ll need to adjust your flash output and the distance from your subject appropriately, but for most situations, you can start with flash output at around low-medium power and adjust from there.
I’d recommend placing your flash on a stand and leaving it in the same place (or instructing whoever’s holding it to remain still), and just adjusting the flash output.
Remember, you need to deal with all the variables one by one to un-complicate your shot. By keeping your light in one spot, you’ve just dealt with the distance/position variable.
Since you won’t be able to see your subject through your camera’s Live View with the ‘LIT’ photo settings, I’d recommend you use one of the auto settings on your camera (such as Program mode) which will force the camera to adjust its exposure to allow you to view the scene. Then it’s just a matter of directing your subject into your chosen position.
Finally, switch your camera back to your saved settings, tell your stand-in subject to get back to the dance floor, and go and find the newly weds to take their place.
You can of course do all of the above whilst using the newly weds as your actual subject, but I find it far smoother to set everything up in advance. Then it’s just a case of snap-snap… one creatively LIT photo complete :-)
Obviously the above wedding photography lighting technique is just a quick and dirty guide to getting something creative with your lights. As I mentioned at the start, there are many wedding photography lighting technique, but this is just one that I find simple and effective.
Lighting wedding photography often relies on these “in the moment” hacks. Even if you have the best lighting equipment for wedding photography, you still need to respond quickly to capture a unforgettable moment with the newly weds!
It’s just the tip of the iceberg as you’ll see from the incredible work of the other photographers LIT but I hope that you now feel motivated and inspired to get out there and try it for yourself.

Image by Mark Condon of Gold Hat Photography.
Above is an example from a recent wedding in Montreal. As for the post processing, I had to clone out the face of the wedding guest who was holding my LED light panel behind the couple, raise the exposure of the couple slightly, and warm the temperature of the LED rim light (since I didn’t have a CTO gel to hand at the time.)
To achieve the image, I followed the exact process that I’ve outlined in this post. Once I’d found the location at the wedding venue, the entire shot took less than a minute to execute. Post processing took around 3 minutes.
Lighting Techniques for Wedding Photographers

The information in this post is actually an excerpt from my latest book on wedding photography lighting techniques called LIT.
LIT delves into the creative minds of over 50 world-class wedding photographers, examining their lighting techniques and uncovering their secrets to alluring imagery.
The LIT book is the most comprehensive wealth of practical lighting information I’ve ever seen. Thanks for illuminating the way!
– Lanny & Erika Mann
Each photographer featured in LIT explains their thought-process and concept behind each shot, details the actual execution and even speaks about their post-processing to provide the finishing touches.
To help further demystify the process, lighting diagrams and camera plus wedding photography lighting gear guides also accompany each photographer.  Whether you’re a new or experienced wedding photographer, you can learn from the detailed explanations in LIT, or simply get inspired to create your own LIT photos during your next shoot.
If you’re interested in seeing more of the wedding photography lighting techniques described here and many others head over to LIT.
What are your go-to wedding photography lighting techniques? Let us know in the comments below ;-)


Check out these 8 essential tools to help you succeed as a professional photographer.
Includes limited-time discounts.
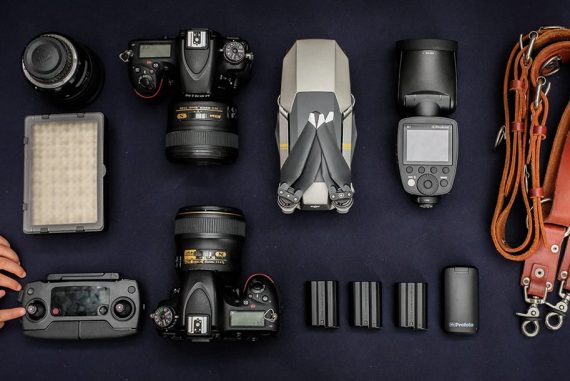 Best Wedding Photography Gear
 Comprehensive Guide to Wedding Photography in 2024
 How to Use Flash Effectively for Wedding Photography
 Expert Guide to On-Camera Flash (How, When & Why to Use)
 Wedding Photography Tips: How to Photograph a Wedding in 2024
 67 Best Photography Books of 2024 for All Levels


