


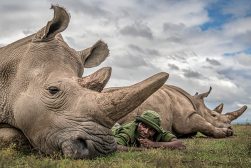
Wildlife Photography Tips, Ideas & Real World Examples
Want to photograph animals in 2023? Whether you're going on safari or just documenting animal behavior in your back garden, these top 15 tips will help!
Learn | Photography Guides | By Ana Mireles
If you like the outdoors and you love to take pictures, wildlife photography might be the right thing for you.
What most people don’t realize, though, is that you need much more than just photography skills to take a good wildlife photograph.
It’s one of the most challenging but also rewarding types of photography. That’s why I put together this guide to help you get started.
In this article, you’ll find plenty of images to get you inspired, equipment advice to get the best gear for the job, and a bunch of wildlife photography tips.
Ready? Let’s take a walk on the wild side!
Related: 17 Essential Hunting Photography Tips
What Is Wildlife Photography?
Wildlife photography is a branch of nature photography. It features live animals in the wild (as opposed to domestic animals, which fall into the pet photography field).
So, if you go trekking with your dog and do a photoshoot, it doesn’t qualify as wildlife photography just because you’re in the wild.
On the other hand, what if you photograph a fox that shows up in your backyard? It’s a wild animal, but in a domestic environment: does it count?
There’s some debate about these issues; the same goes for wild animals in captivity, such as those in the zoo.
Some international organizations have tried to establish an official definition that can be recognized worldwide. This would certainly make it easier for contests and other activities. However, there hasn’t been any global agreements yet.
For example, the Photographic Society of America defines wildlife as “one or more extant zoological or botanical organisms free and unrestrained in a natural or adopted habitat.”
This means that wildlife is not restricted to live animals, but also landscapes, geological formations, fungi, algae, carcasses, etc.
It’s a bit difficult to draw a hard line between photographic genres – I invite you to make your own parameters to what you want to photograph!
You can use publications and contests as guidelines. Certainly, the most famous publication about wildlife photography is National Geographic. It’s been setting the pace for this kind of photography since 1906.
Another important source is the Wildlife Photographer of the Year competition, which was founded in 1965 – you can research the winners and rules to see how it’s evolved through time and what type of wildlife photographs are being accepted.
- How do you become a wildlife photographer?
You don’t need any degree or certificate; you just have to grab your gear and start practicing. In time, your skills will improve, your portfolio will grow, and you can start selling your pictures and accepting commissioned work.
- How much money does a wildlife photographer make?
The average yearly income for a full-time professional ranges between $30,000 and $50,000 USD. This will come from a mixture of activities: selling fine art prints, offering workshops, selling editorial projects to magazines and newspapers, and/or selling the pictures on stock photography websites.
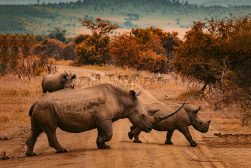
15 Wildlife Photography Tips for Amazing Animal Photos
Wildlife photography allows you to capture and share the wonders of the world, and it motivates you to go to places where you’ve never been. That’s why it’s such a popular activity.
However, just because it’s fun doesn’t mean that it’s easy.
How Much Do You REALLY Know About Photography?! 🤔
Test your photography knowledge with this quick quiz!
See how much you really know about photography...

So, what makes a great wildlife photo? First, keep it simple. Don’t add any distracting and unnecessary elements – the subject needs to stand out.
Second – and this is the most important wildlife photography tip – help the viewer make a connection with the subject. This may be because there’s eye contact, or because you’re telling a story.
Of course, you also need to make good use of light and composition to enhance these moments.
If you’re ready to get started, here are a few wildlife photography tips to help you out.
1. Choose the right gear

Equipment used by wildlife photographer Jose Luis Jimenez
Wildlife photography is one of the genres that requires some of the biggest investments in gear.
Of course, you don’t have to buy everything at once. You can start with the gear you already own, and then you can rent as you need it. This way you’ll be sure to get the right equipment, and not spend your money on an expensive thing that you won’t use.
Your basic setup should be a camera, a telephoto lens, and a tripod (except for bird photography which is mostly done handheld).
However, to complete your gear, it would be ideal to have a lens sack, a gimbal, a resistant and waterproof camera bag, and a rain cover for your lens. Don’t forget to pack a pair of binoculars and a torch or a headlamp.
Some wildlife photographers also use trail cameras to get that impossible image of a skittish subject. To get more gear advice from a professional, take a look inside the bag of Jose Luis Jimenez.
What is the best camera for wildlife photography?
A good camera for wildlife photography needs to have a fast shutter speed. It’s also best if it’s weather-proof. Also, consider the number of autofocus points and the burst rate.
Here are a few of the top choices; they are all full-frame to ensure the best image quality:
- Nikon D5
- Nikon D850
- Canon 5D Mark IV
- Canon 7D Mark II
- Sony a9
What is the best lens for wildlife photography?
In wildlife photography, you’ll use a telephoto lens 99% of the time. Only if you want to include part of the scenery would you need a shorter focal length. You can also use an extender (teleconverter).
Here’s a list of the best telephotos for wildlife photography:
- Canon 100-400mm f/4.5-5.6L IS II.
- Nikon 200-400mm f/4 VR II
- Nikon 500mm f/4 FL VR
- Sigma 500mm f/5
- Sony 200-600mm f/5.6-6.3
You might also want to check out our guide to the best spotting scope – using a scope is a great way of spying on wildlife from a distance.
Another practical accessory is a photo vest, which is often a more practical way to carry camera gear while out on safari than a camera bag.
Finally, if you want to film wildlife or game, make sure you read our guide to video cameras ideal for hunting.
2. Practice close to home

Credit: Brandon Montrone
Wildlife photography is challenging enough without having to deal with unknown circumstances. If you’re a beginner, you can always start close to home.
When you find yourself in familiar territory, you already know the weather and the rules and you can focus exclusively on taking photos. As a result, you can develop the photography skills needed for shooting stunning wildlife images.
Practicing close to home is also a good exercise for more advanced photographers. If you’re used to travelling all over the world and capturing exotic animals, this will force you to find new subjects and break habits.
For example, you can try macro photography and capture bugs or insects. You can also pack only a wide-angle lens and challenge yourself within its limits, forcing you to get up close and personal with the animals.
3. Try burst mode for action shots
Credit: Silvana Palacios
Burst mode is the camera setting that allows you to take continuous photos for as long as you hold down the shutter button. It’s great for bird photography or action shots of animals because you don’t have to rely so much on your reflexes and your camera’s reactivity.
The number of frames per second (fps) is called burst rate, and it’s different for each camera. You can find it with the name of burst mode, continuous mode or sports mode. A few high-end cameras offer two different speeds: High and Low.
You should also check the camera’s image buffer. This will tell you how many photos can be processed before it needs to ‘take a break’!
4. Adjust the focus mode
Credit: Tobias Adam
You can use autofocus mode when you photograph wildlife. Most cameras have a feature that can track a moving subject to keep it in focus. In Nikon, it’s called Continuous AF-C, and Canon calls it AI Servo.
You can pair this setting with burst mode to nail action shots. You just press the shutter button halfway to set the focal point and then press it all the way to start shooting.
5. Learn from others
Credit: Robert Anthony Carbone
Photography skills are not the only ones needed for wildlife photography. You need to know how to behave and approach the animal that you want to photograph. Many times you need to camouflage or mimic animal sounds.
It helps if you also learn what to pack – aside from your photographic gear – to be prepared and survive specific temperatures for long periods of time. You also might need to camp at the location, etc.
All of these things and are best learned via real-life experience. To guide you, you can approach other photographers and ask them for advice or for their wildlife photography tips. Try finding a mentor or attending a workshop.
6. Ask for honest feedback

Credit: Gabriela Palai
This tip applies to all types of photography, of course – but in wildlife photography, it’s particularly important.
Since it’s physically challenging to do this type of photography, it’s common to get attached to an experience and disregard the actual results.
For example, you might love a picture because you achieved it after long hours in the rain or because you captured a rare species. Unfortunately, that doesn’t necessarily mean the photograph is good.
Asking for feedback from someone who wasn’t there can give you a better idea of how to improve.
7. Use a wide aperture
Credit: Hannes Wolf
When you’re photographing wildlife, you want to have a narrow depth of field. This will help you to blur the background and separate your subject from it.
It’s also useful to highlight a specific detail, such as the eyes or the head of the animal. Using a selective focus helps the viewer see what you want them to see.
To achieve a narrow depth of field, you should use a wide aperture. With the telephoto lenses used for wildlife photography, this probably means something like f/4 or f/5.6. Normally this is not a very wide aperture, but long focal lengths also narrow the depth of field, so you don’t have to worry about this.
Remember that exposure is controlled by three factors: aperture, shutter speed and ISO. When you change the aperture, you need to compensate by adjusting either of the other two.
If you’re not comfortable using the manual mode to control all the camera settings, try using aperture priority mode. This way, you’ll control the depth of field and leave the rest up to the camera.
I recommend using a tripod to avoid camera shake if the shutter speed needs to slow down too much – despite the temptation to buy something lightweight, this sometimes means that the legs will be too flimsy to support a camera and long lens.
If packing a tripod isn’t possible, consider using a monopod, which will provide some stabilization as well as giving your body a much-needed rest from lugging around heavy gear. This guide reviews monopods for photographers.
Also, consider that slow shutter speeds will capture motion blur if your subject moves. You can use exposure compensation to have more control.
8. Research your subject

Credit: Flickr
The more you know about your subject, the better photos you’ll be able to get. When you understand animal behavior, you can stay one step ahead of the game.
Different animals have different habits. Some may be more active during the day, others at night; with a few of them you can get close, with others it’s better if you don’t.
It’s best if you research where to find the animals or birds that you want to photograph.
Plan your trip, from the means of transportation to the weather. You should also learn about mating and breeding seasons; you have to be extra careful when approaching wildlife in these periods to avoid disturbing them.
Every piece of information will allow you to plan more efficiently for the time of the year, the time of the day, the type of gear you should pack, etc. In the end, you’ll have a better chance of capturing the best wildlife photos.
You might even want to look at using camera traps, also known as trail cameras. Some photographers use them to actually capture the perfect image, but you can also use them to watch your subject and learn their behavior.
9. Be patient

Credit: Diana Parkhouse
Shooting wildlife photos needs patience and timing. You need to have a lot of passion for succeeding in the wildlife photography genre.
Best case scenario, you’re facing long hours sitting and waiting – maybe crouching inside a hide (a portable structure with a camouflaged exterior). Beyond that, you could be facing years of trying and trying before you find that rare subject you were looking for.
There’s no way to rush things when you’re photographing wildlife because you are dependant on the animal’s behavior.
Once you have the animal in front of you, you still need to be patient to get the perfect shot. Get close to it without scaring or stressing it. Wait until it gets comfortable with your presence; it’s better if you can make eye contact.
Of course, this is only possible with certain animals. If it’s not approachable, use a telephoto lens to get close, get down to be at their eye level, and again, wait for those moments in which everything comes together.
Always be respectful and ethical; remember that the well-being of the wildlife comes before your perfect photo.
10. Bring an extra battery and memory card

Credit: Mali Maeder
When you photograph animals on the move, you’ll find yourself using continuous shooting mode often. This is fantastic to nail the perfect image, but it goes through your battery life and storage space very quickly. The same goes for the continuous focus mode.
The last thing you want is to run out of battery or memory when you’re out in the field and you’ve waited so long for the subject to show up – so you’d best bring a backup.
11. Watch the composition
Credit: Aldo Picaso
Sometimes this is difficult to achieve with wildlife photography because you need to react quickly before your subjects move or leave. However, the composition can make or break a photo.
To improve this skill, you need to know the composition rules that apply to all kinds of photography. The first one most photographers learn is the rule of thirds. This one is marked in most camera’s grids.
Following on from that basic one, you’ll find many guidelines you can follow according to what you want to say with your images and your artistic style.
12. Be ethical
Credit: DSD
This advice should be a given. If you’re a wildlife photographer, you love animals and nature, so you wouldn’t want to harm them in any way.
However, sometimes we’re not aware of the consequences of certain actions, so it’s better to get informed before heading out on a wildlife photography adventure. Learn how to behave – for example, you shouldn’t feed a wild animal.
If you give food to wildlife that’s not appropriate for their diet, it can make them sick. It can also make them accustomed to human food and contact – which isn’t a good thing.
When you offer food to a predator, they might come to expect it from any human they see. This can lead to aggressive behaviour the next time they encounter a person who doesn’t happen to have a bag on snacks on hand.
You should respect the animal’s natural behaviour and environment. If they need to rest or eat, you have to respect this despite your photographic schedule. You need to be patient and make nature’s wellbeing a top priority.
Always respect the safe space of the wildlife, even if you’re using a hide. They may feel your presence and start to show signs of distress. If you notice that, stop and retreat slowly. Then wait until the animal settles before you start to take photos.
During breeding season, you need to be especially careful not to interfere. Also, don’t introduce any outside elements into the habitat. Everything you bring with you, you should take away when you leave – that includes organic waste.
Be as careful as you can, and get informed to avoid causing any damage. On top of the ethical rules, keep an eye on the different laws. They exist to protect animals and nature so they need to be followed.
13. Be weatherproof

Credit: Tetyana Kovyrina
Depending on the location and weather, you’ll need to weatherproof yourself and your wildlife photography gear.
Consider that you’re probably going to be on location for many hours.
If you’re not comfortable because you’re cold, hot, or being bitten by mosquitos, you won’t be able to focus on your photographs.
This is something where you don’t want to skimp – invest in good quality clothing. Research the climate conditions and dress accordingly. Footwear is also essential if you’re going to hike in the snow or damp; it not only needs to be weather resistant but also comfortable.
Keep in mind that sometimes you need to walk for a long time before you arrive at the best location and you’re going to be carrying heavy gear on your back. So, look for good ankle support.
Get protection for your camera if it’s going to be damp or raining. You can even find it in camouflage fabric, meaning it doubles as a disguise.
A good camera bag is also a must-have for wildlife photography. It should protect your gear against any bumps along the road and offer a weather coat for rainy days.
Since wildlife photographers use long telephoto lenses, the camera bag must be long enough to hold these, so always double-check the dimensions before buying.
You should also look into getting a ‘storm jacket’ like this one for your lens, especially since it’ll be exposed to the elements for most of your shoot.
14. Choose the best exposure mode
Credit: Jeremy Bishop
Setting the exposure mode is something that most people overlook. To determine the right exposure, the camera needs to know how much light is in the scene. It does that by measuring the reflective light.
If you leave the default mode – which is called by different names according to the manufacturer – the camera will read the entire scene and make an average to determine the exposure.
This does a good job most of the time. However, it’s not ideal for highly contrasted scenes. Instead, you can use centre-weighted (average) exposure mode for centered compositions or whenever the subject fills the frame.
If you want to photograph a small subject in a contrasted scene – for example, in bird photography – you should use spot metering. It’s also useful for backlighting.
This is the most accurate exposure mode as it measures a small part of the scene. In most cameras, it’s in the center, but a few high-end cameras allow you to choose between the center or the focal point.
15. Don’t forget the post-processing
Credit: Vincent Ma Janssen
After a session photographing wildlife, you might end up with a huge amount of files – especially if you use burst mode.
You’ll need a good photo editor to download, browse and cull all the images. There are many choices on the market – Photo Mechanic is a good, fast option.
You can also do the entire post-processing workflow in Lightroom, but it might take some extra time. In any case, choose whichever works best for you.
Once you’re done with the management part, you can move on to retouching. Again, you can use any software you like. Personally, I prefer Adobe apps: Lightroom and Photoshop.
Cropping to reframe the composition is often needed if the birds are animals were moving. Dehazing is also very helpful.
Any improvement in white balance, saturation or exposure can also be done fairly quickly and can give your images that extra ‘pop’.
Since many wildlife photographs are taken in low light, you probably have to pump up the ISO. This will create noise that can later be cleaned up in post-processing – to a certain degree. If you overdo it, your photo will lose sharpness, so you’ll have to find a good balance.
Wildlife Photography FAQs
Is wildlife photography a good career?
If you have a passion for it, yes. You will need patience and perseverance before you can make a living out of it, though.
Is a 200mm lens enough for wildlife?
It depends on the animal and the environment, but yes, you can start with a 200mm for some wide wildlife shots. You can also buy teleconverters, which will extend your focal length and are more affordable than buying a new longer lens. Be aware that they won’t have the same quality.
What cameras do National Geographic photographers use?
Each photographer has their own preference. Some professionals have talked about the Canon 5D Mark III and Nikon D800E when they’ve taken their award-winning pictures. Others favour using medium-format cameras such as Bronica SQAI or even the large format Wista 4×5.
Can I sell my photos to National Geographic?
Unfortunately, no. National Geographic’s editors plan the articles and reach out to the photographer they consider to be the most suited for the project. They don’t receive unsolicited images.
Final Words
I hope you found these wildlife photography tips useful. Be sure to share your experiences, and keep adding your own tips in the comments section for anyone who wants to give this type of photography a try.

Check out these 8 essential tools to help you succeed as a professional photographer.
Includes limited-time discounts.
 50 Famous Wildlife Photographers to Follow in 2024
 How to become a professional photographer
 Best Camera for Wildlife Photography to Capture Nature, Birds & Animals
 How to Choose the Best Lens for Wildlife Photography
 122 Photography Tricks & Camera Special Effects to Try Today
 Best Photo Editing Software for Wildlife Photography in 2024

Ana Mireles is a Mexican researcher that specializes in photography and communications for the arts and culture sector.


