How to Remove Background in Photoshop (6 Foolproof Ways)
Learn how to easily remove the background from an image using Photoshop's automated and manual methods. Follow our guide for easy background removal.
Photoshop | Software | By Judyth Satyn
Removing a background in Photoshop is one of the essential skills for every designer and artist, one of the first steps to becoming a proficient Photoshop designer.
Removing the background of an image presents you with a beautiful blank backdrop, a clean slate, so you can set any color behind your subject to accentuate it.
There is more than just one technique to remove the background in Photoshop.
The one you chose will depend on the image’s quality and the range of blend between the subject and background.
If the background is a block of solid color, such as a white background or a green screen (some people plan) removing the background layer will be a cinch.
Removing the background of an image with blended lines might be more time-consuming but not impossible, we’ll show you how.
Here are four ways to help you remove a background in Photoshop, automatically with the remove background tool or manually with the background eraser tool.

Download the latest version of Adobe Photoshop to follow along with this simple tutorial.
Start a free 7-day trial today
How to Remove Background in Photoshop (6 Fool-Proof Ways)
Method 1 – Remove a Background Using the Remove Tool
The Remove Tool is a new addition to Photoshop’s editing toolbox. It was added to Photoshop in June 2023.
It’s the master of deleting objects or backgrounds from an image with one simple click, and has made life easier for photo editors and designers.
The Remove Tool is enhanced by AI to intelligently discern where a background begins and ends, making it possible to delete backgrounds quickly.
Let’s give it a shot.
Step 1 – Open your Document
To open your document, head to File > Open and locate the image.
Once clicked, the image will open in your canvas workspace.
Step 2 – Select Remove Tool
When your image is open, select the Remove Tool from the toolbar to the left of your canvas.
Click on the Spot Healing tool, and you will find the Remove Tool in the drop-down menu.
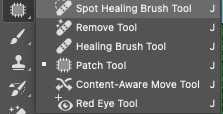
Alternatively, you can use the keyboard shortcut. Hold down the Shift key, then click the J key consecutively until the Remove Tool icon appears.
Step 3 – Remove the Background
When the Remove Tool is active, a box will appear below your image.
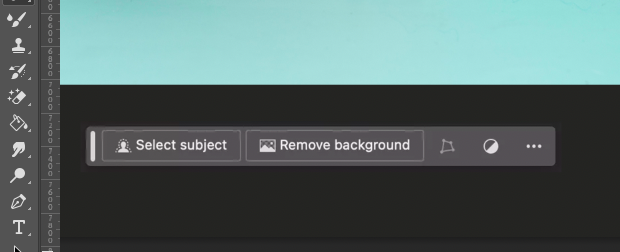
Here, you will see a few buttons: the first button is the Select Subject button, and the second is the Remove Background button.
Using the Remove Tool, you don’t need to make an accurate or active selection.
All you need to do is click the Remove Background button.
Photoshop makes it that easy.
As you can see in the image below, the background behind the cat has been removed.
The added bonus to using the Remove Tool is that a layer mask will be created in the Layers panel.
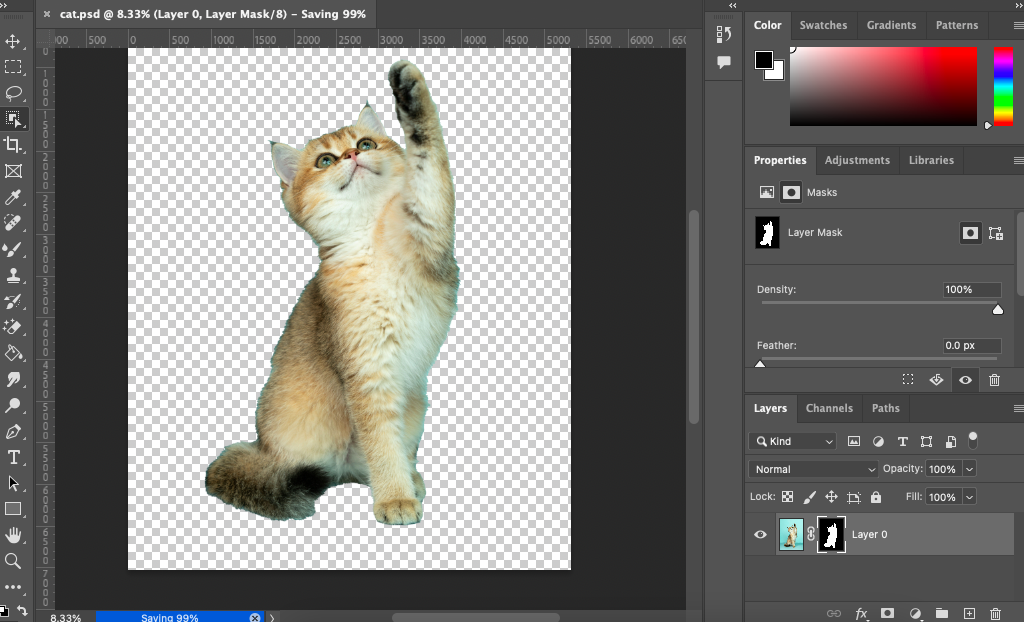
The Layer Mask makes it possible to edit and refine the edges of the cut. Plus, you can alter the transparency of the background.
Step 4 – Refine the Background Selection
The Remove Tool is the most effective way to accurately remove a background area in one click.
Usually, all you need to do is hit the Remove Background button, and the entire background will be removed.
However, if Photoshop’s AI has made a mistake and either missed an area of the background or deleted too much, you have the option to retract areas of the background.
This is because the Remove Tool doesn’t delete the background permanently from the image but instead creates an editable Layer Mask.
As you can see in the image below, a Layer Mask has appeared in the Layers panel when the Background Remove button was clicked.
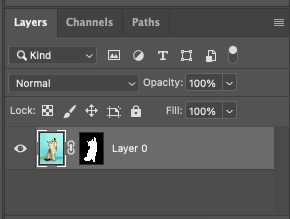
To edit the edges of the image, alternate between the Subtract from Mask and Add to Mask buttons below the canvas workspace.
Use Subtract from Mask to remove extra areas of background.
Use Add to Mask to add back areas of the background that Photoshop has removed.
Step 5 – Refine the Edges
When the edges are cut from the subject, they might be jagged or too sharp.
You can soften and refine the edges using the Layer Mask’s Properties panel.
To open the Properties panel, head to the main menu, and in the drop-down menu beneath Windows, check to see if Properties has a tick beside it.

If there is no tick, click Properties to activate it.
When the Properties panel opens, click on the second icon in the top left corner.
The Pixel Layer icon is a rectangle containing a black dot.
Once clicked, a thumbnail of the mask will appear. Beneath the mask icon, you will find two sliders, Density and Feather.
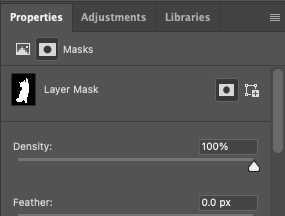
Slide the Density from 100% down to 0% to affect the transparency of the background.
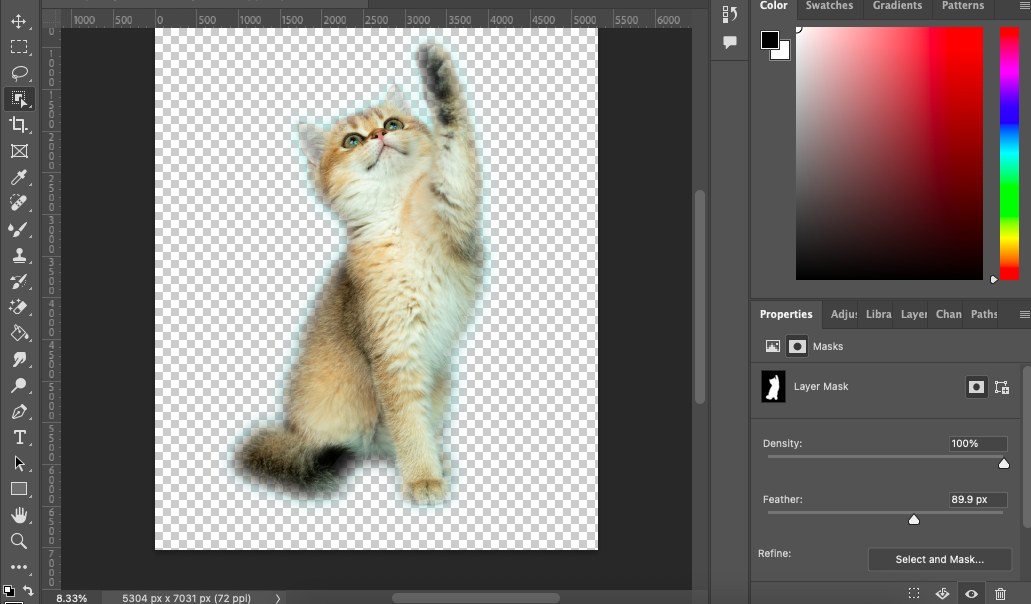
To refine the edges of the subject, move the Feather slider.
As you can see in the image below, the Feather slider has been set to a value of 89.9, and the edges are now semi-transparent.
This will make it easier to merge the subject with a new background.
The Remove Tool is a fantastic one-click solution to have up your sleeve for editing tasks that require rapid results.
Method 1 A – Delete a Section of the Background with the Remove tool
If you prefer, you can create an outline guide for Photoshop to help the Remove Tool select the background more accurately.
This is useful if your background has similar colors, the image is blurred, or the subject’s edges are fuzzy.
When an image is blurred or fuzzy, it can be harder for Photoshop to discern where the background is.
This method is also good to use if you wish to remove only half of a background. For example, remove the background sea but not the background sky.
Step 1 – Select the Remove tool
First, activate the Remove Tool, by selecting it from the toolbar.
Step 2 – Paint Over the Background Area
Now, using your cursor, click on your canvas and drag your cursor to paint over the areas you wish to remove.
Don’t worry about accuracy; you don’t need to make a perfect selection. This is only a rough guide to help Photoshop calculate where the background area is.
Using this technique, it’s possible to paint the area in one stroke (or one click). When you let go of the cursor, the Remove Tool will work its magic and remove the unwanted painted area.

If you want to remove another area of the background, click drag and release to delete more of the background.
Remember, you can also use the Remove Tool to remove objects or subjects from your image.
If you want quick results and you don’t need the result to be perfect, the following technique is for you.
It works a total treat when the subject contrasts the background or it has highly contrasting edges.
Method 2 – Remove a Background Using the Magic Eraser Tool
If you are not new to Photoshop, most likely you will be familiar with the Eraser Tool and have used it at some point during editing.
But have you discovered the Magic Eraser tool? The Magic Eraser tool is located in the Eraser tool’s toolbox.
The Magic Eraser tool is a great one-click option for quickly deleting backgrounds.
It works best when erasing backgrounds that are a uniform block of color.
Let’s check how to do it.
Step 1 – Select the Magic Eraser Tool
With your document open in Photoshop, head to the toolbar to the left of your workspace and select the Magic Eraser Tool.
The Magic Eraser Tool can be found in the Eraser tool’s drop-out menu.
Alternatively, hold down the Shift key for the shortcut and repeatedly press E on your keyboard until the Magic Eraser tool icon appears.
Step 2 – Erase the Background
When the Magic Eraser Tool is active, click on the background in your canvas workspace to remove it.
As you can see in the image below, the background has been deleted.
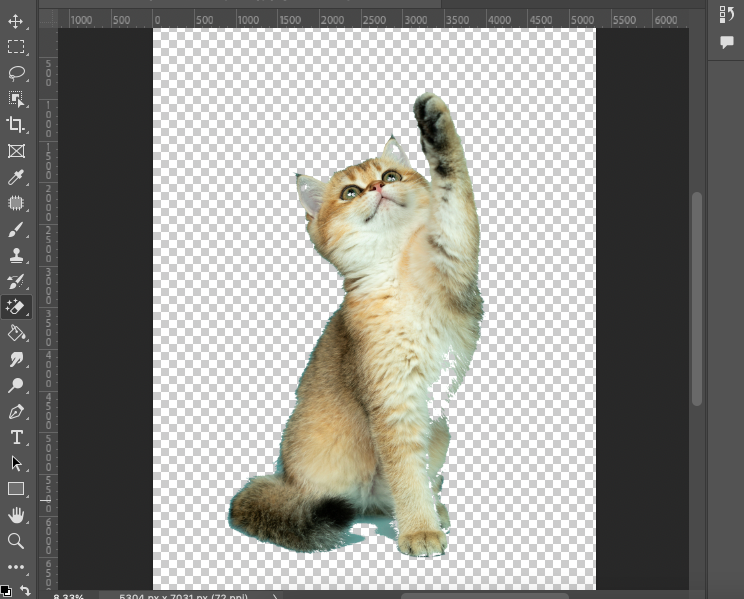
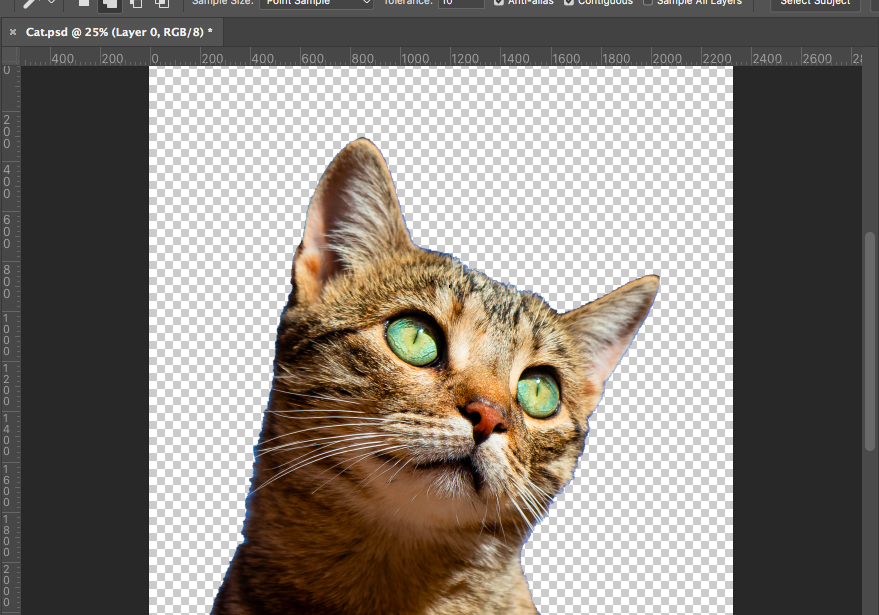
However, the Magic Eraser has also removed some of the cat’s body. If this is not what you want, you can correct the image by changing the tolerance of the Magic Eraser in the Tool’s Options tab.
![]()
Changing the Tolerance value will alter the sensitivity of the Magic Eraser’s selection to select more or less adjacent color pixels.
The first color clicked will be the baseline color. A tolerance value set above this will indicate to the Magic Eraser to delete color pixels with a numerical value within the new tolerance range.
In the image below, the Magic Eraser’s tolerance was decreased from 60 to 10.
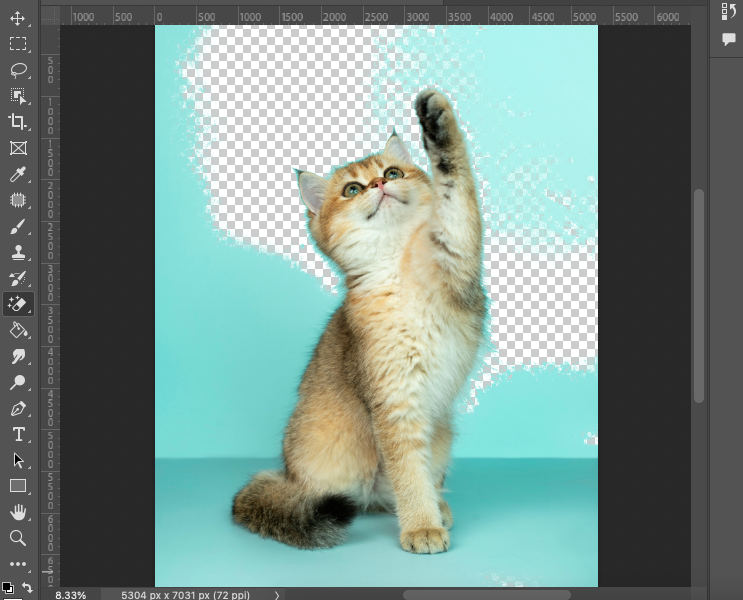
As you can see, not enough of the background has been erased.
The Magic Eraser Tool is not powered with AI intelligence like the Remove Tool.
To remove more of the background in the above picture without eliminating sections of the cat, you will have to click on the unwanted areas in the workspace.
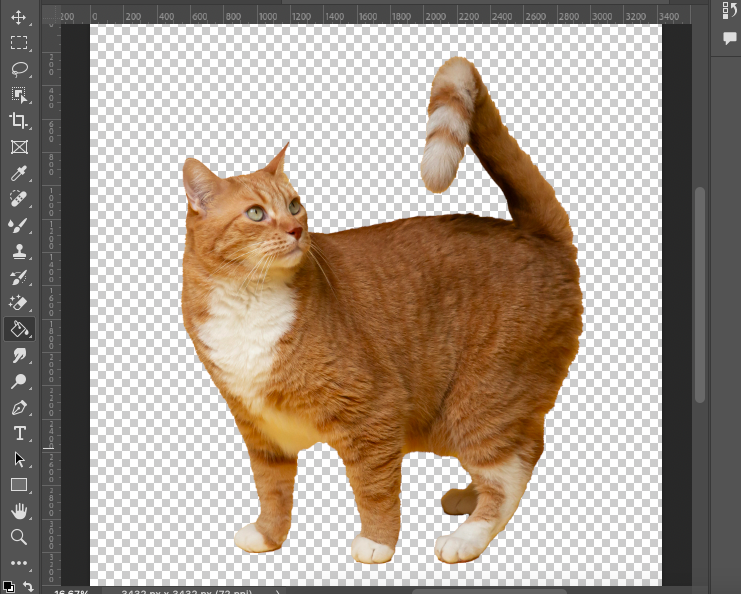
The Magic Eraser tool is best used to remove backgrounds that are one block of color, or backgrounds with a small range of colors that contrast the subject, like in the image below.
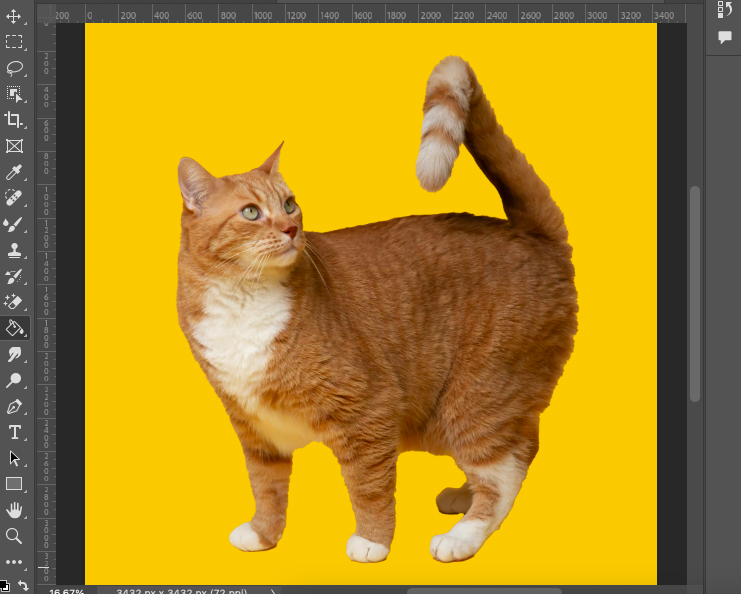
Once the orange background behind the cat is clicked, the Magic Eraser tool will delete the entire background.
Method 3 – Quick Action
If the background is one block of color contrasting the subject or foreground, you’re in luck, you can also use a quick action to remove the background instantly.
Locate Quick Actions in the Properties panel, and choose the Remove Background option.
To locate the properties panel, click on the two arrowed icon at the top right-hand corner of the canvas window or go to Windows > Properties.
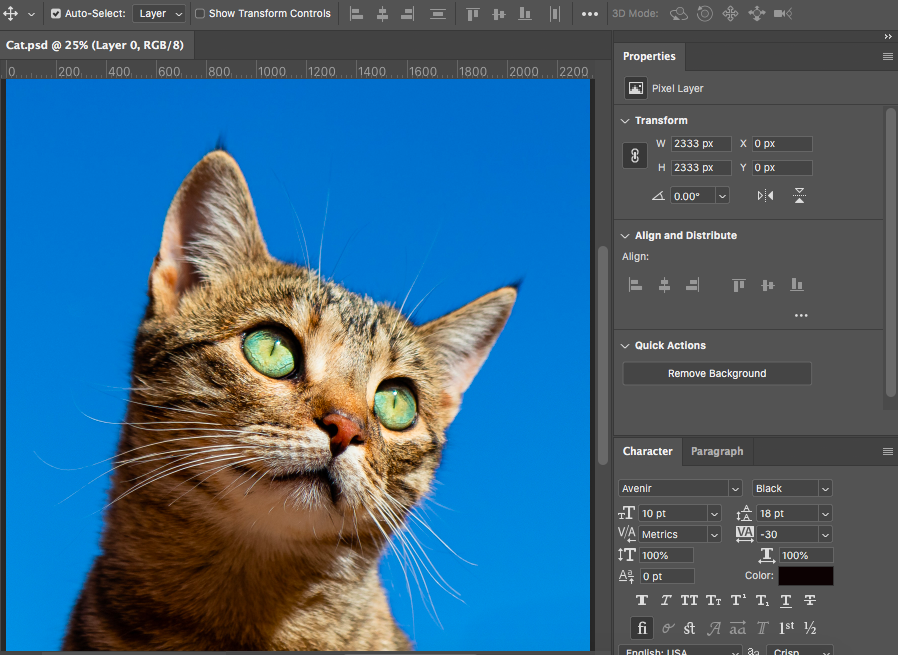
When you click Remove Background, Photoshop will instantly remove the background.
Method 4 – Magic Wand
Another quick-click option is using a selection tool like the Pen Tool or the Magic Wand Tool.
Select Magic Wand from the Tool Bar to the left of your image or use the keyboard shortcut by pressing W.
When the Magic Wand tool is selected navigate to Select in the menu and click on Subject.
The active selection area is now your subject, change this to the background area, navigate to Select in the drop-down menu select Inverse.
The active area is now the background, to remove the background head to the Top Menu bar choose Edit > Cut. The background will be deleted.
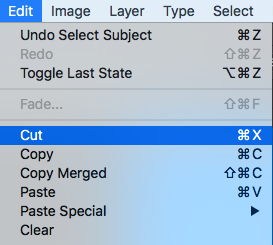
When the image is complex or has overlapping colors, Photoshop will not always be able to select the entire subject perfectly.
If Photoshop’s remove background tool can’t do the job to perfection, you can use one of the next two techniques.
Method 5 – Background Eraser Tool
The background eraser tool does exactly what it says it is going to do – erases the background.
The great thing about this tool is you have more control than the previous two methods.
However, it doesn’t use AI to remove the whole background in one click (for that, you want the Removal Tool – see Method 1 above).
To use this method, select the Eraser Tool from the Toolbar. In the drop-down menu select Background Eraser Tool.
On top of your image window, the Background Eraser Tool Options Bar will appear.
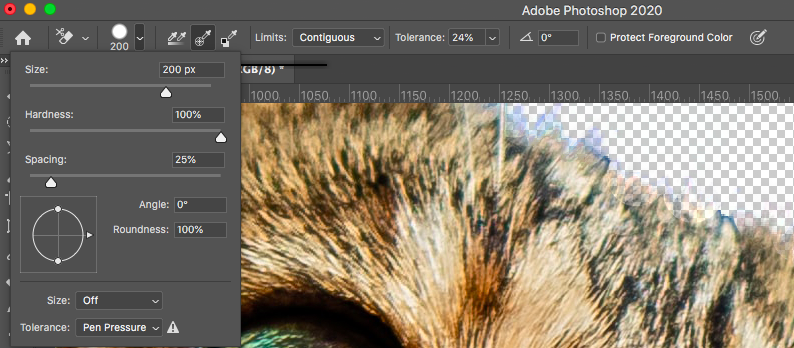
Here you can set the size of the Background Eraser Tool’s brush, tolerance, and limits.
Adjust the Background Eraser Tool’s brush to suit your needs and begin to erase your background.
If you make a mistake you can revert using the Keyboard Shortcut Command Z (for Mac) or Ctrl Z (for Windows).
When you have finished you will have a checkered backdrop behind your subject.
Method 4 – Create a Layer Mask
Use this method to remove the background of an image that has overlapping colors in the background and foreground.
Using a Layer Mask you will have more control to select the exact area you wish to remove, no extra bits will be included or excluded.
To add a layer mask navigate to the Top Menu Bar and select Layer in the drop-down menu below scroll down and select Layer Mask > Reveal All.
A layer mask thumbnail will appear beside the layer thumbnail in the layers panel.
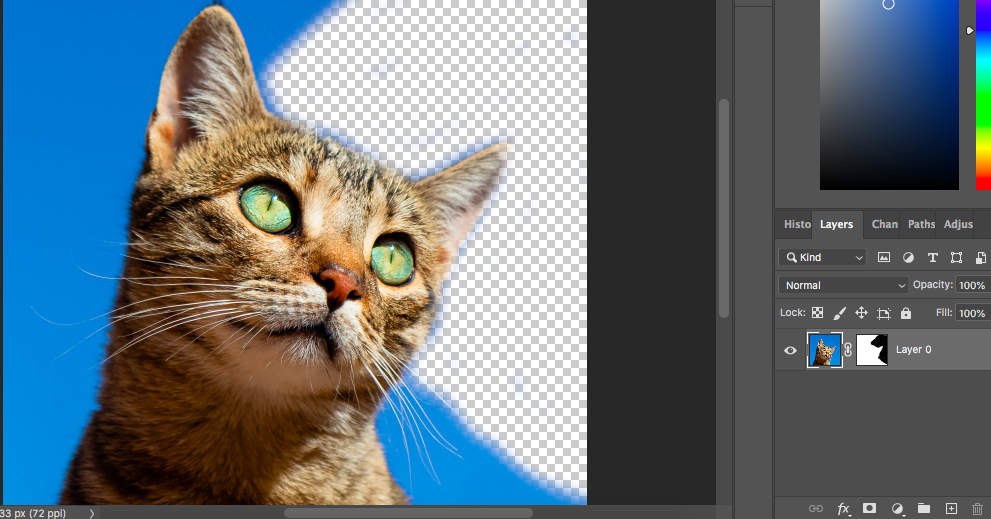
The layer mask indicates visible areas in white, invisible in black, and grey areas indicate full opacity and transparency.
Click on the layer mask thumbnail in the layers panel to make it the active layer.
Using the Brush Tool you can hide or recover areas from the Layer Mask.
The two squared black and white icon at the bottom of the toolbox sets the foreground and background colors.
When the foreground color is black areas of the layer mask will be hidden and when switched to white areas of the layer mask will be recovered.
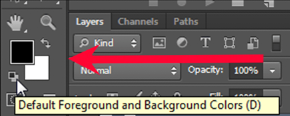
Use the brush tool to remove areas of the background, zooming in when you want to work in more intricate detail.
When you have removed the background you can leave the layer mask for later edits or you can delete it.
To delete the layer mask go to the top menu bar Layers > Layer Mask > Delete.
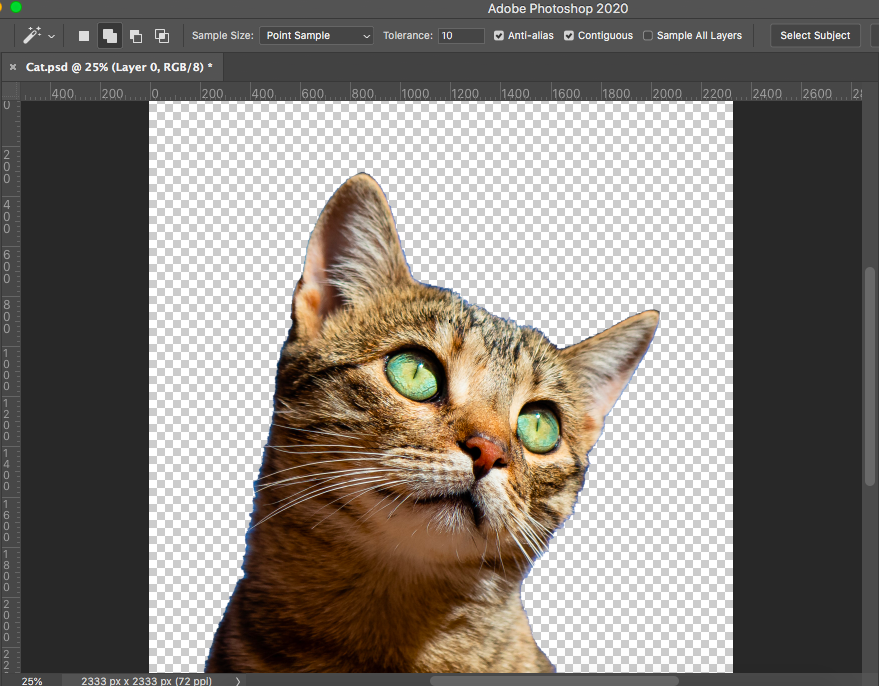
Now that you have successfully removed the background, you can transpose your isolated subject onto your background of choice.
The freedom to replace the background of a product you wish to sell online will make marketing a breeze.
Why can’t I erase the background in Photoshop?
Photoshop is an amazing tool, but sometimes it can be downright frustrating, especially when a tool won’t work no matter how much you click on it.
The more you use Photoshop, the sooner you will realize that the first port of call to resolve an error easily is in the Layers panel.
Normally, the issue arises because a layer is locked or the layer visible in the window is not the active layer.
Check the Layers Panel to see if the layer is unlocked, if it isn’t click on the layer to unlock it.
If the layer is unlocked, check if the visible layer is selected and active. If it isn’t, click on the layer thumbnail in the Layers panel to make it the active layer; now the eraser tool should work.
FAQ
How do I remove a background from one click?
You can use the Remove Tool to remove the background in Photoshop using one click.
Head to the toolbar and select the Remove Tool. Once selected, a panel will open below your image.
Click the Remove Background button in the panel, and your background will be removed.
How do you remove the background in Photoshop Quick Selection?
To remove a background using Quick Selection in Photoshop, head to the toolbar and select the Quick Selection Tool.
The Quick Selection Tool’s options bar will open above the workspace. Click the Select Subject button.
When Photoshop has created an active selection around the subject, click the next button in the options bar, Select and Mask…
Your background will be removed, and a Layer Mask will be created.
What is the shortcut to remove the background in Photoshop?
The fastest way or shortcut to remove the background in Photoshop is with the Remove Tool.
Select the Remove Tool from your toolbar to the left of the workspace.
The Remove Tool panel will open below the canvas. Click the Remove Background button.
Can you batch-remove the background in Photoshop?
Yes, you can batch-remove the background in Photoshop.
To batch remove a background in Photoshop, first record the action.
To do this, head to the main menu and select File > Automate > Batch > Remove Tool > Remove Background (or select your preference of background removing action).
How do I remove a background after quick selecting an object?
To remove a background after quick selecting an object, create a layer mask.
You can do this by clicking the Select and Mask button in the Quick Selection tool’s option bar.
Or by hitting the Layer Mask icon at the bottom of the Layer panel.
How do you change the background on Photoshop fast?
To change a background fast in Photoshop, first remove the background using the Remove Tool.
Once the background has been removed, add a new image as a background layer.
How do I select and change the background in Photoshop?
To select and change the background in Photoshop, use the Remove Tool to remove the background.
Then, add a new background layer to change the background.


