


Best Outdoor Poses for Solo Backpackers
Capture a sense of adventure with this collection of the best outdoor poses for solo backpackers and nature explorers.
Learn | Posing | By Jeff Collier | Last Updated: June 22, 2026
Shotkit may earn a commission on affiliate links. Learn more.
Taking your camera into the great outdoors is a time-honored way of capturing true moments of adventure. As a photographer, I find that accompanying hikers and backpackers gives me some amazing opportunities to capture dynamic poses combined with stunning scenery.
Of course, you can get even better outdoor shots by carefully posing your subjects to make the most of their surroundings. This guide explores some of my favorite poses for backpackers on solo adventures, helping you snap authentic shots that you and your adventure buddies will treasure forever.
The Call of the Great Outdoors
Hiking, backpacking, or trekking – whatever you like to call it, it takes place against some of the most breathtaking natural backdrops.
As a professional photographer, you might get called on by outdoor or sports brands to do nature-based photoshoots that show people exploring the woods or mountains. These shoots offer great opportunities to utilize the poses in this guide and carefully frame your subjects, as your clients will expect you to be in control and directing the action.
If, like me, you’re simply invited along on hiking trips to enjoy the air and, occasionally, snap a memory or two, then you’ll probably prefer capturing more organic poses. A friend gazing out over a lake or taking a pause to tie a shoelace; these brief moments of stillness can help highlight the beauty of the surrounding nature.
Backpacking, of course, can take place in so many places: up hills and mountains, around the coast, and even in semi-urban areas. If you’re planning to photograph people hiking around lakes, rivers, or the shoreline, check out this guide to photographing individuals and couples on boats.
1. The Start of a Great Adventure
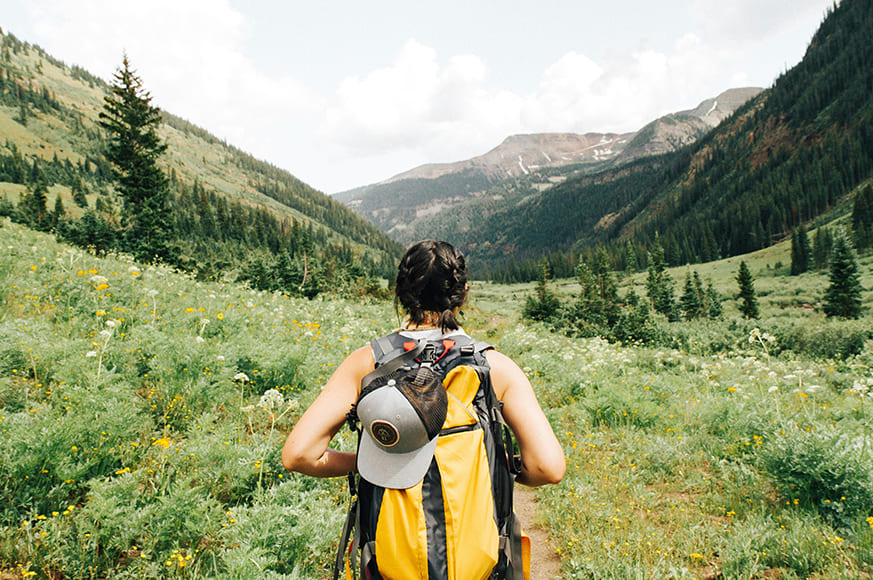
Setting out on a backpacking trip is exciting. I find one of the best ways to capture the anticipation of the path ahead is to pose your subject as if they’ve just passed the point of view of the camera.
Have them completely central, stepping forward to give the impression of steady motion away from the camera. Take the shot from waist height or higher; you don’t need to see their legs or feet, although you can add lower shots in for contrast if you’re creating a set.
Consider the shape of the landscape around the subject. I look for elements of the horizon or backdrop that are coming together, such as hills and mountains meeting or crossing over.
Pose your subject so that they appear to be moving toward these meeting points, to create a true feeling of distance.
Finally, I always make sure that the person has all their necessary gear on their back: bag, flask, hat, and so forth. The more ready for adventure they look, the more exciting the finished shot will be.
2. Traversing the Summit

Climbing a mountain is a big achievement, and you want to capture some amazing shots along the way. As well as the classic shot right at the top of the summit, try to snap your subject as they overcome obstacles or traverse ridges and other challenges.
I find that one of the most stunning shots is where a hiker or climber is posed with the sunlight behind them, creating a striking silhouette of both them and the ridge or rocks they’re climbing.
These shots work best where the background is far away, giving the light plenty of chance to saturate the shot. Try to frame your subject just off center but moving toward the center, for an impression of progress.
Don’t encourage your subject to try different poses over and over if they’re on a scree-lined (rock fragment-lined) ridge. Safety first: you don’t want any scrapes or tumbles.
3. Leaving a Mark
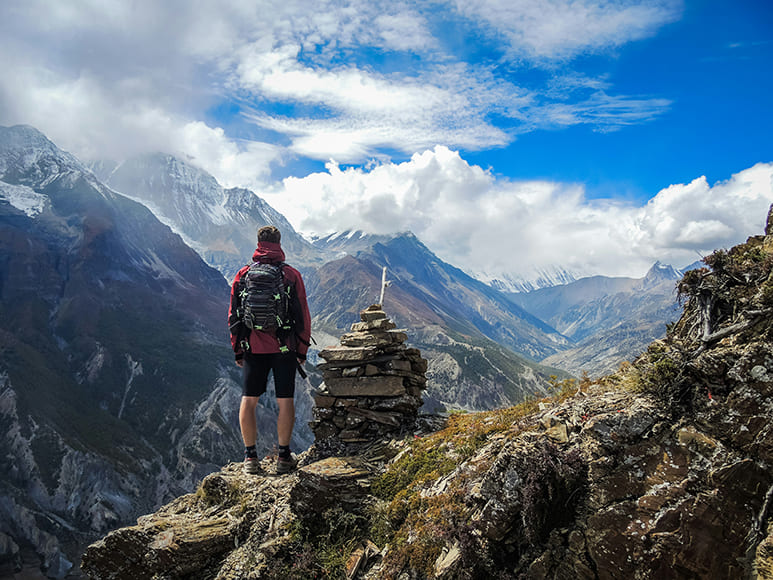
If you travel on your own, how does anyone know you were even there?
Well, as a photographer, I’m always there to record my friends’ adventures. But also, there’s a long tradition of creating cairns or adding to an existing cairn or pile of marker stones.
However, I should note that many outdoor organizations discourage adding rocks even to existing cairns, as even small changes can affect navigation or local habitats. If possible, check first.
Along those lines and as a point of environmental concern, it’s not recommended that you go hauling rocks out of lakes or dig them up. You could inadvertently destroy an animal's home.
As the photographer, pose your subject next to the cairn, looking out at the awe-inspiring scenery. Choose your distance wisely; you want to capture the surroundings without reducing the backpacker to a blurry dot.
Another alternative is to capture them as they place the rock on the pile (again, within reason), for a memory of truly leaving their mark.
4. The Navigator
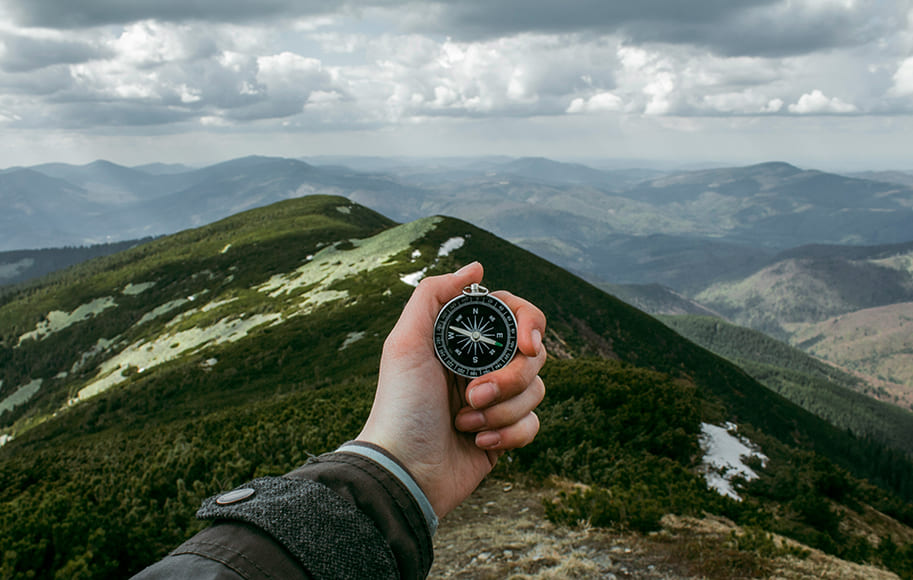
This is a pose you can take of yourself or of someone else. The idea is to snap the person using a compass, GPS device, or map while the majority of the shot showcases the incredible scenery.
If I’m trying to take this shot of myself when I’m out hiking, I simply hang my camera around my neck, stand still to avoid judders, and snap my own hand holding a compass. But if I need to get this type of close-up hand shot of someone else, I’ll usually take the shot over their shoulder.
The framing of this pose works best with the hand positioned in the exact center of the image. This works even better if the scenery is coming to a natural juncture, such as a hilltop, mountain peak, or path end.
Consider color for this type of shot. If your subject is dressed in drab colors and the background is equally dreary, you might not get the sharp definition you’re hoping for.
Either choose contrasting clothing and backgrounds, where possible, or you can simply get your subject to roll their sleeve up to remove the dull colors.
5. The Top-Down View
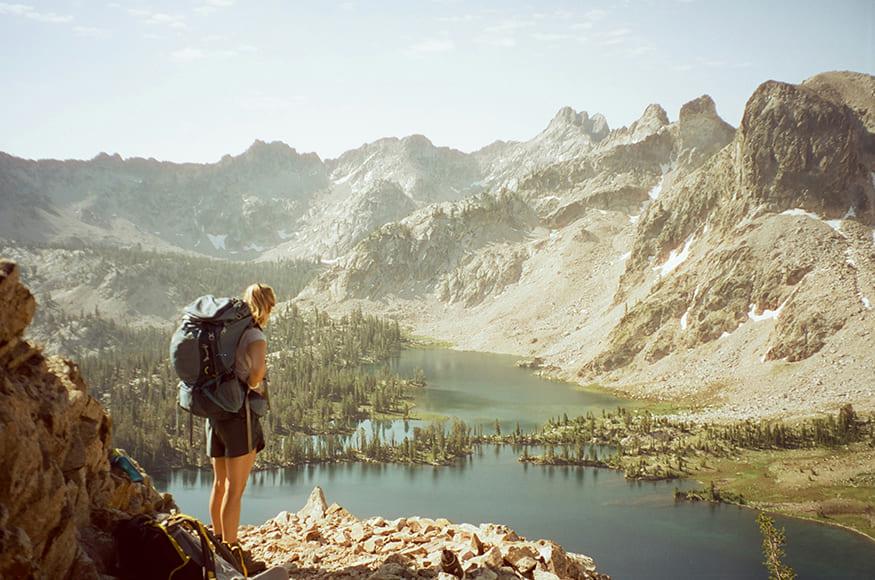
There’s nothing better than climbing to a high place and looking down over beautiful surroundings, especially when nature is all around. As the photographer, the challenge for this pose is finding an equally high yet safe and sturdy platform from which to take this shot.
Your solo backpacker needs to be on their prominent point by themselves. Ideally, you want them fully in shot, clearly looking out over the landscape.
With that in mind, consider traveling up the next hill or simply hanging back on the path a little way. You can use a tripod to adjust the height of your camera to create the illusion of seeing the view over the subject’s shoulder.
In most cases, these shots work best with the person facing away from you. They may have their backpack on their back, or set it on the ground, showing that they’re taking a break to appreciate the natural beauty.
Try to create a natural frame with a piece of landscape that’s between the person and you. I look for a tree, cliff, or rock formation that helps create a natural “edge” to the photo and brings everything in the background into focus.
6. Conquering the Hike
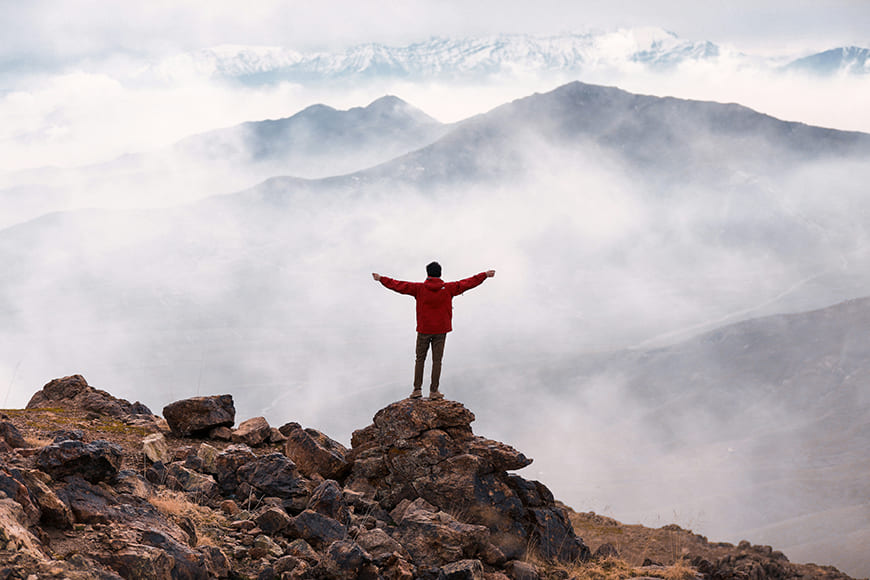
The end of the journey is a triumphant moment, especially for solo backpackers who have set themselves goals such as a particular distance or reaching a certain landmark.
Capture this moment with poses that exude victory. Have your brave adventurer standing at the top of their summit or the end of the path, arms raised, looking out over the land they just conquered.
The most common example of this type of shot is the end of the mountain or hill climb. Standing on one summit or ridge with other mountains in the background creates an epic image that’s worth framing.
Avoid having your subject fill the image field. They should be clearly visible and contrast with the background, but also be dwarfed by it, to emphasize the scope of their achievement.
7. Highlighting the Gear

As a photographer who works with plenty of brands and businesses, I’m often asked to take shots of products, apparel, and gear. For outdoor shots, this is pretty easy, as the gear is usually obviously on show.
Take, for example, hiking boots. A shot of feet stepping along the path, or climbing up some rocks, has the combined benefits of creating action-rich shots and also showing the brand’s products in action.
The key is to focus on what’s happening, rather than leaning too far into branding colors or styles, as you might for an indoor shoot. Let the action speak for itself, and bring in elements of the landscape, from rocks to trees, where possible.
Other examples of gear that you could highlight in shots like this include GPS equipment, hats, gloves, backpacks, and climbing-specific tools.
8. Home for the Night
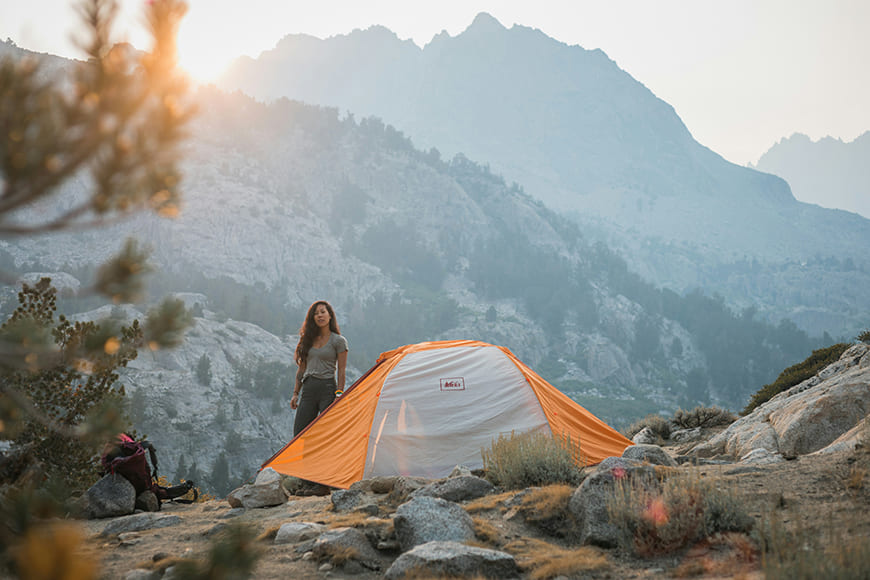
If you’re lucky enough to be invited on a “solo” adventure with camping, you may get the opportunity to snap some shots of the sleeping gear and tents.
A great memory of a backpacking adventure is the area where you (or your subject) slept, whether that’s a tent in the hills or a cabin in the woods.
For camping, try to capture your subject as they’re emerging from the tent, or in the process of setting it up. You can show their gear against the natural backdrop, which makes a striking contrast that looks great on camera.
Other moments I try to snap include building and lighting a campfire, cooking, searching for wood, and moments of reflection, such as reading or listening to music.
9. View From the Tent
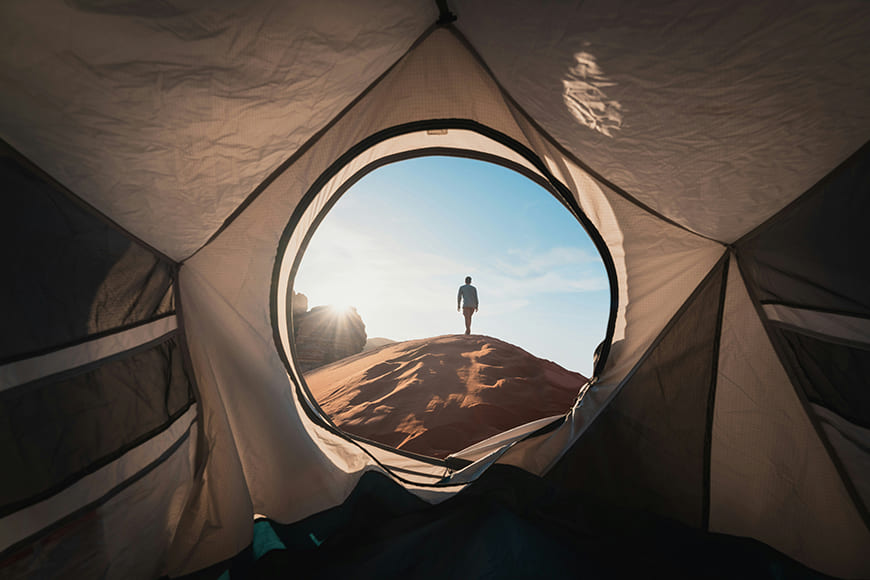
An alternative pose that includes the camping setup is one of your solo adventurer outside the tent, but snapped from within. This works so well, as you can literally frame the person and landscape with the edges of the tent door.
Where the tent door is an uneven shape, try to make it more symmetrical by tying a piece of fabric back or placing something in the doorway.
You want your subject to be relatively central, but positioned enough of a distance away from the tent that there’s a good impression of the surrounding rocks, trees, or desert. Where possible, get them to climb to a slightly higher vantage point and position the camera pointing up toward them.
Top Tips for Backpacking Photos
Remember to think carefully about what gear you’re going to take with you on a backpacking photoshoot. You may have to carry it a long way, so think about how much you’re willing to carry and for how long.
Lightweight tripods can be a lifesaver. The ability to adjust each leg individually is critical, especially for bumpy, uneven ground, where you need a completely stable camera for a distance shot.
Neck straps and stabilizers can be helpful when you need to stop and take snaps on the fly. Consider stiff wire holders to prevent camera judder when you’re using it around your neck.
Wide-angle lenses can work very well for landscape photography. Just don’t carry so many lenses that you weigh yourself down.
Other tips for backpacking photos include:
- Don’t forget snacks and plenty of water.
- Take all the trash away with you.
- If you’re photographing yourself on your own solo adventures, consider safety and ways to stay in touch, such as a GPS tracking device, as well as your cell phone.
- If you’re the “tag-along” photographer, listen to your subject about what’s important to them to photograph, such as specific landmarks.
Backpacking, when done safely and smartly, is a great solo outdoor activity, and even more fun with a friendly photographer.
More: Best Camera Straps for Hiking & Backpacking (+ Clips & Harnesses)
Final Thoughts
For me, the great thing about most of these poses is that you can try them out on yourself. Take your camera out into the forest, up a mountain, or to the coast, and use the timer function or a remote control that allows you to take the shot while standing away from the camera.
Experiment with different landscapes and surroundings, and you’ll soon have a photo album – or portfolio – packed with memories of incredible solo backpacking adventures.

Check out these 8 essential tools to help you succeed as a professional photographer.
Includes limited-time discounts.

Jeff Collier is an experienced film photographer who enjoys experimenting with modern digital photography equipment, software and apps. He’s also an ex-world champion triathlete and avid cyclist, clocking hundreds of km each week in the beautiful Tweed Valley of northern NSW, Australia.
👋 WELCOME TO SHOTKIT!
🔥 Popular NOW:
