


How to Draw Arrows in Photoshop (Four Ways)
Explore four different ways to draw arrows in Photoshop, enhancing your images with directional cues and graphic annotations.
Photoshop | Software | By Judyth Satyn
Shotkit may earn a commission on affiliate links. Learn more.
This is a Photoshop guide on how to draw arrows in Photoshop in four different ways.
Arrows are useful when making tutorials and a fun way to jazz up photos.
Dive in to have all your arrow design needs met, from freestyle and original to customised.

Download a free copy of Adobe Photoshop to follow along with this simple tutorial.
How to Draw Arrows in Photoshop, 4 Different Methods
There is never only one way to complete a task in Photoshop. Usually, there are at the very least three ways.
Here are four different ways to draw an arrow. Each method is suited to different design objectives.
Option 1 – Draw an Arrow with the Line Tool
This option is a neat, quick go-to option using the Line Tool.
Select the Line tool from the toolbar to the left of your canvas workspace.
The Line tool is located in the Shape Tool's dropdown menu.

For the keyboard shortcut, hit Shift plus V repeatedly. This will run you through all the Shape tools until you locate the Line Tool.
The Line Tool might sound like a simple tool, but don't be fooled. You can make some pretty snazzy arrows using this tool.
When the Line tool is active, its options bar will open above the canvas workspace.
This is where you can customize the properties of the Line Tool.
Locate and click on the Cog icon on the right-hand side of the options bar. This will open up the Path Options dialogue window.
![]()
Here, you will find a section named Arrowheads. This is where all the Line Tool's arrow-making magic happens.
In the Arrowheads section, you can specify the shape and size of your arrowhead.
Tick the box beside Start or End if you want the arrowhead to be positioned at the start or end of the line.
If you want an arrowhead at each end of the line, tick both of the boxes.
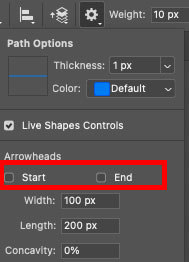
Enter a value beside Width and Height to create the arrowhead's dimensions.
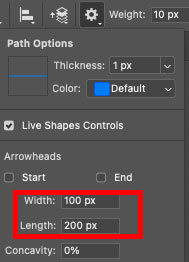
Bear in mind that how the arrowhead appears will be affected by the line's dimension.
For example, if your line is Width 10 px x Length 50 px and the arrowhead's dimensions are Width 400 x Length 200 px. The arrowhead will appear out of proportion to the line.
Therefore, it is a good idea to have a rough idea of the line's dimensions before you enter the arrowhead's dimensions.
You can also draw a few arrows to see how they look and then refine the arrowhead's size and proportions.
Enter a value in the box beside Concavity. This will create the indent or convexity of the arrow.
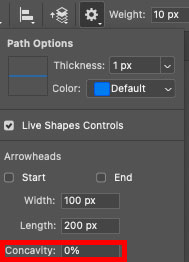
Leave the percentage at zero if you don't want your arrowhead to have concavity.
When you have specified the preferences for the arrowhead, click on the canvas and drag your cursor to create a line.
As you drag, an outline of the line with an arrowhead will be created. This will give you an indication of the size of the line and arrowhead.
Release the cursor when you are happy with your arrow and line size.
Below, you can see an arrow created using the Line Tool. The concavity was set to 25%, thus the noticable indent.
![]()
If you want to customize the arrow, you can.
When using the Line tool, you can choose to create your arrow as a block of color, pattern, gradient, or add a stroke.
Below is an arrow created with the Line Tool, filled with a grass pattern and outlined with a green stroke.
![]()
Remember to customize the line before you draw it.
The Line Tool is an unassuming tool that is capable of more than people realize.
If you want to learn more about the Line tool's customization options, check out this Photoshop tutorial – How to use the Line Tool in Photoshop.
Option 2 – Drawing an Arrow with the Pen Tool
Before discovering you can create arrows using the Line Tool, this was my go-to option.
I still use the Pen tool to create an arrow when I have a specific arrow design in mind.
The Pen Tool gives you complete design freedom, which is something I appreciate.
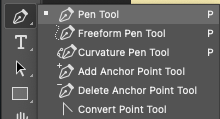
Select the Pen Tool from the toolbar or hit P for the keyboard shortcut.
Click on the canvas to create the first anchor point.
Click on the canvas to add additional anchor points.
To reposition an anchor point, hold down Command (for Macs) or Ctrl (for Windows).
Click the anchor point you wish to reposition and drag it to its new location.
Release the Command or Ctrl key when you have finished.
To bend or curve the lines on either side of an anchor point, hold down the Option key.
When you hover the cursor over the anchor point, handlebars will appear.
Move the handlebars to curve the lines.
Release the Option key when you have finished.
To remove an anchor point, hover the cursor over the anchor point until a minus symbol appears.
Now click on the anchor point, and it will be deleted.
![]()
To complete the path, hover the cursor over the first anchor point until a circle icon appears, then click on the canvas.
Now, you will need to change the arrow path to an active selection.
To do this, open the Paths panel.
Click on the selection icon, the circle made up of dotted lines at the bottom of the Paths panel.
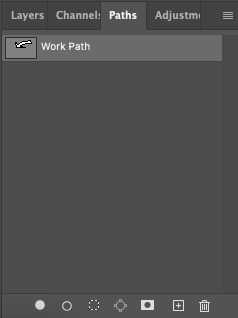
The arrow-shaped path will be replaced with an active selection, depicted by marching ants.
Create a new layer if you do not wish to merge the arrow shape with its background layer.
To create a new layer, click on the new layer icon, a square with a plus sign inside, at the bottom of the Layer Panel.
Now, you can get creative and fill the arrow selection with any design you like.
A simple option is to fill it with a block of color using the Paint Tool.
Select the Paint Tool from the toolbar or hit P for the keyboard shortcut.
Select a color from the Color panel. Click inside the active arrow-shaped selection to fill it with the color.
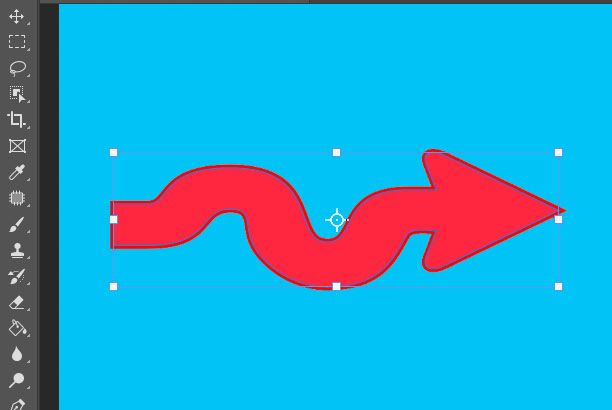
As you can see below, the arrow design is simple but unique.
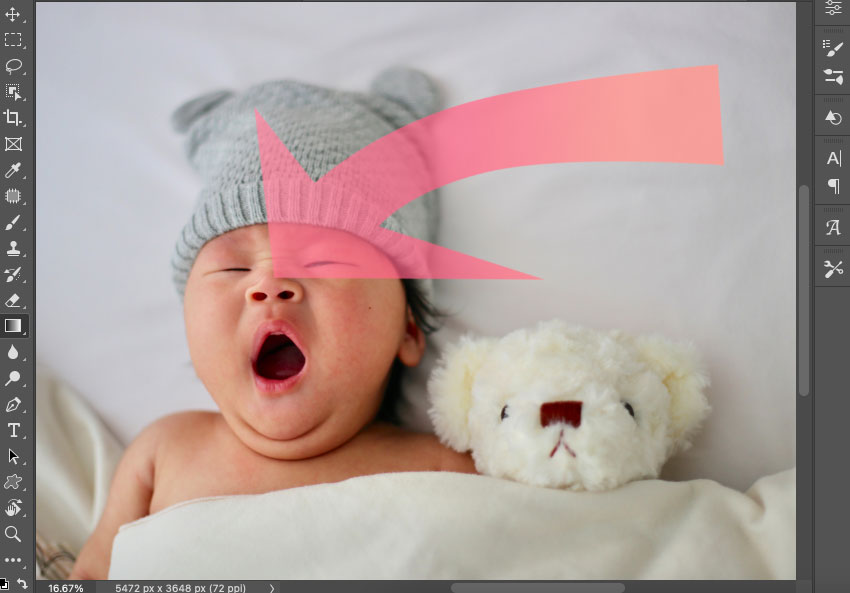
Use the Pen Tool when you want complete control over your arrow design result.
When you wish to create an arrow with precise dimensions, activate Photoshop's grids and guidelines.
If you want to try drawing curved arrows, check out this Photoshop tutorial – How to Draw Curved Arrows in Photoshop.
Option 3 – Drawing Arrows with the Custom Shape Tool
When you've used Photoshop more than once, you usually have had a peek in the Custom Shape's library.
To discover it has only four custom-shaped folders: Leaf Trees, Wild Animals, Flowers, and Boats.
Unknown to most, there is the option to download a folder of arrows containing 20 different arrow shapes.
Okay, maybe this isn't exactly drawing an arrow, but it definitely comes in useful when you need an arrow quickly.
Select the Custom Shape Tool from the toolbar.
Head to the top menu bar, and from the dropdown menu under Windows, select Shapes.
A Shapes dialogue window will pop out. Click the stacked line icon in the top right corner.
A drop-down menu will open. From here, select Legacy Shapes and More.
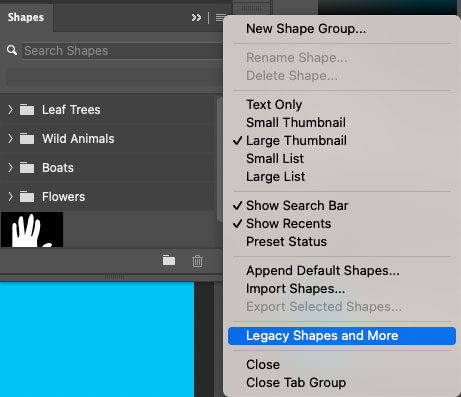
Once you click Legacy Shapes and More, Photoshop will download two additional folders of custom shapes.
Open the All Legacy Default Shapes folder. In this folder, you will find a folder of Arrows shapes.
![]()
Open the arrows folder to find a selection of 20 arrow shapes you can now choose from.

Select an arrow shape from the folder by clicking on it.
Now, draw the arrow shape on the workspace.
Click the start point of the arrow and then drag your cursor across the canvas.
You will see the outline of the arrow as you drag.
Release the cursor to create the arrow.
Use the Move Tool and the Transform tool to reposition or resize the arrow.
If you wish to customise the arrow shape, use the Custom Shape Tool's options bar.
The Custom Shape Tool has the same customise options as the Line Tool.
You will be able to fill the vector shape with a pattern, gradient, block of color or add a stroke.
You can also choose to create an arrow with no fill.
Below is a customised arrow with a green stroke and gradient fill.
![]()
When using the Custom Shape Tool, you can customise the arrow after it has been created.
As long as the Custom Shape Tool is active and the arrow layer is selected in the Layer's panel.
Option 4 – How to Draw an Arrow using the Brush Tool
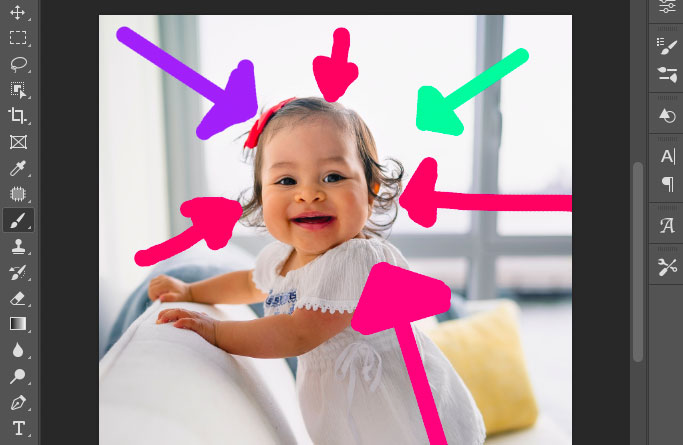
Last but not least, it is worth remembering that you can simply draw a free-hand arrow.
Yes, customised tools rock, but sometimes, a free-hand arrow is just what you need.
A free-hand arrow has the charm of looking organic and being completely original.
This is where the Brush tool comes in.
Select the Brush Tool from the toolbar or hit B for the keyboard shortcut.
Set the preferences for the Brush's properties in the Brush Tool's options bar.
Click on the downward pointing arrow to change the size of the brush.
![]()
Open the brush folder to choose your preferred brush style, such as scattering, textured or wet edges.
![]()
You can find unique brush styles online, which you can upload to Photoshop to use.
The next option is Mode. Choose a mode from the drop-down menu or leave it as Normal.
![]()
Enter a value in the box beside Opacity if you want an opaque arrow.
![]()
Next, select a color for your arrow from the Color panel and begin to draw an arrow.
Drawing a free-style arrow will be easier if you use a drawing tablet. The mouse can be difficult to control.
There is a neat trick to create a straight line when using the Brush tool.
Click on the canvas to add the first point of the arrow, then hold the Shift key while you add the endpoint.
The line between the first and last point will be filled in by Photoshop, creating a straight line.
So now you have learned four different ways to draw an arrow in Photoshop.
If you have a different snazzy option to draw an arrow in Photoshop, please share it with us in the comments.
If you like this Photoshop tutorial, you will most likely enjoy How to Outline Images in Photoshop.
Enjoy editing and creating arrows.
FAQs
How do you get the arrow instead of the line in Photoshop?
You can use the Line tool when you want to create an arrow in Photoshop.
Open the Line Tool and click the Cog on the right-hand side of the options tab.
This will open the Path Options dialogue box. At the bottom of the box, you will find the Arrowheads section.
Tick one of the boxes, Start or End, to add an arrowhead to your line.
What tool is used to draw arrows in Photoshop?
There are a number of tools you can use to draw an arrow in Photoshop.
To draw an arrow, you can use the Line Tool, the Bush Tool, the Pen Tool or the Custom Shape Tool.
The choice of tool you decide to use will depend on the style of arrow you wish to achieve.
How do you add pointing arrows in Photoshop?
To add a pointing arrow in Photoshop, use the Line Tool, Pen Tool or Custom Shape Tool.
To use the Custom Shape Tool, select a pointed arrow from the Custom Shape library.
Then click on the canvas, drag your cursor across the workspace and release when you have created the arrow.
How do you draw a curved arrow using Photoshop?
To draw a curved arrow in Photoshop, use the Custom Shape Tool and select a curved arrow from its library.
Alternatively, you can use the Pen Tool or Brush Tool to create a curved arrow.

Judyth is an experienced studio photographer and glass artist. When she isn’t Photoshopping comedians into the bellies of sharks, you can find her cooking delicious treats for her guests.
👋 WELCOME TO SHOTKIT!
🔥 Popular NOW:
