


Learn How to Layer Mask in Photoshop in 4 Simple Steps
Mastering the art of creating layer masks will allow you to switch between different layers, choose to add or subtract and make quick reversible changes.
Photoshop | Software | By Judyth Satyn
Shotkit may earn a commission on affiliate links. Learn more.
Layer masking in Photoshop is considered to be an exclusive tool only to be used by those proficient in black-belt Photoshop.
Exclusive as the layer mask skill may seem, this layer mask tutorial will show you that layer masking is an easy-to-learn skill.
Mastering the art of creating layer masks in Photoshop will allow you to switch between different layers, choose to add or subtract and make quick reversible changes.
Read on to learn how to use layer masks to hide or make visible specific areas of a selected layer within an image file.
(You should also learn how to use the clipping mask in Photoshop.)

Download the latest version of Adobe Photoshop to follow along with this simple tutorial.
Start a free 7-day trial today
How to Make Your First Layer Mask in Just 4 Steps
Step 1 – Open the Image
Select the image you wish to add a layer mask to in Photoshop.
Click the lock icon to make sure the image is unlocked.
Step 2 – Add a Layer Mask
When you have chosen the layer in the layers panel to which you wish to add a layer mask, navigate to the top menu bar and select Layer.
In the drop-down menu, scroll down and select Layer Mask > Reveal All.
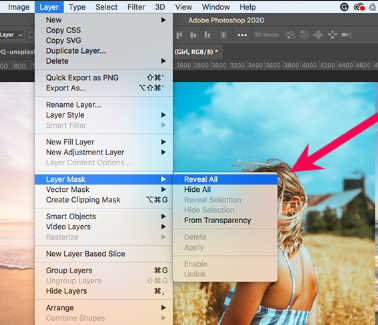
Alternatively, create a layer mask by clicking the Layer Mask Button in the Layer Panel.
The Layer Mask button is a white rectangle with a circle inside located at the bottom of the layer panel.
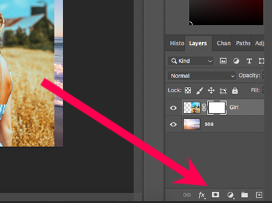
After clicking Reveal All or the Layer Mask Button, a layer mask thumbnail will appear beside the layer thumbnail in the layers panel.
The layer mask thumbnail indicates visible areas in white, invisible in black, and grey areas indicate opacity.
The lock symbol between the layer mask thumbnail and layer thumbnail in the layers panel indicates they are locked together.
If you unlock the layer mask from the layer, the layer mask will no longer be active.
- Read more: How to save a PDF file in Photoshop
Step 3 – Select a Tool
Use The Eraser Tool
The Eraser Tool or the Brush Tool can be used in tandem with the layer mask to make areas of the image visible or invisible.
Select the Layer Mask Thumbnail in the layers panel to make it the active layer.
The two squared icons at the bottom of the toolbar sets the foreground and background colors.
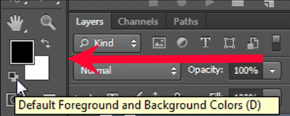
When black is set in the foreground of the icon, the eraser tool will reinstate hidden areas of the layer mask.
When the white box is set in the foreground, the eraser tool will hide areas of the layer mask.
Select the Eraser Tool from the toolbar.
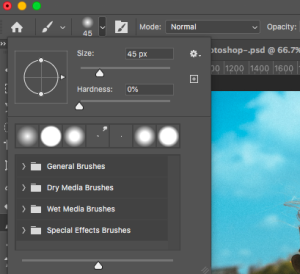
In the Eraser Tool Options Bar, choose the size and hardness of the eraser.
Hide or recover areas of the image by painting on the image with the Eraser Tool.
Alternatively, Use The Brush Tool
Select the Brush Tool from the toolbar.
In the Brush Tool Options Bar, choose the size and hardness of the brush to use on your layer mask.
The Brush Tool can be used in a similar way to the eraser tool.
When the black square of the icon is positioned in the foreground, the brush tool will conceal areas of the layer mask.
When the square is switched to white, the brush tool will reinstate hidden areas of the layer mask.
You can experiment with different brush tool settings to achieve different effects when layer masking.
A brush tool with a hard edge will create a defined line on the layer mask.
A soft-edged brush will create a faded line represented by grey in the layer mask thumbnail.
Shortcut – When editing layer masks, you can switch the background color by pressing X.
Select Grey from the Colour Palette and paint with your brush tool to blend layers between layer masks.
When grey is used when you want to make areas of the layer mask partially visible or faded.
Use darker grey to make areas of the layer mask more transparent or lighter to make them less transparent.
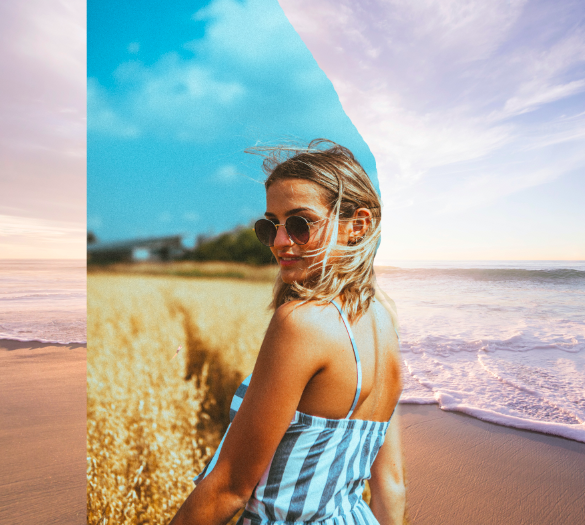
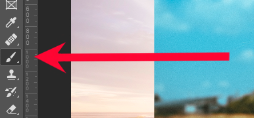
Example of an unfinished Photoshop layer mask edit.
What is the purpose of masking a layer?
You might wonder why anyone would use a layer mask. Why not use the eraser? Isn’t it essentially the same?
There are many advantages to using a layer mask. Layer masks allow you to stack and combine layers to reveal or conceal areas of a design.
When using layer masks, you can modify background colors without permanently altering any of the layers.
Layer masks give you the flexibility to remove or cut out objects and later add them back.
You can target your edits to work on specific areas of the layer mask and not the entire layer.
One of the priceless aspects of a layer mask is being able to easily reverse edits without having to delete other edits or backtrack through a hundred previous edits.
Layer Masks are the perfect tool for designers or editors who love creating compositions. You can read more about them in this Adobe article.
Why not give it a shot and use layer masks in Photoshop to create interesting compositions?
(If you prefer using Lightroom over Photoshop, you can learn more about the new mask tool in Lightroom.)
Adobe MAX Update 2024
Photoshop is the ultimate tool for photographers, graphic designers, and visual creatives looking to take complete creative control of their workflow.
The Adobe MAX Update 2024 introduces several enhancements and new features to simplify core tasks.
With the assistance of Generative AI, these tasks include the ability to remove distracting elements from an image and streamlined processes for placing 3D elements in a 2D design.
Removal Tool – The key updates include an enhanced Remove Tool to effectively remove unwanted or distracting objects from an image without deteriorating the overall composition.
Distraction Removal – The automated Distraction Removal feature identifies people, objects, and overhead wires that may distract from the image.
Generative Fill – Powered by Adobe Firefly AI, Generative Fill allows you to build a composition with photo-realistic 3D elements, including correctly placed shadows, highlights, and perspective.
Generative Expand – Photoshop’s Generative Expland allows you to resize the canvas and use Adobe Firefly Image Mode to fill in photorealistic elements.
The Adobe MAX 2024 Updates are now live, and there’s never been a better time to optimize your creative output with the Adobe Creative Cloud suite of applications.

Judyth is an experienced studio photographer and glass artist. When she isn’t Photoshopping comedians into the bellies of sharks, you can find her cooking delicious treats for her guests.

👋 WELCOME TO SHOTKIT!
🔥 Popular NOW:
