


How to Defringe in Lightroom (Remove Aberration)
Learn to defringe your photos in Adobe Lightroom, enhancing clarity by removing chromatic aberration for pristine images.
Lightroom | Software | By Judyth Satyn
Shotkit may earn a commission on affiliate links. Learn more.
This guide will give you the easiest ways to Defringe in Lightroom.
I’ve been using Adobe Lightroom for years, and I often need to remove color fringing from my landscape photos taken when the sun is low in the sky.
Defringing in Lightroom helps you correct distracting chromatic aberration in photos to make them look more professional.
Let’s dive into the tutorial.

Popular course reveals the simple tricks to getting incredible results with Lightroom in record time.
Give Your Photos The Look They Deserve!
How to Defringe in Lightroom
Color fringing, also known as chromatic aberration, is a noticeable outline of unnatural color on the edges of an object.
Basically, it is a color distortion that occurs due to the way light interacts with the camera's lens.
This is due to differences in each color's focal point. For the most part, purple fringing will appear in front of the point of focus, and green fringing will manifest behind the point of focus.
A photo with chromatic aberration doesn't make you a bad photographer.
It happens to all photographers, particularly in high-contrast areas of photos.
Chromatic aberration is most common when an object is photographed in front of a strong light, such as the sun or a bright spotlight.
Zoom into the high-contrast area of a tree shot in front of a sunset, and there will usually be an evident chromatic aberration.
Although evident fringing in your photos doesn't make you a bad photographer, not fixing it can make your photos appear amateurish.
Sometimes, chromatic aberration isn't obvious in a photo until you enlarge it. However, even when the effect is subtle, it can downgrade the quality of your photos.
Luckily, you can easily fix color fringing to bring your image back to professional standards using Adobe Lightroom.
Lightroom software has quick-fix editing solutions for photographers.
Using Lightroom's Lens Correction panel with one click, you can rid your image of unprofessional and distracting fringes.
Your image will be instantly Defringe in one click. Perfect.
When the Lens Correction panel doesn't correct chromatic aberration, don't worry; there are other editing steps we will show you so you can remove it.
Let's check them out.
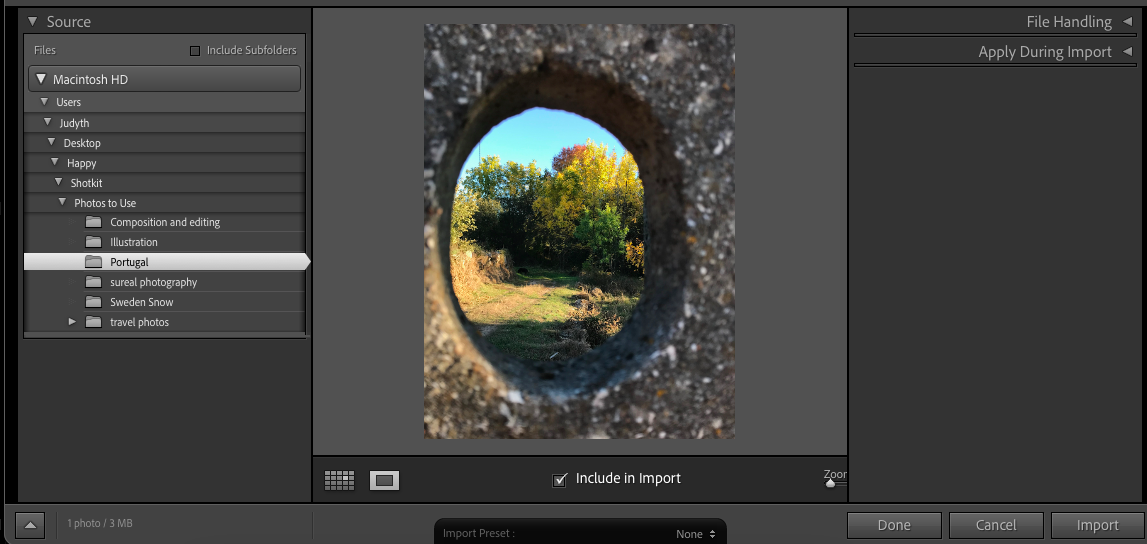
Step 1 – Open your Image
Open your image in Lightroom.
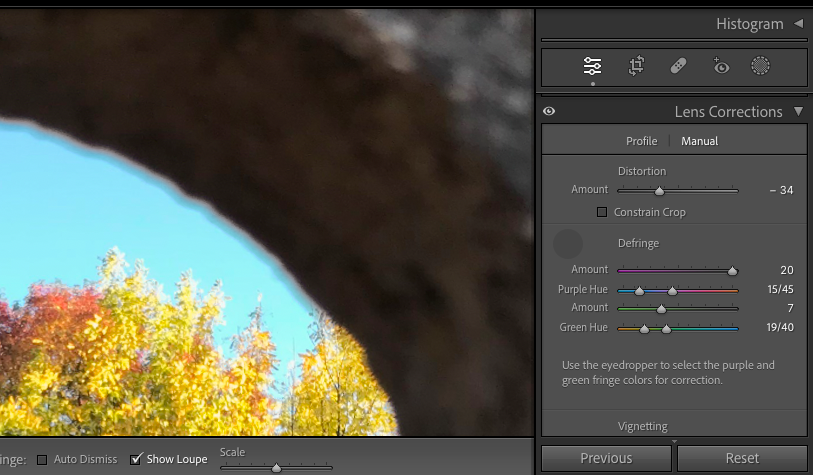
When we zoom in on the image, we can see the evident color fringe.
In the image we are using for this tutorial, the color fringing clings to the edges between the sky and the cement wall.
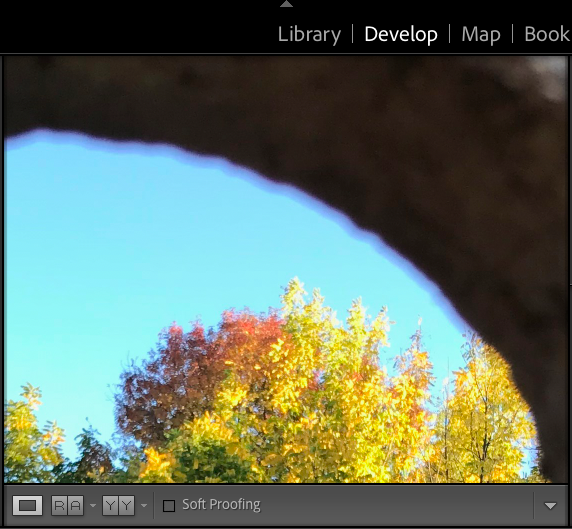
This isn't the worst fringing in photography history, but the hazy line has the potential to distract the viewer's eye.
As you can see, it is in front of the focal point and thus is purple in hue.
Step 2 – Open Lens Correction
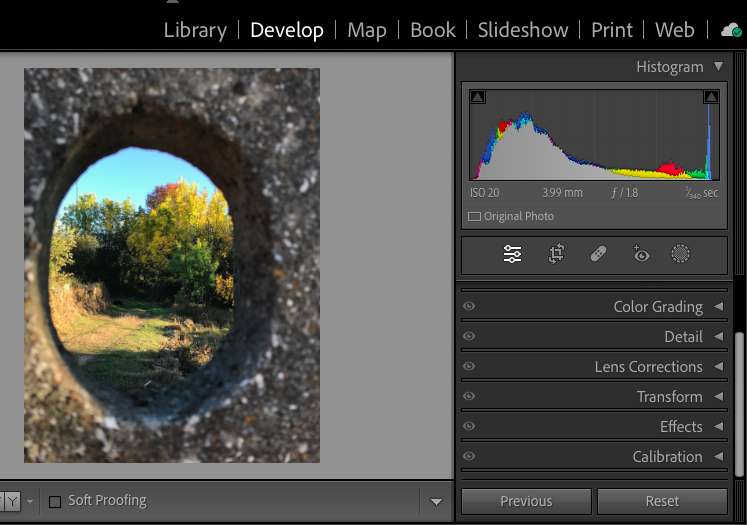
When your image is open, head to the top menu bar and select Develop.
This will open the developing mode of Lightroom, where all the editing magic happens.
Once Develop is clicked, Lightroom's image editing options will appear on the right-hand side of your canvas workspace.
Click the arrow beside Lens Correction to open the Lens Correction panel.
At the top of the Lens Correction panel, you will have two options: Profile or Manual. Click Profile.
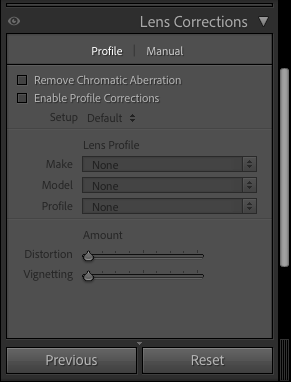
Now, tick the box at the top of the panel beside Remove Chromatic Aberration.
If the chromatic aberration is blue in hue, ticking this box will most likely immediately correct the color fringing in your image.
However, if the hues are more intense, such as green or purple in hue, this will not correct the chromatic aberration.
Ticking the box beside Enable Profile Corrections will also sometimes remove areas of unwanted fringe.
When you tick this box, Lightroom reads the photo's EXIF data.
The EXIF data informs Lightroom which type of lens was used when the photo was taken.
Using this information, Lightroom can make distortion corrections.
Check your image in the canvas workspace to see if ticking these boxes has removed the chromatic aberration.
If your image still has evident chromatic aberration, follow the next steps.
Step 3 – Open Manual Lens Correction Editing
The chromatic aberration in the image we are editing is purple in hue.
Therefore, ticking the box beside Remove Chromatic Aberration has not removed it.
To remove the fringing, we will use the manual correction option by clicking Manual at the top of the Lens Correction panel.
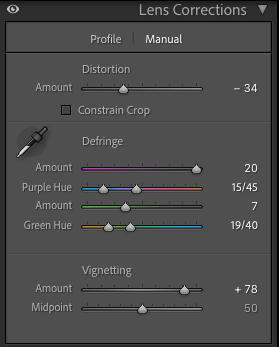
Under the first slider, the Distortion slider, you will find the Defringe sliders and eyedropper.
Step 4 – Select the Defringe Eyedropper
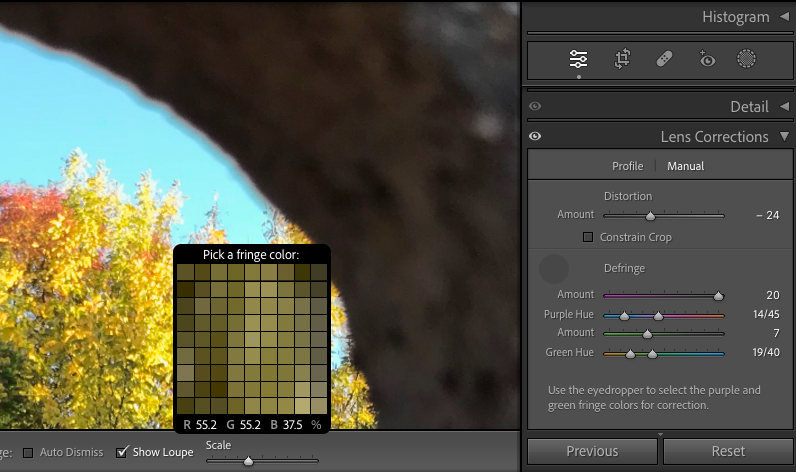
Click on the Defringe Eyedropper icon to activate it.
Using your cursor, hover the Eyedropper pointer over the chromatic aberration in the image.
The “Pick a fringe color” window will appear, displaying the colors beneath the Defringe Eyedropper pointer.
To get a better vantage point, use the Navigator panel to zoom in on the canvas.
You will find the Navigator panel on the left-hand side of your canvas.
To zoom in, simply click the percentage value in the top right of the Navigator panel.
A drop-down menu will appear; select a percentage to zoom in.
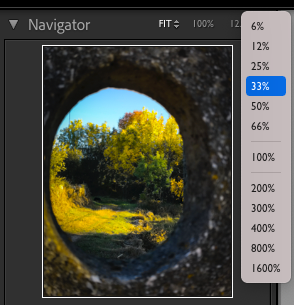
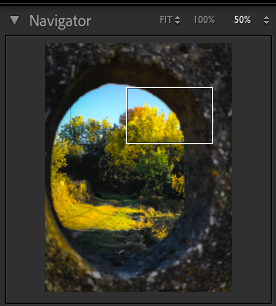
When you have zoomed in, click inside the Navigator's viewing square and drag it to move it.
The “Pick a fringe color” window will move as you move the Eyedropper pointer.
The window acts like a magnifying tool, showing an enlarged view of the colors beneath the Eyedropper pointer.
Click on the canvas with the Eyedropper pointer when the colors displayed in the “Pick a fringe color” window are the fringing colors you wish to correct.
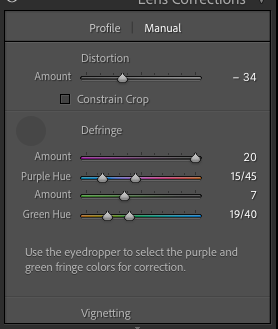
Once clicked, the Defringe sliders in the Lens Correction panel will jump to a new position.
And the chromatic aberration will be corrected.
As you can see in the image below, the purple hue has been removed from the blurred area between the stone and the sky.
The image below shows that the Purple Hue slider has jumped from 14/45 to 15/45.
The Amount slider above has moved from a value of 9 to 20.
If you wish, you can use the sliders instead of the Defringe Eyedropper. This will give you more editing control.
Many Lightroom editors use the automatic setting first and then fine-tune the sliders to their liking.
Step 5 – Select More Colors
If your photo has more areas of color fringe, you can repeat step four.
Hover the Defringe Eyedropper over each area of out-of-place fringing. Then click with the eyedropper to Defringe.
The Lens Correction will change the tones of the colors to match other areas of the image.
And that's it for our Lightroom Defringing tutorial.
I hope you liked the tutorial and can use these editing skills to your advantage.
FAQs
How do I use the Defringe tool in Lightroom?
To use the Defringe tool in Lightroom, open the Lens Correction panel in Lightroom's Develop mode.
Click on the eyedropper icon to activate it. Then, hover the Eyedropper over areas of fringing you wish to remove.
Click the canvas when the eyedropper pop-up window displays the chromatic aberration.
The fringing will automatically be corrected.
What does the Defringe slider do in Lightroom?
The Defringe sliders can be used to remove purple or green hue fringing in photos.
Slide either the Green or Purple Hue slider to remove purple or green chromatic aberration.
How do I get rid of blue fringing in Lightroom?
To remove blue fringing in Lightroom, head to the Lens Correction panel in Develop mode when the image is open.
In the Profile tab, tick the box beside Remove Chromatic Aberration.
Usually, this is all it takes to remove blue fringing.
How do you get rid of fringing?
To get rid of unwanted fringing in photos, you can use the Defringe tool in Lightroom.
When the image is open in Lightroom, select Develop from the top menu bar.
Open the Lens Correction panel to find the Defringe Eyedropper.
Click on the color fringing using the Eyedropper tool to remove it automatically.

Judyth is an experienced studio photographer and glass artist. When she isn’t Photoshopping comedians into the bellies of sharks, you can find her cooking delicious treats for her guests.

👋 WELCOME TO SHOTKIT!
🔥 Popular NOW:
