


How to use Luminar Neo with Photoshop (Via the Plugin)
Every purchase of Luminar Neo comes with a handy Photoshop plugin which enables you to use both pieces of software together. Here's how to do it.
Luminar | Software | By Andrew Dilks
Shotkit may earn a commission on affiliate links. Learn more.
Learning how to use Luminar Neo with Photoshop opens up a new world of image editing tools and options previously unavailable when using either program in isolation.

Download the latest version of Luminar Neo to follow along with this simple tutorial.
Use code shotkit10neo to save $10
As a landscape photographer looking for the best ways to improve my images, I love the ability to quickly hop over to Luminar Neo to fine-tune values for the best possible results.
In this tutorial, I'll run through the simple way to integrate Luminar Neo with Photoshop so you can take advantage of the many tools it has to offer.
For a general overview of Neo, see our beginner's guide and if you don't own it already, here's how to buy Luminar.
How to use Luminar Neo with Photoshop with ease
Using Luminar Neo with Photoshop allows you to access its broad set of editing tools at the touch of a button, applying presets and other changes in Luminar Neo before reverting back to Photoshop for the finishing touches.
It's incredibly easy to do in a matter of seconds and can help enhance your images without requiring a great deal of experience and technical know-how.
Here's how you can use Luminar Neo and Photoshop together to take your image edits to the next level:
Load up the image you wish to edit in Photoshop
The first thing you need to do to use Luminar Neo and Photoshop together is open Photoshop and choose the image you wish to edit.
Make sure the image type is in the correct format, then once you're happy with the chosen picture, you can open up the Photoshop filter.
Select Luminar Neo from the Photoshop filters
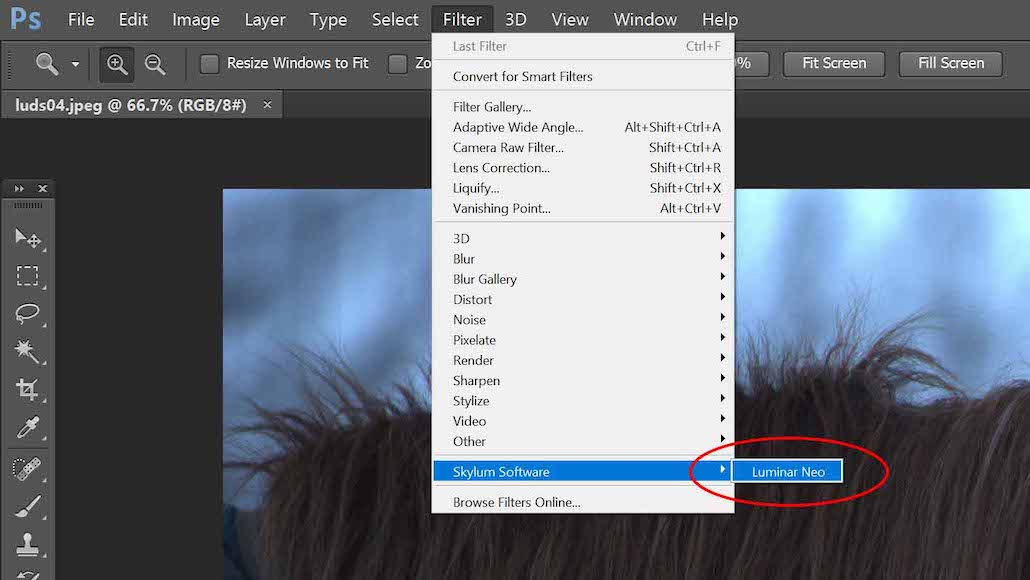
Selecting the Luminar Neo plugin from Photoshop filters is incredibly easy
Next, you'll need to choose Luminar Neo from the list of filters available through Photoshop, which should be automatically listed once you have Luminar Neo installed on your device.
You can do this by:
Choosing Filter > Skylum Software Luminar Neo
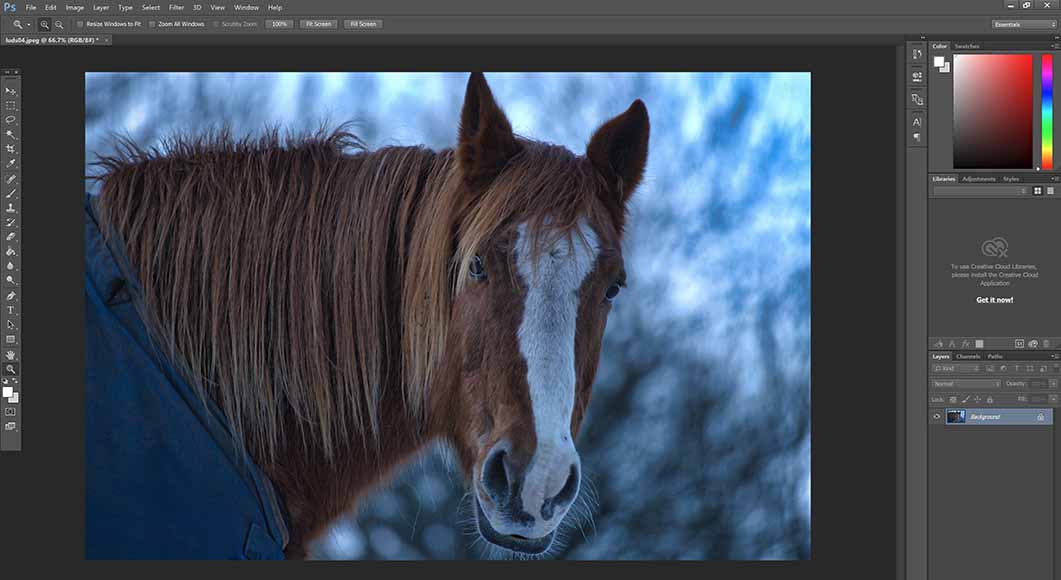
Once you've selected this, Luminar Neo will load up with your selected image ready to apply presets or any other Luminar Neo edits you wish to perform.
(If you don't see the option, you may need to reinstall the Luminar plugin – see how to install Luminar.)
Apply the changes in Luminar Neo

Changes made in Luminar Neo can be easily applied in Photoshop
Once you've applied any changes you wish to make to the image in Luminar Neo, it's time to apply these changes and return to Photoshop.
The Apply button can be found in the top right-hand corner of the screen, so tap this when you're done and the image will process in Photoshop.
Return to Photoshop to continue editing
Returning to Photoshop after applying changes in Luminar Neo
Once you've hit the Apply button, Luminar Neo will make these applications and automatically send you straight back to Photoshop.
It's as simple as that! Should you wish to make additional edits using the tools and presets in Luminar Neo, simply repeat the second step of this process and select the software in Photoshop's Filter options.
How to Open a Photo in Photoshop from (Inside) Luminar Neo
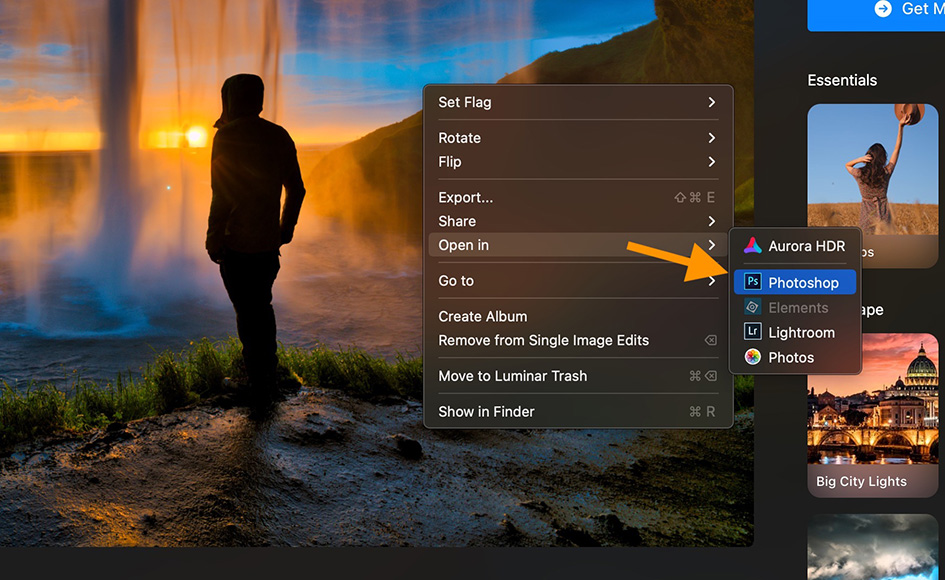
You can also do the vice versa, and open your photo from within Neo and edit it in Photoshop.
To do so, right click the image, select ‘Open In', then choose Photoshop.
Adobe MAX Update 2024
Photoshop is the ultimate tool for photographers, graphic designers, and visual creatives looking to take complete creative control of their workflow.
The Adobe MAX Update 2024 introduces several enhancements and new features to simplify core tasks.
With the assistance of Generative AI, these tasks include the ability to remove distracting elements from an image and streamlined processes for placing 3D elements in a 2D design.
Removal Tool – The key updates include an enhanced Remove Tool to effectively remove unwanted or distracting objects from an image without deteriorating the overall composition.
Distraction Removal – The automated Distraction Removal feature identifies people, objects, and overhead wires that may distract from the image.
Generative Fill – Powered by Adobe Firefly AI, Generative Fill allows you to build a composition with photo-realistic 3D elements, including correctly placed shadows, highlights, and perspective.
Generative Expand – Photoshop’s Generative Expland allows you to resize the canvas and use Adobe Firefly Image Mode to fill in photorealistic elements.
The Adobe MAX 2024 Updates are now live, and there's never been a better time to optimize your creative output with the Adobe Creative Cloud suite of applications.
How to use Luminar Neo with Photoshop – FAQs
Using Luminar Neo with Photoshop is incredibly easy, but in case you still have any concerns, here are some answers to the more frequently asked questions on this topic:
Photoshop is widely used by professional photographers and graphic designers on account of its broad set of tools and other features that give it professional-level options for image editing.
Luminar Neo simplifies the range of options available, which makes it ideal for beginners and amateur photographers who are looking for an entry-level image editor for quick changes.
It's a more straightforward tool that enhances its appeal among more casual users, which nevertheless is still capable of delivering a wide range of edits at the highest quality.
How do I install Luminar plugin in Photoshop?
If you've installed Luminar Neo on your computer, you should find it is automatically listed in Photoshop's Filter menu and is ready to use straight away.
This will give you instant access to Luminar Neo without the need to add it as an extension in Photoshop, saving time and hassle getting it up and running.
Can Luminar neo replace Lightroom?
Luminar Neo is a great tool for photo editing for non-professionals and those who are looking for an intuitive and automated image editing package.
While it's unlikely to replace Lightroom for pros who need the full range of tools to fine-tune their work, for many photographers, it delivers stunning results in a matter of seconds.

Andy Dilks is an experienced landscape photographer and former games industry veteran. When he isn’t taking photos or reviewing the latest tech gadgets, you can find him hiking and wild camping in the Peak District.
3 Comments
Leave a Comment
👋 WELCOME TO SHOTKIT!
🔥 Popular NOW:

You forgot to mention a very important item. Many of the AI tools (Generase, etc) are not available thru the plugin. This was the main reason I purchased Neo to use the AI tools. I feel betrayed and feel like I was taken. After over an hour of Googling I found a brief note in the Neo web ads that the AI tools were unavailable as plugin but they are “working on it”. All the literature I went thru and only found this mentioned in one place. Seems scamish to me.
Completely agree. Just purchased Neo Pro and cannot find SKY AI in the tool edit list. There are some other AI tools listed, but haven’t yet tried – because like you, I’ve been googling for the last hour trying to find out why Sky is not listed and available. Finally tripped over your post. Also have yet to find anyway to speak with a customer service agent. Another issue.
Hi Andrew,
Can Luminar Neo be used with Photoshop Elements?