


How to Build the Best PC/Desktop Computer for Photo Editing
Are you a photographer looking to build your ideal PC? Then this guide is for you! Find out how to choose the best PC components for image editing.
Learn | Photography Guides | By Athol Hill
Shotkit may earn a commission on affiliate links. Learn more.
I hadn't built a PC for about 15 years before venturing into this. That's a long time in PC land. The last time I built something, fans were tiny, and hard drives spun.
For the last 15 or so years, I've been a Mac user for photo editing, and for the most part, I've been happy. It didn't bother me too much when Apple went Unibody and updates became confined to RAM and hard drives.
The problem is that it didn't stop with that. The Apple tax rose, and the decisions seemed to be pushing consumers down a path where the wastage was insurmountable and the price premium wasn't justifiable.
I won't bore you with my evaluation process of Apple gear; suffice to say that when they started producing $7,000 displays with $1,000 stands, it became clear that Apple was no longer making computers for photographers like me. So I decided to go down the PC path.
I never planned to build the machine myself. Unfortunately, due to the coronavirus, the timeline on a custom build was taking two weeks or more as people geared up for working at home.
If you're not comfortable physically building a PC yourself, don't worry. You can put together the specifications of your machine and someone at the computer store will build it for you for a small cost.
Decide If Building Your PC Is the Right Way to Go
Building your own PC is great. You get more bang for your buck, and you get to choose what you want.
But it also has risks. If you're not prepared to take that risk, going for a pre-built machine mitigates it by putting all the responsibility on one vendor to deliver a solution for you.
This article may help you understand what the specifications mean to some degree, but in many cases, you don't have much of an option to modify them.
There are two types of pre-built:
- A pre-built from a brand name like HP, Dell or Lenovo – I've covered these under “Branded Pre-Builts” below.
- A pre-built from the store you are buying your computer – I've covered these under “Store Pre-Builts” below.
Branded Pre-Builts

The HP all-in-one range is an example of a PC equivalent of a Mac.
On the surface, branded pre-builts are great, but they come with inherent disadvantages.
We all have these, to some degree, in our lives already, whether it's laptops or phones. The degree of disadvantage depends on the device.
The first disadvantage is the cost. A branded pre-built costs more. Vendors rely on consumers wanting a minimum level of inconvenience, so the intention is to do all the work for you. But the cost to build a branded PC isn't just about the components.
The cost has to do with checking that all the components work together, and that all the drivers and software are packaged together on an ongoing basis and maintained long term.
The advantage is that you typically have a vendor taking care of all the driver and software updates for the various components for you.
The second disadvantage is something called “bloatware”. Computers have to cater to the lowest common denominator and let's be honest, sometimes that can be pretty low. Think about Auntie Jane or Uncle Bob, who have never touched a computer in their entire lives and still think a mouse is something a cat chases.
To make these machines as idiot-proof as possible, vendors incorporate a myriad of applications to do everything for the user.
Although these may seem valuable on the surface (like anti-virus), some of them are poorly designed and don't offer the same levels of performance as the more established solutions.
As an example, I'm typing this right now on the HP Dragonfly Elite. It's an incredible piece of hardware, lighter and more powerful than a Macbook Air and with better battery life. But, when you first get it, it runs like a pig, and the pig holding it back is bloatware.
After uninstalling the bloatware on this laptop, the performance doubled, and it's back to the level I would expect from a laptop of this specification. HP included a lot of tools already covered by Windows that just added overhead to the resources on the machine.
For laptops, you don't have a choice to buy anything but pre-built – i.e., you can't custom build a laptop. But you can remove the bloatware.
The third disadvantage is upgradability. With many pre-built computers, you don't have the option of upgrading, particularly if they follow the all-in-one design that the iMac supports. This means that when you need to upgrade, you'll have to replace the entire machine or plug on additional storage.
Store Pre-Builts

This shows an example of store pre-builts. Centrecom is a store located in Australia, and like most PC stores, they offer their own pre-built solutions for customers who don't want to go through the process of defining their own. Most local computer stores in your area will have similar offerings.
Store pre-builts are slightly different from the branded pre-built computers from HP, Dell, Lenovo and other companies.
Where branded pre-builts are fixed, store pre-builts are computers the store has put together, allowing the customer to walk in and buy a computer off the shelf while still getting something mostly custom.
If the store's name is “Joe's Computers”, these computers will be given names like Joe's Entry Gaming Computer, Joe's Home Computer or Joe's Work Computer.
Unlike the branded pre-built, these aren't more expensive (they're often cheaper), but you still need to know whether you're getting a good deal.
But depending on your needs, this could be a cost-effective PC photo editing rig for less.
They make it less costly because they can adjust the components to fit their current stock, getting rid of components that might be sitting on the shelf too long, or that they purchased in bulk for a discount.
I've recently purchased one for my daughter and, component by component, it was cheaper than building it myself. I wasn't worried as I just wanted a cheap PC for homeschooling during COVID and this suited that perfectly.
They also know that if you buy everything from them, you're going to buy more than just a single component. It's the same idea as getting a discount because you're buying a camera and four lenses at the same shop, instead of the body from one retailer and the lenses from anther.
Sounds perfect right? Yes and no. There are some small disadvantages to them so let's cover those:
Firstly, you need to know the components you're getting. While most retailers are reasonable, there are some unscrupulous retailers that will put the biggest load of crap into a box and call it a PC.
The warning sign for this is to look at whether the retailer lists the actual components or the specs.
As an example, an X570 (X570 indicates the chipset) motherboard ranges in price between US$120 and US$1,000. If someone specifies X570 motherboard and doesn't mention the brand or model, be very wary. More often than not, it's because they don't want to list it, and that means cheap and nasty.
If they list the motherboard with the brand and name like MSI X570 Prestige Creation, then you know what you are getting, and they aren't trying to hide anything.
Would you buy a TV if they just said it was a 55″ TV and didn't tell you the brand? Most people wouldn't unless they were on a shoestring budget.
An Overview of the Parts Required
The best computer for photo editing depends on your needs and the parts that you get.
Choosing parts for your PC build will seem incredibly scary if you don't know PC components, so I'm going to try to simplify it.
Keep in mind that what I am telling you isn't 100% technically correct. The way I'm describing it is to make sure it's easier to understand than the gospel truth.
If you know the truth, you'll probably understand why and you aren't the target audience for this. It's a little like saying “f/2.8 zooms are high quality”. It has nothing to do with the actual aperture and more to do with the pro construction, but the outcome is still the same or similar.
Ultimately, doing a photo editing build is trying to take advantage of the best components and minimising the wastage on things that aren't important. Image-editing has different requirements to a PC build for video editing so you could inadvertently spend a lot of money on the best PC for video editing but get no real benefits from it.
When you create a custom build, the components you'll be required to buy are:
- Motherboard
- CPU with the cooling fan
- RAM
- Video Card
- Storage (SSD and/or Harddrive)
- Case
- Power supply
- Screen (for video editing, a larger computer screen is better)
- Keyboard and mouse
You should also check out our guide on the best video editing software tools for movie making.
How to Know if Your Parts Are Compatible
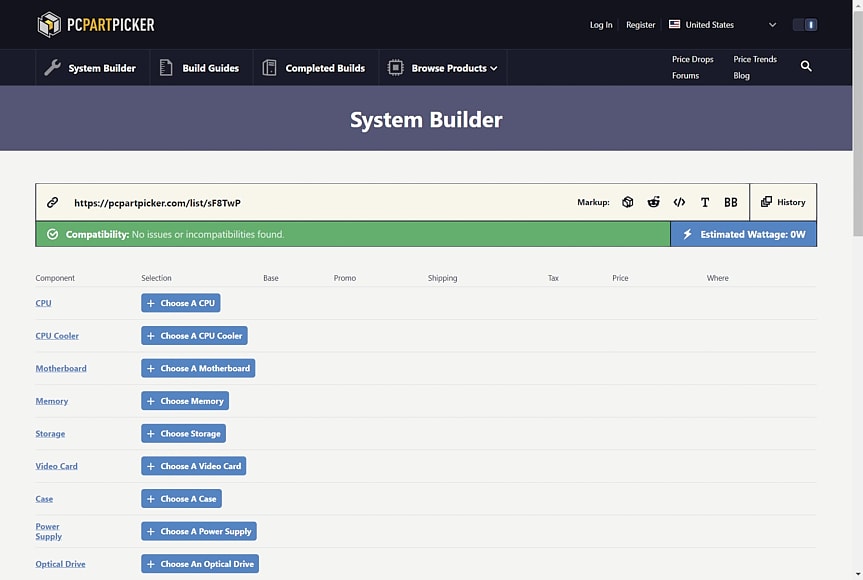
PCPartPicker.com is a great website that allows you to check the compatibility of parts.
The scariest thing for PC novices is knowing whether the parts you put together are compatible. Fortunately, someone already thought of that and created a website.
An excellent place to start looking at putting together your PC is a location called PCPartPicker. Not only will it let you know if you've ordered an incompatible hard drive for your motherboard, but it will provide sample builds to meet your budget.
The completed build allows you to search by keyword, so searching for photography will bring back lots of examples in a range of budgets.
Photo-Editing PC Build Guide
Okay, we talked about the build enough, let's get into the individual components.
1. Pick Your Motherboard and CPU
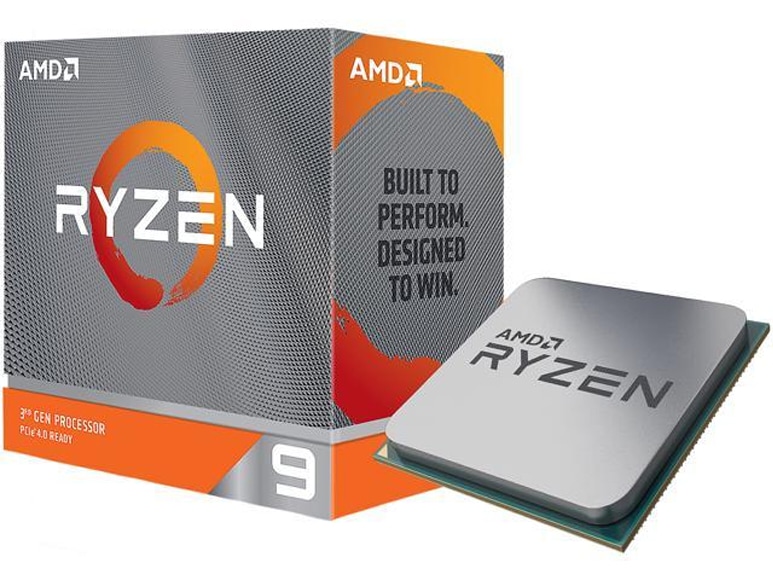
The AMD Ryzen range has increased in popularity in recent years through matching Intel performance at a lower cost.
This is the heart of your computer, but fortunately, if you get a recent processor and motherboard, it's hard to get it wrong.
The first thing to consider is the CPU as this impacts the motherboard you have to select. CPU's aren't compatible with every motherboard. This is usually indicated on the motherboard by a reference code like Z390 or X570.
This refers to the chipset used, and by definition the CPU compatibility.
CPU
Intel and AMD change lead year by year. Think of it as a Canon vs Sony vs Nikon race.
In the latest generations, you have Intel and AMD. Intel ruled the roost for an extended period, but AMD has caught up and in some cases, exceeded Intel. This changes every generation or two – by the time I've finished writing this, it could all be wrong.
Assuming the latest generation, at the bottom of the range you'll find that the Intel i3 and AMD Ryzen 3 will give you similar results. Both are entry-level, but these are entry-level for home use. I'd avoid these unless you are under severe budget constraints.
Next up we have the Intel i5 and AMD Ryzen 5. This is what I consider the real entry-level for photographers. These'll handle photo processing with ease.
In the mid-tier for photography, you'll find Intel i7 and Ryzen 7. Now you're starting to move into processors that will handle newer 40-80MP sensors with ease. You can read our article on the best Intel Core i7 Windows laptops if you need something portable.
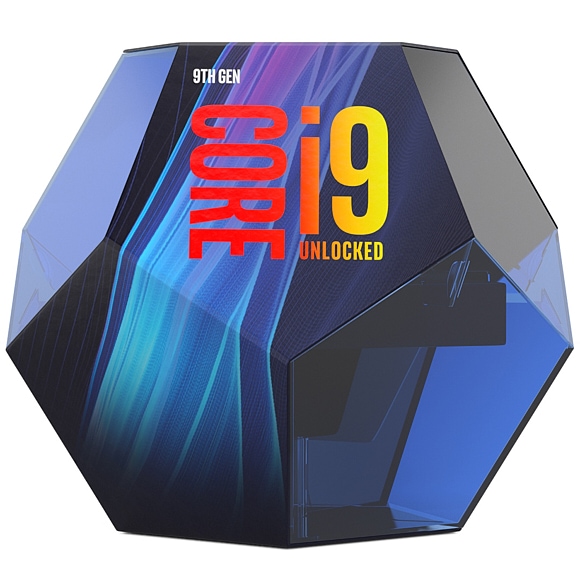
On the high end, you'll find the Intel i9 and Ryzen 9 Processors. This will put you in Porsche territory as far as processors go. Superfast.
In case you're wondering, it doesn't stop there. There are some levels higher than that, but we're going into the types of processors that require gold plate budgets. Intel has something called a Xeon and AMD have something called a Threadripper.
From a photo editing perspective, both would be overkill for the average photographer and substantially damage your wallet.
To put it into perspective, the Threadrippers sell for more than US$3,000 for the processor alone. The Xeon sells for over $6,000 on the upper end of the range. Good luck hiding that expenditure from your partner.
CPU Cooler

AMD Ryzen processor have a CPU cooler in the box. If you're buying Intel, you'll need to confirm if the CPU fan is in the box.
CPUs work at high heat and need constant cooling. A CPU fan or cooler helps achieve this.
When you spec up a PC for photo editing, ensure that you have a CPU cooler included. Some CPUs like AMD Ryzen include the CPU cooler. In the case of AMD, the CPU cooler is the Wraith PRISM.
The AMD supplied CPU Cooler is good. While, not the best, it's more than up to the task so take advantage of it.
Motherboards
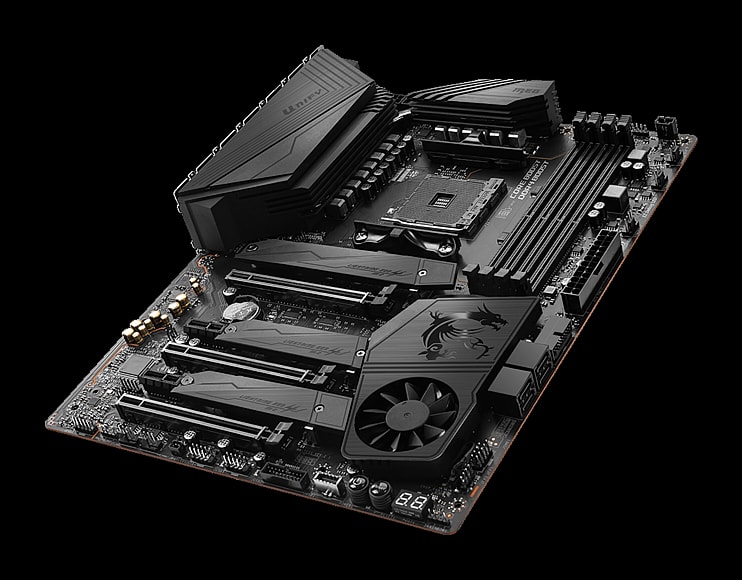
A motherboard needs to align with your CPU. This is an MSI X570 motherboard which is compatible with AMD CPUs.
As mentioned previously, depending on the processor, your motherboard options will change. I would recommend using something like PCPartPicker to understand what motherboards you can select. However, most stores will offer some capability to build a PC through them with automatic part selection.
When looking at your motherboard, I would try to ensure the motherboard has four slots of RAM and at least one M.2 slot which is a slot used for storage. I'll cover more on this in the RAM and storage section.
These types of decisions could add to your long term cost considerably.
2. Selecting How Much RAM You Want

Ram is provided in DIMM modules and typically sold in pairs
RAM (Random Access Memory) is a critical part of your PC. It represents a set of high-speed memory used to store the information your computer needs at the time of processing something.
RAM has become less critical in recent years as computers move towards solid-state drives which are very similar. While solid states have mitigated the performance issues encountered due to lack of RAM, there's still a minimum RAM to ensure that your PC performs to your expectations.
RAM is represented by three specifications: type, size and speed.
The type is represented by a DDR1, 2, 3 or 4.
Most modern-day motherboards are DDR3 or DDR4, with most modern systems now being DDR4.
Unlike other components, RAM isn't interchangeable. I.e. DDR3 isn't compatible with DDR4 motherboards so ensure you buy the right type.
The size will be represented in gigabytes (GB) while the speed is expressed in megahertz (MHz). The format is logical where 32GB>16GB>8GB. The higher you go, the more expensive it gets, as you would expect.
Speed also works on the basis that higher is better. That means that 3200MHz is faster (and by definition better) than 2400MHz.
Each RAM is provided in something called a DIMM module, which looks like a mini-computer card that plugs directly onto the motherboard.
Motherboards will come with up to 8 DIMM slots, usually 2 or 4 unless you're going for really high-end systems.
Not all of these slots will be in use when you build your PC, so if you're planning to upgrade in future, expect to use half the slots which allows you to upgrade later.
As an example, if you have four slots and you put in two 8GB DIMMs, it will leave you with 16GB and the ability to add more later.
You don't have to add the same size DIMMs at a later stage. So in future, you could add another two 16GB or 32GB when prices on these come down. You don't have to add RAM in pairs, but there are performance benefits to it.
At a bare minimum, if you're working with a constrained budget, 8GB would be okay for a photo editing computer, but I would recommend going to 16GB for photography, which I would consider the true entry-level.
For those doing more substantial processing, you could upgrade to 32GB, but it's not mandatory. 64GB is heading into the massive processing territory.
3. Choosing Your Graphics Card

The graphics card is no longer about merely displaying images. Graphics cards are used to process images as well.
In the early days of computing, graphics cards were just used for the display. They helped display the image on the screen, and that's where it ended. If you had a higher resolution screen, you needed a better card, and if you wanted to run more than one monitor, you needed a better card.
These days the graphics card is a little more complicated. At some point, someone worked out that the processor (called a GPU or Graphics Processing Unit) in the graphics card was pretty good for other things, like converting files from RAW to JPG, exporting files and creating image previews, along with several other tasks.
From there, software vendors started integrating the ability to use the graphics card for image processing. If you go into an application like Lightroom or CaptureOne, you'll find this option in the settings.
Today, picking the right graphics card for the job is an integral part of computer photo editing.
In Lightroom, navigate to Preferences then Performance. Click the Use Graphics Processor dropdown and select Custom. Make sure that Use GPU for Display is checked.
In CaptureOne, there is an option called Hardware Accelerator and OpenCL in the General tab of settings. Ensure this is enabled.
4. What You Need for Drives/Storage
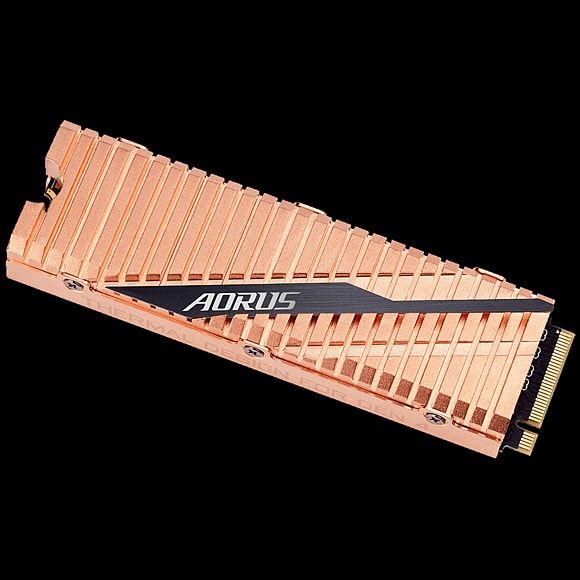
M.2 NVME Storage offers the highest performance in modern-day desktops.
Storage isn't complicated, but there are a few things to understand to get the best performance out of it. These are:
- Type of storage
- Connectivity method
Type of Storage
Type of storage refers to the media itself. Modern storage is most likely to be solid-state, or spindle referred to as a hard drive.
Solid-state drives are microchip-based drives, similar to a USB stick. Spindle drives are similar to CDs or DVDs in that the drive contains a number of these spindles and the content is stored on them.
Solid-state is extremely fast – in many cases more than ten times faster than spindle – making it ideal for files you're currently working on.
It's also much more expensive than conventional hard drives, so most photographers tend to use it sparingly. Solid-State drives are typically five times more costly than the equivalent hard drives, with that multiple being higher or lower depending on the drive size.
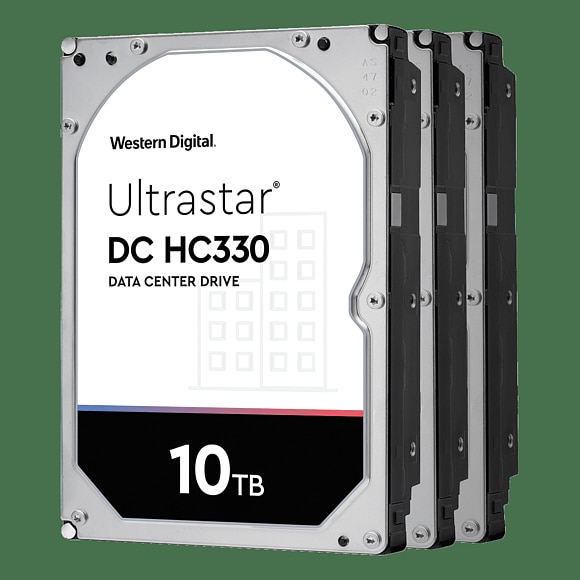
Hard drives are great for high volume storage due to the low cost. Whilst both types are reliable, it's essential to always back up.
Connectivity Method
The way the drive connects impacts the look and performance of the drive.
Non-Volatile Memory Express (NVME) looks like a RAM module and plugs directly onto the motherboard offering exceptionally high performance.
NVME is always a form of solid-state drive although solid-state drives aren't exclusively NVME.
A hard drive would use SATA as the maximum speed of most drives would be much lower than SATA.
What Does This Mean and What Should You Buy?
Ultimately, as a photographer, you want the best combination of speed and storage, which isn't available in one medium.
This means buying both offers you the best outcome. I would recommend a 500GB to 1TB NVME for your operating system and current working files, and hard drives for long term storage.
In my case, I have my primary operating system and my photos that I'm currently editing on my NVME, and, after a month, I move them to external hard drives.
With an unlimited budget, you could buy only solid-state, but you will pay a premium for it.
5. Pick Your Case
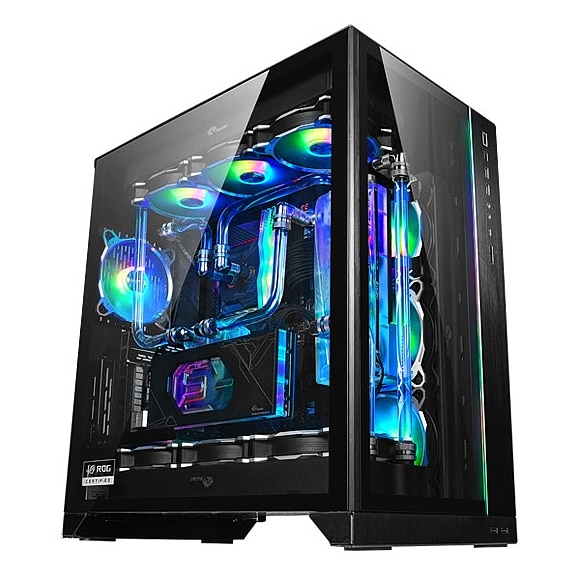
Cases come in all shapes and sizes (including RGB colours). Brands like Lian Li are known to provide high-quality cases.
A case is a case, right? Can't be that hard?
Yes, and no. A large portion of cases these days are designed for gamers. The RGB lighting might look fantastic, but if you plan on putting the case on top of the desk, it's the worst conceivable addition for a photographer.
The RGB lighting will change the ambient light in the room, and your screen colour will no longer be correct. So while the temptation may be to show off all that colourful RGB lighting, it's a bad move.
If you're planning on putting the case under the desk, then I wouldn't worry. RGB to your heart's content, just make sure the light doesn't go onto the screen.
I have an RGB case as I find the ambient lighting from the box relaxing, but it sits under my desk away from everything.
What else should you consider with a case? Generally, there isn't too much to worry about unless you're planning on putting lots of drives in and you need to know that all of them will fit.
I run 4 x 4GB drives internally so that rules out a fair portion of cases.
The PCPartPicker website will do a good job of letting you know if the case is compatible with the number of drives you intend on buying.
6. Picking Displays

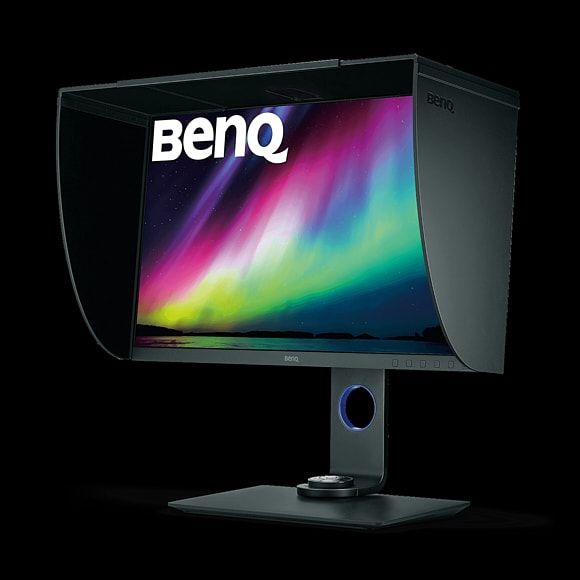
BenQ is a brand that offers excellent quality displays at a reasonable price.
Contrary to popular belief, not all displays are created equal, and you do get what you pay for.
When you see a $3,000 screen, there's a reason it's $3,000. The question is more whether you need a $3,000 screen.
There are a couple of things to consider when looking at screens: size, resolution and colour accuracy. Getting the best outcome is a balance of the three based on your budget.
- Bigger = more expensive
- Higher-resolution = more expensive
- More colour accuracy = more expensive
Size
Size is how big the monitor is, typically measured in inches. Most people buy monitors in the 27-34″ sizing.
While it's great to have a big screen, it is possible to buy a display that's too big. I've seen people buy 40″ screens only to find out the experience is substandard.
Right now, I'm using a 27″ screen. The 32″ was marginally more expensive but I found the 27″ screen was a far better experience.
My recommendation is to go in-store and try different sizes to see what works for you.
At the top of the range, you'll find brands like Eizo. I'd recommend the middle of the market with brands like BenQ who offer very similar image quality to Eizo at a fraction of the cost.
If you're constrained for budget, stay in the 27″ range.
Resolution
Resolution ties closely to size, however, higher resolution in a small monitor also means you see fewer pixels due to the small size of each dot. It's similar to an iPhone with the retina display. Having a high resolution in a tiny screen means it looks better.
There are still reasons to go larger. For example, if you want to have additional information on your screen, like post-processing tools, it's nice to have an image that takes up 27″ with the 27″-34″ used for tools. This is common with videographers who like to have the video larger on the screen with the timeline below.
Colour Accuracy
Colour accuracy is the most important. I can't tell you how many images I've seen ruined by the photographer using poor quality displays that aren't colour-correct.
Colour accuracy means the image you see on the screen is closer to what you would see when it gets printed, and what you would see on the web.
If you've ever wondered why people sometimes post under or overexposed photos on Facebook, this is one of the reasons why. Just having the display set too bright or too dim can create issues.
Again, colour accuracy comes at a price. If you're shooting billboards or for Vogue, that price may be Eizo, but for most people, cheaper brands are sufficient.
Shading Hood (Nice to Have)
Shading hoods help keep stray light from impacting the image colour.
Shading hoods are underrated for photography. Shading hoods prevent light fall off from other light sources onto the screen which keeps your display looking more colour accurate.
Think of a window sitting to one side of your screen. The lighting colour of the window changes with the time of day outside, the weather conditions and cloud cover. The shading hood means this won't adversely impact the look of the photo on your screen and how you're editing them.
Monitor Calibration

Screen calibration using tools like the X-Rite i1Display Pro will ensure that your images look the way you think they do.
Some high-end displays have built-in calibration tools. They are great, but not mandatory.
You can buy a colour calibration tool for about US$200 that will do a similar job, so I wouldn't specifically look for a monitor with this feature unless you have a gold plated budget.
If you don't have one, I'd recommend looking at an X-rite i1DisplayPro range.
Recommendations
To avoid including 20 different brands, I'll focus on one for now and recommend that you make comparisons against these if you don't want to consider alternatives.
- Low end – BenQ SW2700PT – $600
- Medium end – BenQ SW270C – $800
- High end 27″ – BenQ SW271 – $1,100
- High end 32″ BenQ SW321 – $2,000
- Gold plated budget EIZO ColorEdge CG319X – $5,700
7. Power Supply

Power supplies are not standard with cases and have to be purchased separately based on what you intend to put in your PC.
Understanding what size power supply to get is nearly impossible as a novice PC builder, so it's a good idea to use the PCPartPicker website for this purpose. When you build your PC parts, it will indicate the size of the power supply required to produce the PC.
Power supplies are important, so I would recommend going one size higher on the power supply as you'll need to keep in mind that you may want to add more components later.
8. Operating System
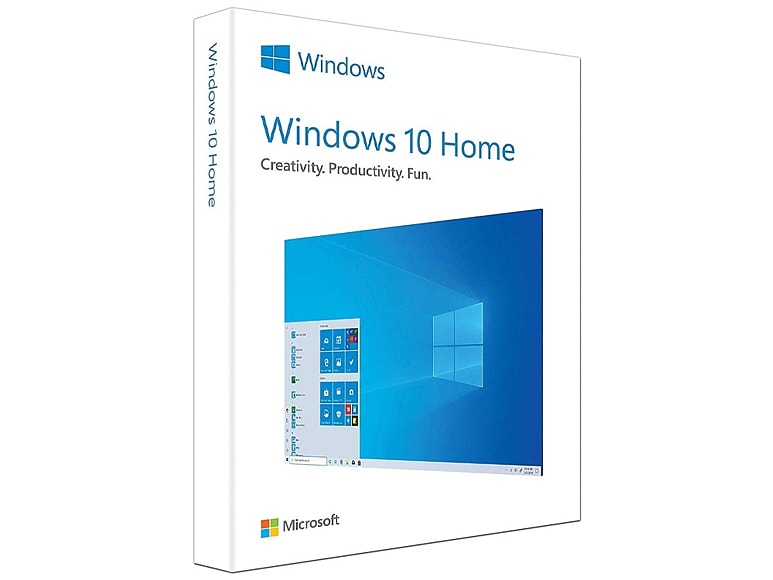
Windows 10 Home Edition should be good enough for photography use.
If you're building your PC, there's only one choice really when it comes to the operating system, and that's Windows 10.
Yes, there are Linux and other varieties of operating systems available, but Windows 10 is the most readily accessible and has the highest amount of software available.
Windows 10 Pro isn't required with photo editing for PC, so I'd recommend just going with the Home edition.
I won't cover specific editing applications as these have been covered in many articles on Shotkit previously. I'd recommend going here if you're looking at preferred editing tools.
9. Additional Peripherals
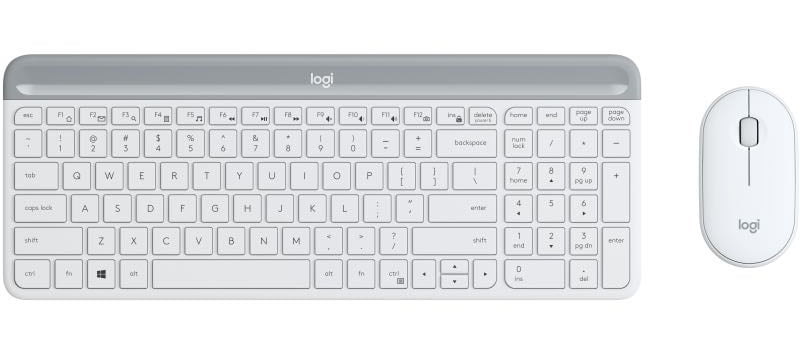
Some accessories like a keyboard and mouse are mandatory; others like a card reader depend on whether you intend to plug your camera directly into the PC or take the SD card out.
If you aren't buying a packaged PC, you'll need to consider small accessories, so I'll list them out:
Keyboard and mouse – Keyboards and mice are a personal choice. You get better and worse options depending on your budget. I'd recommend looking at these instore to find one that feels right. Small things like key travel (how far the keys press down) make a big difference.
Wifi/Bluetooth card – Most motherboards will come with wifi and Bluetooth built in. If yours doesn't (check the specs), you'll need to purchase one. They are cheap, under $50.
USB 3.0 Card Reader – In the past, people used internal card readers, but these days, USB 3.0 card readers are more than adequate for the task due to the increases in speed.
My Recommendations
If we take all of the above into consideration, what might the specs of an image editing PC look like?
I'd recommend starting with a mid-tier build, which would look something like this:
- Intel i9/AMD Ryzen 9 plus supporting motherboard
- 16GB or 32GB RAM
- 1TB M.2 NVME SSD plus 4TB Hard Drive
- 8GB RTX 2070 Graphics card
- 27″ BenQ SW270C or SW271 Screen
- Keyboard and mouse
A computer for graphic design or video editing would look slightly different.
Video editing uses two components intensely: CPU and graphics card. In most cases, the photography specs should be adequate, but if you intend on rendering 4K video, I'd recommend taking your specs for those two components up a notch.
Final Words
Hopefully, that should be enough information to get you going with your first custom build. If I've missed anything, feel free to let me know in the comments.
Alternatively, if there are any questions, post them here, and I'll respond to them as best I can.
Disclaimer: All recommendations are impartial and based on user experience, with no bias to the products or the brand. The products in this post may contain affiliate links.

Check out these 8 essential tools to help you succeed as a professional photographer.
Includes limited-time discounts.

Athol Hill is a sports and portrait photographer based in Melbourne, Australia
15 Comments
Leave a Comment
👋 WELCOME TO SHOTKIT!
🔥 Popular NOW:

Excellent, thanks for sharing the information.
Hi! Thanks for this article it’s very informative I am work for a public high school as a Chorus and Drama Teacher full time and a part-time church Worship music leader who helps with our on screen announcement/song lyric slides presentations. I also help with graphic design for both my church AND my chorus program at an Amateur level. I am looking to build or buy a PC that will be able to handle editing video, photos, graphic design (using Adobe Suite), AND music notation software (Finale Music Notation) as well as some gaming when I’m not working but I need some advice on where I can start looking to build or buy the best PC I can for as low as I can. I am fairly well versed in PC tech so putting one together would not be an issue I just need help getting started since I need it to essentially be a swiss army knife for all the jobs I need it to handle. Any advice would be helpful. Thanks!!
For video editing, I’d recommend a minimum of 32GB with the preference being 64GB if you can afford it, along with a 8GB video card as most of the work on rendering final edits is done in the video card. From a CPU perspective, an Intel i7 or AMD Ryzen 7 would do the job. I’d put a 1TB SSD and then have the rest of the disk as cheaper storage. What this means is you benefit from SSD for the main files you are working on, but move them to the cheaper storage when you are finished with a project.
Thanks for the good information. The monitor was a great help as I was looking for one to get this summer when I get a new computer.
Good to hear that, Gordon – you should also check out our guide to the best monitors for photographers – use the search bar above to find it.
I use Topaz Denoise and Sharpen and Gigapixel. They run quite slowly on my current system.
What specs would you suggest to make this software run FAST?
More RAM always helps with these RAM intensive applications, but in my experience, those software are just rather slow in general due to the processing that is required.
With both the Intel i7 and i9 there is the K and the H version. The former has UHD graphics and the latter Iris Xe graphics. The Iris Xe graphics seems considerably superior. I would have thought that would make it the best CPU for image processing. What do you think?
Thank you for this, now I feel equipped to go into a computer store, the novice that I am and have a decent conversation that would allow me to sound like an expert thus avoid the pitfalls made by an amateur
Thank you for this article. Breaking down the components and explaining what they are for is very helpful. It is now Dec. 2021. Anything you would change? From a novice in Atlanta, GA USA
This is the best explanation I have read about putting together a system for photographic editing. Thanks for taking the time to put this togeter.
Thanks John. Much appreciated
Thanks for reading this. If anyone has questions, please feel free to post them here and I’ll try to answer them.
Tremendous, informative article! As I read I kept expecting the; “Just send $39.95 to….!” Your generosity in sharing your research and ‘direct to the point” approach was refreshing – and not even in the market for another computer, let alone build one… and I feel like sending you money!
Thanks William. Appreciate the feedback.