


How to Remove Objects in Lightroom in a Few Clicks
Erasing or cloning part of a photo to remove unwanted objects used to be time-consuming and fiddly. Now you can do it with one click in Lightroom. Here's how.
Lightroom | Software | By Brenda Bergreen
Shotkit may earn a commission on affiliate links. Learn more.
There's nothing I hate more than a powerline cutting right through my view especially if I'm trying to capture the scene in a photograph!
That's why knowing how to remove objects in Lightroom is so important.
Ok, maybe there are a few things I hate more, but luckily distracting objects in my photos are something I can control and easily fix.
Popular course reveals the simple tricks to getting incredible results with Lightroom in record time. Give Your Photos The Look They Deserve!
![]()
Now, with the heal, clone, and content-aware remove tools in Lightroom, it's easier to remove a distracting element in post-production than ever before.
No more need to go into Photoshop to do detailed and precise object removal!
So download a copy of Lightroom, and let's get started.
How to Remove Objects in Lightroom

I always try to remind myself and others to get it right in camera first. It makes sense to do what you can to eliminate distractions from your photos before you shoot them rather than spending all data on post-production.
If shifting your perspective a bit will remove an object, do it. If you can walk over and grab that water bottle out of the frame before taking the picture, I promise it will be easier than cloning it out later!
However, it's inevitable that there are objects you might want to remove from a photo rather than leave them in, and luckily, it's pretty easy to do so. Lightroom has come a long way from the early days of spot removal, which only sometimes worked.
Reasons You Might Need to Remove Objects from Lightroom
Depending on the type of photography you do, there might be various reasons you need to remove objects from Lightroom.
Maybe you're a portrait photographer and need to remove a blemish, or you're a landscape photographer interested in removing trash or graffiti.
Sometimes there are distracting elements in an image that you can exclude simply by changing the position you're shooting from or picking a different lens. If that boring background is just not very pleasing, another option is to pick a telephoto lens and shoot at f/1.8.
Some of the most common objects I find myself removing are trashcans, water bottles, powerlines, blemishes, or dust particles that are distracting in backlit photos.
Every once in a while, I'll also remove a distracting lens flare or hair fly away.
Essentially, if something doesn't add to the composition or, worse, takes away from the impact of the photo and is distracting but could easily be removed, I'll remove it.
Especially if it's something that might not be there tomorrow, like a pimple, or something that should have been picked up, like a water bottle.
The easiest things to remove are small objects on a homogeneous background. Think golf ball on grass or a plane in the blue sky.
Lightroom will remove these objects with ease. Alternatively, powerlines across a busy multicolored city backdrop will be very difficult to remove without a lot of effort.
Thinking through the post-production while you're out on a shoot will save you lots of time!
Ways to Remove Objects in Lightroom
So now that you've taken the photo and done your best to minimize the distracting elements, you may still need to do some object removal. Let's take a quick look at the tools available in Lightroom.
All these tools are available under the heading of the healing tool. Right above the basic panel in the develop module, click the bandaid to access the following tools:
- Content-Aware Remove – This tool is designed similarly to Photoshop's Content-Aware Fill. It utilizes AI to fill in the selected area with the best replacement pixels to remove the selected object or area.
- Heal – This tool will allow you to heal an area by selecting a source area. It does a good job of matching the area you want to replace and blending it with the existing area around the object to be removed.
- Clone – This tool takes a direct copy of another area of the image without any effort to blend it with the surroundings.
Steps to Removing Unwanted Objects
The first step in removing an object is to determine how complex it is. If the object is on a consistent backdrop, it will be easy to simply select the Content-Aware Remove tool and remove it with a simple one-click circle.
With more complex objects, you'll need to be more decisive and selective on how to use your tools. As described above, you'll want to choose the best tool for the job.
I usually start with the Content-Aware Remove tool and check the results. If I know I have an area of the image that I want to match, I'll choose the heal tool so I can decide where the replaced pixels will be sourced from.
If it is a particularly stubborn object to remove, I sometimes start by choosing the clone tool, then blend the area around the replaced pixels with the Heal or Content-Aware Remove tools.
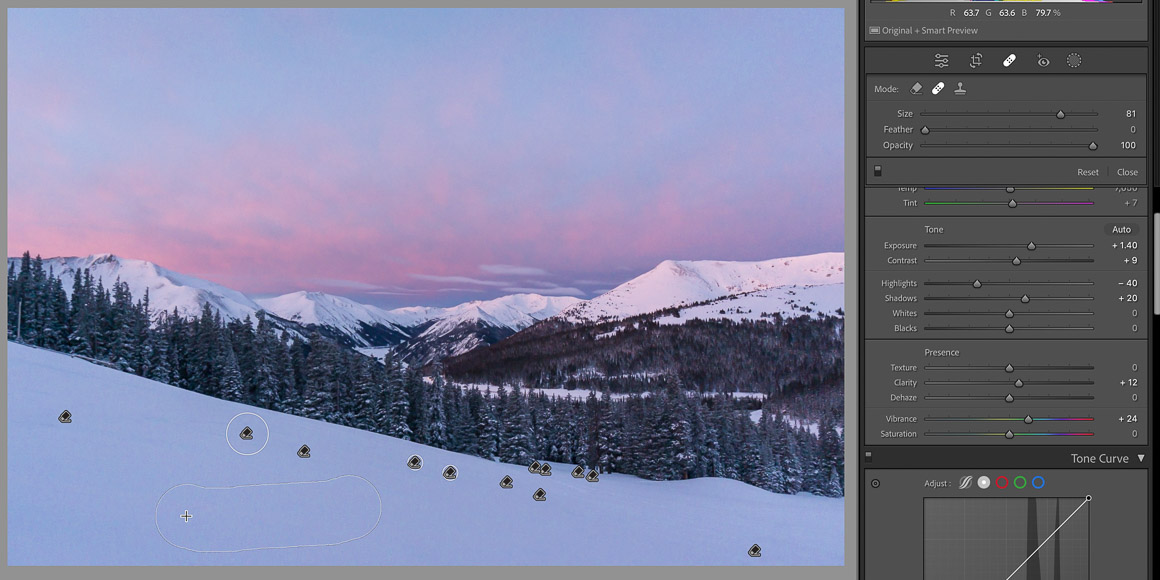
Additionally, it's important to adjust the size of the tool as well as the feather to get the correct look. The feather is important because it will determine how quickly the replaced area transitions back to the original image.
Lastly, you will notice that a smaller or larger area selector can be used. I often go with one circle but if you have an odd-shaped object, select a smaller brush size. Then you'll be able to click and hold while you select the area to be removed.
This is especially useful for long skinny objects like power lines. You may have the best results if you choose segments of the object as opposed to trying to remove it all in one step.
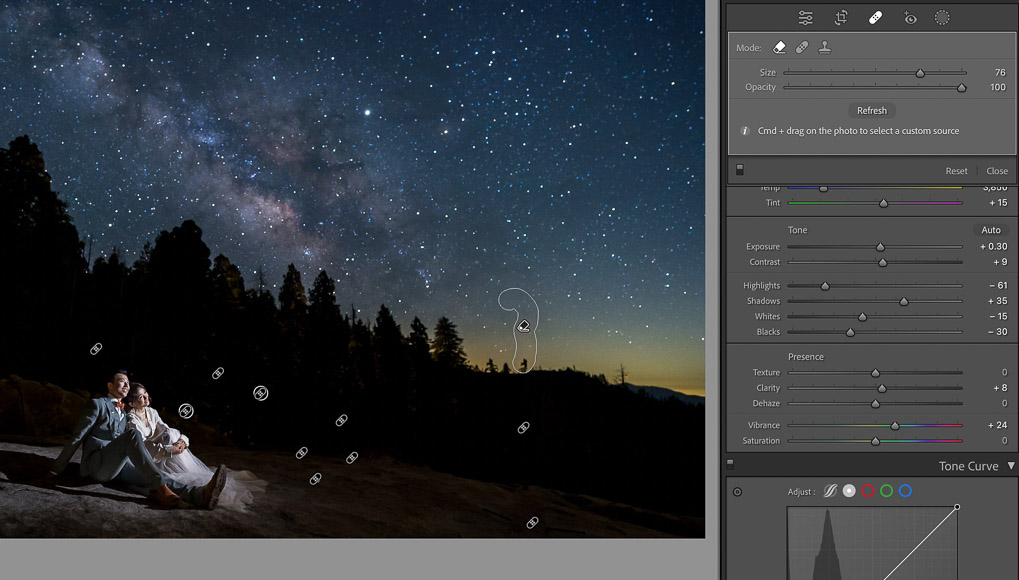
Slowly stacking healing tools will be needed for the most stubborn objects. You can combine different sizes and styles of healing tools to get the desired effect.
The only part of the heal tool that I rarely find useful is the opacity. If the opacity is turned down below 100%, part of your object will show through.
Most of the time, my goal is to remove an object completely, so having part of it remain isn't helpful.
How to Use Lightroom Content-Aware Remove
Content-aware remove is the new kid on the block in the Healing panel. As I mentioned above, it is the simplest and easiest to use. If you have an object to remove, simply select it and it will be replaced with AI-generated pixels.
The Content-Aware Remove tool is powerful and effective against everything but the most complicated textures/details. You may need to experiment with stacking a series of healing tools or selecting the object in segments.
Another thing to keep in mind is that you should do your object removal prior to doing any AI-powered mask adjustments (i.e., darken the background with the Select Background mask).
If you try to do object removal with masking adjustments already applied it can create a ghosting effect that will be distracting. The healing tool will not match the adjustments if it comes from a different part of the image that doesn't have the mask applied.
Content-Aware Remove works best in large continuous areas. If you have a very busy image, it can get thrown off, and you may have to take the image into Photoshop for detailed cloning.
However, this tool has mostly eliminated the need for Photoshop in the majority of my images!
How Do I Cut Out a Shape in Lightroom?
Although you can't cut out a shape in the same way you'll be able to in Photoshop, you can choose the Clone tool under the healing brush. This will allow you to select an area to copy to another part of the image directly.
In effect, this allows you to duplicate objects as long as the background isn't too complicated. Think airplane in the sky or basketball on a continuous concrete backdrop.
Once you copy the object to another area, you could also erase the original with the Content-Aware Remove tool or any other option under the Heal tool.
Is there an Eraser tool in Lightroom?
The heal tool functions kind of like an eraser in Lightroom. Especially with the newest heal tool, Content-Aware Remove, you'll be able to take out distracting objects quickly.
I find all the healing tools to be quite powerful in getting rid of objects in an image. It is rare that I have to go into Photoshop to clone out unwanted pixels.
Don't use Lightroom? See how to remove objects from photos using Luminar.
Adobe MAX 2024 Update
The Adobe MAX Update 2024 further enhances Lightroom Mobile’s powerful editing and workflow management toolkit.
The 2024 MAX update adds the new Quick Actions feature and significantly improves the Generative Remove function.
Quick Actions automatically creates masks to best suit an image's subject matter. It also suggests ways to optimize your workflow further and reduce time spent editing on the go.
Generative Remove is the second standout feature of Adobe MAX Update 2024 for Lightroom.
It’s simpler than ever to identify an unwanted distraction, circle it, and Generate Remove cleanly remove the item and correctly render the vacant space.

Brenda Bergreen is a photographer, videographer, writer, and storyteller based in Colorado. She specializes in Colorado wedding photography and adventurous storytelling. When she’s not behind the camera or the keyboard, you can find her adventuring with her family.
2 Comments
Leave a Comment
👋 WELCOME TO SHOTKIT!
🔥 Popular NOW:

The problem with Lightroom is its auto masking is a joke. 20 years ago eliminating electric lines in Aperture was a one click task. Adobe’s still nowhere near that capability. The new remove objects tool is borderline useless because auto masking is worthless. It can’t select what you want to remove.
It sounds like you’re experiencing significant frustration with Lightroom’s auto masking and object removal tools. Lightroom’s automated tools can sometimes fall short, especially when compared to specific features in older or discontinued software like Apple’s Aperture.
Auto masking and object removal in photo editing software are complex tasks, often relying on sophisticated algorithms and machine learning. Adobe has made strides in these areas, but the results can still be hit or miss depending on the image’s complexity and the elements involved.