


Guide to Wet Plate Photography
Ever wanted to learn about wet plate photography? The 'Collodion Process' is a fascinating way to produce creative & original artwork. Learn how to do it here.
Shotkit may earn a commission on affiliate links. Learn more.
This is a guide to wet plate photography for any photographer who's interested to try something a little different…
The wet collodion process is for people who like to experience the roots of photography… and enjoy being a control freak!
Before you expose the plate, there is a lot of preparation needed, but as soon as you see the image coming to life during the fixing process you will be hooked on this wonderful photography technique.
Let's take a look at what wet plate photography exactly is, some history about the technique, what it requires, and how you can have a go at it yourself.
What is Wet Plate Photography?
Wet plate photography, otherwise known as the collodion wet plate process, encompasses the first three early photographic processes that gained widespread popularity in the 19th century: Daguerreotypese, ambrotypes and tintypes.
With wet plate photography, you expose an image onto glass or metal where the chemicals are wet – this was the predominant method used to create photographs throughout Europe and North America.
Nowadays, photographers attempt the wet plate photography process to capture everything from still life to portraits and landscapes.
To understand this unique art, let's take a closer look at the other photography processes that led to the wet plate collodion process.
- 1839: Louis Daguerre introduced the Daguerreotype process to the world. These high polished plates are beautiful and have lots of wonderful detail. Even today, the plates from back then are amazing.
- In 1841, William Henry Fox Talbot was inspired by the daguerreotype and patented the calotype (from Greek – beautiful impression). In this process, he used salt and silver nitrate to sensitise paper. When exposed to light, these papers turned into the world's first negatives. By putting one of these negatives over another sensitised paper he created a positive image.
- In 1851, Frederic Scott Archer, who was interested in Talbot's work, invented the wet collodion process. He dissolved salts into collodion, coated plates with it and sensitised them in a silver nitrate solution.
(See here for more fun photography facts.)
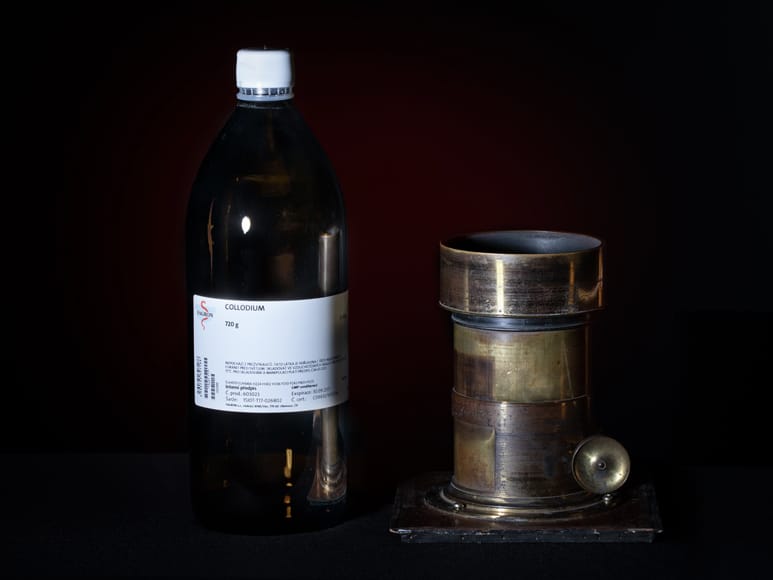
Collodion is a viscous solution made of nitrocellulose dissolved in ether and alcohol. Because of its qualities, it was used for medical purposes as a liquid bandage before being used in the photographic process.
The medical application was documented in The Boston Medical and Surgical Journal. Archer discovered that he could replace albumen with collodion and so he created a wonderful process named after this solution, and wet plate photography was born.
Fun fact: Collodion is still used today by makeup artists to create scars.
- What were the advantages of the collodion wet plate process?
Daguerreotypes, for all their beauty, could not be replicated; for a second image, you needed to make a second photograph. Also, the toxic mercury fumes were a downside of this process.
As for the calotype, William Henry Fox Talbot went after many people who used his process without paying a license fee. Additionally, the copies created with this process always contained the structure of the paper. For these two reasons, it was not one of the most popular photographic processes at that time.
The wet plate collodion process can create very detailed photographs, and when poured on glass sheets it is also possible to create prints. That's the reason it took over until 1880 when dry plates were invented.
Also, if you want to compare it to traditional analog film photography, wet plate photography is a quicker process, like shooting a polaroid.
- What were the disadvantages of the collodion wet plate process?
What made wet plate photography so complicated is the fact that you have to finish the whole process with the plate being wet. As soon as the plate dries, it is no longer light sensitive.
Temperature is also important: all chemicals (not the fixer and varnish) should have the same temperature and have to be adjusted with cold and warm weather. On top of that, humidity is an important factor.
The nature of the wet plate process indicates that you need a mobile darkroom when shooting on location. It's not a very light-sensitive process either – when you compare it with digital cameras, it has an ISO sensitivity of about 0.5 to 1!
- Is the wet collodion process dangerous?
There are toxic and dangerous chemicals involved when working with the wet collodion process.
Ether is explosive, for example; cadmium bromide (used for some collodion mixtures) is carcinogenic, and silver nitrate could blind your eyes.
But with the right safety precautions, like using nitrile gloves, a proper mask, working in a well ventilated area and safety goggles, you can enjoy this wonderful process with no worries.
If you want to start learning the process of wet plate photography, I strongly recommend visiting the workshop of an experienced wet plate artist or reading a good book (like this one from Quinn Jacobson). Be sure to re-read it again and again!
I take all safety precautions very serious and take blood tests (for cadmium) twice a year. Thus far I've never had an issue.
What do you need for Wet Plate Photography?
Here's a list of things you'll need for the collodion process of wet plate photography.
Material
- Salted collodion
- 9% silver nitrate solution
- Developer for wet plates (mostly made with ferrous sulfate, alcohol and vinegar)
- Fixer (20% sodium thiosulfate solution)
- Black aluminium, glass or acrylic plates. Basically, you can coat anything with collodion as long as it fits in your plate holder
- Varnish to seal the plates (typically Sandarac or Shellac varnish)
Equipment
- Any large format camera with a modified plate holder (actually any camera where you can load a plate, even a 35mm works)
- A silver nitrate tank or trays (I prefer trays because alcohol and ether can evaporate easier)
- Laboratory-grade equipment (bottles, measuring cylinder, tubes and so on) – normal bottles break too easily and you don't want to pour chemicals everywhere
- A precision scale, a precision areometer
- Nitrile gloves
You can start with premixed chemicals. Here are some places to get wet plate photography supplies:
- In Europe, Camera Obscura is a very good source.
- For the USA, lots of my fellow wet plate friends like to order from UV Photographics.
- In Canada, there is a good shop for raw chemicals (no premixed) called Antique Pictureology.
After some time you will see that you also get very consistent results with self-mixed chemicals.
Interested in the basics of making chemicals? Have a look here.
How do you do Wet Plate Photography?
Two of the most important tasks are to avoid cross-contamination at all costs and to work as cleanly as possible.
Clean everything before you do a plate, starting from the plate holder to everything you touch, everything the plate comes in contact with and everything the chemicals come in contact with.
1. Pouring the collodion
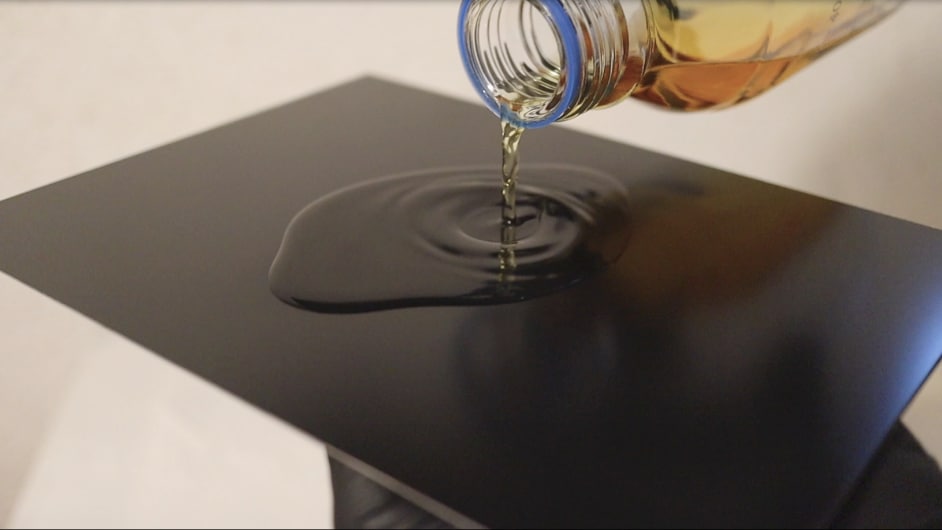
To coat the plate, the salted collodion is poured in the middle of the plate and then you walk it from one corner to the next until it is evenly spread above the whole plate.
The excesses of the collodion are poured back from the plate into your pouring bottle.
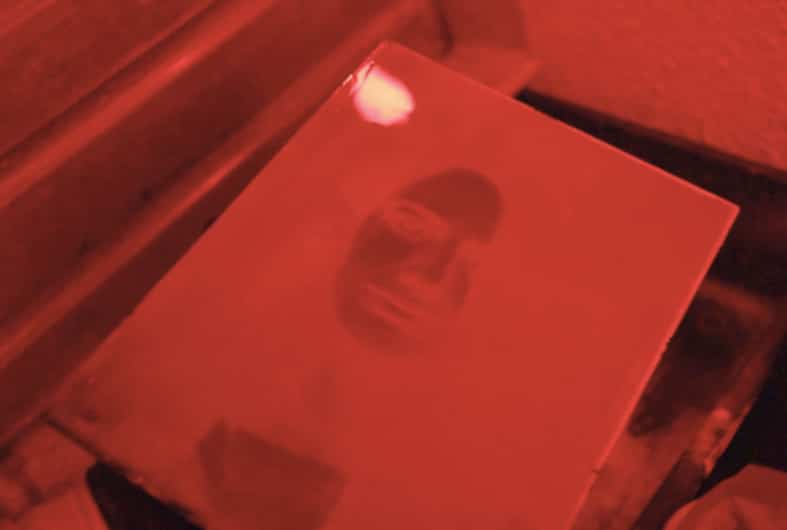
2. Sensitising the plate (making it light sensitive)

The plate now goes in the silver nitrate solution for about 3 minutes.
During that time the salts turn into silver salts (halides). That's when the plate becomes light sensitive.
From now on you have to work under safelight (red light). After 3 minutes, the plate goes into the plate holder.
3. Exposure

Now the plate is exposed to light. Typically this happens in large format cameras; the light photons transform the halides to silver.
Since the plate is not very sensitive to light (ISO 0,5 to 1) you need either long exposures or lots of strobe power. For example, I use 3000 to 10000 watts in my studio. It all depends on what light modifier you use.
The speed of the lens is also important. With fast lenses like my Dallmeyer Petzval lenses (220mm f/3 or 290mm f/3), it's much easier to do shorter exposures.
4. Development
During the developing process, the ferrous sulfate completes the transformation of the halides on the wet plates to pure silver. The developing process is stopped with water.
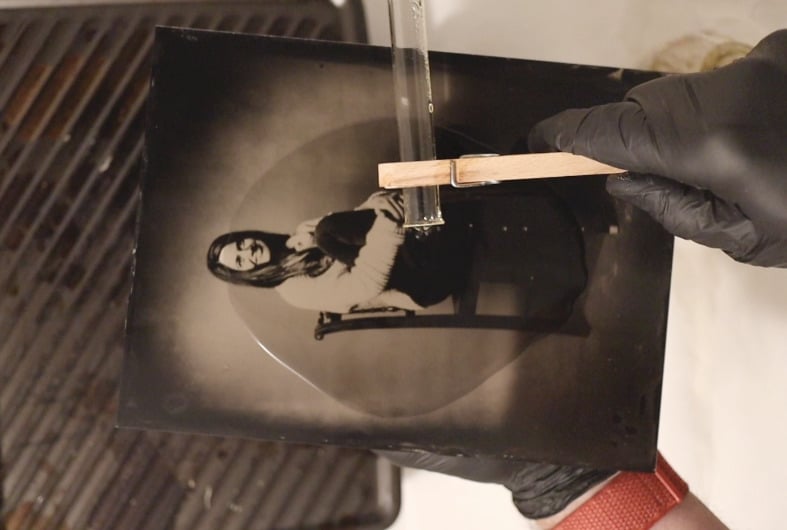
5. Fixing

The sodium thiosulfate solution washes the non-exposed silver from the plate and that's when you see the magic happen.
The image shortly disappears and comes to life again. To prevent the fixer from dissolving the whole image over the years, the plate must be washed for 30 minutes afterwards.
6. Varnishing
Silver would oxidise over the years and turn black. To avoid that, the tintypes are varnished with Sandarac varnish.

Portraits done with the wet collodion process have a unique character and look. The sensitivity to blue light is one of the main reasons for that.
Final Words
My subjects have to take some time to be photographed. With wet plate photography, I have to go through the same process to work with them on this one portrait I will take. The whole process is very special in these fast-moving times.
Also, working with your hands and your gut feeling to guess the exposure and development is very rewarding. Holding a finished wet plate in my hand is one of the most satisfying things I've ever experienced during my photography career.
I am pretty sure you will feel the same after you follow me into this rabbit hole!
Working with authentic equipment is also very enjoyable, because of the unique character of the lenses and the history behind each piece of gear.
Just imagine who might have shot with your equipment 140 years ago, and how all this wonderful equipment was built (I talk about the history and inspiring people who created these lenses here).
Creating all these chemicals by yourself will forge a big emotional bond to every plate you make. This is something about the wet plate collodion process that's not easy to achieve with digital photography.
With this process, you can be totally independent – making your own “film”, cutting your own plates and modifying the chemicals/steps to achieve a look that you prefer.
I hope you enjoyed this brief trip to another side of photography. Please let me know in the comments if you have any more questions about wet plate photography. I'll be happy to answer them.
Alternatively if you need more information, head over to my Patreon where I can help you with every step of the collodion process.

Check out these 8 essential tools to help you succeed as a professional photographer.
Includes limited-time discounts.

I am photographer artist and writer for photography articles from Austria. My work is primarily focused on portraits and the wet collodion process. I love and enjoy to share my knowledge about this wonderful process in workshops and coachings.
3 Comments
Leave a Comment
👋 WELCOME TO SHOTKIT!
🔥 Popular NOW:

Do you do workshops with wet plates processing? I’m more of a hands on learner.
Fantastic, thanks
Amazing!