






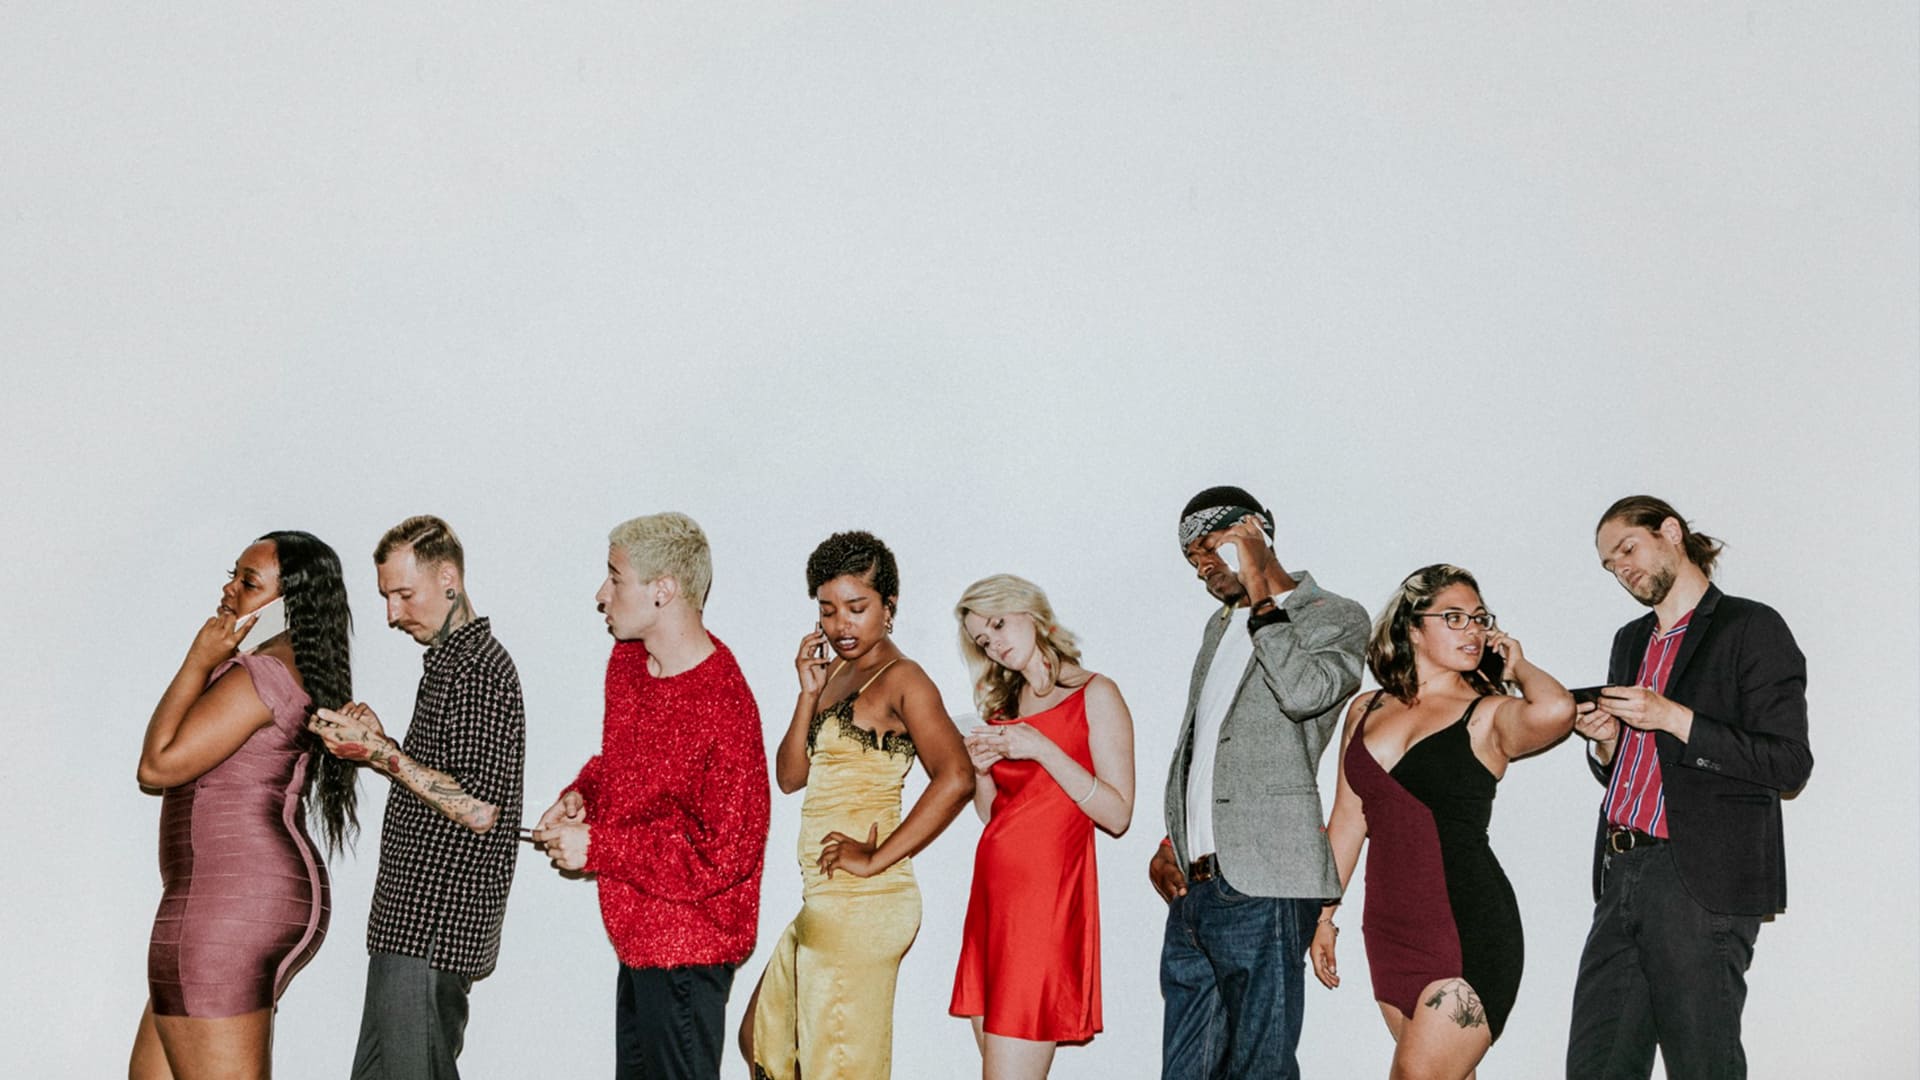
How to Pose Large Friend Groups (By Group Size, No Awkward Lineups)
Want to take photos of all your friends at once? This guide takes you through how to pose large friend groups without awkwardness.
Learn | Posing | By India Mantle | Last Updated: August 25, 2026
Shotkit may earn a commission on affiliate links. Learn more.
We’ve all been there: You’re out with your best friends, and someone wants to snap a photo of the group, but someone’s head is always cut off at the top, or the shortest member if the group somehow always ends up at the back.
Off-the-cuff group shots are hard, but with some thoughtful posing, you can make sure that everyone is visible, and that the group looks great in the final image.
If you’re the photographer hired for family get-togethers, school reunions, or just big, celebratory nights out, these are the poses you need to know. This guide, sorted by group size, takes you through a number of different ways to ensure everyone is in frame and happy with the result.
Why Group Photos Are So Tricky
There are so many times you might be asked to snap a large group. Think weddings, corporate photos, or family outings. You probably have some set poses that work for these types of occasions, but they may not work for large groups of friends.
That’s because a friend group has its own shared personality. Depending on the event, there may be a theme, or you may find that one or more participants are less enthusiastic than others about the photo, or perhaps so enthusiastic that they won’t stay still.
That’s why group photography requires more than just excellent technical skills. You also need to dabble in people management.
I find that it’s essential to have a set of poses in mind before the event, plus strategies to handle objections. Make sure you can explain why a pose is a good idea, so you don’t get a photography “expert” telling you how you’re doing it all wrong.
Let them know that your pose makes sure they’ll be seen, and even try a few of their ideas to show the difference between the poses. When they see that your pose works better, they’ll probably be delighted to carry on.
Group photos are great, but if you decide you’d rather have some meaningful snaps with you and your number one person, take a look at this collection of 28 fun ideas and poses for best friend photoshoots.
Groups of Five to Ten People
1. Raising a Glass
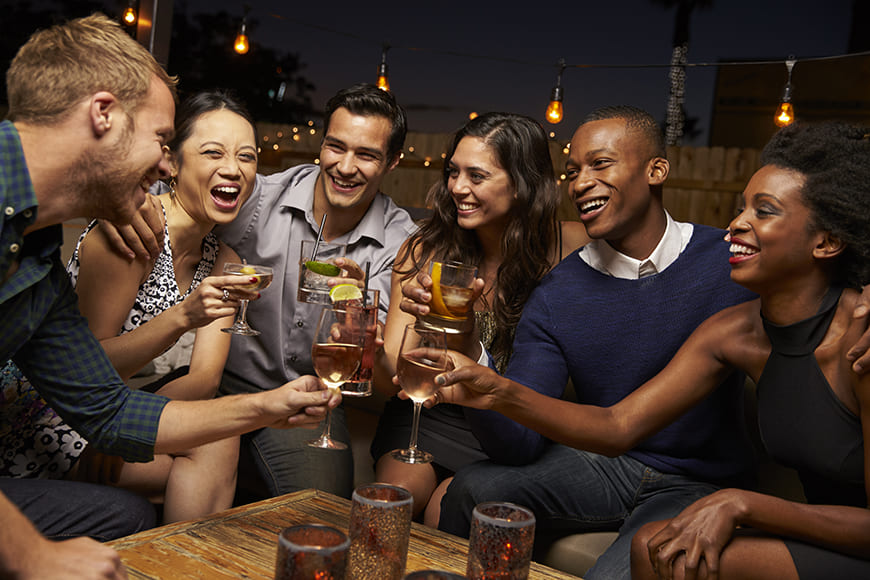
Many of the events you’ll be invited to photograph will, at some point, involve drinking. So, I find a good way to get the group warmed up is to snap them as they raise a glass, perhaps in a toast to some celebratory moment, or just to each other.
This won’t be a shot where everyone is looking at the camera, but you’re likely to see everyone’s faces as they all focus on the shared moment. You’ll also capture some natural smiles and laughter, which always work better than forced grins made just for the camera.
Just don’t be tempted to take this shot too many times. You may end up with a group of friends who are too intoxicated to do the rest of the photoshoot.
2. The Fake Selfie
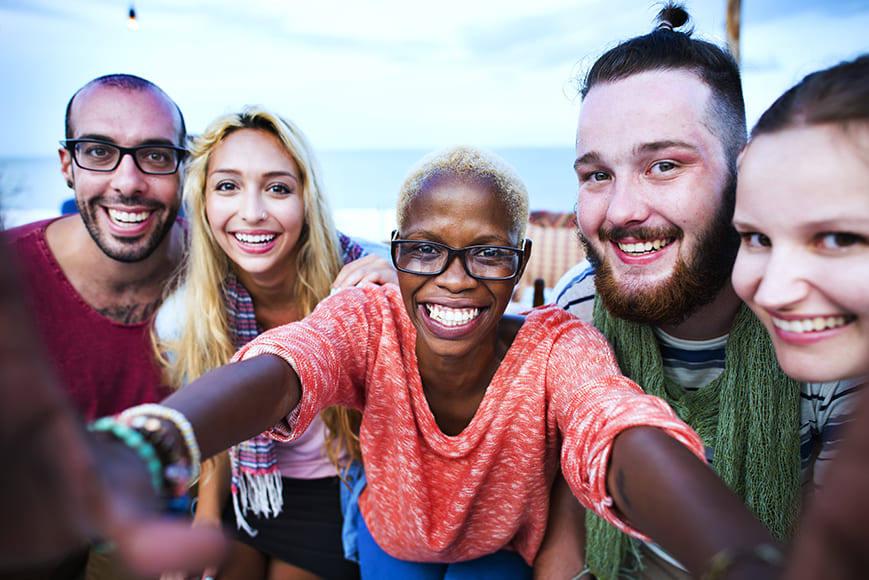
So many group photos end up being one person desperately clutching a phone at a weird angle, trying to get everyone in the frame for a group “selfie.”
But it’s possible to capture the candid spontaneity of a selfie without blurred or missing faces.
Get your group to gather quite close to the camera. They should be side by side without squashing each other.
You need an odd number of people at the front. For rear layers, I find it doesn’t matter so much, as long as you can see everyone’s faces.
Get the middle person of the front row to reach out and put their hands at either side of your camera. You’ll probably want to coach them not to touch the lens or press any buttons.
Once their hands are in place, take a few snaps, experimenting with different facial expressions. I find it’s useful to figure out who the comedian of the group is, as you can rely on them to make the group laugh, and you can snap the resulting grins.
Try this pose with just arms visible, then with a slight portion of hands visible, to see which gives the best “selfie” effect.
3. Sitting on the Ground
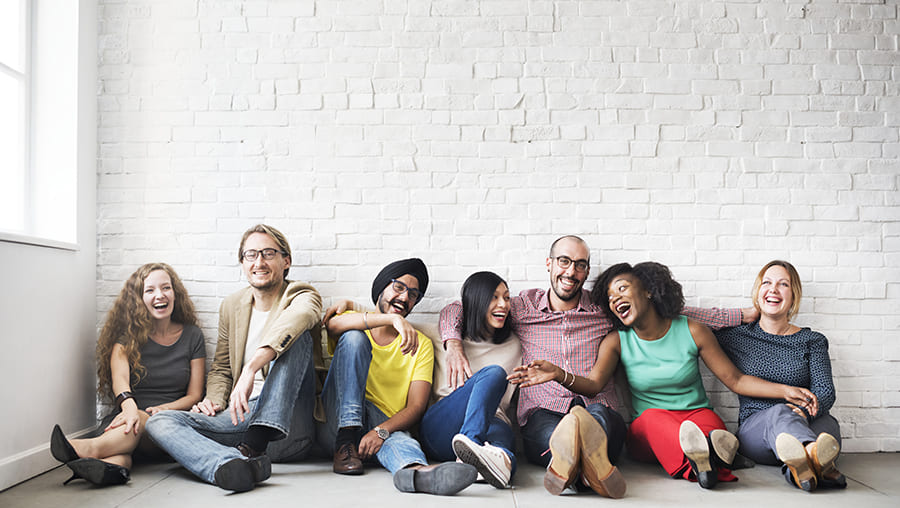
This works for groups of any size, but it’s particularly effective for smaller groups. Get your subjects to sit on the ground, either against the wall or the back of a couch, and chat among themselves.
Try getting one or more of them to put an arm around another’s shoulder, or even lean their head on someone’s shoulder.
Don’t worry too much about what’s going on with their feet. Knees up with feet flat on the ground is fine, as long as it doesn’t hide anyone’s face.
But feet dangling out in front is quite natural. If everyone’s shoes end up being too reflective or distracting, I just get my subjects to take them off.
Sitting in socks, laughing, and hugging makes for a nice, natural shot that’s lots of fun.
Groups of 10 to 20 People
1. Kriss-Kross Apple Sauce
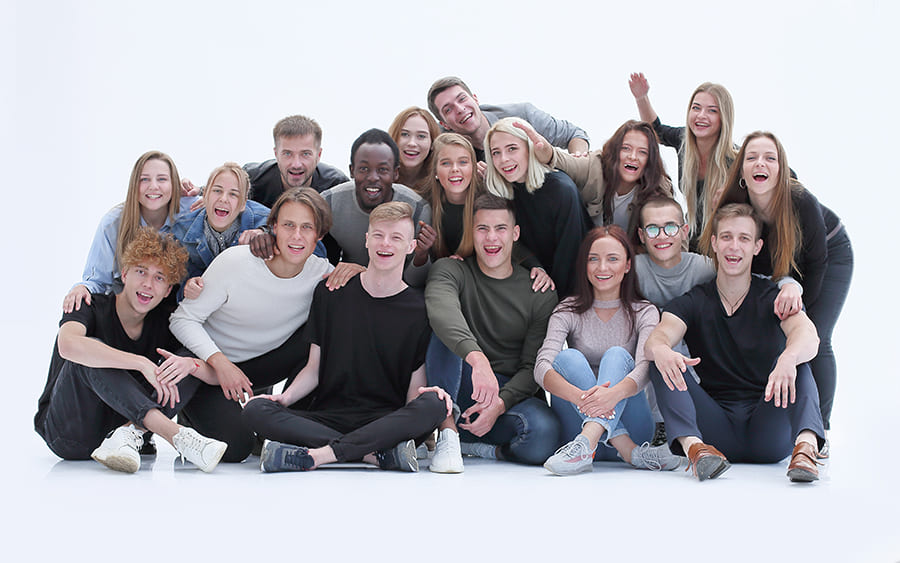
This variation on the relaxed sitting group photo is ideal for bigger groups. Have the front members sit with their legs crossed.
It’s a nostalgic pose that’s ideal for old-school friends, but it’s also a great way to manage height differences.
You can have a layer of cross-legged friends, a layer behind of people sitting on their heels, and a layer of people standing. The standing people may have to lean forward just a bit to bring everyone’s heads together and create a cohesive group finish.
This pose works particularly well when everyone is dressed in similar shades. Consider asking your group if they can all turn up in jeans and a white or black T-shirt, for a unified look.
Hands can be on each other’s shoulders, in laps, or raised in the air if you want a really energetic shot.
2. The Conga
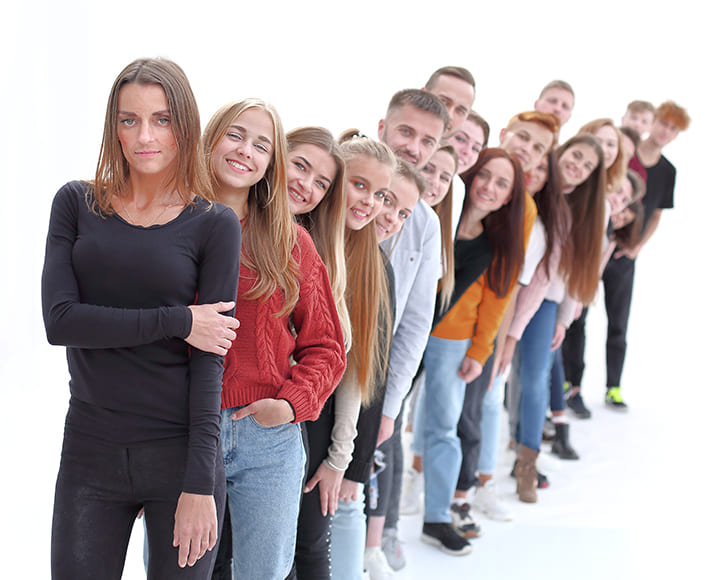
I always try to avoid a flat line of people facing the camera. But what I find works well for medium to large groups is a conga-style line of friends, one behind the other.
Get the first person to face the camera, and get everyone to line up behind them. Height doesn’t matter for this one, because of what you’re going to do next.
You’re going to shift your camera to the right, so your lead subject is on the left of the shot, and you’re effectively looking down the line of friends.
Now, ask everyone to lean slightly to their left. Get them to try and look past the person in front, without leaving their position in the line.
They can step out a little, as long as they don’t fully obscure the person behind. You might need to take this shot a few times, as people’s faces will become obscured as people shift about.
It’s worth the effort, though, for a group shot that really stands out and makes a great memory.
3. The Lean In
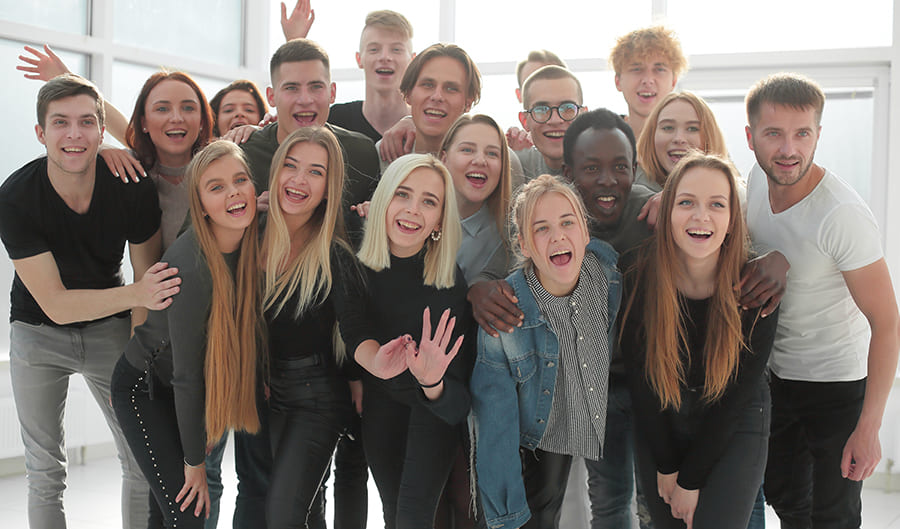
One of the biggest challenges when taking group shots is a range of height differences. When everyone leans in a little, it creates a uniformity that largely eliminates this problem.
You should still aim to have shorter people near the front, and taller folks at the back of the shot. But by getting everyone to initiate a slight lean toward the camera, you’re creating a fun sense of camaraderie.
Consider getting everyone to put a hand on the person in front’s shoulder. This works especially well if the people at the edges of the shot touch the person in front, as it looks like a big, happy group hug.
For more guidance on dealing with people of varying sizes, check out these 10 clever posing tricks for couples with drastic height differences.
Groups of More Than 20 People
1. Standing at the Sides, Slouched in the Middle
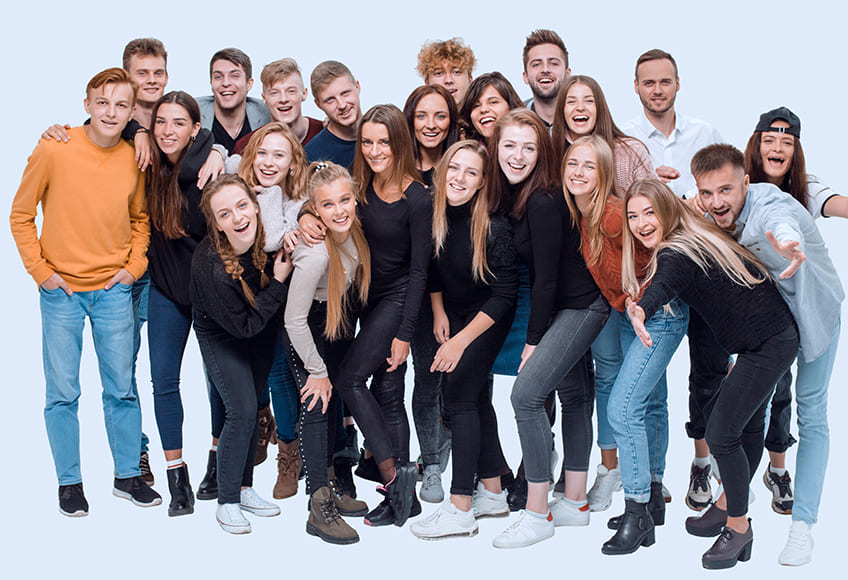
A variation on the leaning method for averaging out height differences is to go against the grain and move the shorter members of the group to the edge.
This might sound counterintuitive, but it actually gives you a useful frame of reference. When your shortest participants are at the edge of the picture, you know how much you need to get everyone else to slouch, bend their knees, or lean.
Taller members of the group might want to lean their hand on one knee, which naturally reduces height. You could also prompt your group to wear flat shoes for the event, which takes out the added hassle of dealing with six-inch heels.
2. Heads Together, Looking Down
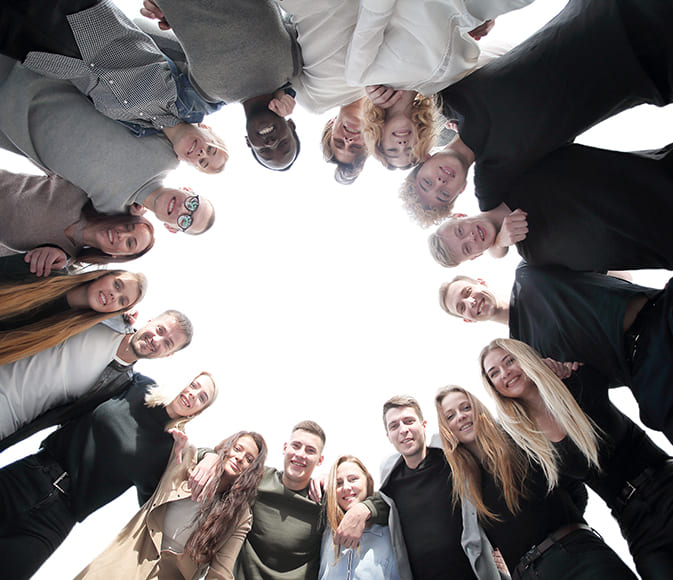
Not every group shot has to involve everyone standing and staring into the camera. Why not mix it up a bit by placing the camera low down, in the middle of the group.
To make this work, you need a group of friends who are close enough to be comfortable with putting their heads together. Sports teams and friends who engage in outdoor pursuits are likely to be fine with this pose, as they’re used to being in close contact all the time.
Heads can either be touching or have just a small gap between them. You want to emphasize closeness and camaraderie, but without making the group look squashed or physically uncomfortable.
Lighting is an important consideration here. If the venue has overhead lighting, the faces will be shadowed as soon as they look down.
You may also have to contend with the fact that bright overhead lights can cause faces to appear silhouetted in this position.
If you can, bring a soft, warm light that you can position near the camera, and turn the overheads off.
Top Tips for Photographing Big Groups of Friends
Be prepared to have your ideas challenged, but don’t take this personally. Any large group has at least two or more people who want to lead, and they’ll come at you with all sorts of big ideas for the session.
It’s okay to be open to these ideas, but make sure they’re aware that you’re the expert, and that your ideas are more than likely to work best.
To mitigate potential problems, meet with members of the group beforehand, showcase your portfolio, and suggest poses you might use. They can see what you have in mind and will be more prepared to organize themselves (and their friends), which should make your day a lot easier.
Some quick “dos” and “don’ts” for group photography:
Do:
- Listen to your clients, even if you don’t follow their advice.
- Try several poses if you have time, and in between shots, check to see how they’re turning out.
- Check that everyone in the group can see you and the camera; otherwise, they might be hidden in the final image.
- Have a visual cue or a sound that can attract everyone’s attention and help ensure everyone is looking where they’re supposed to be.
Don’t:
- Just bunch everyone together and hope for the best – someone will be hidden or look awkward.
- Set very short people far forward from the group, as they will look isolated. Consider leaning or sitting poses instead to manage height difference.
- Avoid one long, flat line of people facing the camera – it’s dull, and you’ll spend all day figuring out if Tracy is actually an inch shorter than Dave and do you need to move people around… It’s more effort than it’s worth.
Friend photos are supposed to be fun, so consider grabbing some candid shots in between the more posed group snaps.
Final Thoughts
Find ways to stay in control. This might sound like it’s easier said than done, but don’t be intimidated just because the group is large.
At the end of the day, they’re happy that you’re there to photograph them, and will respond well to clear instructions and a confident strategy.
Just remember to let them have fun, as you’ll get better results when everyone in the frame is happy.

Check out these 8 essential tools to help you succeed as a professional photographer.
Includes limited-time discounts.

As the General Manager of Shotkit, India Mantle brings with her a lifelong love for photography that she developed during her childhood, watching her father document their family moments with his Nikon EM. In her free time, you find her enjoying the awe-inspiring natural beauty of her home, Northern Rivers, Australia.
👋 WELCOME TO SHOTKIT!
🔥 Popular NOW: