






How to Use Luminar Upscale AI to Enlarge Any Photo
Being able to enlarge photos taken with low-resolution cameras allows you to make big prints or enhance detail. Here's how to do it with Luminar's Upscale AI.
AI | Luminar | Software | By Jeff Collier
Shotkit may earn a commission on affiliate links. Learn more.
Having worked with all kinds of digital cameras and processes over the years, I have had to deal with images of various resolutions.
I can confidently say that upscaling an image and ensuring the photo looks convincing can be anything but easy.
There are a few ways to upscale your images, but none are as easy as the process/tool I will share with you or produce an image that looks convincing.
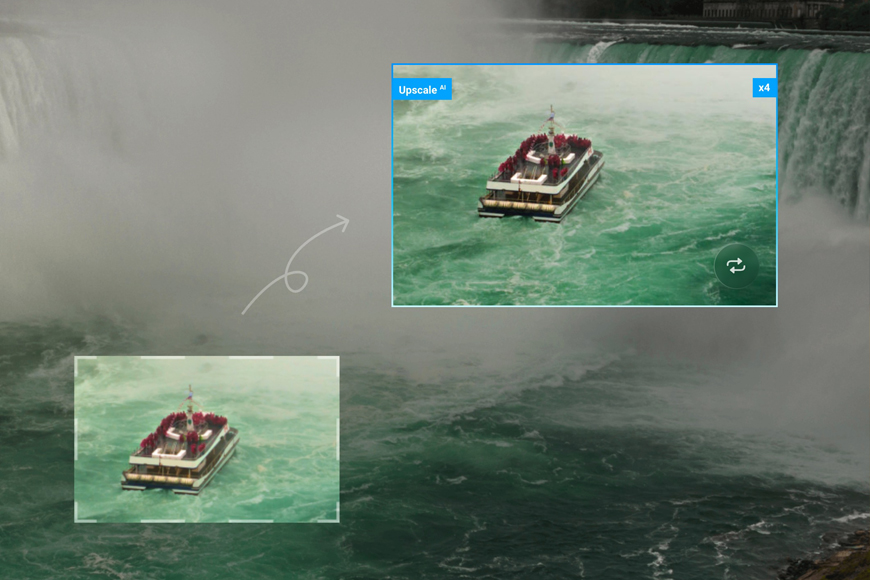

Follow along with this simple tutorial to upscale your first image with no degradation in quality using Luminar.
Use code shotkit10 to save 10%
Luminar's Upscale AI is a quick and easy way to upscale your images. It's as easy as saying 1-2-3, and you're done.
In this discussion, I will explain how Luminar's Upscale AI can literally save you a lot of time.
How to use Luminar Upscale AI to Enhance Photo Resolution
Best user case
Before diving right in and starting to upscale our images, let me quickly give you the best user-case scenarios for this tool.
Let's say that you have an image that's not perfectly composed, and you've included too much into the frame that you now want to get rid of.
So, you use the crop tool and get rid of everything you don't want in the frame. Considering that it's the fringe of the frame that was the worrying part.
The problem is when you crop your image, you lose out on an awful amount of detail with it. This is where Upscale AI comes in.
Another valid use case is when you have a low-resolution image to start with.
For example, many of you may have old archived images shot using low-res digital cameras of yesteryears.
In order to print them to larger sizes, Upscale AI can be used, often in conjunction with Luminar Supersharp AI.
How to Use the Upscale AI Tool to upscale your images
The Upscale AI tool offers you three different options to choose from. You can upscale your images 2, 4, or 6 times. For me, the 2x and the 4x options tend to give the most realistic results.
A few additional points you need to keep in mind when using this tool
- The minimum input size is 257 pixels x 257 pixels.
- The maximum input size is 16,000 pixels on the longest side.
- The maximum output size is 32,000 pixels on the longest side.
To use the Upscale AI image, first, you've to add a photo using the Add Photo option. I have already added an image and made some basic edits to it.
Here is the final edited image.

As this image had a lot of detail in it already (the image had a dimension of 4032 x 3024 pixels), I had to crop out a small section to demonstrate the applicability of the Upscale AI tool.
Here is the cropped section of the image.

As you can see in the above screenshot, this is a small crop of the original image.

I have cropped it to 2000 x 1325 pixels.
But I will now use the Upscale AI Extension to increase the image's resolution.
To upscale the image, you need to drag an image from the All Photos tab under the Catalog Menu and drop it within the Upscale AI box.

I choose the 2x option for upscaling and hit the Upscale button.
The tool does its job and makes an upscaled copy of the image and places it in the Upscale folder.

As you can see now, the image has been upscaled to a resolution of 4000 x 2650 pixels.
Here is the final image.

Concluding thoughts
The Upscale AI Extension is a huge time saver. But more than that, it does an excellent job of making a realistic boost (resolution-wise) to low-res images; and that, for me, is what makes the tool worth having.
On many occasions, I have cropped images that I was not particularly happy about in terms of composition. The resulting loss of resolution often made things worse.
With the traditional alternatives to upscaling images often cumbersome and time-consuming, I never even made an effort to salvage many of these images. As a result, many such photos were simply lost in piles of hard drives.
Now, I have a way to easily push the resolution of these images even after I have heavily cropped them.
If you're only going to use these images on the internet, Upscale AI does an excellent job of pushing the resolution. I would say even for 4 x 6-inch and 5 x 7-inch prints, the upscaled images have a lot of resolution to work with.
You should also check my guides on how to use the Luminar Focus Stack extension, how to use Noiseless AI, and read the full review of Luminar too.
Follow along with this simple tutorial to upscale your first image with no degradation in quality using Luminar.
Use code shotkit10 to save 10%
Jeff Collier is an experienced film photographer who enjoys experimenting with modern digital photography equipment, software and apps. He’s also an ex-world champion triathlete and avid cyclist, clocking hundreds of km each week in the beautiful Tweed Valley of northern NSW, Australia.
👋 WELCOME TO SHOTKIT!
🔥 Popular NOW: