






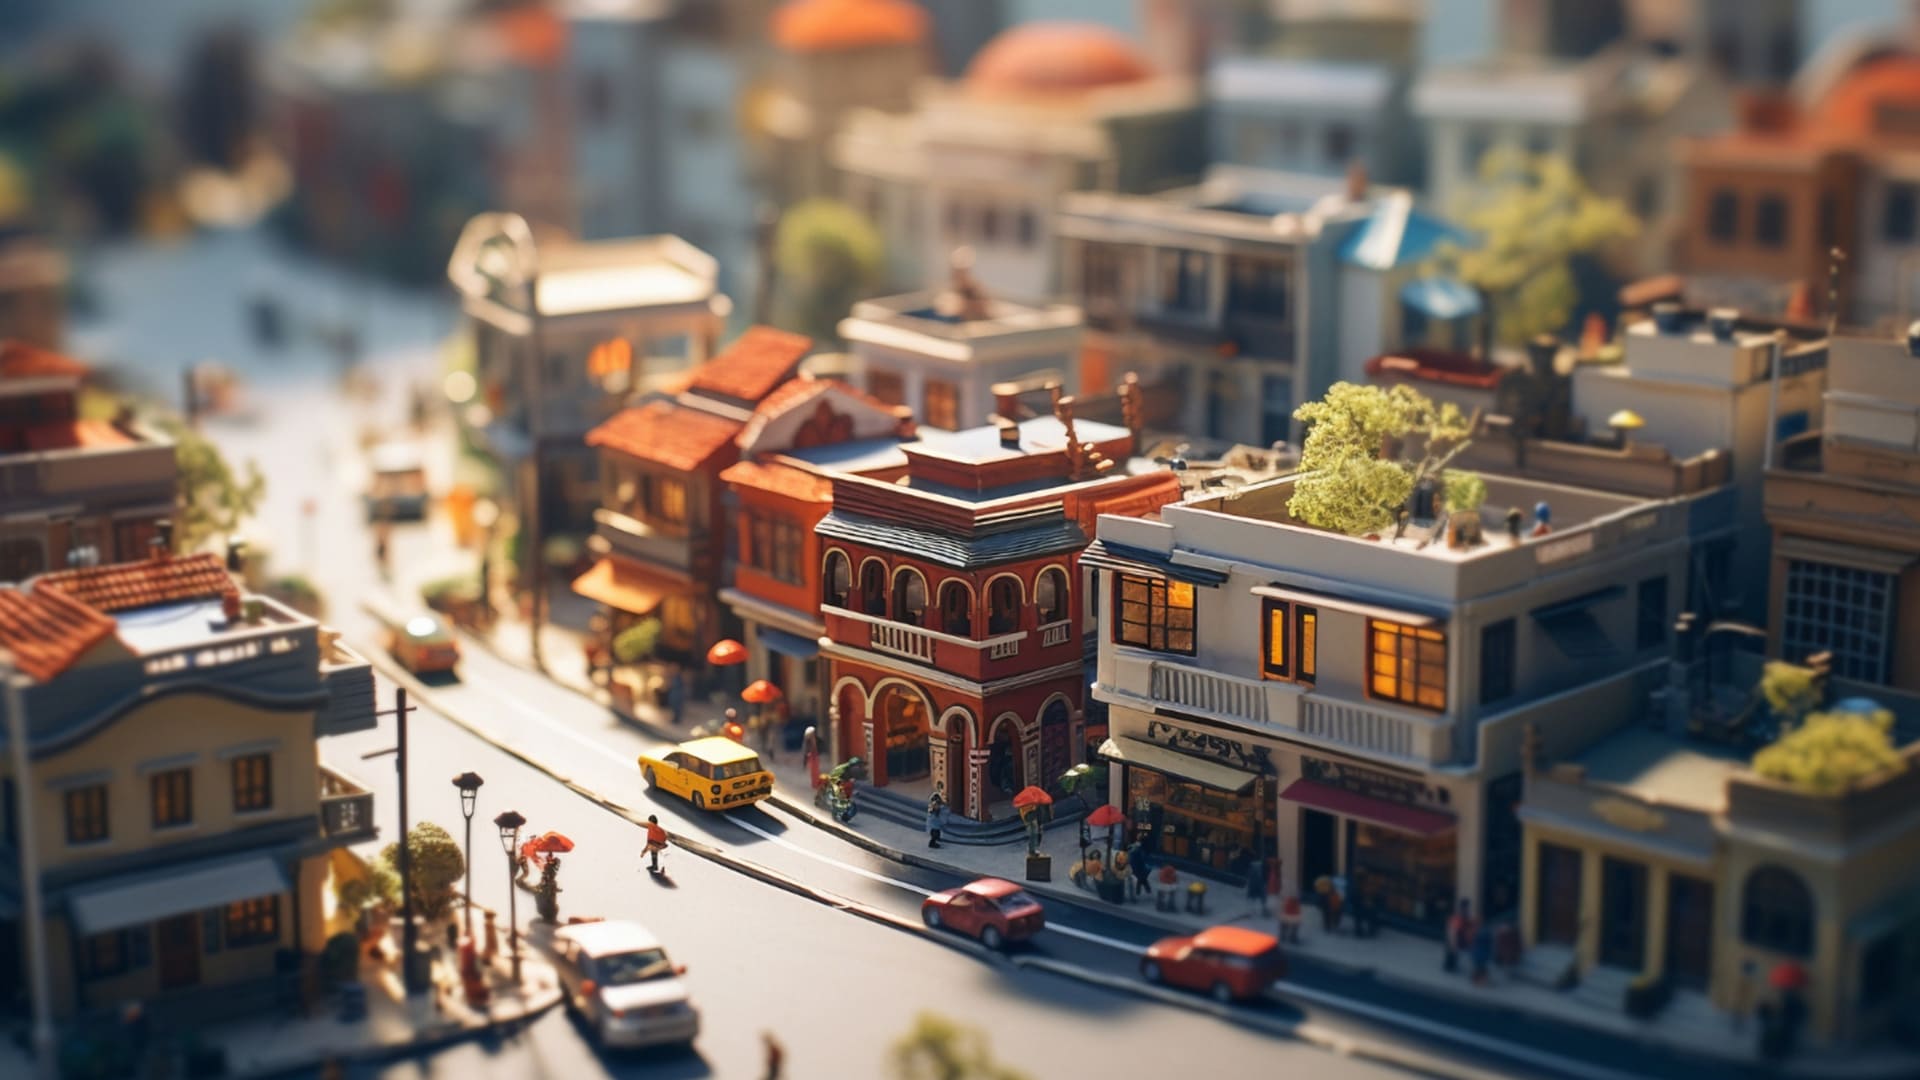
How Creators Use Morphic AI to Get the Viral Tilt-Shift Toy Effect
Can Morphic AI create the viral tilt-shift toy effect? Our review goes over its chat-based editing, workflows, and pricing.
AI | Software | By India Mantle | Last Updated: November 12, 2026
Shotkit may earn a commission on affiliate links. Learn more.
The “toy” image effect has become something of a viral trend on social media, to the point that even mainstream media and video games have begun emulating it.
But the actual effect is surprisingly difficult to create using traditional camera placement and lenses.
Instead, you can use editing tools to get the same effect. And when you account for all that, it leaves AI as the obvious choice to apply complex yet methodical changes to an image to achieve the result.
Among the tools, Morphic AI is one that has the most natural result straight out of the box.
So in this review, we’ll go over the tool’s capabilities and how exactly it might be useful.
What Is the Tilt-Shift Toy Effect?
Technically, tilt-shift photography has been relatively common for over a decade, being a real effect that you can create through special lenses and smart camera positioning.
The famous “toy” effect is an evolution of this, and is more strictly called “selective focus,” where only a part of the plane is focused while the sections at the ends are increasingly blurred.
The result is a narrow band of the image that remains sharp, while the areas above and below it are blurred. Our brains associate wide-angle tilt-shift selective focus with macro-lensing, so any objects seen in the photo appear smaller than they actually are.

The illusion of making objects appear as toys is further sold by having the plane pictured from an angle of around 45 to 60 degrees, making it appear from a bird’s-eye view. Additionally, with post-processing ramping up the contrast, the objects look even more toy-like due to exaggerated “plasticky” colors.
What Is Morphic AI and How to Use It for Tilt-Shift Toy Effect?
On the surface, Morphic AI is one of the more “complete” AI image editing suites that uses a chatbot workflow to perform and organize image editing.
Much like other AI chat platforms, it offers a range of specialized editing features. It works in a web browser, so much of the image processing is handled online rather than by your PC.
However, unlike traditional image editors, the workflow is extremely dependent on the AI chatbot to the point where it’s more reminiscent of something like ChatGPT or Claude than Photoshop or Lightroom.
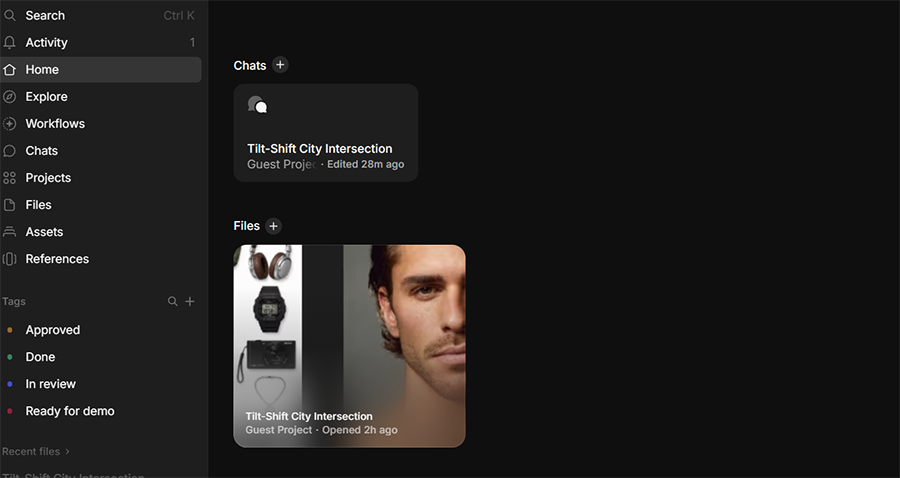
The platform is also “cleaner” than most online tools, where there are no strict delineations in specific features or editing sequences. Instead, you can use any given editing feature in any given chat just by asking for it in natural language.
This makes a tilt-shift edit relatively easy.
For example, I could use a fairly basic text prompt with a simple attachment to get a decent result in my first minute of running the AI.
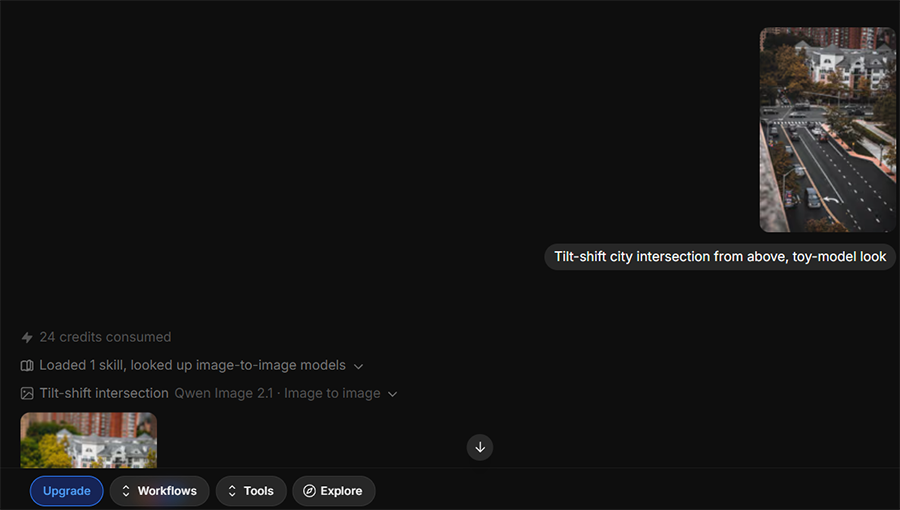
As for the actual result, the AI automatically applies both the selective focus and increased contrast effect in one go.
Take a look at the examples below.
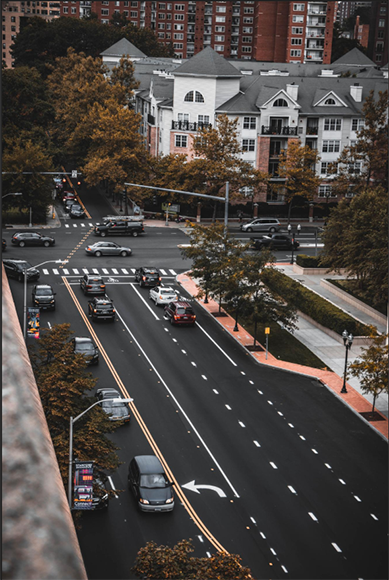
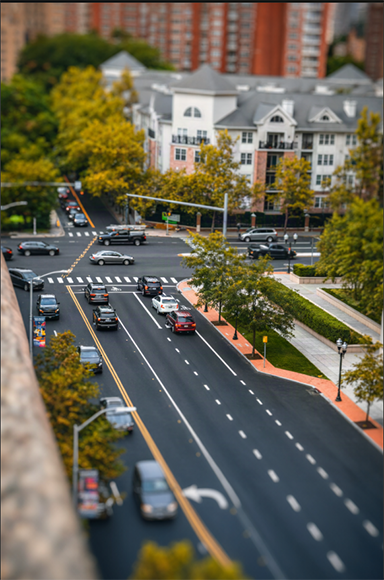
As you can see, the tool’s automatic setting puts the “focal lines” of the image where it detects the most activity or objects.
When I upload an image where the subjects are closer to the top or bottom edges, the focus will shift with them.
This effect isn’t always perfect with a barebones prompt, and the tool can occasionally not apply the contrast at first.
However, you can ask the AI to make a specific type of edit or retry the generation with a slightly different prompt.
I also particularly admire Morhpic’s no-nonsense response for small queries, where it will just output the image result and say it did it. You can also look into the details behind the AI’s “thinking” to help narrow down which tools, options, settings, or “skills” were used, which allows you to improve on a failed result.
How to Get a Better Result in Morphic AI
While a one-line prompt is usually enough, there are a few ways to improve the result based on the techniques used in tilt-shift photography.
The first is to clearly state where you want the focus band to be. In this case, I’d specify its position as a percentage of the image’s height. For example, a prompt such as “place the focus band between 45% and 55% of the image height” may work. Alternatively, you can directly state which objects the AI should focus on (like cars of a specific color or any people in the image).
The second is to force the AI to recalibrate the color to a higher saturation. This avoids the photo looking blurry and unfocused at once or making it look like it was taken through a dirty lens.
Apart from the actual prompt, you can also play with the desired resolution, aspect ratio, and how many results you want.
If you want even more granular control, you can turn the “Copilot” (which is how the platform calls the chatbot) into “Planning mode.” This prevents it from actually generating images and only allows the chatbot to answer with what it plans to do to an image.
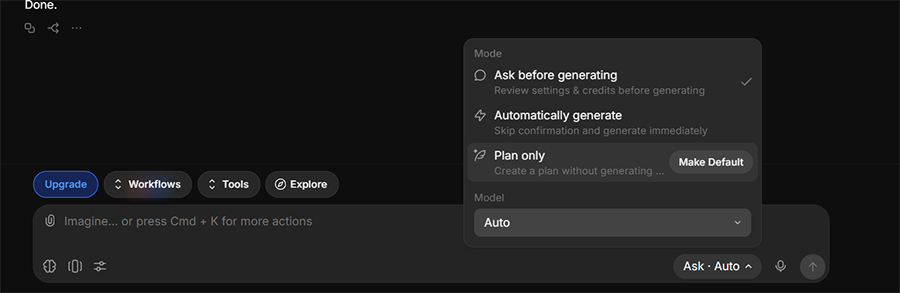
Finally, keep each chat focused on one piece of work. Copilot reads the whole conversation as context, so a previous unrelated edit might “poison” the result or have the AI generate images from a past reference.
How to Get the Best Camera Angle
Arguably the biggest issue of the tilt-shift toy effect is that it relies on a relatively specific band of high viewpoints to deliver a good result, as eye-level shots don’t read as miniatures.
Technically, you should be overcoming this when you’re actually taking the shot. Instead of photographing a street from street level, you need to go up to a roof to get a genuine bird’s-eye view.
Alternatively, the tool can help by generating a new perspective from the original image.
For that, you can use the dedicated Camera Angle tool (which will ultimately reroute you to the Copilot page with a prompt that distills whatever you put into the textbox).
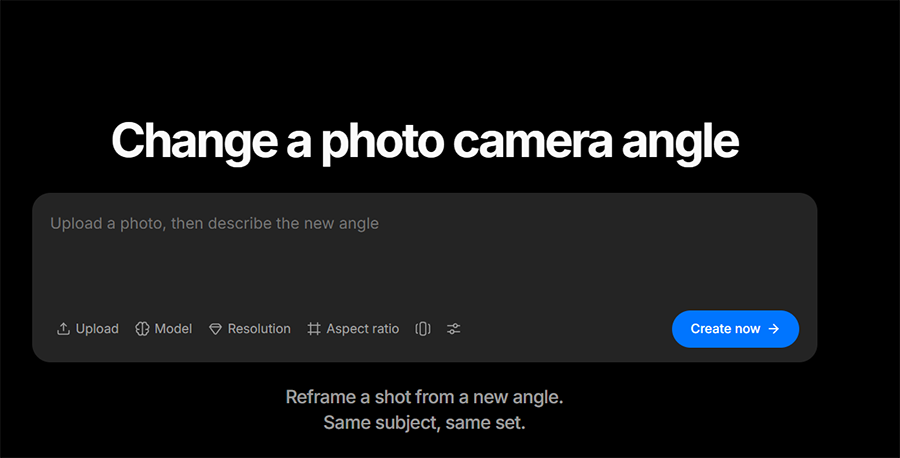
In general, try one of the following presets: Bird’s Eye, Low Angle, or 3/4 Left.
This means that in practice, you can take a street photo shot at eye level, use the tool to generate a Bird’s Eye view, and then apply the tilt-shift toy effect.
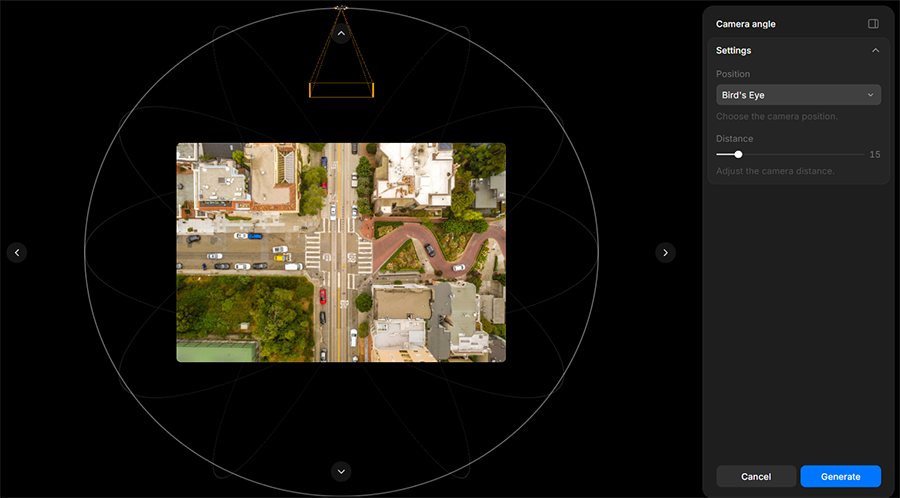
The main caveat here is that the AI has to generate details that weren’t visible in the original photo, including parts of objects that were previously outside the frame or hidden from view. This means that you may need to constantly regenerate the image until you get a decent result.
That’s fine for a fun social media post, but I wouldn’t use it for anything that’s supposed to show a real place accurately.
How to Make a “Collage” of Tilt-Shift Images From Your Gallery
If you’re making a set of images that are based on a similar location, you can use the same blur and color settings between images or even canvases.
For this, you can use the “Art Style Transfer” option in Copilot’s workflow.
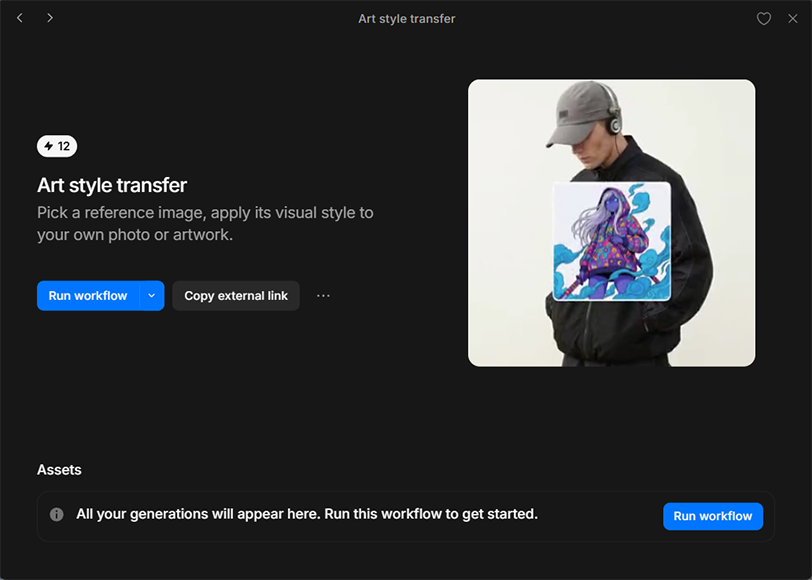
Alternatively, when uploading an image in Copilot, you can directly ask the chatbot to apply the same general setting as in the previous image.
Note that Morphic doesn’t really do full-gallery edits in one go, so you may still need to apply the edits manually and redirect how it refocuses on each image.
Other Features of Morphic AI
While we’re focusing on the tilt-shift toy effect, Morphic is a fairly extensive platform that can also be useful for simple edits and larger projects.
Workflows
Workflows are ready-made “recipes” that chain several steps (like generation, editing, and styling) into one process.
Some of the most interesting ones are Skin Enhancer, which adds natural texture to overly smooth AI skin, and AI headshot studio, which creates several professional headshot styles from a single selfie.

The more interesting part here is that you can technically create your own workflow. This is as easy as editing an image, then asking Copilot to save whatever edits you made as a separate workflow and naming it whatever you want. From then on, it becomes available for your personal use whenever you log in.
Asset Memory and Upload
If you’re building a series with the same person, product, or style, Morphic’s Assets and References features save you from re-uploading the “base” images each time.
You can use them to create a named reference, upload one or more images, and select it when writing a prompt. In most cases, the AI will take one image from the reference that most closely aligns with the desired angle or composition, but it can also combine references when you need a more complex result.
Where Morphic Falls Short
The biggest limitation of using Morphic AI over a traditional image editor is the lack of control. You have no sliders to work with for most of the settings, including the ones used for the tilt-shift toy effect, so if the AI decides to automatically focus on the wrong part of the image, you need to chat with it to persuade it otherwise.
The second and possibly worse issue is that Morphic actually regenerates the image rather than simply editing it. With a photo of a real place, you might see smaller details like signage change subtly between takes (for our example, one of the signs in the “focal band” actually changed hues noticeably, which couldn’t be attributed to simple contrast).
Third, a lot of the workflow tools don’t actually say which model they’re using. This might mean you’ll unknowingly depend on an obsolete image generator where a more modern version already exists and can give you a better result. It’s also more difficult to pinpoint how to declare what AI you used if you’re planning to post on platforms where attribution is mandatory.
Morphic AI Trial and Pricing
Morphic uses a credit-based system for image and video generation, Copilot replies, and other AI operations.
The free plan provides 20 one-time credits, which don’t renew. You’ll need to subscribe to a paid plan to receive additional monthly credits.
In terms of usage, those 20 credits are actually just enough to get you a single high-quality edit. If you want a better test of the tool’s editing capabilities, use lower-resolution images since they’re easier on the credit budget.
Workflows and “pre-set” features like tilt-shift have a set credit limit that applies to each image you pull through them. Conversely, using Copilot can become more expensive, as replies and “thinking” about which skill to use also cost credits.
If you do decide to purchase credits, I’d recommend either trying the “Basic” plan for one month or using an annual “Standard” subscription, as they both cost the same per year while Standard gives you way more credits. Alternatively, there’s an option to outright buy 2,500 credits in one go if you only sporadically use the tool.
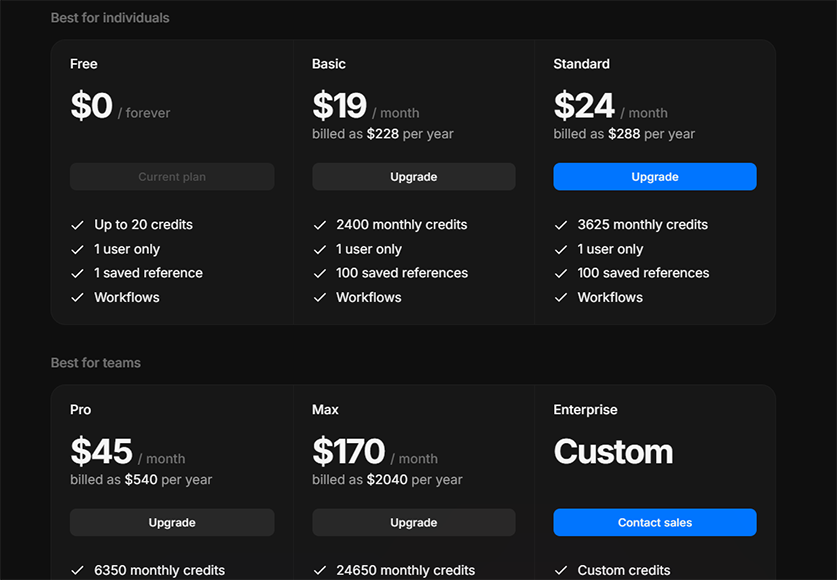
On the plus side, Copilot and generated results also send a report on how many credits were used, and you can ask Copilot what a generation will cost before running it.
Who Is Morphic AI For?
Morphic AI is a genuinely useful tool if it already has the workflows that you want to use most often. These end up being relatively cheap in terms of credit usage, and the AI doesn’t actually need to get trained on more extensive edits.
It can also be useful if you need to manage bigger projects that have a similar overarching theme or setting. The asset management options allow Morphic to keep the references consistent between regenerations, which can help in maintaining a particular style.
Where the platform is a bit iffy is in how ineffective the trial period is. You can barely get more than one image result with a free account, and after a while, even the Copilot option stops working if you don’t have credits. Inevitably, you’ll need to pay up if you want to use the tool.

As the General Manager of Shotkit, India Mantle brings with her a lifelong love for photography that she developed during her childhood, watching her father document their family moments with his Nikon EM. In her free time, you find her enjoying the awe-inspiring natural beauty of her home, Northern Rivers, Australia.
👋 WELCOME TO SHOTKIT!
🔥 Popular NOW: