How to Move Anchor Points in Photoshop
Master the techniques and shortcuts for moving anchor points in Photoshop with our guide, enhancing your precision and efficiency in graphic design.
Photoshop | Software | By Judyth Satyn
This guide will give you the easiest ways to move anchor points in Photoshop.
Moving anchor points is useful when making designs, and I often use this process in my Photoshop work.
Knowing how to move anchor points gives you more editing control when working with the Pen tool, text, and vector shapes.
Let’s dive into the tutorial.

Download a free copy of Adobe Photoshop to follow along with this simple tutorial.
How to Move Anchor Points in Photoshop
The Pen tool is one of my favorite Photoshop tools. It’s powerful and versatile, but mastering it can take some time.
In my opinion, it’s definitely worth investing the time to learn how to use this versatile tool efficiently.
When you first use the pen tool, it seems to have a mind of its own. It takes patience and practice to become familiar with this ingenious tool.
The Pen tool, using anchor points, gives you the ultimate editing control for creating paths and selections.
Move a Pen Tool Anchor Point
When creating paths, designs, or selections using the Pen tool, you will need to reposition an anchor point.
There are different ways to move an Anchor Point. Let’s check out how.
Step 1 – Open a Blank Document
When Photoshop is open, head to the main menu and select File > New.

Once clicked, the New Document dialogue window will open.
For this tutorial, we will select the first Custom document of 1080 x 1080 px. Click on it to select it.
If you prefer, you can create a document by entering measurements in the boxes beside Width and Height.

Then, in the bottom right-hand corner of the dialogue window, click the blue button, Create.
Step 2 – Select the Pen Tool
Before we can move Anchor Points, we first need to add some to the document.
Head to the toolbar to the left of your canvas workspace and click on the Pen tool.
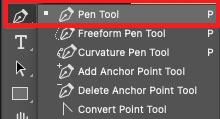
Alternatively, hit P for the keyboard shortcut.
These techniques to move the Pen tool will work for all the Pen tools: the standard Pen tool, the Freeform Pen tool, and the Curvature Pen tool.
Select the Pen tool that you prefer to use.
Step 3 – Create Anchor Points
Once the Pen tool is active, you can create anchor points by clicking on the canvas workspace with your cursor.
Each click you make will create a new anchor point.
For this tutorial, we have made a basic box shape with straight lines.
When you wish to achieve a perfectly horizontal or vertical line in Photoshop, simply hold down the Shift key between clicks.
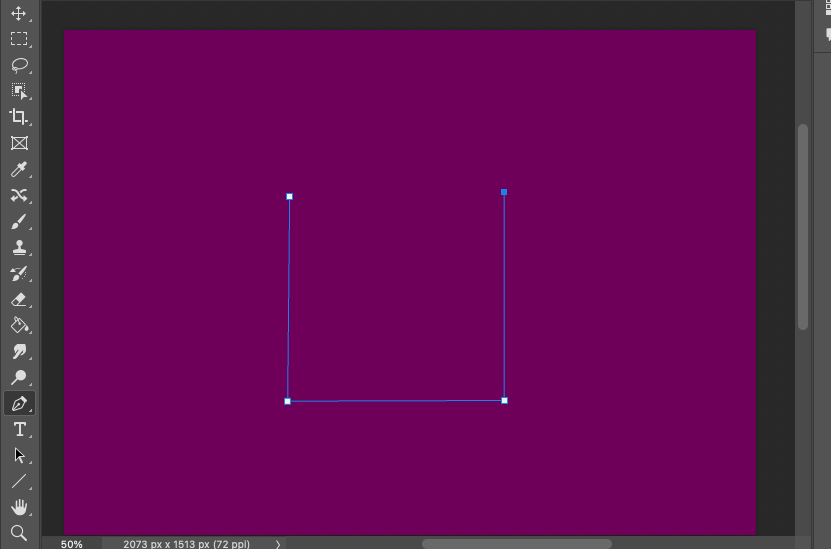
Step 4 – Move the Anchor Point
There are different ways to move individual anchor points. Your chosen method will depend on which one best suits your editing project.
You can use your cursor, the Direct Selection tool, or the keyboard.
Move the Anchor Point Using the Cursor
To use your cursor to move anchor points, hold Command (for Macs) or Ctrl (for Windows) and click on the point you want to move.
You can now drag the anchor point to a new position. Once the anchor point is in the desired spot, release the cursor.
Below is an example of the top right anchor point (the fourth one) being moved up into the righthand corner of the canvas.

In the image below, the bottom left anchor point has been moved down further to the left of the canvas.

As you can see, the other anchor points that are not moved do not budge a millimeter.
However, the lines between the points adapt to accommodate the move, stretching between the stationary and repositioned anchor points.
Move the Anchor Point Using the Keyboard
Another method to move an anchor point is using the arrow keys on the keyboard.
Activate the anchor point you wish to reposition by holding down the Command (for Macs) or Ctrl (for Windows) and clicking on it.
You will know when an anchor point is active as it will change color. Active anchor points are blue, and non-active ones are white.
Now, tap one of the arrow keys to move the anchor point. There are four arrow keys: up, down, right, or left.
When you click the upward pointing arrow, the anchor point will move towards the top of the canvas.
Click the arrow pointing left, and the anchor point will move to the left of the canvas, and so on.
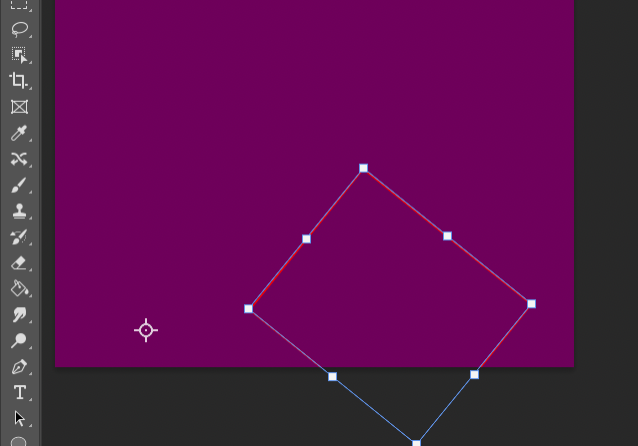
In the image below, you will notice the bottom right anchor point is active, as it is blue, not white.
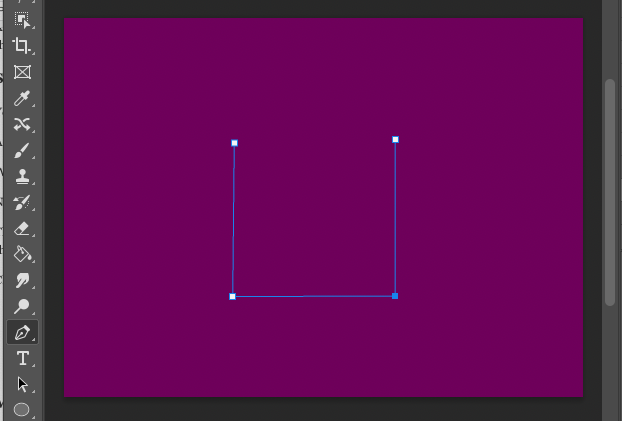
When the right-pointing arrow is pressed and held down, the active anchor point is moved to the right.
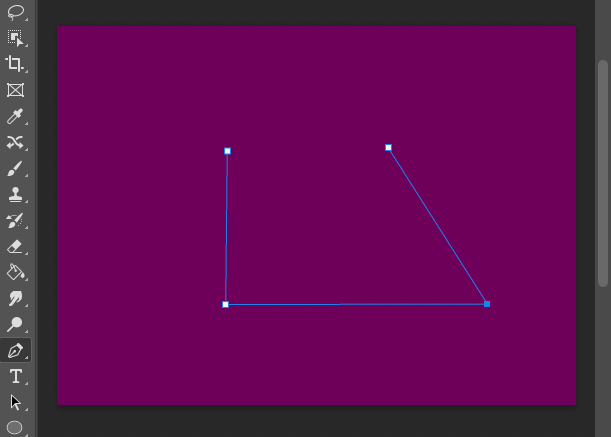
Next, the downward point arrow is held down, and the active anchor point is moved towards the bottom of the canvas.
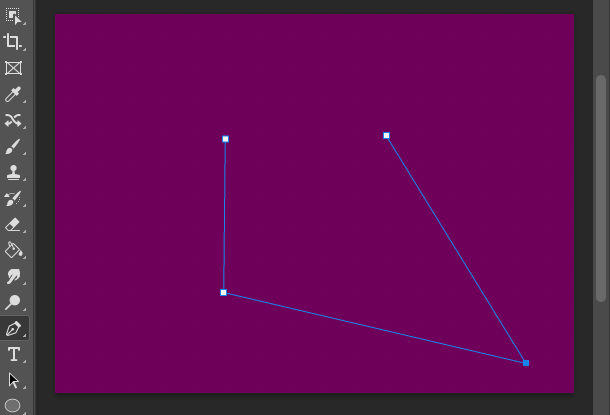
The option to reposition the anchor point using the keyboard can be handy in some editing situations. For example, if you need to only slightly nudge an anchor point into a position when editing.
Or if you need the move to be perfectly horizontal or vertical.
However, this method is a little slow, cumbersome, and restrictive for most edits – particularly editing jobs that need the anchor point to be repositioned at a diverse angle.
Move an Anchor Point Using the Direct Selection Tool
The third method to move an anchor point is to use the Direct Selection tool.
The Path Selection Tool will move every anchor point in the path, while the Direct Selection tool will move one anchor point independently of the others.
Head to the toolbar and select the Direct Selection tool; you will find it below the Text tool.

Or, for the keyboard shortcut, hold Shift and hit A until the cursor point becomes a white arrow.
Once the Direct Selection tool is active, double-click on the anchor point you wish to move.
Then, drag it to its new position.
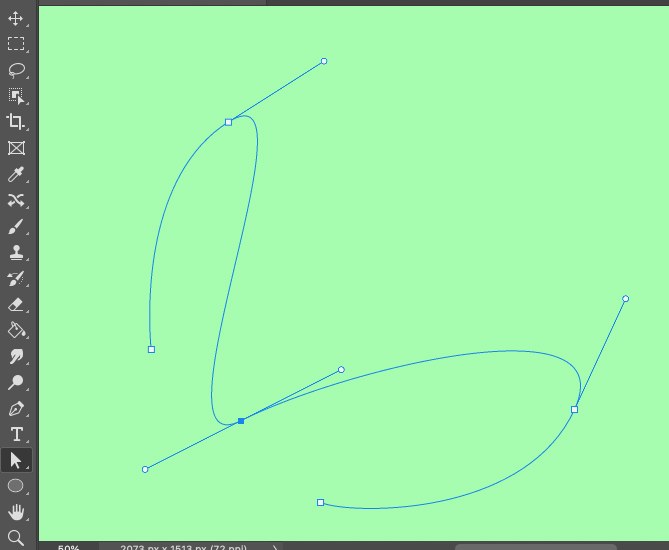
When you are moving an anchor point between curved lines, pay attention to its handlebars.
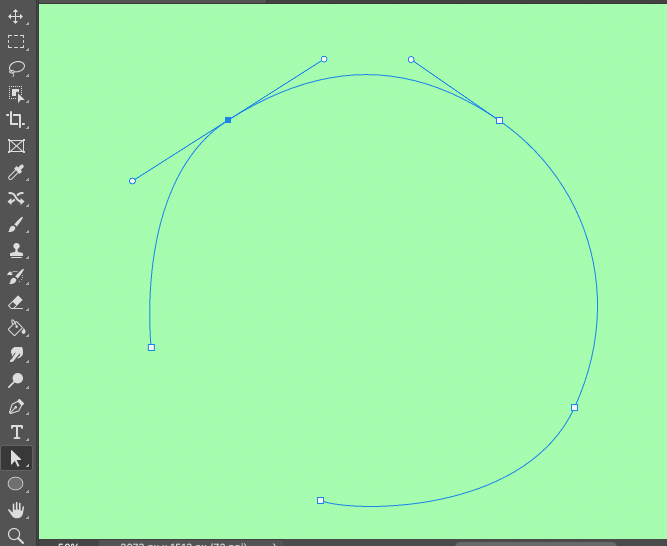
In the examples below, we have used a circular shape so you can see how the path is affected when an anchor point is moved.
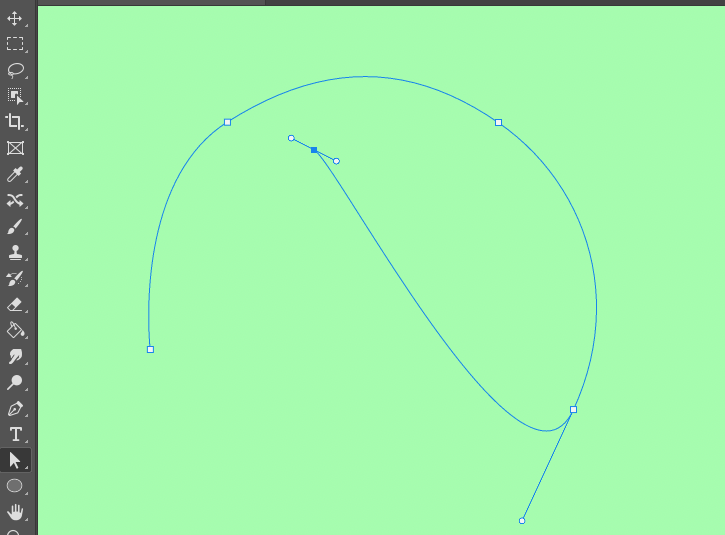
The direction in which the path curves will be determined by the handlebars of the anchor point.

In the example below, you can see that while the anchor point may move, the handlebar will remain at the same angle.
The path will curve in response to the angle of the handlebar.
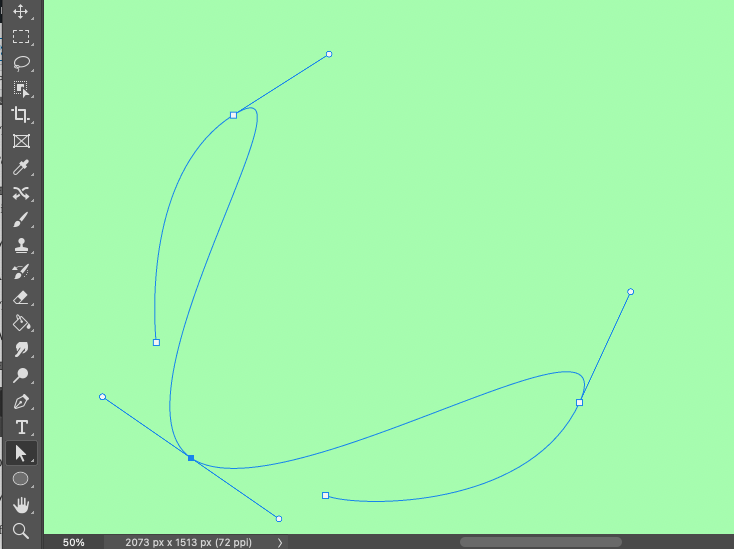
For example, in the image below, the anchor point’s handlebar was swung upwards.
Then, the anchor point was again moved to the bottom left-hand corner.
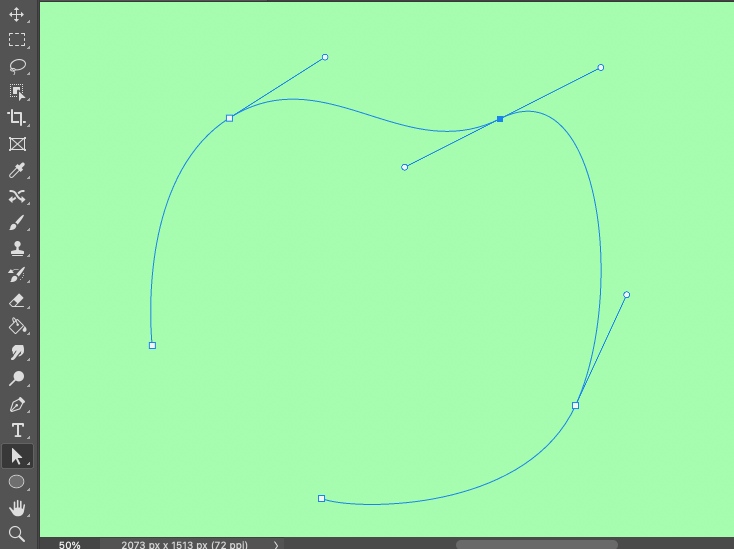
As you can see, the path’s curve in this image has adapted to the position of the handlebar.
Move all Anchor Points Using the Path Selection Tool
Sometimes, we don’t need to move just one anchor point; we want to move all the anchor points.
When we want to move an entire path, we use the Path Selection tool.
Select the Path Selection tool from the toolbar.
Or click A for the keyboard shortcut.
Click on any section of the path, and then drag the path in its entirety to a new position.
The Path Selection tool will only move a path; it will not allow you to resize or rotate the path.
Moving a Vector or Text Shape’s Anchor Point
Vector shapes and text have anchor points that are used to rotate and reposition them.
Designers use the shape’s central anchor point as a guiding point when designing icons and logos.
It’s most useful when creating fine, detailed work where precision matters, helping position items exactly where they’re needed.
Follow the steps below to learn how to move a vector shape or text’s anchor point.
Step 1 – Select the Shape Layer
Head to the Layers panel and click on the shape’s layer to activate it.
Step 2 – Activate the Transform Options
Sometimes, the vector shape’s anchor point is not visible, but that’s okay because we know how to find it.
To make an anchor point visible, we need to open the Transform options.
Head to the main menu and click Edit > Free Transform Path.
Or, for the keyboard shortcut, click Command + T (for Macs) or Ctrl + T (for Windows).
Step 3 – Check the Transform Box
The Transform options bar will open above the canvas.

Check the box beside the first icon in the options bar – a small white square bordered by eight squares.
Once this is checked, a blue bounding box will appear around the shape. The shape’s anchor point will appear at the center of the shape.

Step 4 – Move the Anchor Point
You can move the shape’s anchor point by clicking on it and dragging it into a new position.
Below, you can see the anchor point was repositioned to the bottom left-hand corner of the square shape.

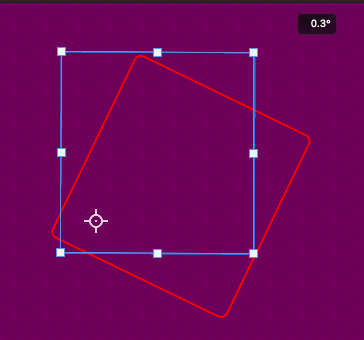
When you rotate the square, it swivels around the anchor point.
In the image below, the square was rotated to the right-hand side. As you can see, the square swiveled using the anchor point as its central axis.
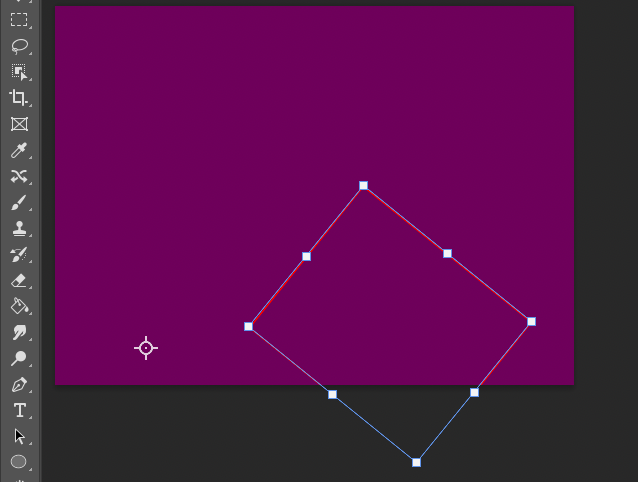
Don’t be restrained by the borders of a vector shape. If it suits your editing purpose, you can drag the anchor point outside the shape’s border.
As you can see in the image below, the anchor point was moved outside of the shape’s edges.

The shape will now twirl around the newly positioned anchor point.
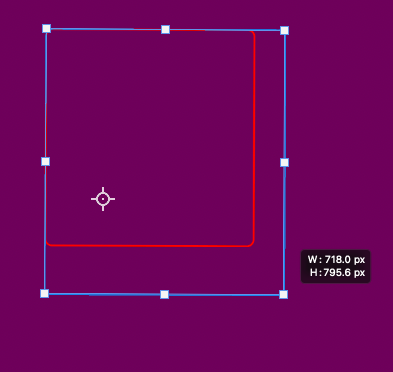
Don’t confuse the squares on the bounding frame with anchor points. They are handlebars, not anchor points; you can not move them independently of one another to distort the shape.
However, you can drag them to alter the size of the shape.
As you can see in the image below, the bottom right-hand handlebar was dragged down to enlarge the square.
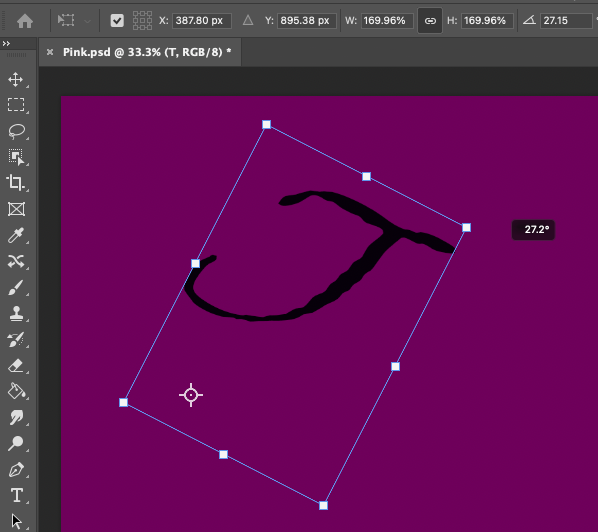
Photoshop text also has a central anchor point, which can be moved the same way as above.
Simply click on the anchor point and drag it to its new position.
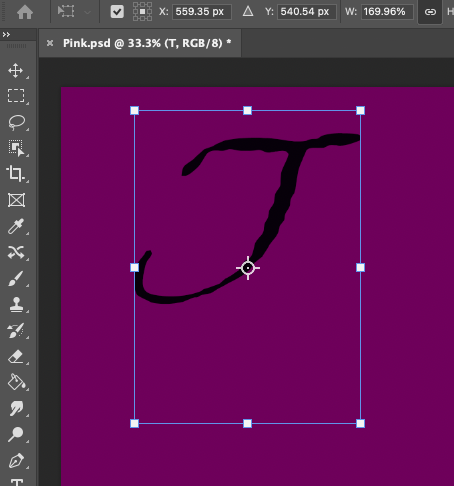
You can then use the anchor point as the central axis when rotating the text.
We hope you enjoyed the tutorial and have fun using your new editing skills.
If you enjoyed this tutorial, you might want to check out this one next – How to Align Layers in Photoshop.
FAQ
Why can’t I move my Anchor Point in Photoshop?
There are a few reasons why you might not be able to move your anchor point in Photoshop.
If your anchor point is not active, you will not be able to move it.
When the Pen tool is not active, you will not be able to move an anchor point.
Check that you’re holding down Command or Ctrl, not the Alt key. The Alt key disables anchor points from moving.
How do you manipulate Anchor Points?
You can manipulate anchor points using the Convert Point tool.
Select the Convert Point tool from the toolbar, then click on the anchor point you wish to manipulate.
The anchor point’s handlebars will appear. Drag the handlebars to manipulate the anchor point.
How do you move the Anchor Point in the Pen tool?
To move the Pen tool’s anchor points in Photoshop, you can use the cursor or the keyboard.
To use the cursor, hold down the Command key (for Macs) or the Ctrl key (for Windows) while clicking on the anchor point and drag it into its new position.
Use the arrow keys if you wish to move an anchor point using the keyboard.
How do I move only an Anchor Point?
To move only an anchor point in Photoshop and not the entire path, activate the Pen tool.
Hold down the Command key (for Macs) or the Ctrl key (for Windows).
Now click on the anchor point you wish to move and drag it into its new position.
How do I find a vector shape’s anchor points?
To find a Vector shape’s anchor point, click Comand + T (for Macs) or Ctrl + T (for Windows).
This will open the transform options; in the Options bar, check the box beside the first icon, a square formed by eight squares.
The vector shape’s anchor point will appear.


