





The No-Studio Photoshoot: A Review of Nightjar AI for Consistent E-Commerce Catalogs
Nightjar AI lets you create consistent product photography at scale with ease. Learn more in our Nightjar AI review.
AI | Software | By India Mantle | Last Updated: July 12, 2026
Shotkit may earn a commission on affiliate links. Learn more.
The last product photoshoot I did involved weeks of work. I had to meet with my client to understand their aesthetic, draw up mood boards, find the ideal shooting location, rent props, and wait for a day when the weather conditions were just right before spending an entire day actually taking pictures.
Imagine if you could condense that entire process into a few quick clicks, generating enough images to fill a product catalog in minutes.
That’s what Nightjar AI aims to deliver, making it one of the most ambitious AI-powered photography platforms I’ve used.
Read on in my Nightjar AI review to learn what this platform is and exactly how it works.
What Does Nightjar AI Offer?
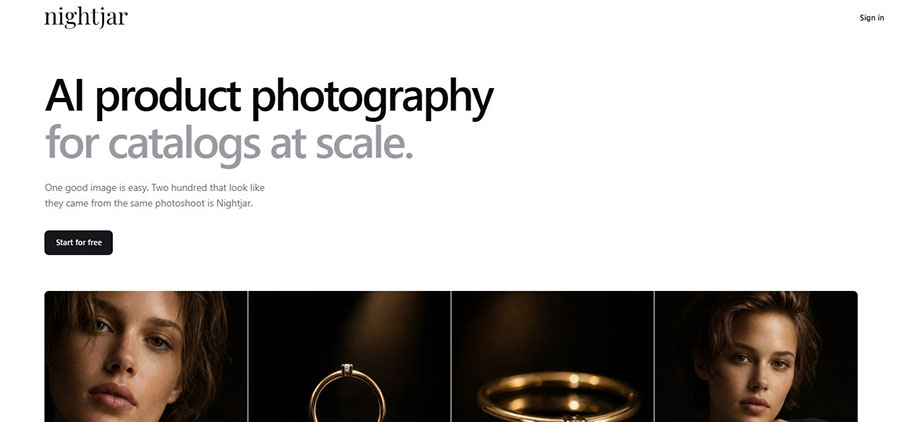
Nightjar is an AI-powered product photography platform, primarily aimed at the e-commerce, retail, and marketing sectors. It essentially allows users to generate entire product photoshoots without the need for any real-world models, sets, props, or equipment.
Imagine a small startup fashion brand has just designed a new handbag, for example, and wants to show it off online. However, the brand doesn’t necessarily have the time, budget, or resources to hire a top model and do a traditional shoot, with all the complexities that entails.
Instead, it can load Nightjar, upload a few pictures of the product, and generate a shoot from scratch.
It can pick from dozens of AI models, choose from a wide range of settings, set the tone, style, and mood, and generate hundreds of images literally in no time.
This, in a nutshell, is what Nightjar does, and it makes the entire process incredibly easy.
It offers a minimalistic interface and clear menu options that allow users to select the “ingredients” of their shoots and enjoy consistent, professional-level results most straightforwardly.
The key word there is “consistent.” Plenty of other generative AI tools can make photoshoot-style images, but they’ll often mix things up from one photo to the next, like changing the model’s face or the background scenery; Nightjar keeps all elements the same to deliver the most realistic results.
As a result, this platform has already attracted thousands of users and is proving particularly popular with emerging e-commerce brands and retail outlets. Many of those brands have praised the platform’s usability, elegant interface, and the high quality of the images it generates.
Key Features of Nightjar AI
Unlike other AI platforms that offer dozens of different features and diverse toolkits, Nightjar AI is exclusively focused on generating product pictures, either individually or in photoshoot-style batches. Here’s a closer look at how it all works, one step at a time.
AI Photoshoot Generation
As mentioned, the core functionality of Nightjar AI is product photoshoot generation. This platform can take a single picture of a product and extrapolate that into dozens or even hundreds of stylish, lifelike images, in accordance with the user’s demands.
I put it to the test myself, so I could show you exactly how the process works and what kinds of results you can expect when you work with Nightjar.
First, let’s take a look at the interface you’ll see when you log into this platform. As you can see, it’s remarkably simplistic.
There aren’t dozens of menus or buttons to bamboozle you, nor does this platform bombard its users with a constantly scrolling feed of content.
Instead, it provides a very clean UI, with all the features you need listed along the left side of the screen and a central Create/Edit tab where you can upload pictures of whichever products you want to work with.
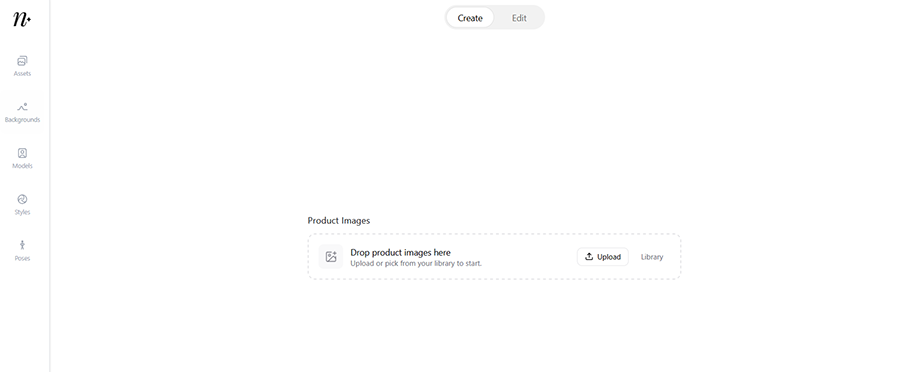
For this review, I used a simple picture of a stylish pink handbag. I dragged and dropped my image into the upload box, at which point the interface automatically moved into the “Photoshoot Generation” menu, where I was able to pick and choose the key ingredients of my shoot.
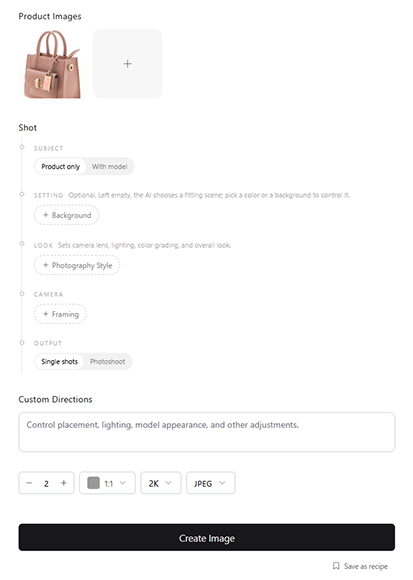
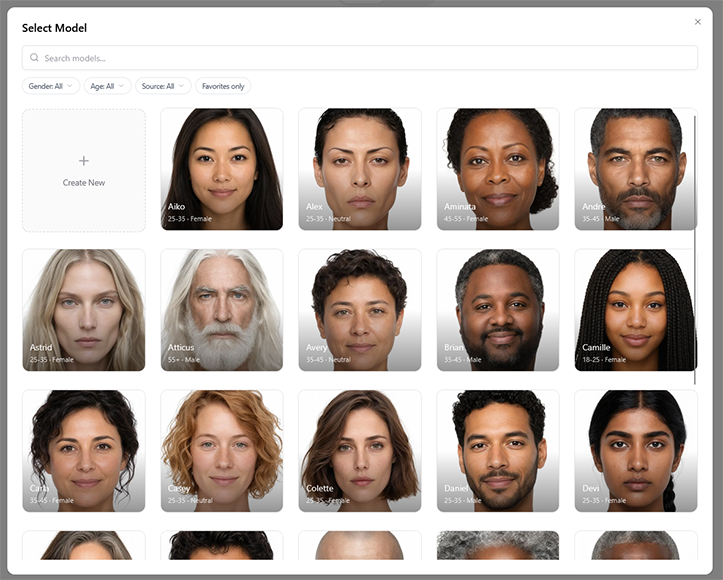
As you can see in the screenshot above, Nightjar AI lets me either keep the focus exclusively on the product itself, or incorporate a model. If I opt for the “With model” option, I can choose from a wide range of dozens of different models of different ages, genders, and ethnicities.
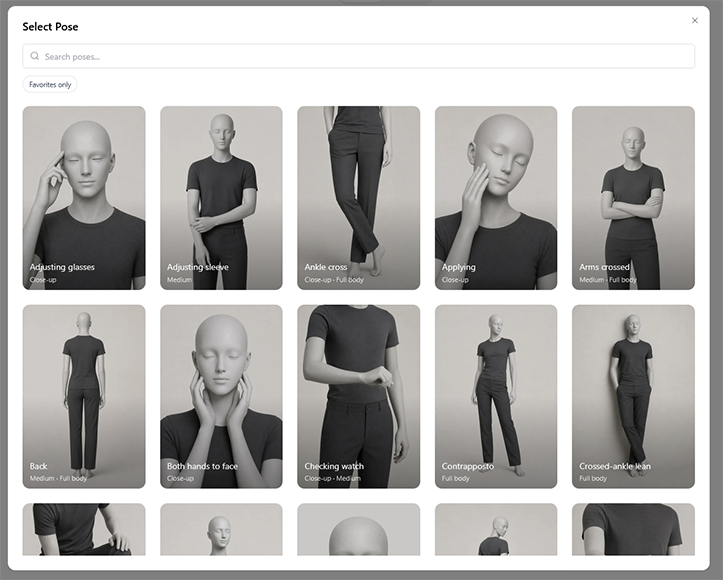
After selecting my model, I was also offered the option to pick a pose for them. Again, there are dozens of options here, including the typical fashion shoot-style poses you’d expect to find in lifestyle magazines, along with quirkier and more out-of-the-box ideas.
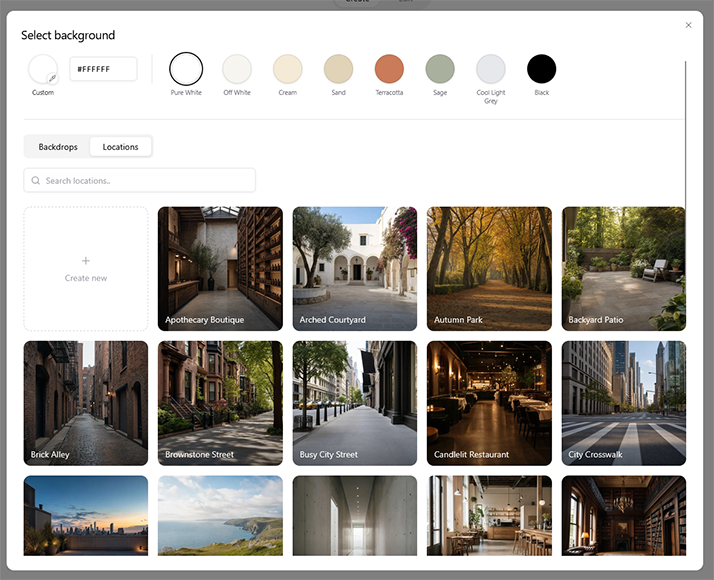
Next, the platform let me pick my background. The number of options available is extraordinary; I could elect to stick with a basic plain background, or I could choose from all sorts of settings, ranging from Parisian-style coffee shops to New York-style city streets, beaches, forests, luxurious homes, and more.
The choices don’t end there. Next, Nightjar let me pick my desired “Photography Style.” I could select options like “Candid Outdoor” or “Cottagecore,” along with dozens more, with helpful samples provided to make it easier to understand how each style differed.
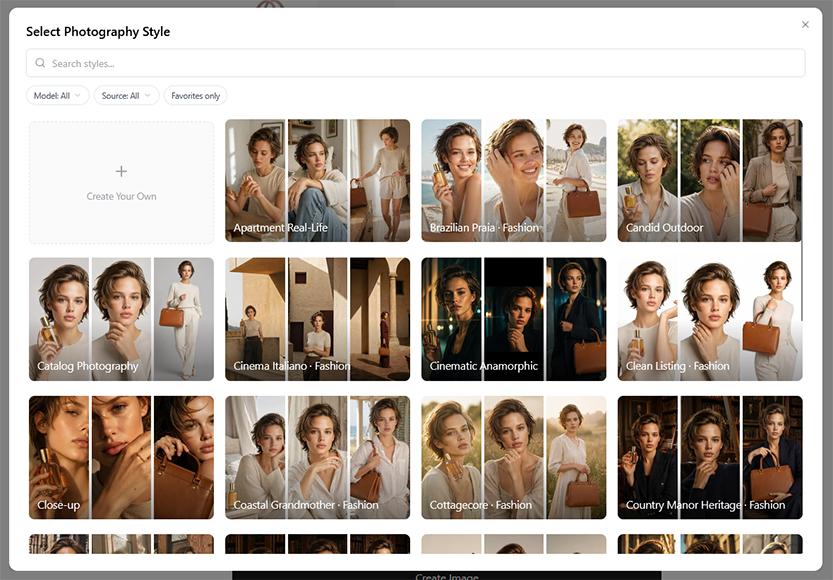
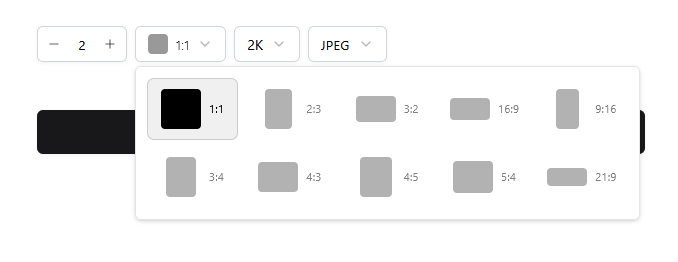
Once I’d chosen my model, pose, setting, and style, I could also decide how many photos I wanted to generate, the aspect ratio of my images, the quality, and the format. Finally, with all my settings customized, it was time to generate my images.
For this initial test, I selected the “Alex” model and a New York street as the setting, with a “Candid Outdoor” photography style. In less than a minute, the platform generated two pictures – you can see my favorite of the pair below.
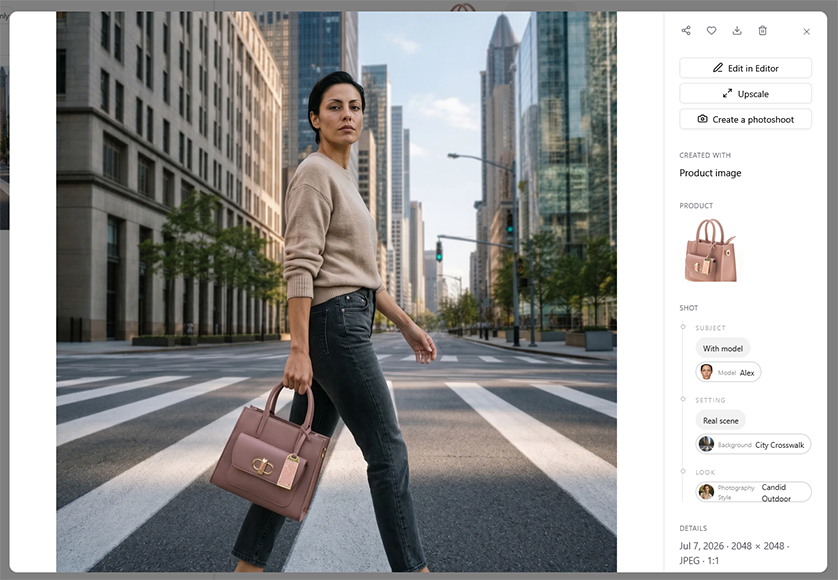
Capturing that kind of picture in real life could involve hours or even days of effort. On Nightjar, it took me less than 10 minutes, and I was thoroughly impressed with the exceptional level of control the platform provided, letting me pick and adjust so many different factors to get the aesthetic I wanted.
More: Guide to Candid photography
I then decided to mix things up, using the same product but switching the model to an older woman and the setting to a seaside scene.
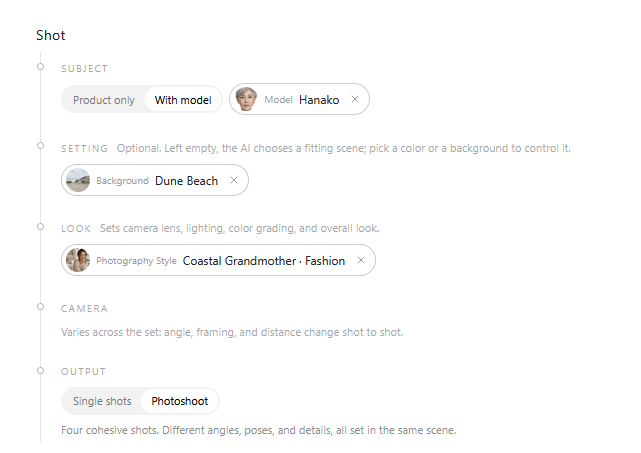
Since there were more images to generate, the process took a little longer. However, after two to three minutes of processing time, I was presented with the following four photos.
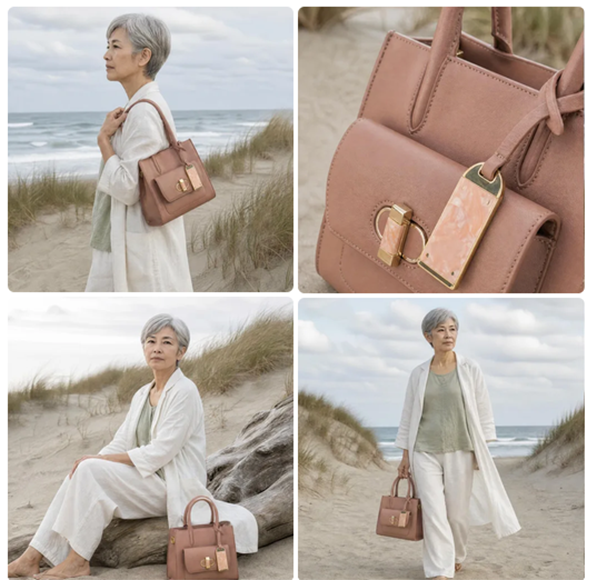
Again, the level of detail here is remarkable. I didn’t need to type in any kind of complicated prompt to tell the AI how to frame these shots. I simply selected my desired model, setting, and style, and let it do the rest, and the results were fabulous.
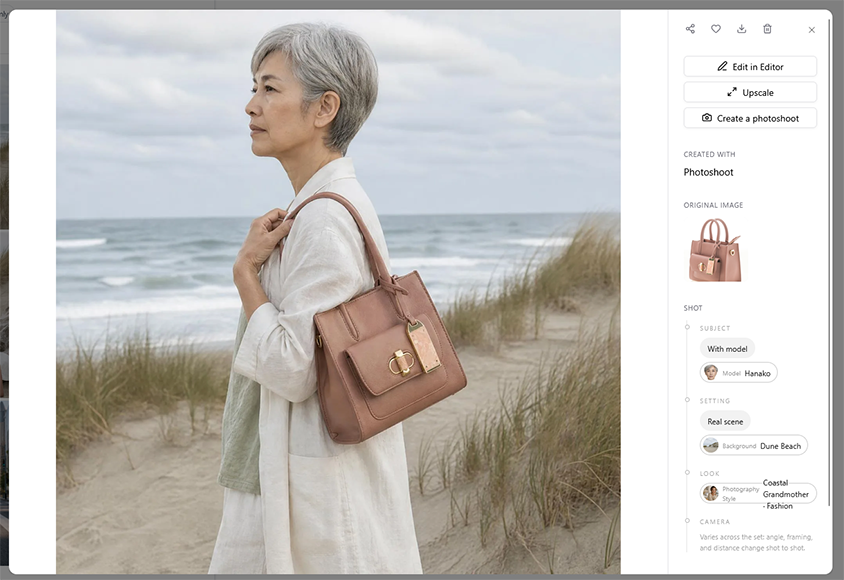
Nightjar also offers the option to expand any individual image into its own separate photoshoot. I can simply select my favorite photo and click the “Create a photoshoot” button to make more images in that same style.
Element Generation
As you’ve seen above, Nightjar offers a deep catalog of preset elements to choose from when constructing your photoshoots, including dozens of models, backgrounds, and photography styles. However, you don’t necessarily need to use these pre-existing templates; you can add your own.
Clicking on the “Backgrounds” tab, for example, offers the option to “Create New” background.
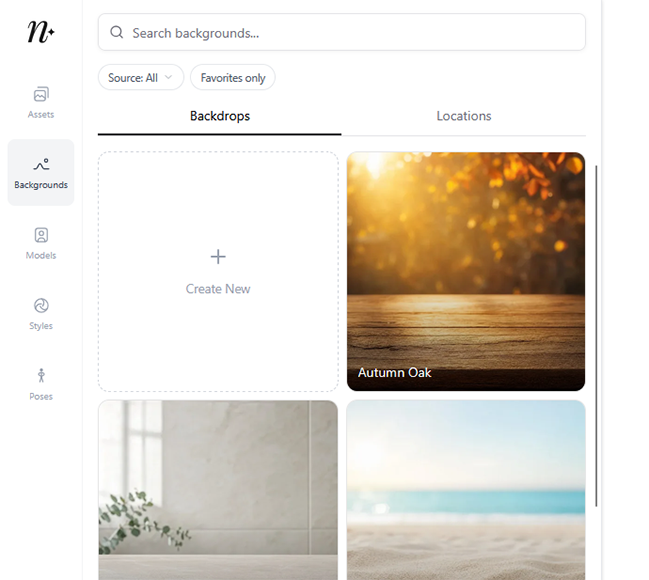
By clicking this button, I’m presented with the option to either upload an image of my chosen backdrop or location, or use AI to generate one from a simple text prompt.

The same system also applies to models. I can click on the “Models” tab, select “Create New,” and then upload up to five source images of a real-world person to use as a model in my future Nightjar photoshoots.
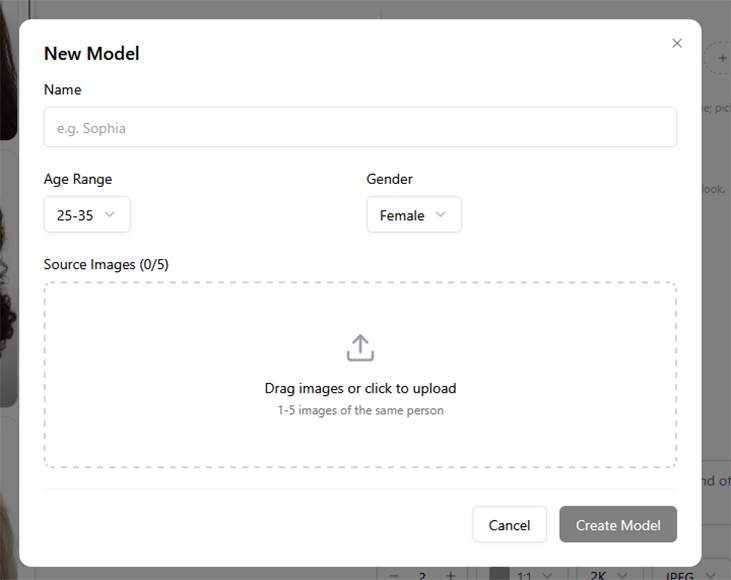
The “Styles” and “Poses” tabs also offer the ability for users to create and add their own unique elements, which they can then store in their personal asset libraries for future use.
Built-In Editor
Nightjar also has editing functionalities built right in, so you don’t necessarily need to download and move your images into a separate piece of software if you want to make some changes.
You can simply select any image you want to adjust and click the “Edit” option.
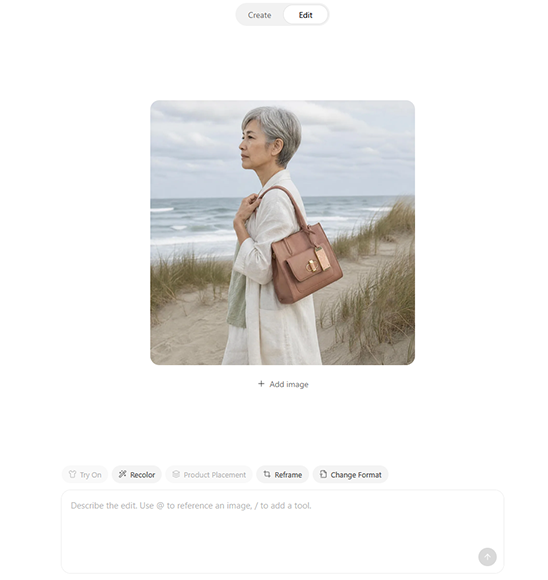
Via the “Edit” tab, I was able to change my model’s outfit, recolor the image, and change its framing and format. I could also type in an AI prompt for more specific adjustments, like changing something about the background or the facial expression of my model.
It’s not the most in-depth editor I’ve ever worked with, and I imagine some users may still want to port their pictures into another tool to make more precise changes. However, it’s good to see that Nightjar offers the ability for users to make quick adjustments.
Recipes
Another handy feature you might miss the first time you use Nightjar is the “Recipes” feature.
How this works is simple: When you choose the various options for your photoshoot – like the setting, model, and style – you can click the small “Save as recipe” button just below the “Create Photoshoot” button to save those settings to use again in the future.
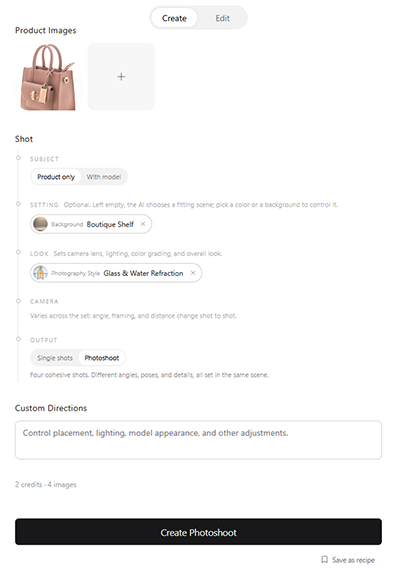
This is a handy way to ensure that your photoshoots remain consistent, helping you establish a clear and distinct style if you’re building an e-commerce catalog, for example, or want to have the same style when marketing different products.
However, I personally feel that Nightjar’s developers should make the button a little larger or more prominent, since it’s so easy to miss.
Pricing

Pricing can sometimes get confusing on AI platforms, with multiple plans and pricing tiers and certain features locked behind paywalls. Thankfully, Nightjar keeps things simple; it offers three separate plans, and you get full access to the platform’s features no matter which one you choose.
The only difference between the three is how many images they allow you to generate:
- Studio: This provides 150 generations for $25 per month.
- Studio+: You receive 400 generations for $50 per month.
- Ultra: This plan is more flexible than the others; pricing ranges from $100 to $350 per month, giving you anywhere from 800 to 2,800 generations.
All plans are billed monthly, not annually, and users can cancel any time they wish. There is also a limited free plan that gives you a handful of generations, which can be helpful for those who want to test out the platform’s capacities before deciding whether or not to invest in a premium subscription.
Overall, I feel that the pricing for Nightjar is relatively fair. It’s more expensive than other AI generation tools I’ve used, but it’s also much more professional than many of them, producing exceptionally high-quality results and offering such a pleasant, intuitive user experience, too.
I also appreciate the fact that Nightjar AI’s developers didn’t lock certain features behind higher-priced plans; they let everyone, from Studio to Ultra members, enjoy the same great features, like high-resolution exports and the option to save and reuse as many “Recipes” as they like.
The Final Verdict: Is Nightjar AI Worth Using?
Having done multiple product photoshoots in the past, I know how much hard work goes into them. They can be exhausting experiences, and there are so many variables you have to control to capture the perfect shots.
For brands, meanwhile, conventional photoshoots can be quite pricey endeavors. That’s not such a problem for large and established companies with suitably sizable marketing budgets, but it can be a real issue for smaller companies to cover the costs.
Nightjar solves all of these problems, making product photoshoots far easier, cheaper, and much more efficient to organize. They turn weeks of work into a few quick clicks, and while AI images can never completely replace authentic photos, the quality of Nightjar’s pictures is highly impressive.
There are a couple of flaws to point out. When you’re generating large batches of photos, for example, you may have to wait a little while for them to appear. Additionally, it can take some time to figure out your favorite combinations of poses and styles.
Overall, though, the positives of this platform far outweigh any minor negatives you might encounter. It’s fairly priced, incredibly easy to work with, and it produces the kind of high-quality images any brand would be proud to share on their websites, marketing campaigns, or social media posts.

As the General Manager of Shotkit, India Mantle brings with her a lifelong love for photography that she developed during her childhood, watching her father document their family moments with his Nikon EM. In her free time, you find her enjoying the awe-inspiring natural beauty of her home, Northern Rivers, Australia.
👋 WELCOME TO SHOTKIT!
🔥 Popular NOW: