


Peak Design Capture Clip Review (Camera Holder for Backpack)
The Peak Design Capture Clip keeps your camera or lens handy while on the move. It works on everything from binoculars to DSLRs and action cameras. Check the review!
Peak Design Strap Reviews | Photography Gear Reviews | Strap Reviews | By Teryani Riggs | Last Updated: April 24, 2023
Shotkit may earn a commission on affiliate links. Learn more.
As an avid backpacker, I'm constantly looking for better ways to carry my camera while on the trail.
Most of my backpacking packs require me to take off the pack to access my camera, and carrying it by hand, on a camera strap or on a chest harness gets a bit old after a while (especially when I used to shoot with a DSLR).
A few months ago, I discovered Peak Design's Capture Clip Version 3 and decided to give it a try.
Useful, affordable and simple to operate. Great way to carry a camera while hiking or shooting outdoors.
I really love Peak Design gear, its business model, its designs, and most of all, the quality of everything they make.
So even though I was a bit dubious – would I really want to carry my camera on my shoulder on a holster clip?
I gave it a go, and I'm so glad I did. (We even included it as the best camera clip for backpacking.)
Here are the results of my real-world Peak Design Cature Clip test.
Design of the Peak Design Capture Clip V3

- Compact and light
- Secure attachments
- Fast to attach/remove camera
- Great solution for carrying camera on belt
- Works with lenses and binoculars too
- Affordable (great value)
- Tight fit on very padded or wide backpack straps
- Leaves camera exposed to the elements
It turns out that the Capture Clip is the original Peak Design product. Then traveler Peter Dering went a trip, got frustrated with carrying his DSLR, and then went home and quit his job. Ten months and a Kickstarter campaign later, the first Capture Clip (and consequently Peak Design) was born.
This was all back in 2011. These days we're on Capture Clip V3, a much sleeker and more streamlined version of the original clip.
You can just buy the clip, buy the clip with the standard mount (like I have), and/or choose from different accessories, including kits that work with lenses, binoculars, and action cameras/point-and-shoots (including GoPros) – see the whole line up of gadgets here.
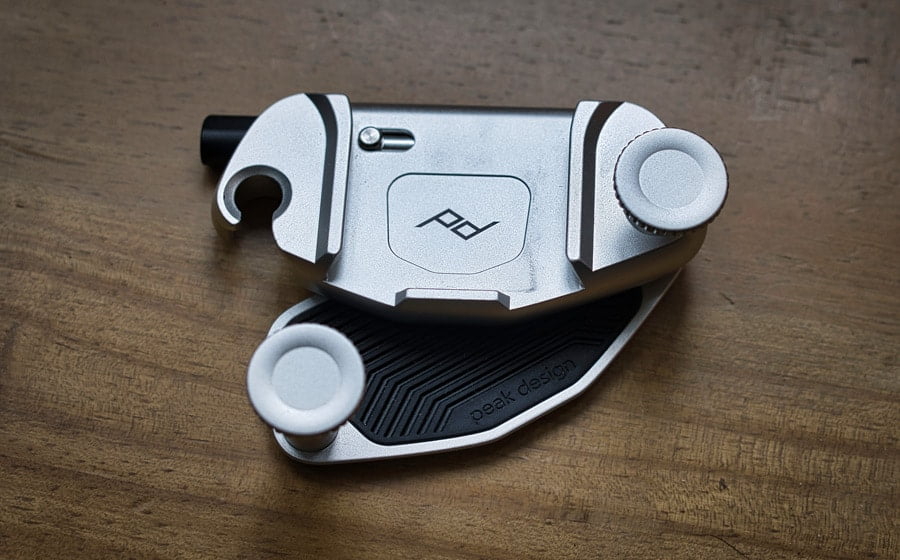
My Peak Design Capture Clip came with a standard Arca-Swiss-compatible plate, 2 hand-drive screws, 2 4mm hex screws, a hex wrench and a microfiber pouch to store everything in.
The Capture Clip itself is made of weatherproof, rust-resistant aluminum and weighs just 3 ounces (84 g). It seems pretty heavy at first, but once I was wearing my pack I didn't really notice it.
The standard camera plate is a bit lighter than the clip (0.5 oz/14 g), though heavier than my tripod plate. It screws in with the hex key, which comes with it.

Image: Marc Bergreen
One cool thing about the standard plate is that it has four anchor points. This gives your camera four-way entry into the clip. There's no front or back – you can't get it wrong, making it an ideal camera harness for hiking or outdoor activities when you need easy and quick access.
Another cool thing is the safety lock is on the button of the Peak Design Capture Clip. A simple 90-degree turn locks or unlocks the clip. (This is much more streamlined than the bulkier safety lock of versions 1 and 2.) There's a hash mark to show whether you're open or closed (they're aligned when open).
As far as where to put it, that's really up to you. Peak Design recommends the right shoulder just above the sternum on a backpack and just off to the right side on the belt, but really, you can place it anywhere.
It'll fit most straps up to roughly 2.5-3 inches wide and 0.87 inches thick, depending on their rigidity. That gives you a lot of options.
Just note, for one-handed access keep the quick release facing down. On a backpack strap, face it inward.
As a camera holder for backpack users, I can see the Capture Clip being very popular.
Key Features of the Capture Clip
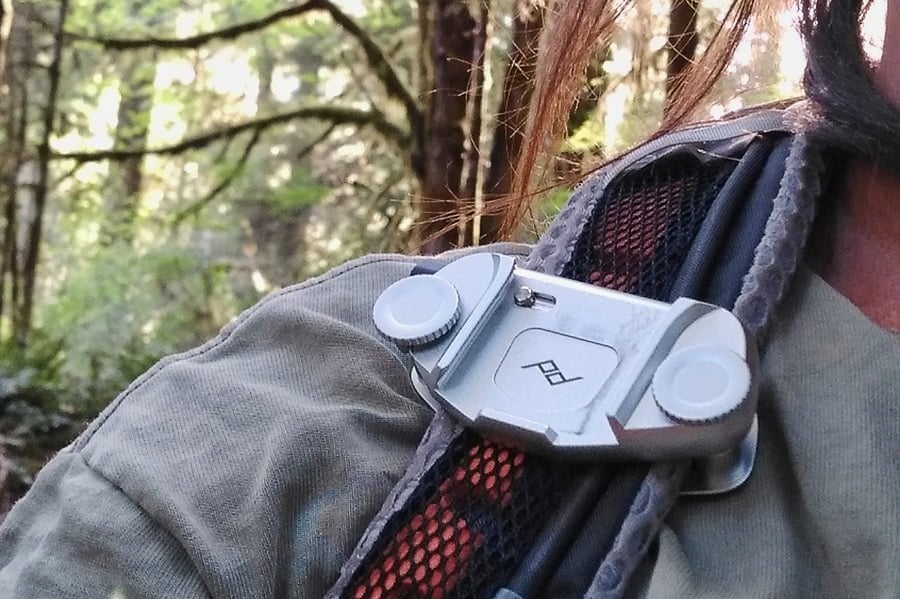
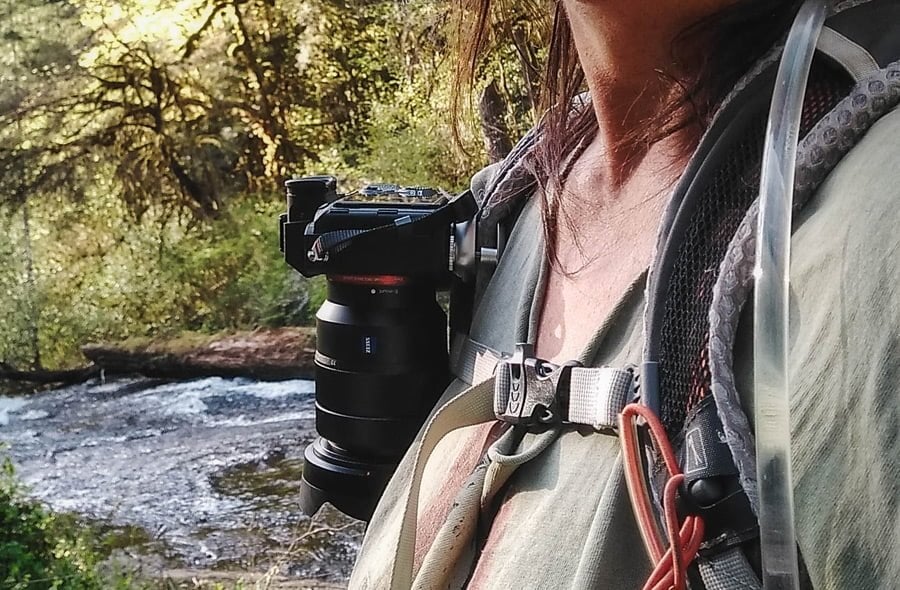
When attached to your backpack strap, you hardly notice the Capture Clip is there.
The Peak Design Capture Clip is designed to be light, ergonomic, and to provide a handy way of carrying your camera /lens/binos on the go.
It also has these features:
- Easy on/easy off (one-handed with practice)
- Rust-proof aluminum
- Rubberized backplate to prevent scuffing
- Hex screws for more permanent installations
- Quick release button with security lock
- Can hold up to 200 lbs (90 kg)
- Version 3 is smaller, lighter, and more secure than previous versions
- Can be used with DSLRs, mirrorless cameras, action cameras, point-and-shoots, lenses, and binoculars
- Lots of options for placement – it will work on just about any strap no more than 2.5 inches wide and 0.87 inches thick
You may find a slightly cheaper earlier version of the Capture Clip, but I highly recommend you invest in the Caoture Clip V3 – it's smaller, lighter, more robust, grippier, doesn't get stuck and has more secure bolts.
Installation and Use
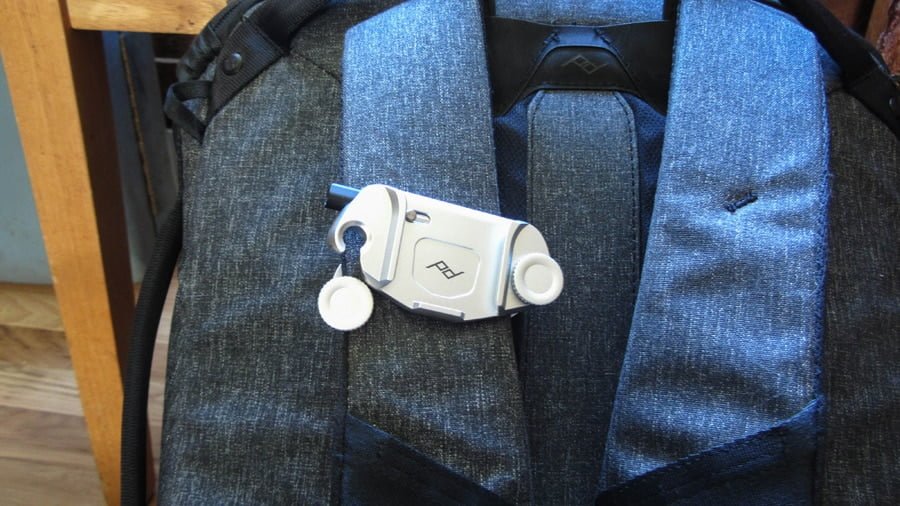
The thumb screws aren't really long enough for the Peak Designs Everyday Backpack I have. The hex screws would have been better.
The packaging of the Capture Clip doesn't really come with a lot of instructions. There were a number of things I didn't realize as a result.
The first was what the hex screws were for. The thumb screws (shown above) seemed pretty self-explanatory, no? Well actually, no. Apparently the thumbscrews work better on belts and thinner straps in general. For thicker straps you'll want to use the longer hex screws.
If you try the thumbscrews on your pack, you'll probably end up wondering (like I did), why the clip is so hard to get on. The photo above is case in point – I'm using the Peak Design Everyday Backpack and the Clip doesn't quite fit. Switch to the hex screws and voila!
One thing with the hex head screws, though, is you won't be able to feel when they're tight. You have to check manually by seeing if the Capture Clip is secure. If it moves up and down on your strap you clearly have a bit more tightening to do. If it doesn't budge, you're good to go. Any more tightening and you might mess with your strap.
Even with the hex screws, though, I had a hard time getting the Capture Clip on my backpacking rucksack. It did, however, work fine on my Osprey day pack.
The Peak Design support page mentions that you can “pinch the foam and squeeze the clip on” for thicker straps, but I'm still dubious as to whether I can get it on my multi-day packs.
It's best to start with two hands when you're first starting out.
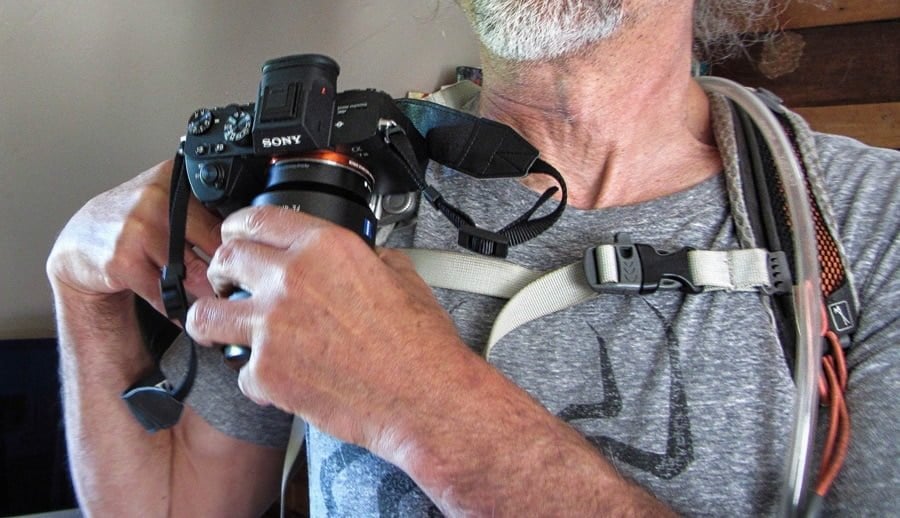
It may not seem like it, but it's actually pretty easy to get your camera in and out of the clip one-handed. It takes practice and you need to make sure the quick-release button is facing in, but it's definitely doable.
When you're first getting started, though, it's best to use two hands. (When we first tried it out, we had the button on the outside and it definitely needed two hands!)
Putting the camera onto the Capture Clip and taking it off is a breeze, especially with the standard 4-way plate. It goes on any which way and when you hear the click, the camera is secure.
While on the trail, I never once felt like my camera was insecure with the the Capture Clip. Sure, I was nervous at first – it seemed like an odd way to carry a camera – but it held and I quickly learned to love it. I didn't even notice the safety lock on the quick release button.
If you're worried, you can always activate it. Simply turn it 90 degrees and the button will be locked. Just remember to release it before trying to get your camera out of the clip.
Also, there's supposed to be a little bit of play between the camera and the clip. Without that play it would be impossible to get your camera in or out.
Tips and Tricks
- The Capture Clip, when used on the belt, can provide a super-stable lens changing platform. Simply put the camera on vertically (it'll look “sideways”). The Capture Clip will hold it in place perfectly for your lens change.
- If you're using smaller prime lenses, consider putting your camera on vertically as well. This will make it so the weight is pointed down, keeping the camera much more secure.
- It's a lot easier to carry a larger camera and/or large lens setup when using the Pro Pad. (See below.)
Peak Design Capture Clip Accessories
Various accessories allow you to carry more than just your camera with the Capture Clip.
Peak Design's Capture Clip has been around long enough to have a number of accessories available for it. The downside is that they're all pretty pricey. The upside is that they're all exquisitely designed.
First of all, you have the two camera plates: the standard ARCA Swiss compatible plate and the dual plate that's Manfrotto (RC2) compatible. (Because of the geometry, this one is only a two-way entry, not a four-way.)
Beyond this, there are three different accessory kits, all sold separately:
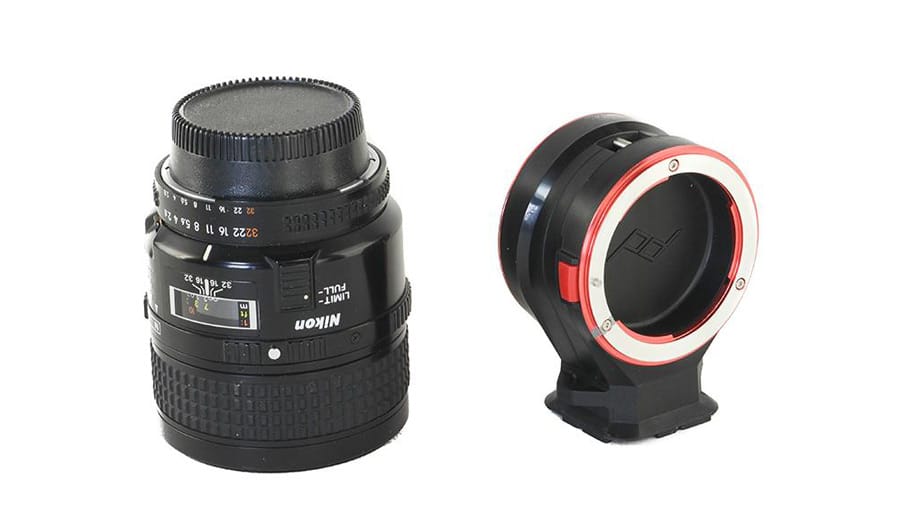
- The Bino Kit – for binoculars. Super handing for birding or hunting.
- The Lens Kit – supports Nikon, Canon, and Sony lenses – makes a camera lens belt holster.
- The POV Kit – designed for GoPros and point-and-shoot cameras. (This one has unfortunately not been optimized for V3 yet. They're working on it.)
There's also the aforementioned Pro Pad, which gives way more stability. It's meant for pro photographers (hence its name) but I haven't had a chance to try it out yet. Anyway, I'm shooting on a Sony A7III, so I'm not really carrying that much weight.
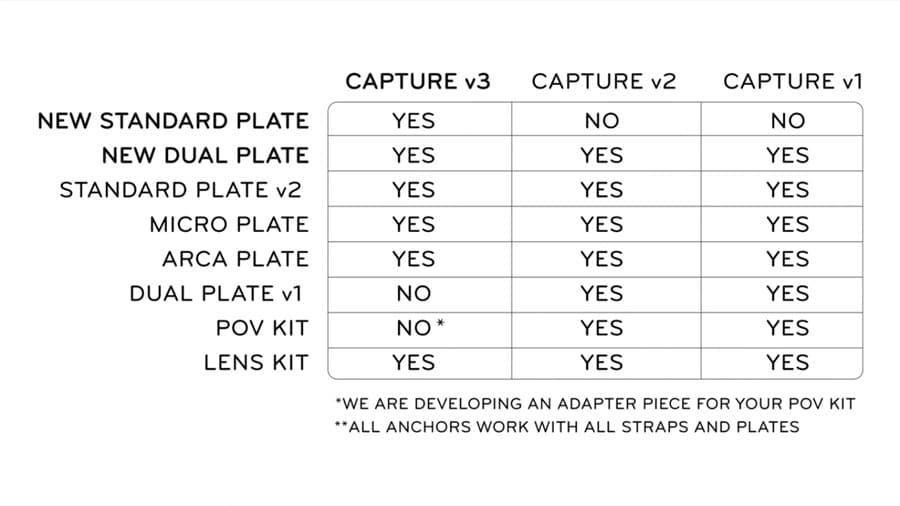
If you have a previous version of the Capture Clip and are wondering if it's backwards compatible, the answer is most likely yes…with a few exceptions as shown in the table below.
Interestingly, you can see the differences between Peak Design Capture v2 vs v3 gave us some things while taking others away.
You can check out all the accessories for the Capture Clip to find out more about what works with what.
There are a few things I didn't like so much about the Capture Clip.
- Neither of my travel tripods use an ARCA plate, so I have to change out. That means I have to carry around the hex wrench. A bit of a bummer for sure.
- The Capture Clip and its accessories are expensive. Granted, we get what we pay for here, but it's a bit much.
- It doesn't fit on rigid, wide straps (i.e. my main backpacking packs). That's another real bummer for me, as that was my primary reason for purchasing it.
- If you're shooting with a Fujifilm X-T1, you have to remove the quick release plate to get to the battery.
Granted, these minor niggles are all pretty personal – I can see most photographers being completely satisfied with the Capture Clip, but I thought I'd mention them anyway.
Peak Design Capture Clip Review | Final Words
The Capture Clip V3 works perfectly on my Osprey backpack.
I didn't really expect to like the Capture Clip, but just a little time in the field and I found that I loved it.
It's pretty much what I was looking for as far as backpacking goes. No more carrying my camera in hand or using a chest harness (which I find uncomfortable when I have a fully-loaded backpacking pack on as well).
The Peak Design Capture Clip is light, easy to use, keeps the camera/lens/etc. at the ready, and works on a wide variety of straps. It's one of the best camera mounting devices I've used.
I love attaching it to my Osprey backpack on long day treks. I'm sure I'll find a way to get it onto my larger pack too. Just have to play around with it a bit more, I suspect.
Highly Recommended, and a steal for the price. Don't see any need for a Peak Design Capture v4 – this one is close to perfect.
Useful, affordable and simple to operate. Great way to carry a camera while hiking or shooting outdoors.

Teryani Riggs (they/them) is an adventure, who loves all things wild and free. Teryani can often be found in the midst of a social/eco-justice campaign, hiking through wild backcountry, or hitchhiking around the world listening to other people’s stories. While their focus has historically centered on landscape, travel, and wilderness photography, they’ve also been hired to shoot genres as varied as historical fiction reenactments in the studio to product and food photography.
5 Comments
Leave a Comment
👋 WELCOME TO SHOTKIT!
🔥 Popular NOW:

Very well written, very informative, thanks for sharing!
It sounds like the Capture attachment is compressing the foam on your Osprey Stratos 34 strap. Over time, foam can flatten from constant pressure, and it might not fully expand back. Consider adjusting the Capture’s position to reduce pressure on the foam. If the foam doesn’t recover, you might need to contact Osprey for replacement options. As for Globe SIM registration, make sure you’re following the steps on their app or website for a smooth process.
Hi, thanks for the review. Have you found it damages your osprey straps over time? I have had one on my Stratos 34 strap for about a year and just checked… the foam underneath the Capture was crushed and much flatter than the rest of the strap now… I’m still waiting to see if it ever expands back at all.
I haven’t tried mine on anything heavier than my Osprey Stratos 36.
I have found one downside, though–the clip is a lot harder than a backpack strap, causing tenderness on my collarbone after a long hike. The “pad” helps a little bit but it’s not actually a pad, it doesn’t do much in this case.
It’s still **far** better than anything else I’ve seen. I just wish there was some way to mount it closer to the center of the chest, or else a true pad to conform to the body better.
Very well written, very informative, thanks for sharing!