


How to Whiten Teeth in Photoshop Elements
Learning how to whiten teeth is useful for any portrait photographer. While it won't be necessary for every photo, here's how to do it with Photoshop Elements.
Shotkit may earn a commission on affiliate links. Learn more.
Whitening teeth using Photoshop Elements may seem complex, but it's actually really easy.
In this tutorial, I'll show you a quick and simple way to make your subject's teeth shiny and white.
I use Photoshop Elements to whiten the teeth of any of my portrait photography subjects who request it.
Obviously, you won't need to whiten people's teeth in every photo, but it's nice to know how it can be done using Elements.
(You can also whiten teeth in Photoshop, using similar steps.)
Let me show you the steps.

Download the latest version of Adobe Photoshop Elements to follow along with this simple tutorial.
Understanding the Whiten Teeth Tool in Photoshop Elements
A common manipulation you'll do on your portrait images will involve making teeth white.
Photoshop Elements provides several tools to make your teeth whitening journey less challenging.
The whiten teeth tool eliminates all the complexities involved in the process. From selecting the teeth, and identifying the color, to providing options to change the teeth's color.
You can also consider using the Lasso Tool to adjust the Hue/Saturation in your layers, which will brighten and whiten your teeth perfectly.
(See how to use the Photoshop lasso tool for more tips.)
Luckily, the teeth whitening technique in Photoshop Elements is not that different from Photoshop.
How to Whiten Teeth in Photoshop Elements?
Making teeth white is straightforward when using Photoshop Elements.
This section explains the best technique to consider when working on Photoshop Elements to whiten teeth.
1. Open Photoshop Elements and Select the Images
The first step is opening the Elements platform on your device by clicking its icon.
Select Open and Pick the images you want to work on from the File menu. Identifying these images before starting the design process would be wise to save you time.
2. Prepare the Image for Teeth Whitening
An image analysis before whitening teeth is necessary to identify the best approach to transform the picture.
Elements like the number of subjects involved are crucial as they determine the process's complexity.
Images with more than one subject will require you to go through the teeth whitening more than once for quality results.
It would help to work on the multiple subjects separately to avoid altering the original image when making adjustments.
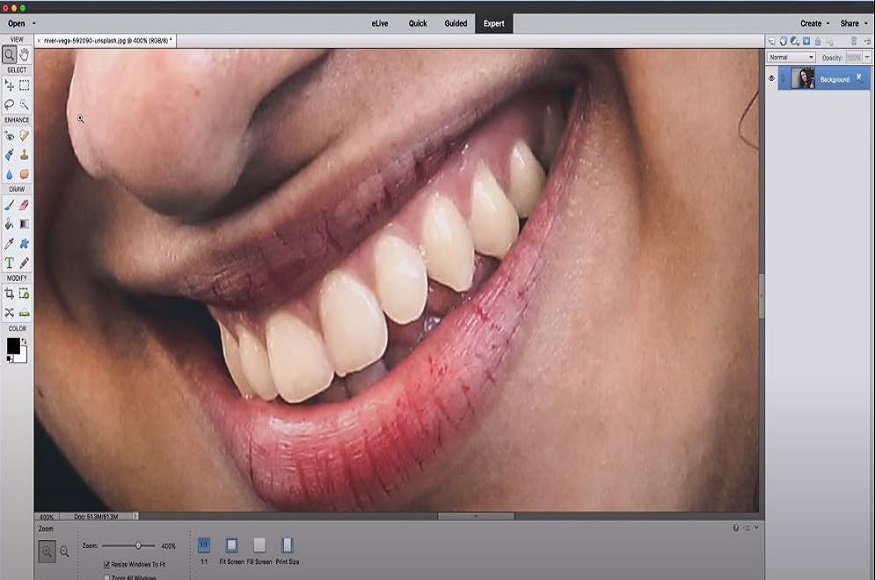
Press Ctrl and + or Cmd and + to zoom in on the subject's teeth until the full smile is visible.
3. Open the Lasso Tool

In the Toolbar panel, select the Lasso tool to draw a selection around the teeth.
You'll have to use your mouse to adjust the outlines for a perfect selection.
Although the mouse may result in inaccurate outlines, it allows you to adjust.
4. Create a Hue/ Saturation Adjustment Layer
After achieving an accurate teeth outline on your subject's teeth, the next step is adjusting the hue and saturation layer.
Click the Adjustment Layer or New Fill Button in the Layers panel to see the layer adjustment options available.

In the drop-down menu, select Hue/ Saturation.
A new Hue/ Saturation layer should appear on the Background layer's top in the Layers panel.
You don't have to change the layer's name if working with one subject.
A layer name change is necessary when working with more than one subject to help quickly identify the set of teeth related to each layer.
5. Set Layer Options to Yellows
The teeth whitening feature makes the subject's teeth white by reducing the yellow color.
Click on Master in the Hue/ Saturation layer in the Properties Panel to access a drop-down menu.
Select Yellows from the drop-down menu. Any changes made to the selection only affects the yellow regions.
6. Lower Yellow Saturation
You'll see a saturation slider on the image editor.
Drag it to the left but not all the way to prevent the edits from fading away. Try to focus on reasonably reducing the teeth's yellowing for whiter teeth.
7. Check Your Work

As you progress with the edits, zoom out frequently to see how the image looks from a different perspective.
You can click the eye icon beside the layer in the Layers panel to toggle the yellow settings on and off when zoomed out.
If unsatisfied with the outcome, you can always return to the editor and make the necessary adjustments.
8. Brighten the Teeth
Once satisfied with the yellow settings configuration, open the Properties panel. Then click Yellow, and select Master.
It means all changes affect all colors in the selection, not just yellow.
You'll observe a Luminosity slider after selecting Master. To add shine to the teeth, gently drag the slider to the right.
It would help to zoom in and out or toggle the adjustment layer to check your work's progress.
9. Clear the Selection Area
Photoshop Elements beginners often find themselves not selecting all the teeth. Sometimes, the selection may include irrelevant subject features like lips and gums.
You should invest your time in making your selection more precise for quality results.
Start by paying close attention to the Layer Mask thumbnail for the Hue/ Saturation layer. It should fill with the foreground document color, primarily black.
The selected and adjusted areas will be visible in the document's background color, which is white.
You can quickly modify your selection by;
- Click on the Brush tool in the tool panel
- Paint all areas you don't want bleaching by selecting the foreground color as your paint color to remove them in the selection
- For areas that you missed in the initial section, you'll need to select the background color and paint these regions to include them in the selection.
10. Save your Work
Forgetting to save your image means all the work you've put in will go to waste.
Confirm that your image meets your expectations and save the image on your device.
In images with more than one subject, start the transformation process from step 3 for everyone.
You can also check our beginner's guide to using Photoshop Elements for more handy tips.
Adobe MAX Update 2024
Photoshop is the ultimate tool for photographers, graphic designers, and visual creatives looking to take complete creative control of their workflow.
The Adobe MAX Update 2024 introduces several enhancements and new features to simplify core tasks.
With the assistance of Generative AI, these tasks include the ability to remove distracting elements from an image and streamlined processes for placing 3D elements in a 2D design.
Removal Tool – The key updates include an enhanced Remove Tool to effectively remove unwanted or distracting objects from an image without deteriorating the overall composition.
Distraction Removal – The automated Distraction Removal feature identifies people, objects, and overhead wires that may distract from the image.
Generative Fill – Powered by Adobe Firefly AI, Generative Fill allows you to build a composition with photo-realistic 3D elements, including correctly placed shadows, highlights, and perspective.
Generative Expand – Photoshop’s Generative Expland allows you to resize the canvas and use Adobe Firefly Image Mode to fill in photorealistic elements.
The Adobe MAX 2024 Updates are now live, and there's never been a better time to optimize your creative output with the Adobe Creative Cloud suite of applications.
Frequently Asked Questions
Can I Whiten my Teeth in Photoshop Elements when Offline?
You don't have to be online to perform the essential image manipulation functions in Photoshop Elements, including whitening teeth.
The processes that require you to be online include the following;
- Installing the software to help validate and activate your software
- Download specific content from the Photoshop Elements repository
- Use online features such as sharing across your socials
- Deactivating the software to install and activate in another device
What are the Requirements to Sign in to Photoshop Elements?
Adobe doesn't require much from you when creating a Photoshop Elements profile.
You must create an Adobe ID using your email address to activate your software. The platform guarantees a secure and personalized experience immediately after you connect to Adobe's servers via the internet.
Activation is a step you can't afford to skip since it validates your Photoshop Elements license, associates it with your device, and guarantees protection against malicious codes.
Can Adobe Lightroom Whiten Teeth?
Lightroom is another release from Adobe that proves effective in editing and transforming images.
The platform features an in-built teeth-whitening effect that brightens the smiles of all in the image.
To access this tool, click the double arrow icon, and a drop-down list of the effect presets will appear.
Select “Teeth Whitening” from the drop-down menu. This preset brings down saturation by -60 and boosts exposure by +4.
What Makes Photoshop Elements Perfect for Image Editing?
One of the primary reasons Photoshop Elements is ideal for image editing is the automation guaranteed by AI-based tools and features.
In addition to these features, Elements also includes new web and mobile companion apps available to all licensed users.
These apps provide users with 2GB of free cloud storage and are available in English only.
The web app allows you to access, view and share edited images and helps create photo collages and slide shows.
On the other hand, the mobile app focuses on uploading media to the cloud or from the desktop.
Is There a Free Version of Photoshop Elements?
There is a free version of Photoshop Elements available for download. However, it only guarantees you a full-featured 30-day trial.
You'll need to purchase the software after the trial period ends to continue enjoying these features.

Jeff Collier is an experienced film photographer who enjoys experimenting with modern digital photography equipment, software and apps. He’s also an ex-world champion triathlete and avid cyclist, clocking hundreds of km each week in the beautiful Tweed Valley of northern NSW, Australia.
👋 WELCOME TO SHOTKIT!
🔥 Popular NOW:
