


How to Make Lightroom Faster
Speed up Lightroom with this quick tip that can have an huge effect on your Lightroom processing time. Just by making one change you can speed up Lightroom!
Lightroom | Software | By Mark Condon | Last Updated: January 25, 2024
If you spend a lot of time behind your computer editing your photos, you’ve probably wondered at some point how to make Lightroom faster.
Here in 2024, computers have never been so powerful, nor so affordable. Whether you use a Mac or a PC, it’s rare with modern computers that you’ll be tapping your fingers, waiting for something to load.
Unfortunately, there are certain programs which don’t take full advantage of the latest advancements in computer hardware…
Is Adobe Lightroom slow? Well, yes and no. It definitely could be faster (and I have every confidence that it eventually will be), but on the other hand, much of the slow pace is down to user-error!
If you’re interested in creating the most efficient workflow for your photography editing, here are my top tips to speed up Lightroom Classic.
Popular course reveals the simple tricks to getting incredible results with Lightroom in record time. Give Your Photos The Look They Deserve!
![]()
13 Tips to Make Lightroom Faster in 2024
1. Build Smart Previews on Import
There are several advantages of using Smart Previews, but all you need to know for now is that you should be building them when you import your photos… every time.
Smart Previews are much smaller than original photos, meaning that as long as you set up your Lightroom Develop module to work from them (rather than from the full size RAWs), your post production will be much snappier.
When you import new images into your catalog, select ‘Build Smart Previews’ (in the top right hand corner of the ‘File Handling’ dialog).
You can also build Smart Previews on demand (from within the catlog) – select the files, then click Library > Previews > Build Smart Previews.
Bonus Tip: When you’re finished editing the photos, you can ‘delete’ the Smart Previews to save some hard drive space – Lbrary > Previews > Discard Smart Previews. Over time, your Smart Previews can grow to many Gigabytes, so it’s good practice to prune them every now and again.
2. Build Standard Previews
Unless you have a job that requires you to zoom in to 100% to check something on every photo, there’s no point created ‘1:1’ previews.
Similarly, unless you’re in a hurry and need to start editing your photos as soon as they hit your catalog (i.e. before all of the other photos have been imported), there’s no need to choose the ‘Embedded & Sidecar’ option.
Side Note: ‘Embedded & Sidecar’ is for journalists, sports photographers, or anyone who needs to get images edited and sent off asap. Here, Adobe ‘borrowed’ one of Photo Mechanic’s best features.
Standard previews offer the best middle ground – large enough that you can see everything you need to without zooming, but also small enough to ensure navigation through the Grid panel, and editing in the Develop panel isn’t hampered.
Find the option in the same top-right hand menu, under ‘Build Previews’ > Standard.
3. Open in Low Resolution

Hat tip to Sam Hurd for this great tip, which helps to make Lightroom faster with minimal effort.
Simply find the location of the Adobe Lightroom CC folder on your hard drive, open it up, then right click the ‘Adobe Lightroom’ application icon. Choose ‘Get Info’ on a Mac – on a PC, I’m guessing it’s labeled something similar.
Then find the ‘Open in Low Resolution’ check box, and make sure it’s ticked (it won’t be by default). If you can’t see it, then you’re not using a monitor that supports 4k resolution, so ignore this tip.
By forcing Lightroom to open in low resolution, you’re sacrificing a slight pixellation of the UI (i.e. text, menu icons, buttons, etc), in favour of a much snappier experience.
4. Don’t use the Graphic Processor
This tip is a little counter-intuitive and deserves a bit of experimentation, but have a go at unchecking the box marked ‘Use Graphic Processor’, under ‘Preferences’ > ‘Performance’.
Even though it sounds like using the Graphics Processor acceleration, Lightroom will run faster, I’ve found that in practice, this is most definitely not the case.
If your computer is anything like my MacBook Pro 13″ 2015, turning on the Graphics Processor acceleration causes weird glitches in the Develop module.
Even if you don’t notice anything abnormal, try unchecking this box to see if it helps speed up Lightroom for you.
5. Use Smart Previews for Editing
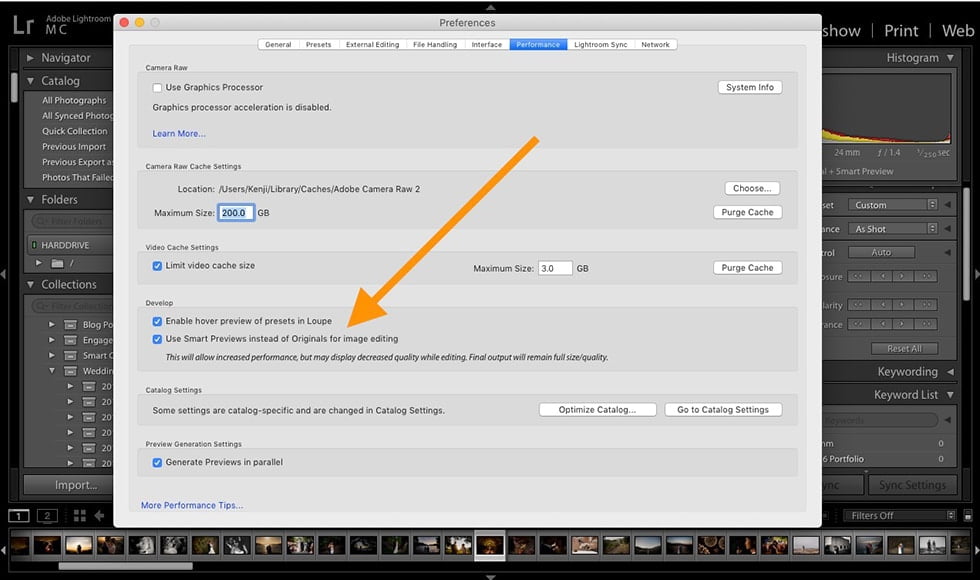
Following on from tip #1, you also need to check the box marked ‘Use Smart Previews instead of Originals for image editing’ (‘Preferences’ > ‘Performance’).
This ‘forces’ Adobe Lightroom to favour the Smart Preview when both the RAW and the SP are present, helping to increase overall Lightroom performance and speed.
With the old version of Lightroom 6, it was necessary to temporarily disconnect (or disassociate) the folder where your original RAW files were kept, to ‘trick’ Lightroom into thinking the RAWs weren’t available, and ‘force’ it to use your Smart Previews – thankfully, with Lightroom Classic this is no longer the case.
6. Increase your Camera RAW Cache
Also located in ‘Preferences’ > ‘Performance’ is a text box where you can enter a maximum size of your Camera Raw Cache.
Every time you view or edit RAW images in the Develop module, Lightroom has to generate up to date previews. This process is made slightly faster if the original data is in the Camera RAW cache.
By default, the cache is set to 1 GB – increasing it will mean you can store more image data, which in turn can speed up the generation of the previews.
I have my cache set to 20GB – you can experiment with setting it to more than this if you like, but the speed increases will probably be negligible.
Bonus Tip: Your Camera RAW cache should always be kept on your fastest hard drive (usually in the case of a laptop, the main internal storage). If you have an SSD that’s faster than your internal storage, try moving the cache over to it: ‘Preferences’ > ‘File Handling’.
7. Watch the Order of your Edits
Lightroom’s local correction tools such as Spot Removal or the Adjustment Brush are powerful features, but they can also severely hamper Lightroom speed when used too much, or in the wrong order.
What do I mean by the ‘order of edits’? Well, to maximise Lightroom performance, you should try and stick to a certain order when post processing your images:
1) Spot Heading; 2) Lens Correction; 3) Transformations; 4) Global Adjustments; 5) Local Adjustments; 6) Sharpening; 7. Noise Reduction.
Obviously if you don’t intend to do any spot healing (or only intend to do a couple of things), feel free to alter the order – these steps are simply the best practices, as set out by Adobe.
Bonus Tip: Leave sharpening to your export preset – I usually set mine to ‘Sharpen for Screen’.
8. Pause Address and Face Lookup
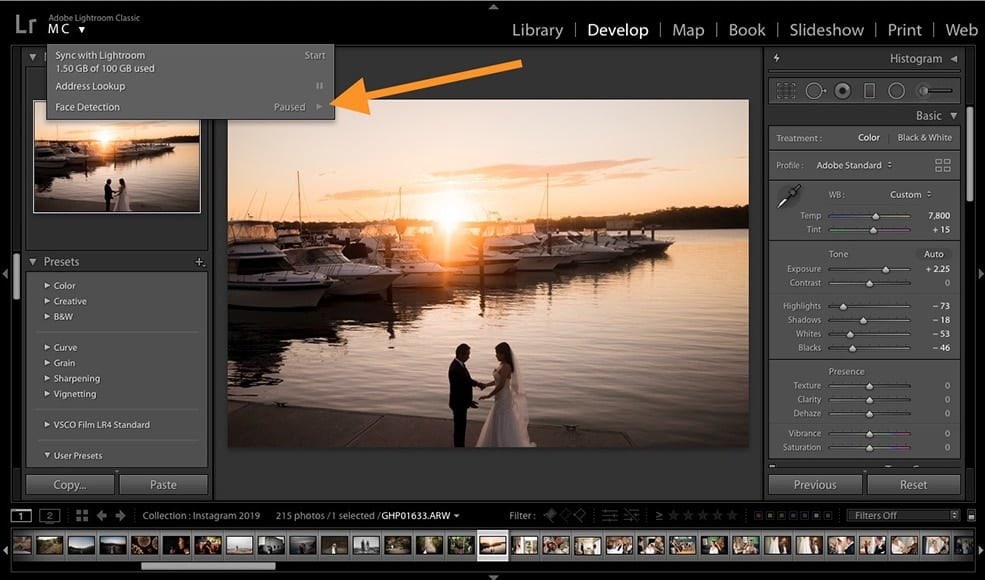
The latest versions of Adobe Lightroom allow you to look up the addresses of images you shoot with a GPS enabled camera or smartphone, and also the ability to search for faces.
The A.I. facial recognition feature is eerily accurate, and GPS information can be great when you come back from traveling, but letting those options run in the background can slow Lightroom down.
To turn these features off, click on the arrow beside your name in the top left hand corner of Lightroom, then choose ‘Pause’ next to the relevant feature.
9. Optimize your Catalog
This one’s pretty simple – just go to ‘File’ and click on ‘Optimize Catalog’. This may take some time (and lock up your computer’s RAM) depending on how many images you have in there. It’s also a good way to solve common Lightroom problems.
…which leads me on to my final tip:
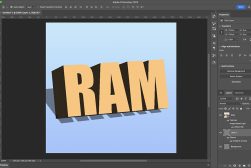
10. Invest in RAM
Computer shopping in 2024 can be pretty damn confusing – processors, ram, storage, GPUs, CPUs… how can you tell which feature you should be investing in, if all you want is to speed up Lightroom?!
According to Adobe, your computer should have at least 4GB of RAM to run Lightroom, ideally 12 GB or more.
At its most basic, more RAM allows you to run more programs/tasks concurrently on your computer. So, if you have 12 Internet browser tabs open and multiple programs running in the background, having more RAM will mean Lightroom is less likely to crawl along at a snail’s pace.
Having more RAM (and more Cores) can also help when importing and exporting photos from Lightroom.
On my 4-core Intel i7 Macbook Pro for example, I can import and export tons of photos with no problem, but usually it means I can’t use any other program on my computer at the same time. i.e. when exporting images, everything else on my Mac grinds to a halt.
However, I’m rarely in a rush to import or export images – I usually set it to run overnight when I’m asleep.
If you’re buying a new computer and want the best overall Lightroom performance, this article helps to illustrate what you should and shouldn’t be spending your money on.
11. Minimise the Histogram
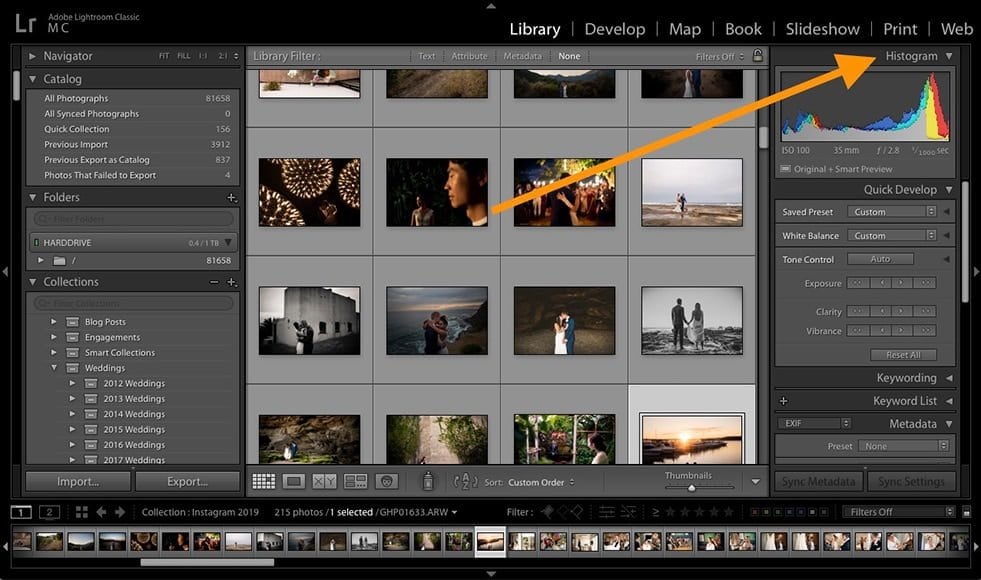
This little tip will do wonders to your Lightroom speed, and it’s as simple as clicking the little arrow next to the word ‘Histogram’ in the top right of your Lightroom Library and Develop modules (be sure to do it on both).
Lightroom needs to process the histogram every time you navigate to a photo, so by turning it off, you redirect some of that processor power back to where it matters more – your editing experience ;-)
When it comes time to show your histogram again, check out this guide for things to look out for when using it.
12. Choose your Camera/File Size Wisely
This final tip relates to when you do your camera shopping, or if it’s too late and you’ve already bought a mega-pixel monster, what file size you choose to shoot at!
I used to shoot with a Sony a7RIII – great camera, but those 42.4MP files were an absolute PITA to edit!
Even when I followed all the above tips (notably the Smart Previews ones, in an attempt to reduce the huge file sizes), my post-production was still markedly slower than it was with my previous camera – one with half the mega-pixels.
Obviously I don’t want you to limit your camera upgrades based on your current computer set up, but I do encourage you to think carefully if you really need those extra mega-pixels.
If you already have a camera with above-average mega-pixels, I recommend you choose one of the smaller file sizes (this wasn’t actually possible on the a7RIII!) whenever possible – save the full resolution shots for when you absolutely need every last pixel.
13. Invest in the Latest Version of Lightroom

If you’re one of the last ones holding out with your aging version of Lightroom 6 (and previous), I strongly recommend you consider upgrading.
Yes, I know… The subscription model may not be attractive for amateurs, or anyone who doesn’t heavily rely on Lightroom to earn their income.
However, if you can justify the monthly fee, you’ll be treated to a version of Lightroom that’s much better optimised than in the past, not to mention having a slew of useful features that you’re eventually find indispensable for your editing.
I held out with my copy of Lightroom 6 for a year, then bit the bullet and upgraded to Lightroom Classic. The benefits of multi-device editing via Lightroom CC Mobile, and the powerful feature upgrades make the subscription cost more that worth it.
If you don’t use it already, I highly recommend you at least download a trial copy of Lightroom Classic CC to see what you’re missing out on.
(If you think you’re ready to upgrade, click here to buy the version of Lr I use.)
Lightroom Speed | Final Words
As long as you abide by the tips above, I’m confident that you can have a fast editing experience with Lightroom, no matter what computer you’re using.
Sure, having tons of RAM and a fast CPU can help, but even on under-powered laptops like the Macbook Air, Lightroom can actually run pretty fast.
With every new release of Adobe Lightroom, I have my fingers crossed for a big performance boost, but in the meantime, hopefully these tips will make the most of what we already have.
Let me know if the comments if I missed any good ones. Happy editing!
 How Lightroom Smart Previews can help photographers
 Adobe Lightroom Review – Still the Best Image Editor in 2024?
 How Much RAM Do You Need For Photoshop? (To Run Smoother)
 12 Best Adobe Lightroom Alternatives in 2024 [User Tested]
 How to Use Photoshop Smart Objects in 2024: Create, Edit & Fix
 Lightroom CC Mobile Guide

Mark Condon is a British wedding photographer and editor of Shotkit. When he’s not taking photos or reviewing the latest camera gear and software, Mark can be found cycling around the northern rivers.


