


How to Build a V Flat (Step by Step Guide)
Discover the step-by-step process of building a V Flat for photography, with our comprehensive guide covering materials, assembly, and usage tips.
Learn | By Ashley Darrow
Shotkit may earn a commission on affiliate links. Learn more.
This guide will show you how to build a v flat even if you lack technical skills.
I had wanted my own v flats for a while now, but I wasn’t about to spend upwards of $400 on a flat white photo backdrop.
That's why I decided to build a DIY v Flat myself!
V flats are the Swiss army knife of studio photography.
You can use them as bounce cards, flags, or just as backdrops for your next photoshoot.
I’m going to walk you through making foldable v flats at a fraction of their retail cost with materials you can pick up from your local hardware store.
Let’s get started!
What is a V Flat (And How Do You Use It?)
Before you build your own portable v flat, you should have a better understanding of what you can do with it.
A v flat is simply two pieces of foam board with one side being matte white and the other side painted a matte black.
They play an important role in studio photography since they do pretty much anything you need them to, from creating negative fill to shaping light.
Buying v flats can get very expensive, so that's why I typically make my own.
How to Build a V Flat
Making your own v flats is incredibly easy and can be done in a single day.
I've actually got some tips at the bottom of this article that can help you build your v flat even faster, but I want to start things off with a traditional and the most affordable way to build a v flat.
Gather Materials
You don't need many materials to build your own v flats. You'll also not need any specialty tools, making this project even more affordable.
Here's a complete list of everything I used to create these DIY v flats.
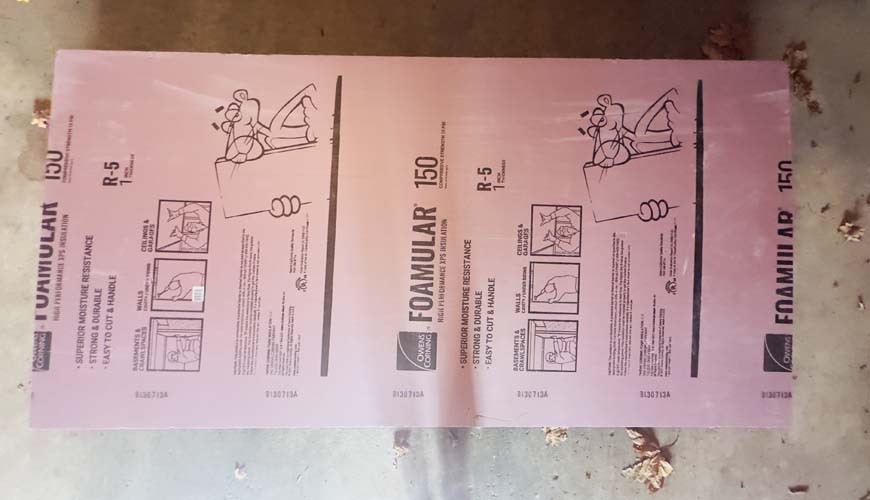
- 2 4×8 sheets of pink insulating foam board
- 1 roll 2 inch wide white gaffers tape
- 1 roll 2 inch wide black gaffers tape
- 1 quart flat white paint, water-based
- 1 quart flat black paint, water-based
- Tools including: tape measurer, box cutter, paint roller, and paint tray
Now, I want to introduce you to your materials. I’ve worked with that pink foam board on many building sets, at haunted attractions, and in photography.
It’s durable, cheap, lightweight, and easy to work with. However, it does dent easily, so you should treat it with little care.
Also, make sure to peel off any price tags or stickers before you start painting. Painting over a sticker will only cause you problems down the road.
Cut Your V Flats
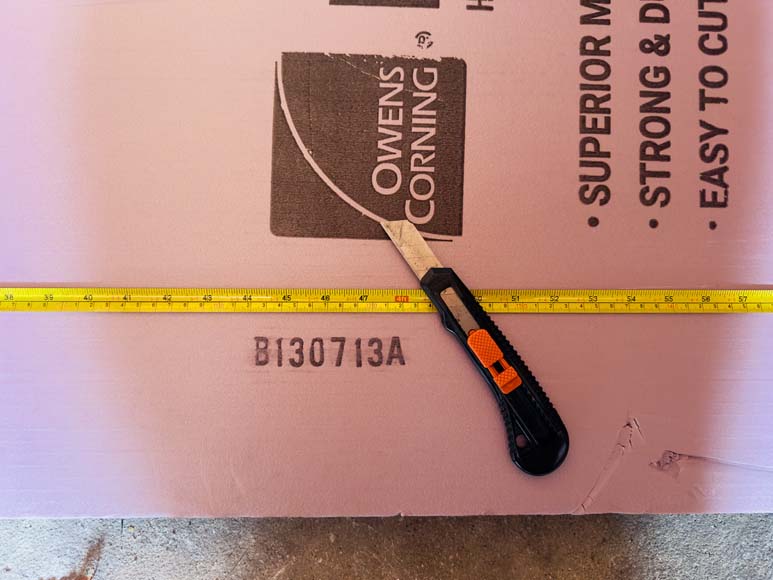
I decided to cut these 4×8 foam boards in half to create two 4 ft by 4 ft squares.
If your studio has a low ceiling, you can cut a bit off the top to ensure that these fit whatever space you're shooting in.\
I recommend keeping them at least 6 ft high to make sure that most of your subjects can move a little freely if you plan on using these as a backdrop.
I randomly got some amazing lighting coming through the window.
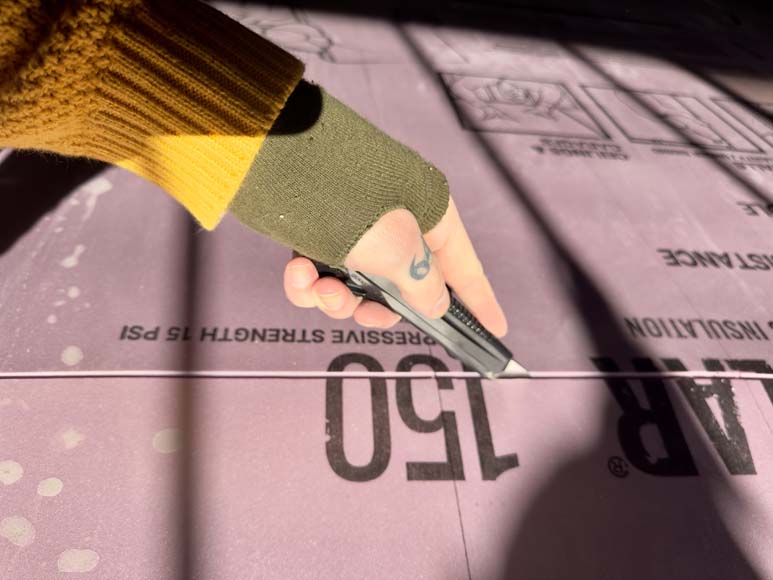
Here's a little tip when working with pink foam. You don't want to cut or see through the foam like a piece of wood.
You want to score the foam and then snap it in half when you're about 3/4 of the way through the board.
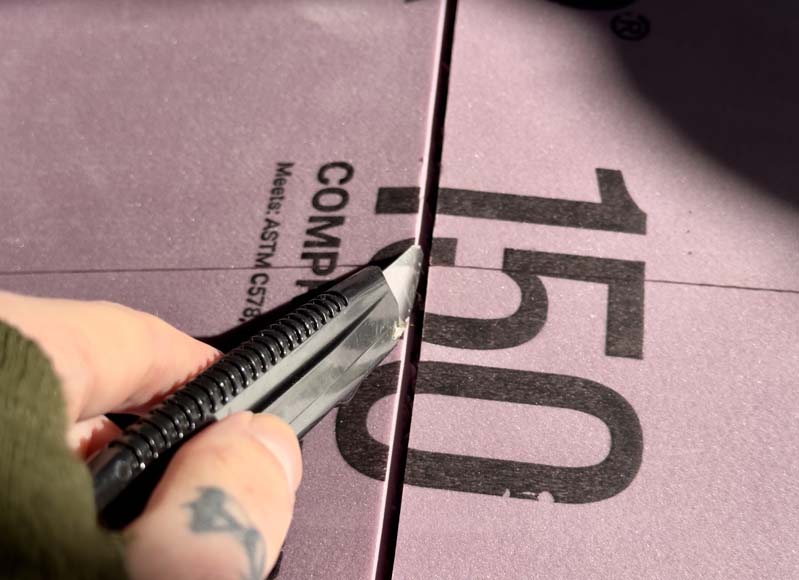
As you can see here, I took a few passes to get the right depth before snapping my boards in half.
If you try to cut or saw the board, you will wind up with an uneven break and lots of foam pieces flying everywhere.
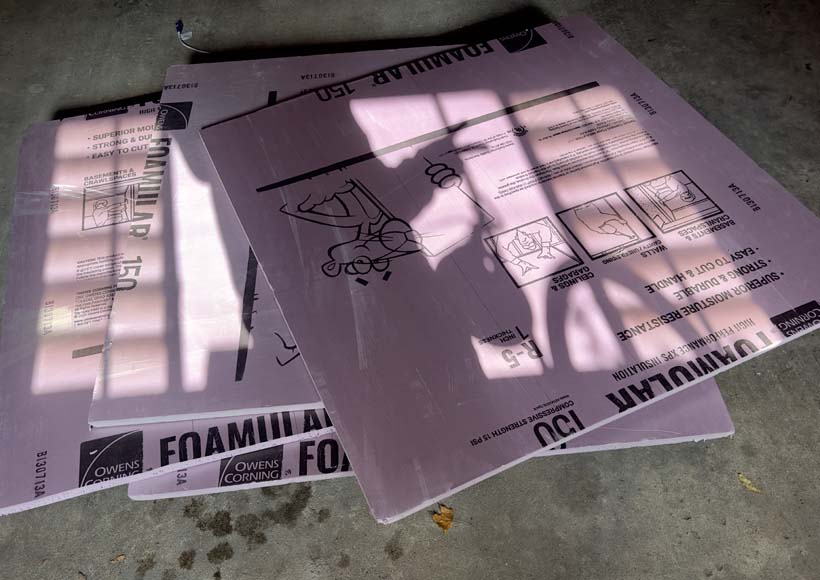
Now, I've got four mostly identical squares and am ready to start painting.
Apply Black and Flat White Paint
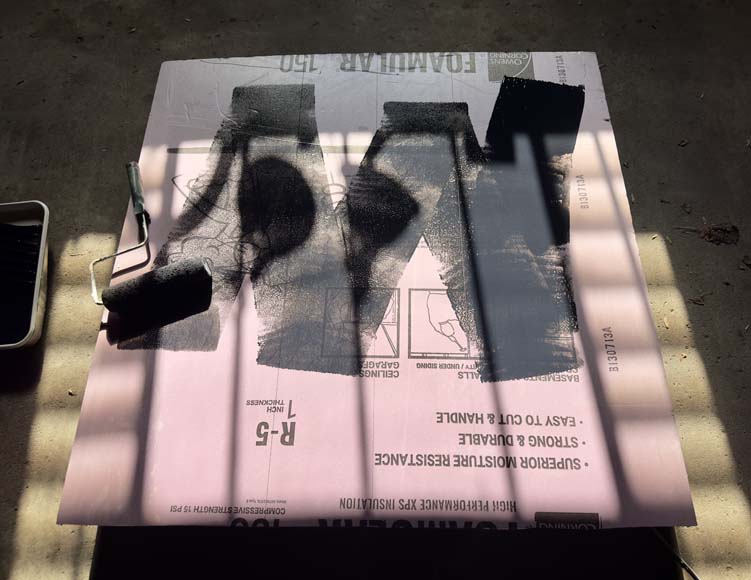
This is the most straightforward part of the entire process. All you need to do is get your flat black and white paint and start putting on coats.
I recommend two coats per side of the flat. This will prevent any of those pink undertones from shining through.
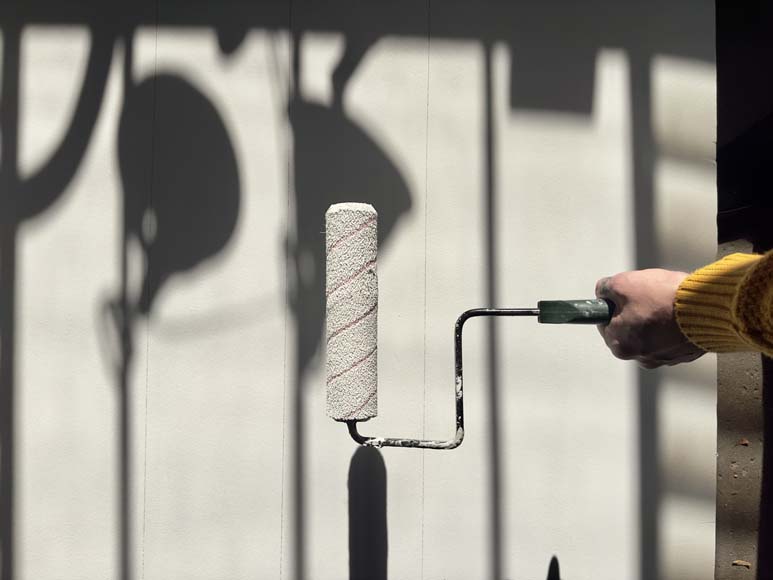
Don't be afraid to go heavy with the paint, either. There will be plenty of nooks and crannies that you'll need to fill up with your paint.
Here's a quick and very important note on what paint to use. Oil-based paints will dissolve foam boards.
This is why I always use water-based paints like acrylics when working with foam.
Create the Hinge
This part of the build might be a bit of a head-scratcher if you've never done a DIY project like building a v flat before.
We're going to reconnect the 4×4 halves to create a foldable hinge, which makes our 8-ft tall v flat easier to store and transport.
You'll have to take my word for this, but once you start working with your gaffer's tape, this will make perfect sense.
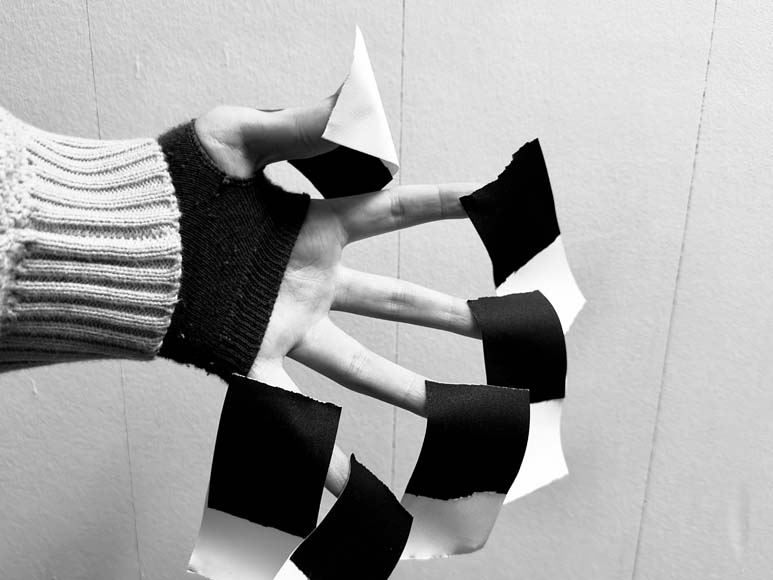
The first step is to create your gaffer's tape hinge. You do this by overlapping a piece of white tape with a piece of black tape.
You want to have about a 1-inch overlap. The sticky sides should be facing in opposite directions so that you create a bicolor strip, with one side facing up and the other side facing down.
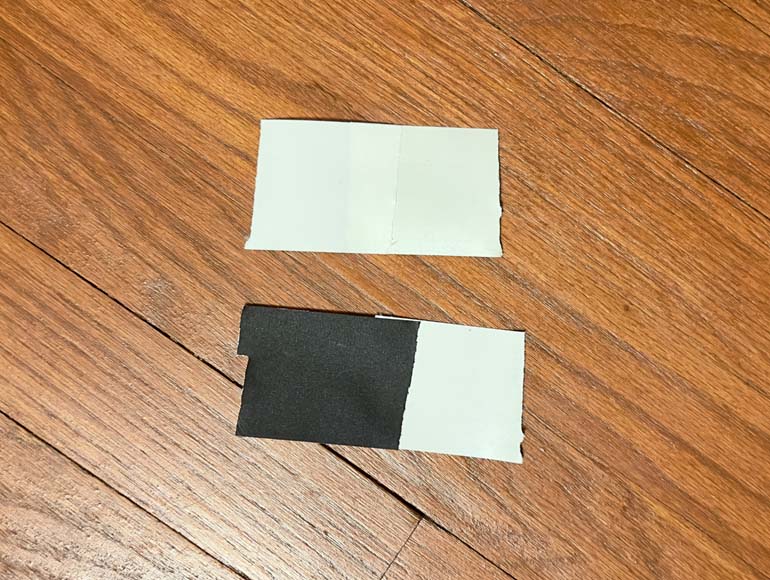
Here, I’ve laid out how the tape will look once it’s secured. As you can see, the sticky side of the tape alternates so that the color matches the side of the v flat it will be stuck to.
I found that it was easier to line everything up and have a friend help me slide it all together than it was to wrestle everything on my own.
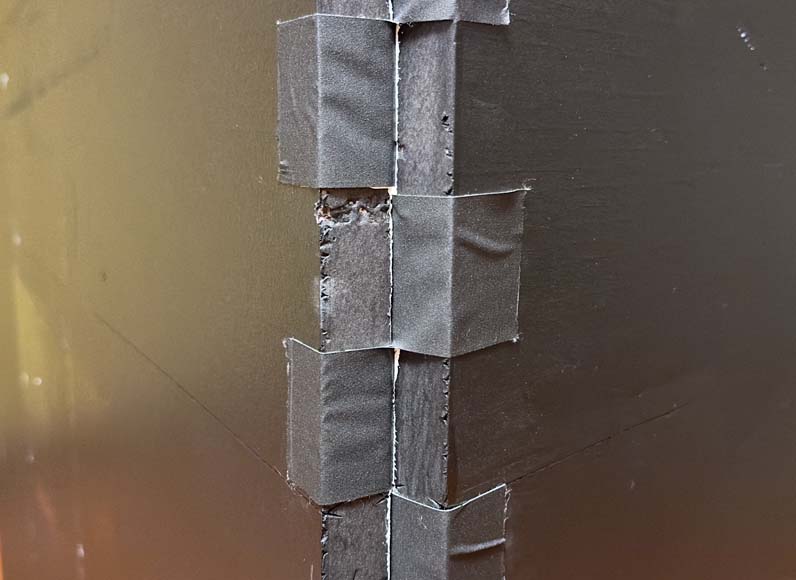
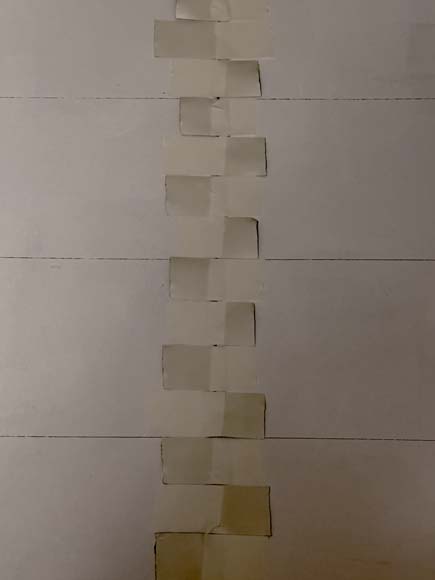
This is the final product of all of our hard taping. It’s a hinge that swings in both directions, allowing the v flat to fold in half.
Check out how each of our tape strips weaves through the seam in the v flat. You want to take your time with this step to ensure everything is right.
Standing Your Own V Flats
Since we put a hinge on these v flats for easy storage and transportation, they won't be free standing. This means that we will have to secure them when they stand up.
I found that the easiest way to do that was to take out more gaffers tape. Three strips on each section connecting them was enough to get the portable v flat to stand up independently.
If you only need to use one section of a v flat, you can secure it by taping it to a c-stand or an extra light stand.
A single 4×4 section is free-standing, which I find to be really useful for sharing light or unique shots with models lying down or on their sides.
Final Results
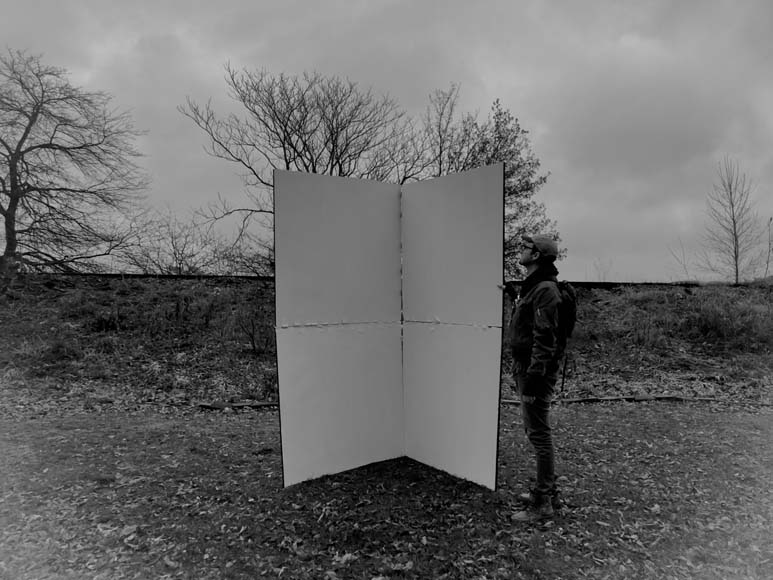
Here is the final product of all of our hard DIY work!
As you can see, this thing is pretty big when fully set up. If 8-feet tall is a little too big for your needs, you can always cut the foam sheets down by a foot or two to get the height to something more workable.
This was light enough for me to carry it solo from my studio to a shooting location (even without a car!)
Your DIY V Flat in Action!

I wanted to show off these v flats by giving you a peek of how they work in an actual shoot.
These v flats are 8 feet tall and 4 feet wide each, so they cover an impressive amount of space.

I wanted to do a fun shoot outdoors, but I didn’t want a busy background distracting from my subject.
Rather than scouting for a suitable location, I used my new v flats to make one!

I positioned the v flats with the white side facing the camera. This lets me really accentuate my subject, but also let me use the other v flat as a bounce card on an otherwise overcast, gray kind of day.
This hinge design also lets you use your new v flats with only half of a side. This is ideal for product photography, portraits, or for use as a free-standing flag/bounce card combo.
You might be wondering where the seams on my DIY v flats went in those pictures. Seams, scuffs, and other issues are just a fact of life with v flats—and cloth backdrops.
So, use Photoshop’s Content Aware Fill feature to erase any unwanted details, just like you would for any post-production touch-up.
DIY V Flat Tips I Wish I Knew Beforehand
I wanted to close out this DIY tutorial by talking about a few tips that I wish I had known before I started building these v flats.
You'll only pick up these things after completing a new project, so I wanted to help get you ahead.
Materials
You essentially have a choice between using a pink foam board and painting it or getting black and white double-sided foam board.
The double-sided foam board would have definitely been easier to work with, but it's also about triple the price of the pink foam board.
If you've got the extra money lying around, black and white double-sided foam board would let you skip the painting and still cost less than buying pre-made v flats.
Paint Drying Time
Standard acrylic paint dries in about 2 hours. However, foam boards tend to have a lot of nooks and crannies where paint can build up.
I'd play it safe and give the paint a few extra hours to dry between coats to ensure pockets of wet paint aren't building up on your v flat.
Don’t Worry About Dings
When I started working with foam boards, I was nervous about chips, dents, and dings in my finished product.
However, as the years have passed, I have gotten a little less precious with handling my DIY v flats.
You can honestly edit out most scuffs and scrapes using the Content-aware Fill in Photoshop. If you ever get a big gouge in your v flat, you can always do some touch-up painting later on.
Wrapping Up Your DIY V Flat Guide
You've now got two brand new v\ flats that are portable and hardly weigh a thing.
If you have any questions about building a DIY v flat or have more DIY photography projects you want me to cover, just let me know in the comments, and I'll reply to your question in a future article!

Check out these 8 essential tools to help you succeed as a professional photographer.
Includes limited-time discounts.

Ashley is a photographer, writer, and film critic. When Ashley’s not writing essays on photography, cinema, and theory, he’s out taking pictures with retro film cameras.

👋 WELCOME TO SHOTKIT!
🔥 Popular NOW:
