


How To Use Content Aware Fill In Photoshop
A step-by-step guide to Photoshop's content aware fill tool. Learn how to quickly remove objects or magically replace backgrounds!
Photoshop | Software | By Teryani Riggs | Last Updated: December 16, 2024
Shotkit may earn a commission on affiliate links. Learn more.
We all have photos where we wish things were different.
Maybe it's impossible to get a clear shot of a beautiful building, or there are power lines reaching as far as the eye can see.
If you want to remove objects like these from an image, Adobe Photoshop will perform a lot better than Lightroom in most circumstances.
In fact, it's still the best in the business when it comes to pixel-level adjustments.
There are, of course, many ways to remove objects in Photoshop.
Still, with the prevalence of AI in today's photo editing world, Photoshop's new content-aware fill workspace is adding a lot more control to what used to be a fully automated process.
The tool is by no means perfect – especially when there's a complex background.
But if you hate making time-consuming selections for object removal in Photoshop, the content aware fill tool can potentially save you a lot of time.
Let's take a look at how it works and when to use it.

Download the latest version of Adobe Photoshop to follow along with this simple tutorial.
Start a free 7-day trial today
How to Use Content Aware Fill In Photoshop
On the surface, using content aware fill is super easy – especially if you're using it to remove objects from a simple background.
We'll start with one of these and then move on to something a bit more complex.
Object Removal on a Simple Background
First, open your image and, if you wish, create a duplicate layer. (The duplicate layer is just so you don't do any destructive editing on your original.)
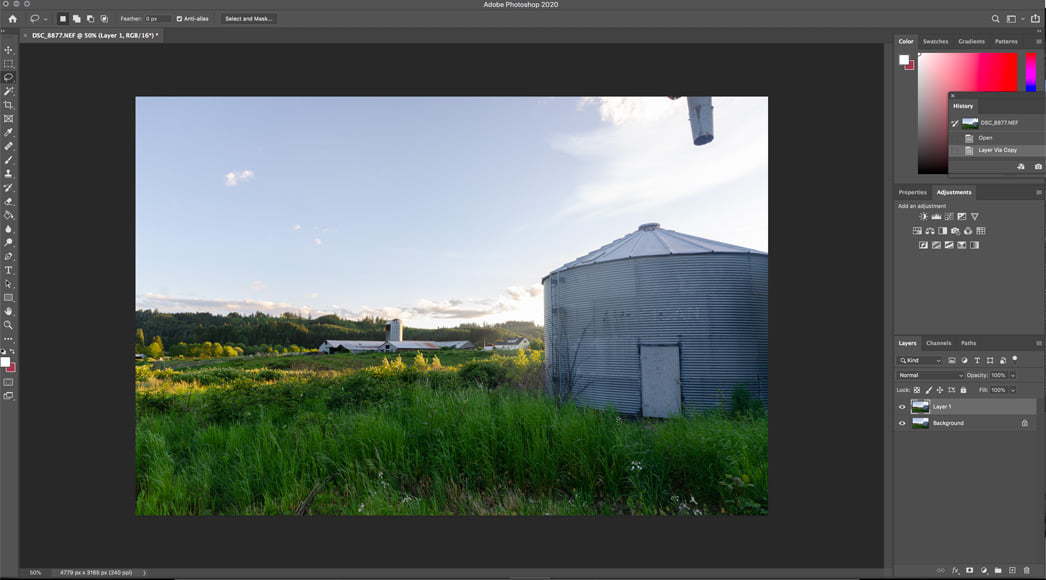
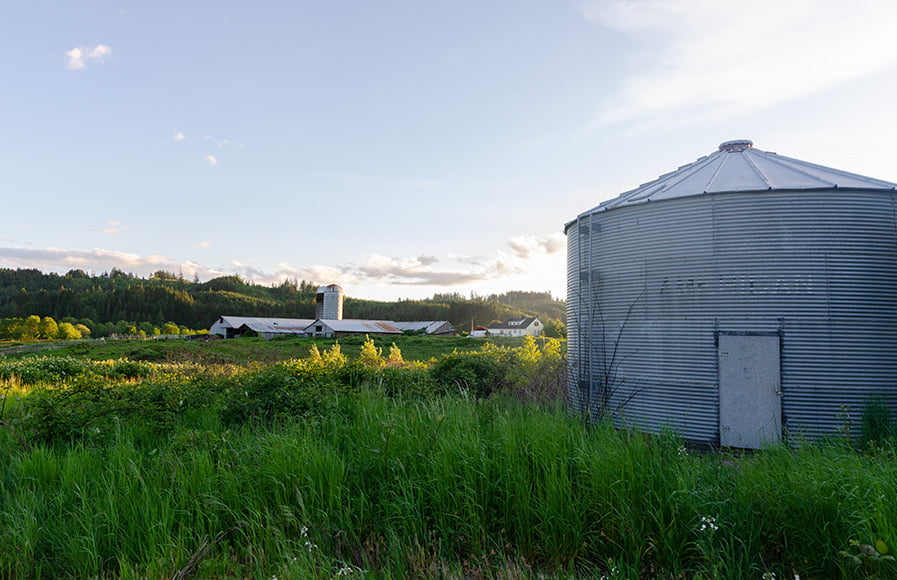
Here's an image with a pretty straightforward object removal – the bit of machinery in the upper right.
Next, make a selection around the object you want to be removed.
You can use any of Photoshop's selection tools. I prefer the lasso tool in most cases, especially since the selection here doesn't have to be perfect.
(Related: How to draw straight lines in Photoshop.)
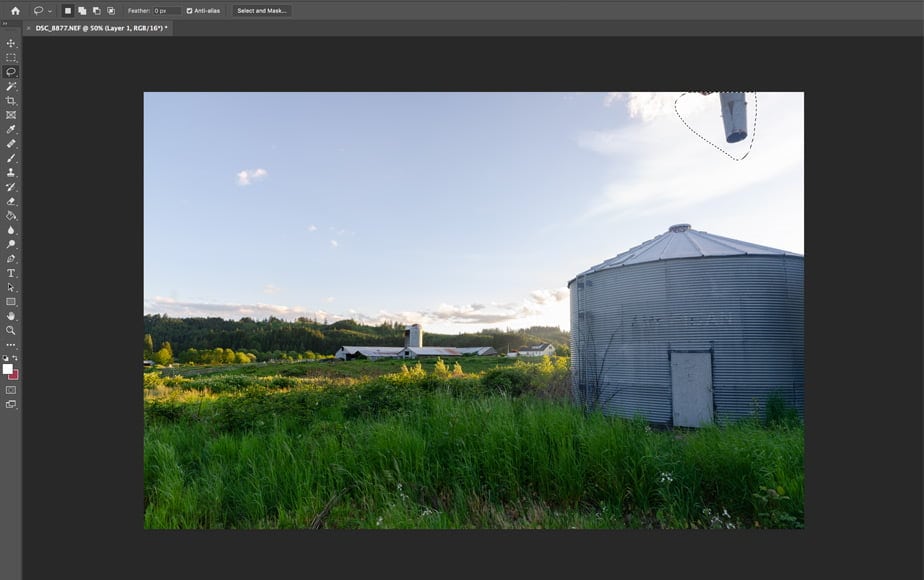
My selection area is a bit bigger than strictly necessary, but since it's on a pretty simple background, it won't really matter much. For more complex backgrounds, the closer you get to the object the easier it is for the software to make its pixel decisions.
Once you've selected what you want removed, it's time to activate the content aware fill workspace.
You'll find it in Edit -> Content Aware Fill. That will open Photoshop's new 2024 workspace.
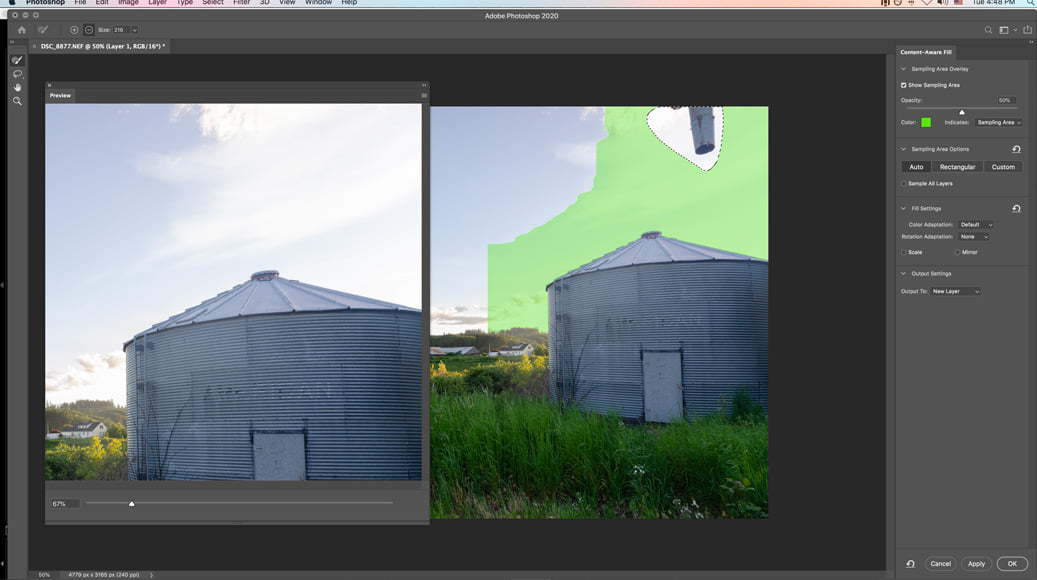
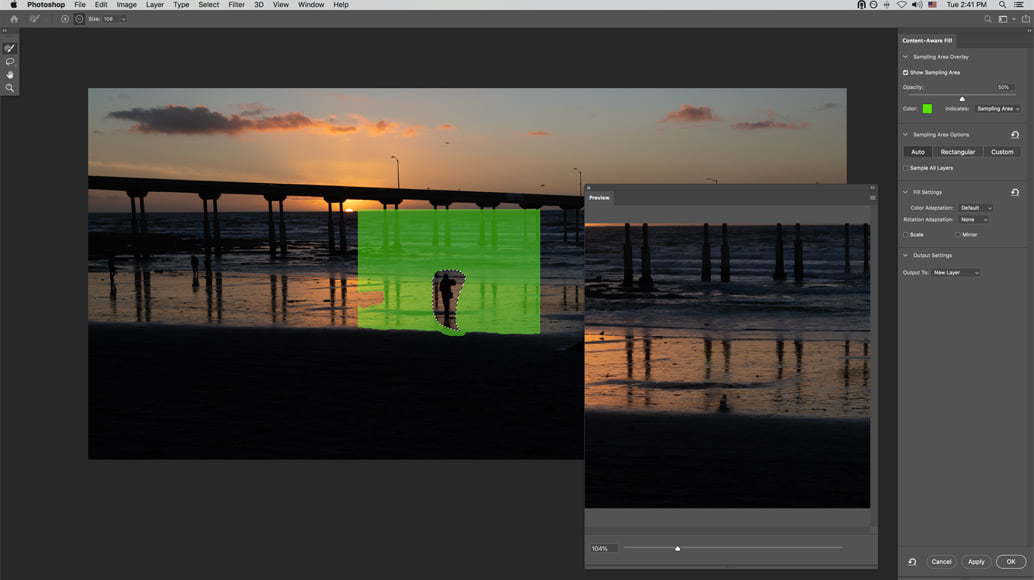
The Photoshop 2024 workspace. The image on the left is the preview of the object removed. The image on the right shows the selected object and the area from which Photoshop is going to pull the pixel information (in green).
The first thing you'll notice is an image box with your selection surrounded by a green mask. The green area is where the content aware fill tool is going to sample from. (It's usually on the left, but I've it moved to the right here so we can see what's happening in the image.)
Next to it is the image preview, which allows you to zoom in or out as needed.
Until recently, Photoshop's content aware fill tool used to just do everything automatically. You either lived with the results or did things by hand. Now we have a dialog box with a lot of controls.
On the toolbar to the right you can adjust how the mask looks, the color adjustment level, and the output settings.
What's new and particularly useful in Photoshop 2024 is the sampling area options. Now you can tell Photoshop exactly where to pull its sampling information from (and where not to).
Scaling will make details larger and smaller to try to fit them in; mirroring will flip details back and forth. (I don’t find that these two options help a lot.)
Color adaption tells the tool how much you want it to blend in to surrounding colors. The default often works great, but sometimes you'll need more blending. Other times – like when you need a hard edge – it'll be better to turn it off.
The output settings allow you to choose to have the output on a new layer or as a layer mask on the current layer. Exporting to a new layer tends to be the least destructive.
It most cases it's good to start with auto just to see what will happen, at least until you really learn the intricacies of the tool.
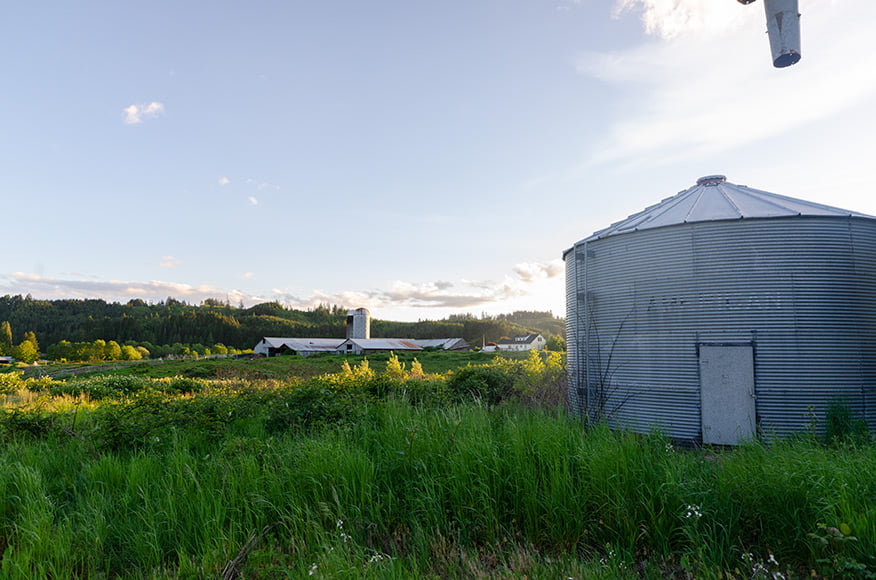
In this example, we don't need to adjust anything as the auto setting does a fine job. There's no need to make it more complicated than it is by fussing with the settings. There wasn't even any clean up to do.
Before using the content aware fill tool.
After removing an object with the content aware fill tool.
Now let's try it on a background that's not totally bland and see how the content aware fill auto option does on its own.
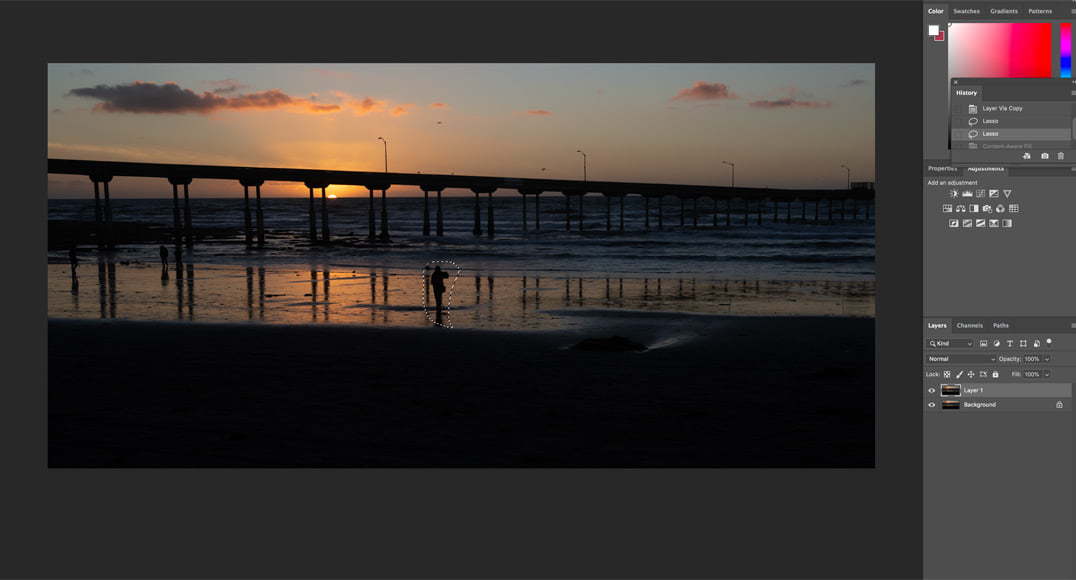
This image has a slightly more complex background.
Here I've once again used the lasso tool to make a selection. Then I went to the Edit pull-down menu and selected Content Aware Fill.
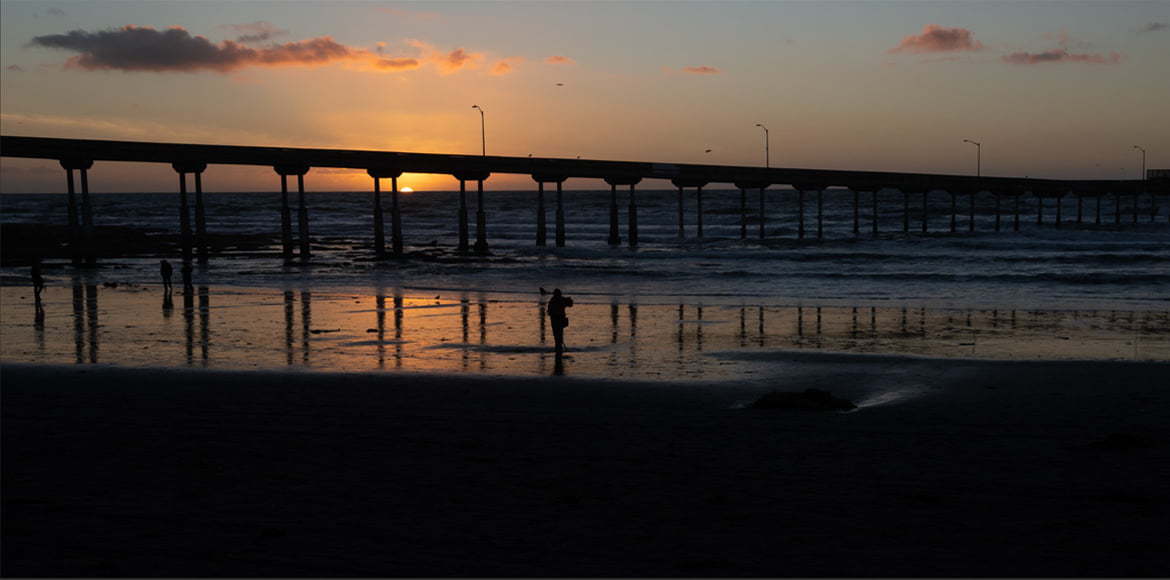
 You can see that while the background's a little more complex than the sky in the first image, the content aware fill still does a pretty good job in auto mode. All that's left to clean up is the base of the shadow.
From here, you just need a moment or two with the Healing Brush tool or the Clone Stamp tool and you can quickly remove the shadow as well.
Object Removal on a More Complex Background
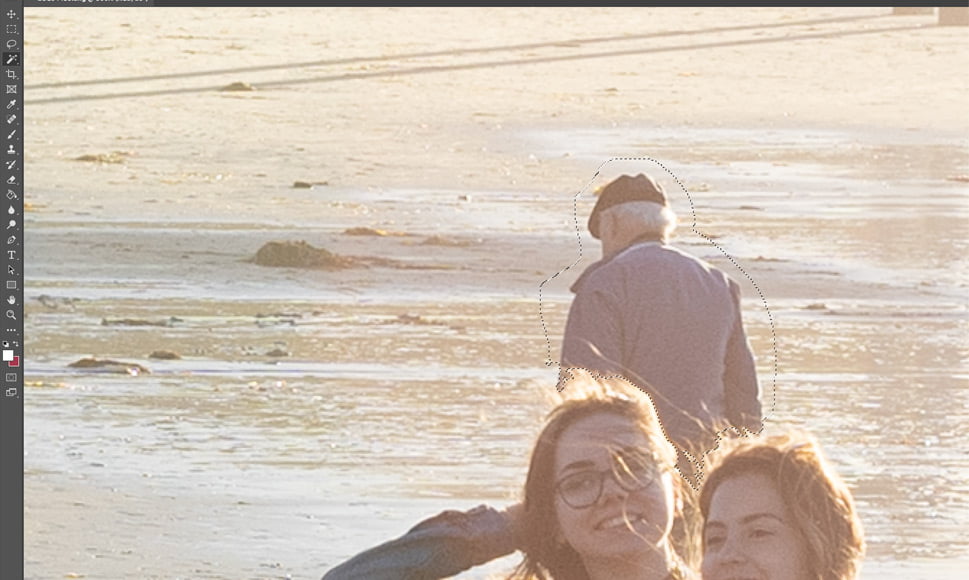
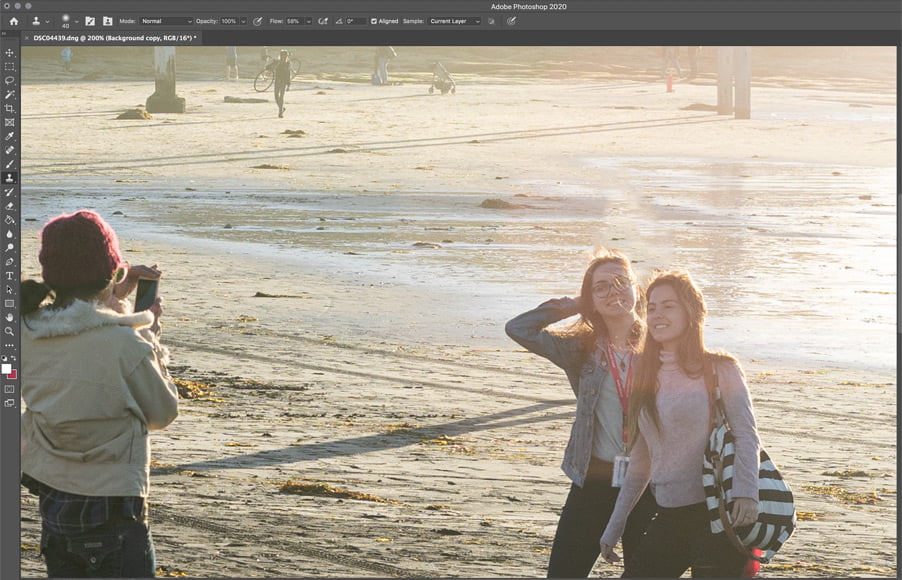
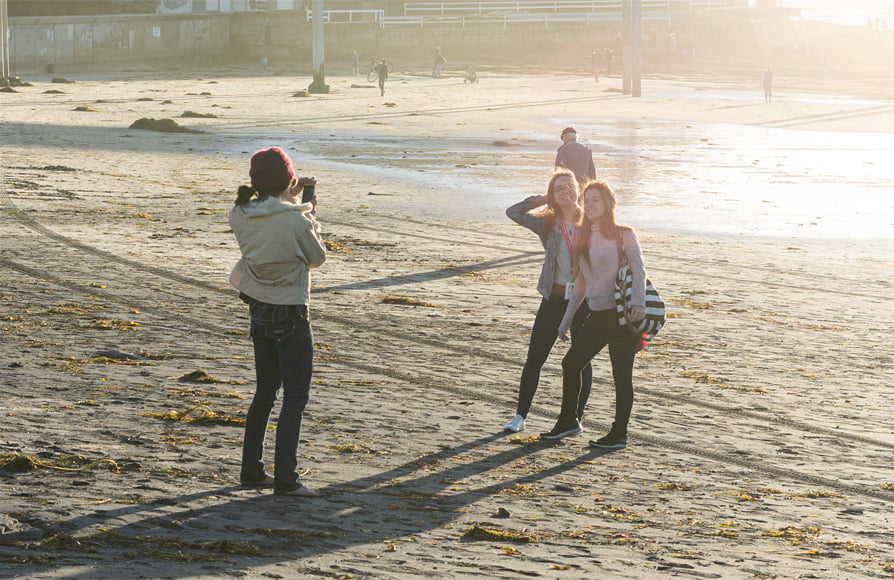
Once we get to more complex backgrounds, the process gets a bit trickier. Take this image, for example, where I want to remove the man right behind the subjects:

Because the man butts up directly behind and into my subjects, I'm a bit more careful with my selection here, using the Magic Wand in addition to the Lasso tool to make sure I get all of his coat.
(See our guide to using the Magic Wand tool.)
Here, the auto function in the Photoshop content aware fill doesn't do so well. You can see that the area where the man used to be is blurry and doesn't really match the background.
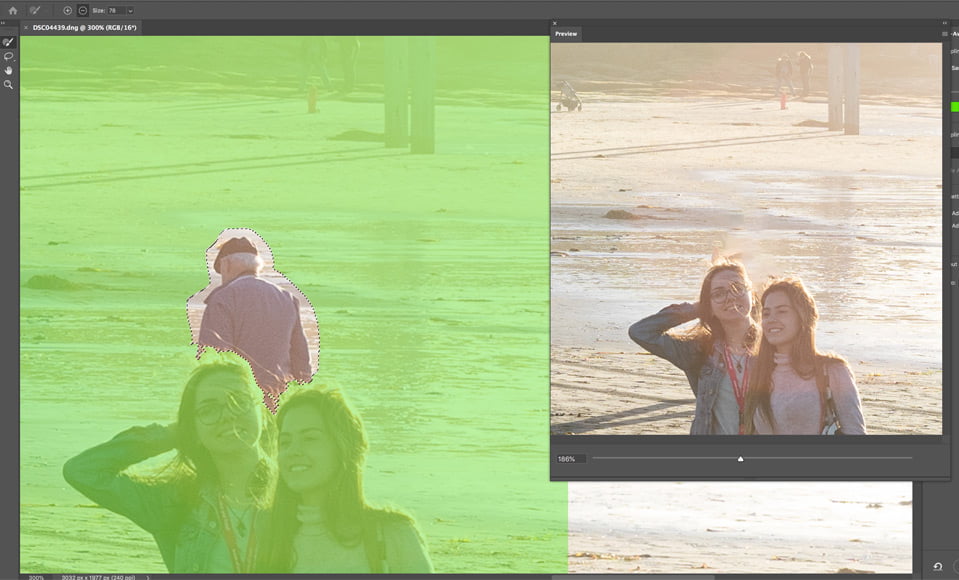
Part of the problem with the auto option here is that it's taking in far too much-unneeded information. For example, it should definitely not be pulling pixels from the two women, nor does it need anything beyond the beach.
This is where the content aware fill custom settings come into play: we can tell the tool what areas to draw information from and which to avoid.
There are two ways to do this. You can either select the custom setting in the workspace area to the right or you can simply add or subtract by brush from the area the auto setting has already generated. If you change to the custom setting, you'll be starting from scratch and drawing your mask in.
Whichever one you choose, make sure you give Photoshop enough pixels to work with. Also, the sampling area doesn't need to be directly attached to the objects you want to remove. You can fill with any content in the image.
In this case, I just want to subtract from the pull area, so I'm just using the brush tools in the upper left.
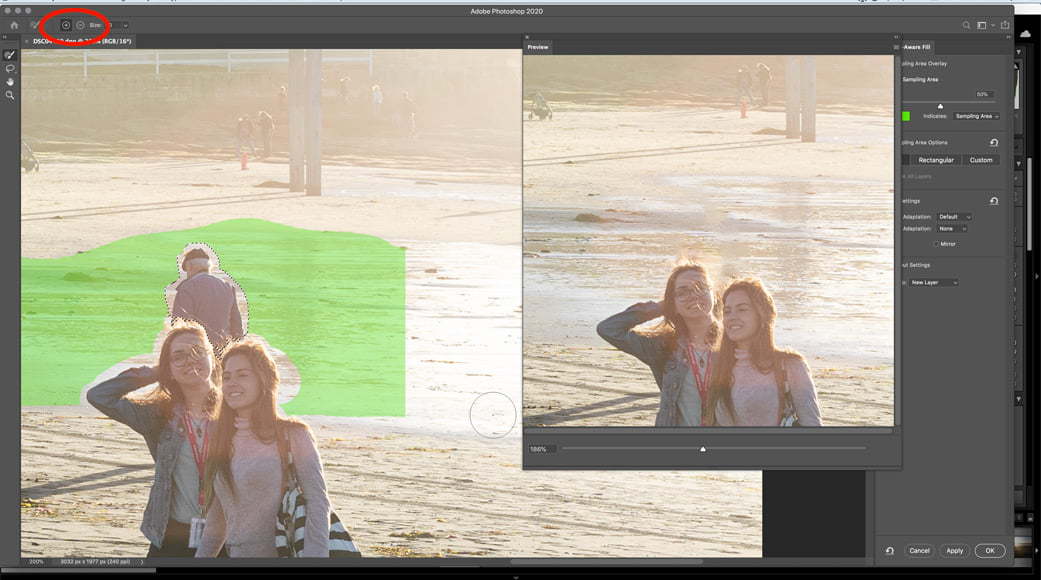
I used the subtract brush to remove the sampling area from the subjects and the area around the pier.
It does seem to have made a bit of a difference, though the area still needs some work.
To fix it, I click ok and return to Photoshop proper. From there a bit of time with the Clone Stamp tool makes the object removal a bit less obvious.
Again, you can choose to have the result on the same layer (as a layer mask) or on a new layer. If, like me, you prefer using a new layer, make sure you merge the output layer with the one you made a selection from or the Clone Stamp won't work.
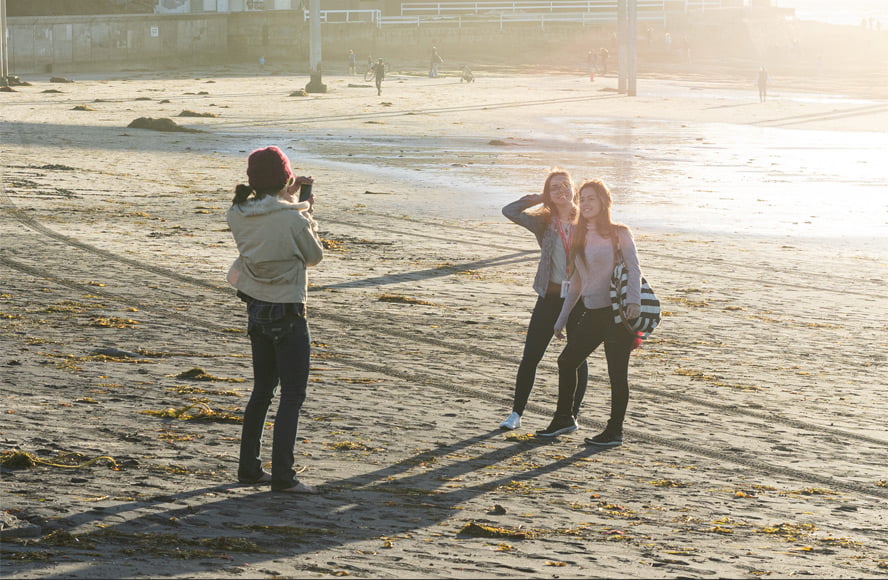
Here's the before and after, with the after version containing my Clone Stamp tool clean up:
When Not to Use Photoshop's Content Aware Fill
Take this image, for example:
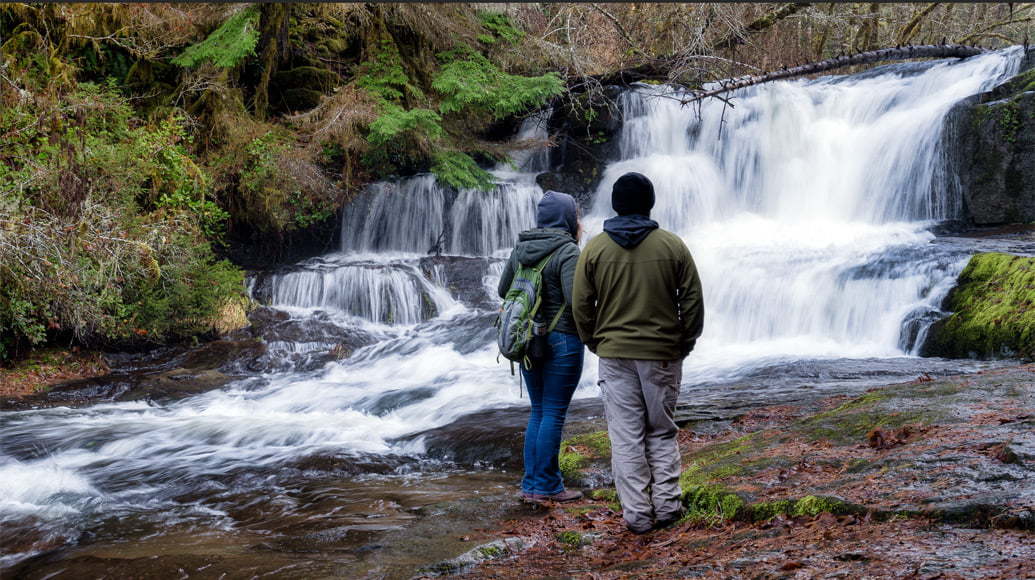
At first glance, it looks like the content aware fill tool did a great job.
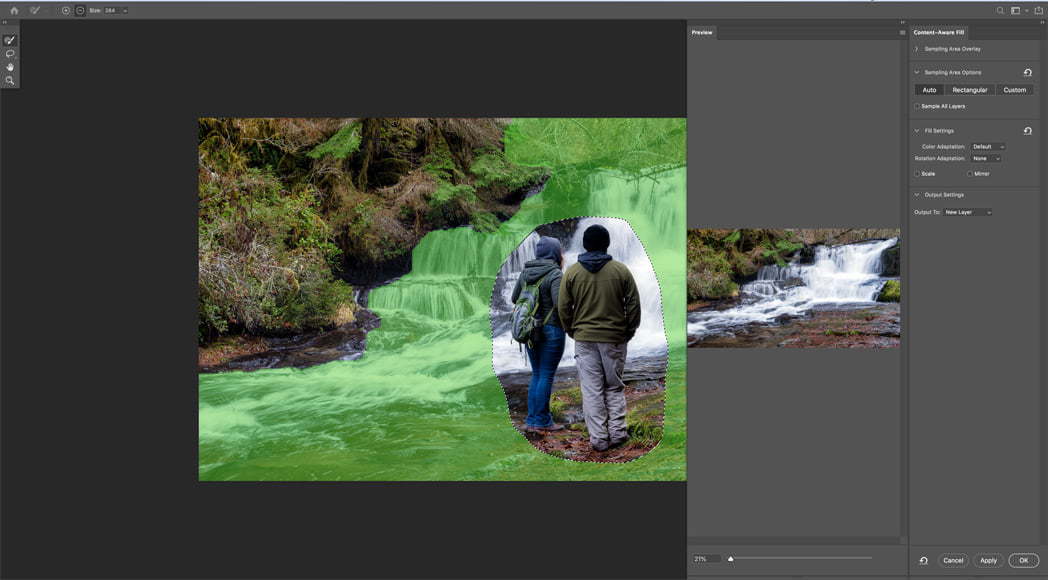
Upon closer evaluation, however, we can see that there are a number of areas that aren't quite looking right.
Some have a bit of duplicate content (see the example below). Other areas have lost a bit too much detail and look a bit blurry (i.e. areas of the waterfall).
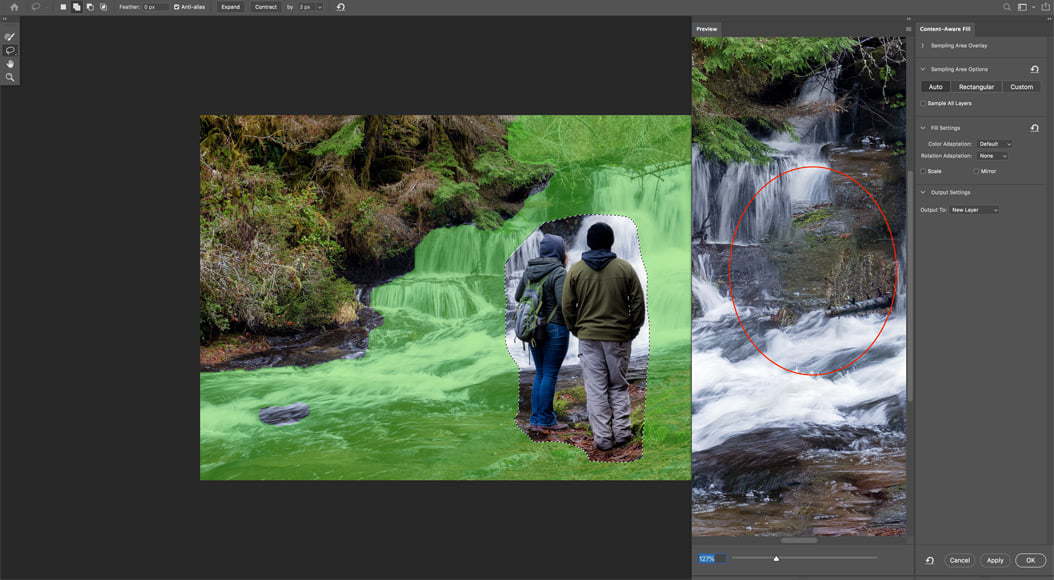 No matter how much I fool around with the settings, I really can't get this image to work with content aware delete for Photoshop.
To be fair, though, this kind of image is really asking a lot from the program. For this type of complex work, you can use some of the generative AI features available in Photoshop as of 2024.
In this particular example, the best solution would be Generative Fill. This tool allows you to add or remove elements on your image.
However, if you need to delete wires, cables, or people in the background – then, use the Generative Remove tool and enable the automatic Distraction Removal feature.
Lastly, you can use the Generative Expand tool if you want to prolongue the background to fix the composition. However, it's still possible to do this without using AI. I'll show you how in the next section.
Using Photoshop's Content Aware Fill to Fix Composition
Content aware fill in Photoshop doesn't have to be limited to object removal. It can also be used to add content to a blank canvas area when you need to move things over a tad.
It does this by extrapolating from other areas of your image and then filling the empty spaces, just like with object removal.
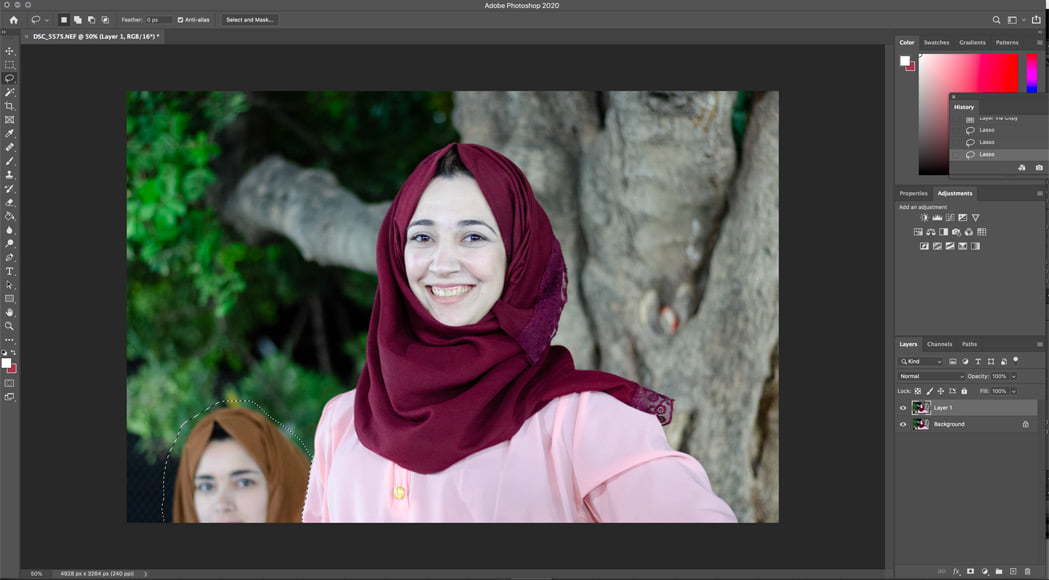
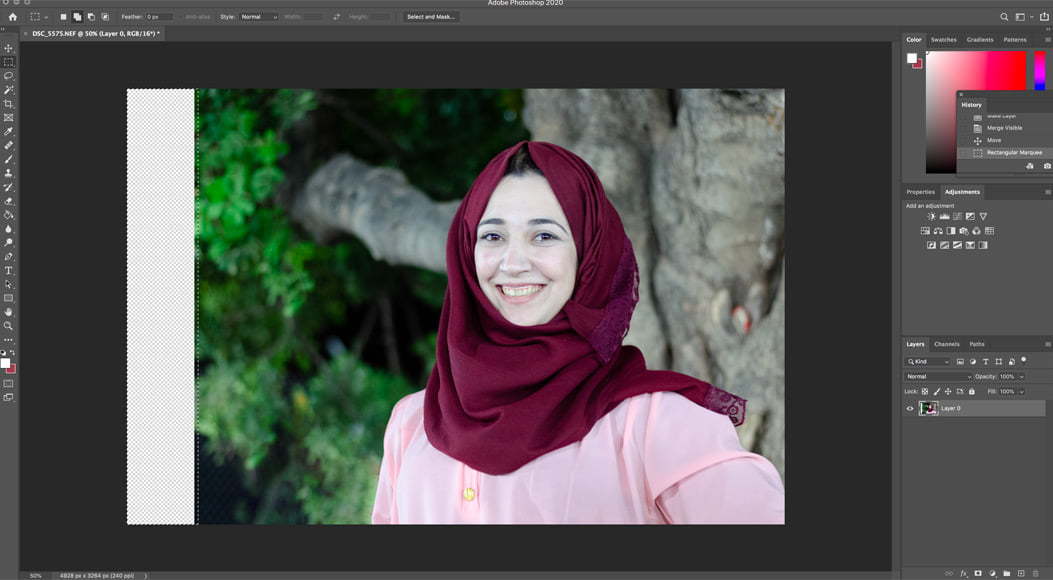
Take the image below. Not only is there an extra person to take out, but the whole composition would also look a lot better if the subject were more to the right.
First, I'll use the lasso tool to select the extra person so I can use the content aware fill tool to remove them.
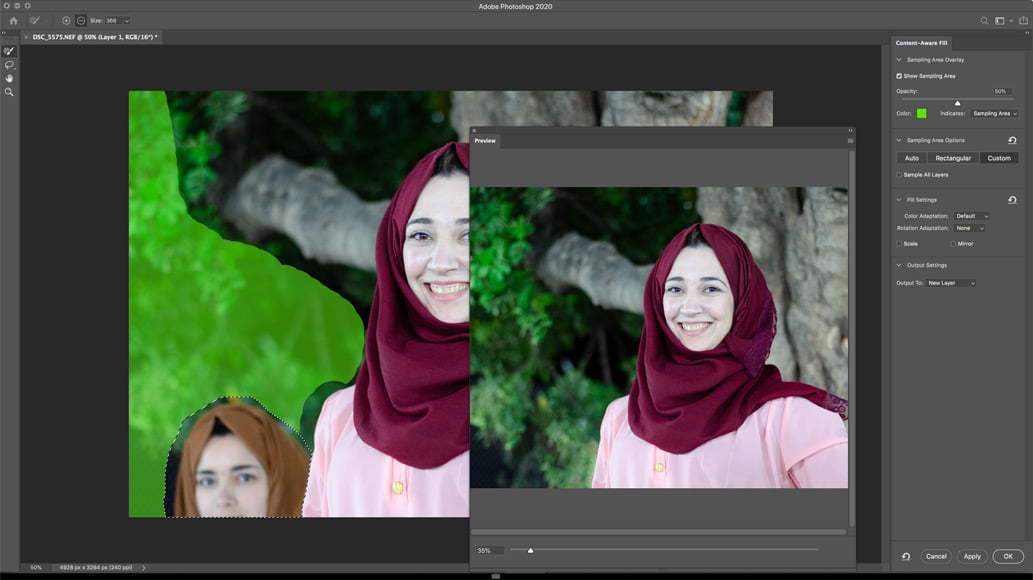
Since the auto settings didn't work well here, I used the custom option, keeping the sampling area off the subject and the tree. The result was pretty passable.
Now it's time to move the composition to the right. To do this, make sure your layer is unlocked. (Click the lock icon if this is your background layer). This will allow you to move it in whatever direction works for you.
Choose the Move tool (the arrow) from the left-hand tool strip or use Command-v. Move the image over until your subject is where you'd like them to be on the canvas.
There should be an empty canvas area where the image was moved from. This will be the area that we'll be using the content aware fill tool to fill.
Switch to the Marquis (M) tool and select the area that's blank, including just a bit of the image in your selection.
Now, instead of going to the content aware fill workspace, we'll go to the Edit menu and select just Fill.
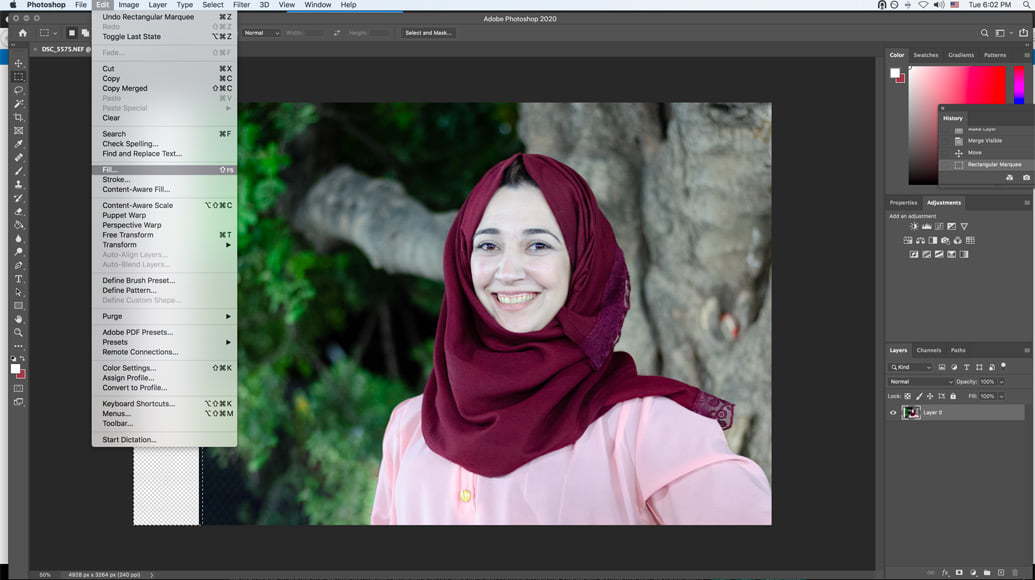
When the fill dialog box pops up, choose Content Aware in the Contents pull-down menu. Click OK.
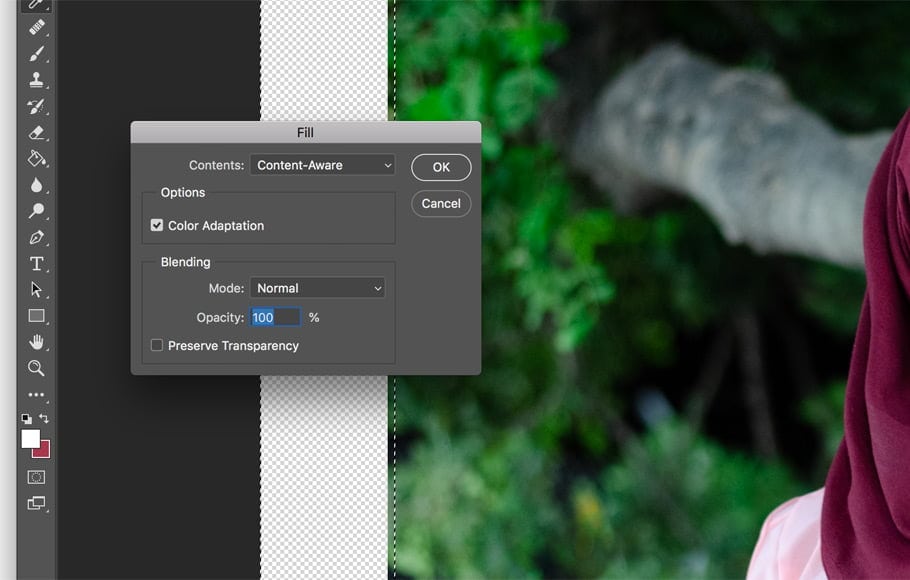
Immediately Photoshop fills in the blank area with what it thinks should be there.
You don't have the controls available in the content aware fill workspace – everything's still automated – but it does a pretty magical job of extrapolating and then filling in content.
I still did some clean-up with the clone stamp tool, but it only took moments.
Here's the final result, with the subject moved over to the right for a more pleasing composition.

Content Aware Fill FAQs
What is the content aware tool in Photoshop?
The content aware tool allows you to fill an area of your image instantly with new information based on surrounding pixels. It's an AI-based way of removing objects or extending backgrounds without having to manually clone and fill the missing parts.
What version of Photoshop has content aware fill?
Content aware fill was introduced in Photoshop CS5 (released in 2010). It has remained in all subsequent versions with some major improvements over time. New additions to PSD content aware fill include adding this tool to the mobile Photoshop app.
How do I use content aware fill in Photoshop 2021?
Select the area you want to fill, then go to the menu Edit > Content-Aware Fill. You can fine-tune the output using the options that appear in the Content-Aware Fill panel. The Photoshop content aware fill shortcut on keyboard is Shift +F5.
Why can't I content aware fill?
If you don't have the option to use content aware fill, check the layer you're working on. Make sure the layer is not locked, and is not an adjustment layer or a smart object. Also check that you have a selection active on which to apply the content aware fill.
Also, your computer may not have enough available RAM to run this advanced tool. Learn how much RAM you need for Photoshop here.
Why is content aware fill greyed out?
There are a few reasons why your content aware fill is disabled or greyed out. Always make sure you've selected a section of your image to fill as this tool can't be opened without having a selection to work on. If that doesn't work, try exiting classic mode in the crop tool options.
How to enable content aware fill in photoshop for mobile?
Content aware fill for Photoshop mobile is a new addition to the mobile app's set of image editing tools. You can use content aware fill for Photoshop on iPad by tapping the “paint bucket” icon to open the Fill Tools menu. Mobile content aware fill can also be used from the Active Selection Properties bar or by selecting Layer Properties > Quick Actions dropdown menu.
Photoshop says could not fill because not enough source pixels?
The “could not fill because not enough source pixels” message is a common error that makes content aware fill unavailable. This error is the result of attempting to sample from a transparent layer or from an image with too much transparency and not enough visual information. You can fix this error by making sure you have the right layers selected, refining the green-highlighted area where Photoshop will sample from, and by avoiding using content aware fill on layers that are mostly transparent.
Can I use content aware fill online?
Adobe recently launched a web-app version of Photoshop that features content aware fill amongst other popular tools. The Photoshop web app is still in beta and is not available in every region. Once the browser version of Photoshop is released, anyone with an Adobe Creative Cloud account will be able to use content aware fill online.
Final Words
The content aware fill tool in Photoshop is constantly evolving, particularly as the AI gets better. It's designed to automate as much as possible and therefore save you time.
How much time it actually saves, however, will really depend on the images you choose and how familiar you are with Photoshop.
If you're new to Photoshop and are used to automated AI tools, then the content aware fill tool will make a lot of sense.
If, however, you're adept with standard (manual) Photoshop tools, you might not find the content aware fill option particularly useful.
In writing this article, the majority of the images I tried didn't work so well, or needed too much clean up work to make this method worthwhile.
Complex backgrounds will always need a lot of trial and error for complex subtractions. In addition, I found that even many of the simpler object removals need some form of manual clean up.
Personally, I'm a big fan of the Healing Brush tool and the Clone Stamp tool and have a lot of experience with them. Using them tends to just take moments for me unless something's really complicated, so I'm not sure how much time content aware fill really helps me.
If, however, you're used to automated tools and aren't accustomed to doing things by hand, this tool will definitely save you time when you want to remove objects quickly – especially those on simple backgrounds.
In my experience, it works much better than the same tools in Luminar, especially when paired with Photoshop's other superb clean up tools.
Download the latest version of Adobe Photoshop to follow along with this simple tutorial.
Start a free 7-day trial today
Teryani Riggs (they/them) is an adventure, who loves all things wild and free. Teryani can often be found in the midst of a social/eco-justice campaign, hiking through wild backcountry, or hitchhiking around the world listening to other people’s stories. While their focus has historically centered on landscape, travel, and wilderness photography, they’ve also been hired to shoot genres as varied as historical fiction reenactments in the studio to product and food photography.
1 Comment
Leave a Comment

👋 WELCOME TO SHOTKIT!
🔥 Popular NOW:

Thanks, Usnea for your beautiful and in-depth explanation of the content-aware fill tool in Photoshop. This was totally worth reading. Looking forward to reading more articles from you.