


How and Why to Use the Channel Mixer in Photoshop
The Channel Mixer allows you to separately target and adjust individual color channels. Learn how to use it like a pro.
Photoshop | Software | By Judyth Satyn
Shotkit may earn a commission on affiliate links. Learn more.
There are many ways to edit and adjust colors in Photoshop, and while curves and levels are the go-to adjustment tool for most photo editors, the Channel Mixer has a unique capability.
The Channel Mixer allows you to separately target and adjust individual color channels – the red channel, green channel, or blue channel.
Read on to learn more about how and why to use the Photoshop Channel Mixer.

Download a free copy of Adobe Photoshop to follow along with this simple tutorial.
How and Why to Use the Channel Mixer in Photoshop
The Why
To understand how the Channel Mixer works, it’s helpful to know how RGB stores color.
The RGB file stores each color pixel in three bytes: one is red, one green, and one blue.
(See also: RGB vs CMYK)
This means each color pixel has not one but three stores of color.
This is most useful when creating greyscale and sepia images or for adding/removing other tonal tints.
When using the Channel Mixer you can separate the red channel from the green and blue channels.
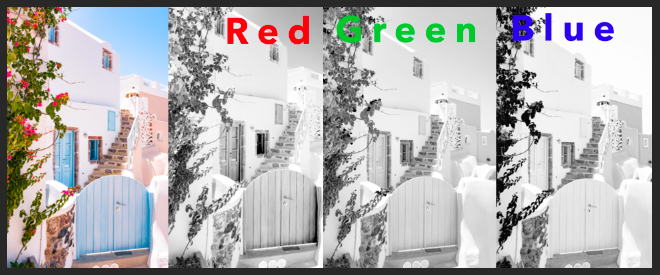
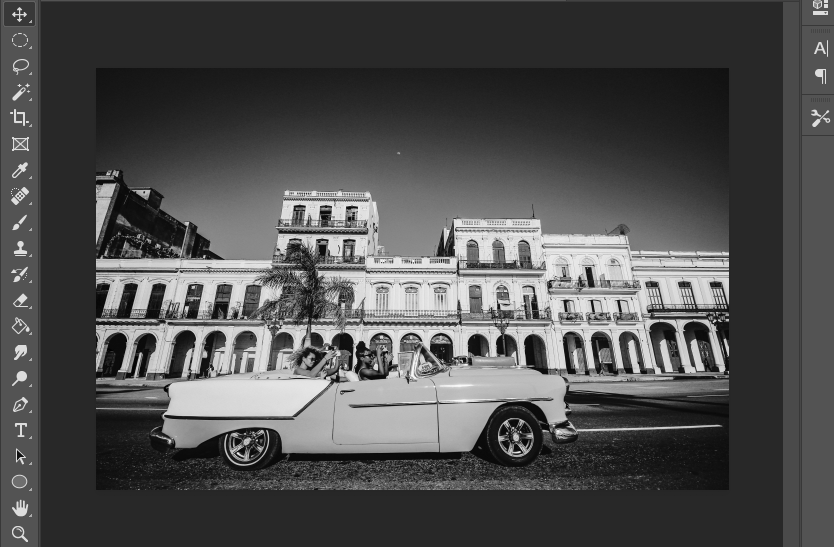
The images below demonstrate what happens when each channel is selected individually.
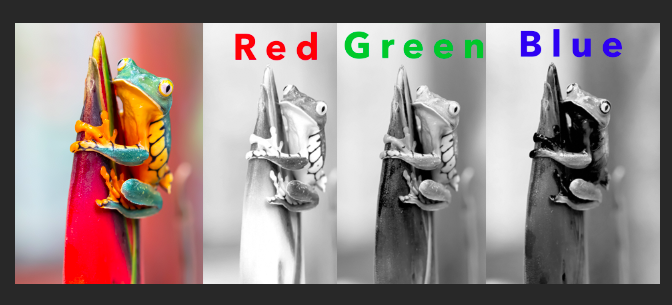
The greyscale of each image is different depending on the image’s content of blue, red, or green.
The Channel Mixer adjustment layer allows you to increase the tones of warm hues or to dull the fire in an overly saturated image.
In the image below, the red in the red channel is decreased to bring forth the green in the image.

The Channel Mixer doesn’t work the same as Selective Color which can isolate and adjust an individual color.
- Want to invert colors completely? Follow this tutorial: How to Invert Colors in Photoshop.
How to use the Channel Mixer
Step 1 – Open the Image
To open your image, head to the top menu bar and select File > Open.
Locate the file you wish to open from the computer and click to open.
If your file is already open, check that the layer you wish to adjust is active in the Layers Panel.
Step 2 – Open the Channel Mixer
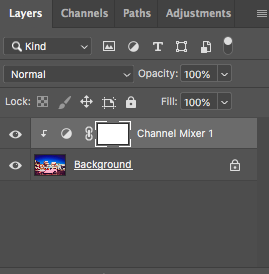
Open the Adjustment Layers Panel which is situated to the right of your workspace.
Click on the Channel Mixer Icon (three overlapping circles).
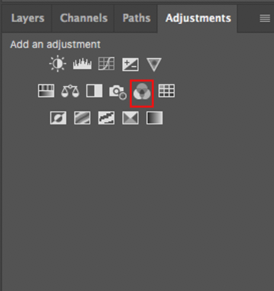
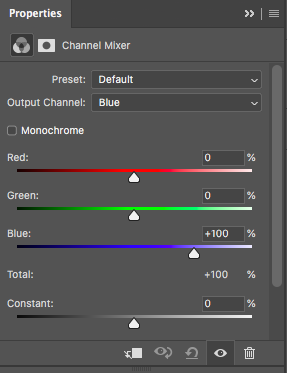
When clicked, the Channel Mixer Properties box will pop up.

In the Channel Mixer’s Properties box, you can pick a Channel Mixer Preset from the Preset drop-down menu.
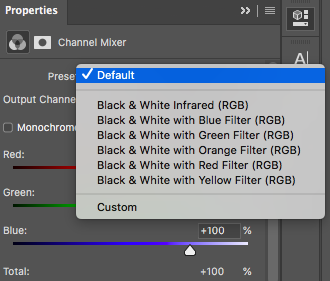
The presets offer a shortcut to some great greyscale adjustments.
The image below is using the Black & White with Blue Filter Preset.
Leave the Preset setting on Default.
- You might also like to check out: How to Change Color to Alpha in Photoshop.
Step 3 – Select a Channel
The Output Channel will give you the option to select one of the three color channels.
For the image below, the Blue Channel is selected to tone down the cool tones.
Step 4 – Adjust the Sliders
In the Channel Mixer, you’ll find a red, a green, and a blue slider.
As you adjust the sliders you will see the results in your canvas workspace.
To tone down the harsh blue in the blue channel, decrease the blue value.

You’ll also notice a slider labeled “Constant” – this slider adjusts the darkness or brightness of the selected output channel.
If you need to undo an edit click the undo arrow at the bottom of the Properties panel.
The Channel Mixer Adjustment Layer will appear in the Layers Panel – you can delete this layer at any time without affecting the original image.
If you want to make additional edits, click on the Adjustment Layer and the properties panel will reopen.
Now you know how to use the Channel Mixer, you can use it to make creative color adjustments.
Try experimenting with the Channel Mixer to create moody images, adjust tones, or make greyscale images.
- Want to try making funky outlines around images in Photoshop? Follow this guide: How to Outline Images in Photoshop.
What is Color Lookup in Photoshop?
A Lookup table tells Photoshop to remap certain colors in your image to other specific allocated colors, resulting in a certain “look”.
Add a Color Lookup Adjustment Layer from the Adjustment Panel and select one of the preset looks, such as HorrorBlue or EdgyAmber.
When you select a Lookup preset, your image can be altered dramatically or refined slightly depending on the source colors in your image.
The Lookup adjustment is new to Photoshop and worth experimenting with.
If you want to learn more about adjusting colors in Photoshop have a look at this tutorial: How to Use Selective Color in Photoshop.

Judyth is an experienced studio photographer and glass artist. When she isn’t Photoshopping comedians into the bellies of sharks, you can find her cooking delicious treats for her guests.

👋 WELCOME TO SHOTKIT!
🔥 Popular NOW:
