


How to Disable Adobe Updater (for Creative Cloud)
Learn how to disable Adobe Updater so you can use your Creative Cloud apps uninterrupted, while still manually keeping up-to-date.
Software | By Judyth Satyn
Shotkit may earn a commission on affiliate links. Learn more.
This guide will give you the easiest ways to disable Adobe Updater.
As an Adobe Photoshop user for many years now, I've often found it handy to turn off Adobe Updater when I'm working to a deadline and don't have time for updates.
Adobe Updater keeps your Adobe software up to date, but sometimes this can interrupt your workflow.
Let’s dive into the tutorial.

Download a free copy of Adobe Photoshop to follow along with this simple tutorial.
How to Disable Adobe Updater
Adobe's software has changed since it was first created. Originally, it was not connected to the internet.
When you bought Adobe products you received a physical disc to upload them onto your computer.
Now, Adobe is connected to the internet, and it's not possible to buy a one-off program.
The positive is that Adobe’s software programs are constantly upgrading and improving.
Technological leaps have been made, and you can delete an entire complex background with one click, create intricate patterns, and even nudge AI to create inspiring visuals with a few words.
Because of the constant evolution of technological capabilities, Adobe needs to keep your software up to date and ensures this by updating it automatically.
This can be useful if you want the latest technical tools, but it can also disrupt your workflow as tools will be moved or removed, and generally, Photoshop can pause to make time for the automatic update.
However, this is not something you want to happen when you have a crucial deadline.
Sometimes, it might have a technical hitch, as mine had this week, putting a spanner in the works and meaning I couldn’t meet a deadline. Thus, I made the decision to disable Adobe Updater when I have deadlines.
Adobe updating can change your workflow, it can affect how you work and use up extra data.
I preferred it how it was: call me a stick in the mud, but when I'm in the flow, I'm in the flow, and I like it that way.
So let’s disable Creative Cloud from automatically updating, and don’t worry, if you want to update, you can choose to.
The difference is you can decide when you want Adobe to update.
(Side note: If you're looking to cancel your Creative Cloud subscription altogether, here's how to do it while avoiding fees.)
Disable any future updates in the Creative Cloud
Creative Cloud is where the magic happens, so we will head straight to the source and snip the connection.
First, open your Creative Cloud desktop app.
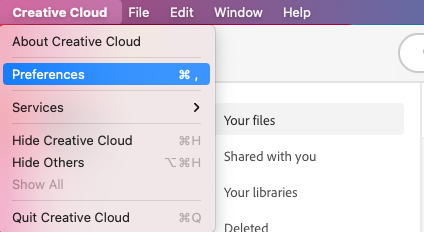
Then head to the top menu bar, and in the drop-down menu under Creative Cloud, select Preferences.
Or, for the keyboard shortcut, hit the Command+, keys (for Macs) or Ctrl+, keys (for Windows).
A dialogue window containing your account information will open.
In the left side panel of the dialogue window, click General.
Once clicked, you will see three buttons under Settings.
The last option is the one you are looking for – “Automatically keep Creative Cloud up to date”.
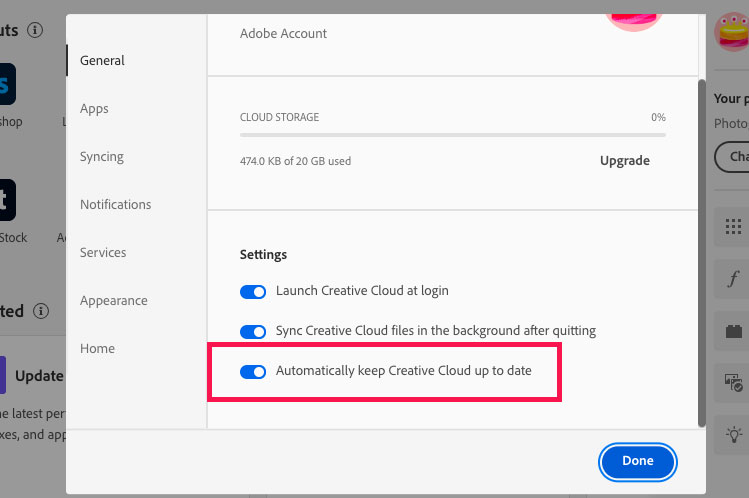
Click on this button to turn it off to prevent Creative Cloud from automatically updating.
Then click Done in the bottom right corner.
Creative Cloud will no longer automatically update.
Auto App Update
There is another box that is worth ticking off to ensure that Adobe Updater does not automatically update.
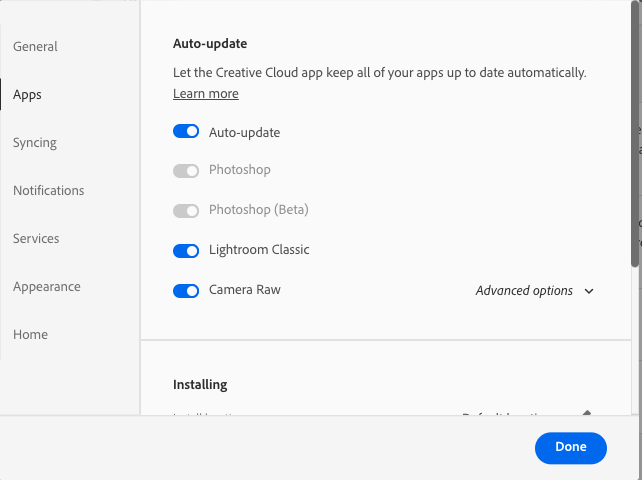
Under General in the left side panel, you will find Apps.
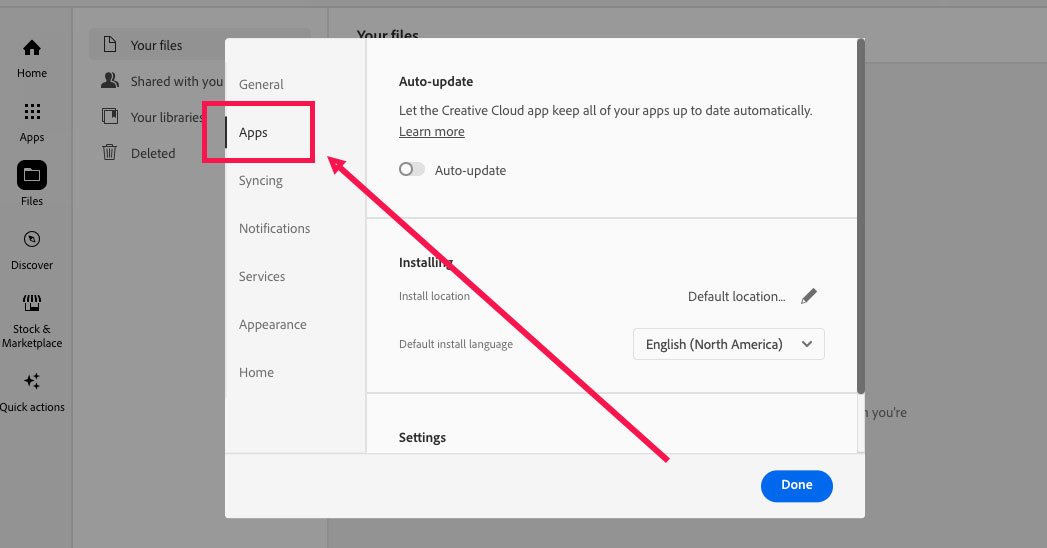
Click on Apps.
Turn off the first button, “Auto-Update” by swiping it to the left. When off, it will turn from blue to light grey, as shown below.
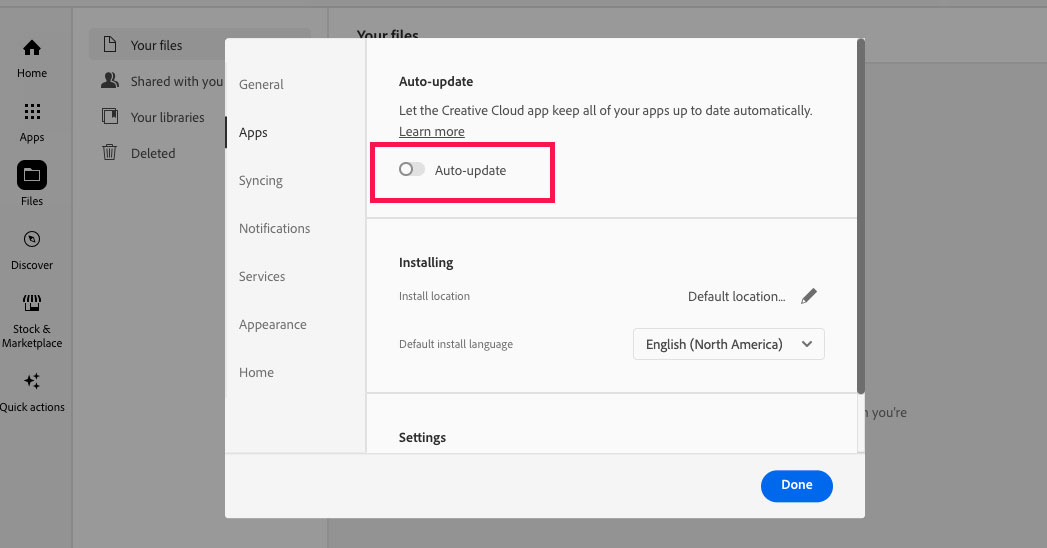
Then click the Done button at the bottom of the window.
Changing this setting means that none of your Adobe Apps will be updated.
Updating Adobe Manually
After you've turned off Adobe Updater, you will still be able to update Adobe apps manually.
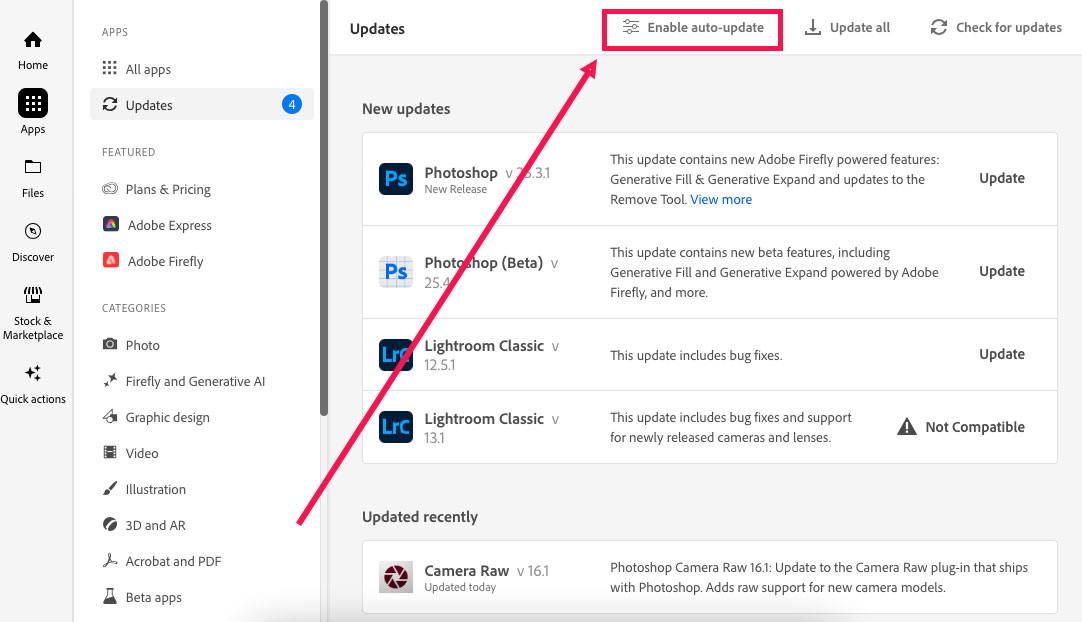
You can do this by heading to the Creative Cloud home page and clicking Apps in the left side panel.
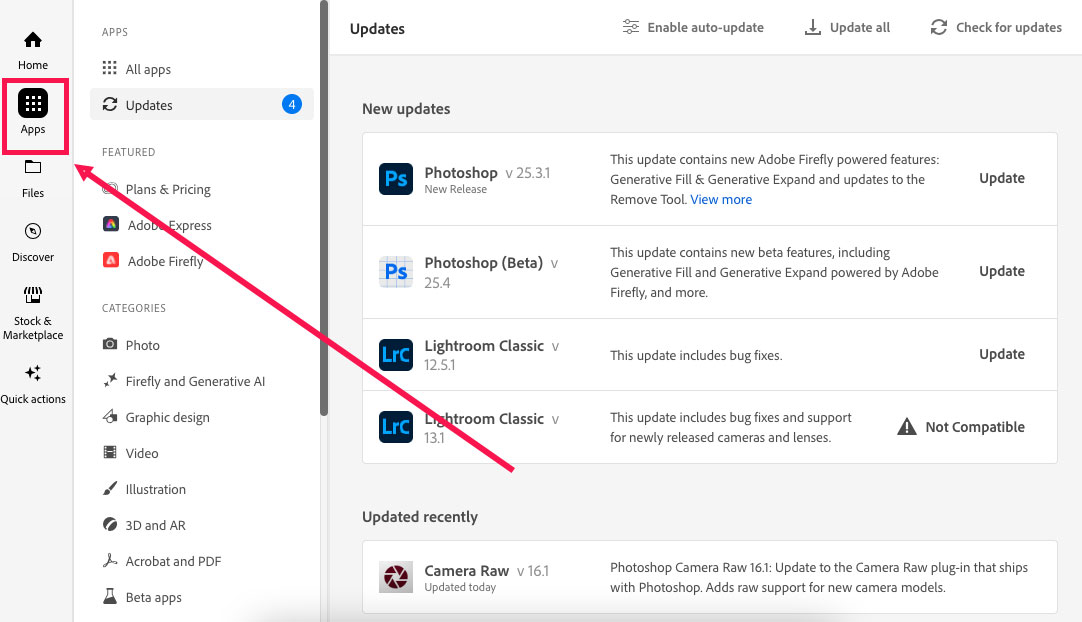
Once clicked, the Apps dialogue window will open. Here, you will find an Updates button.
If there are new software updates, there will be a blue circle beside this Updates button. The number inside indicates the amount of required updates.
Click Updates.
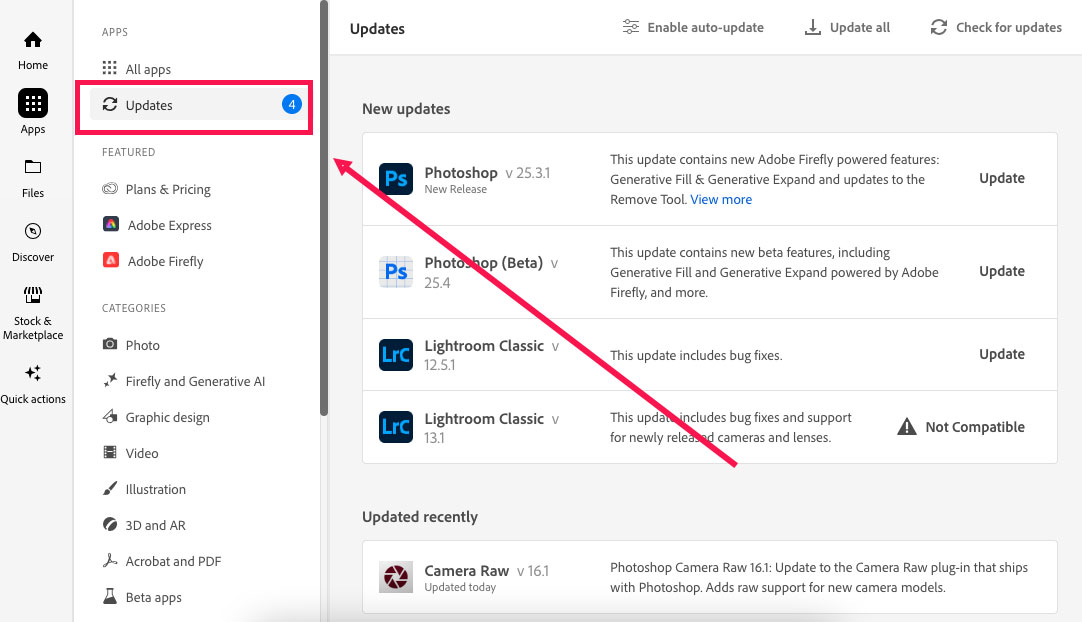
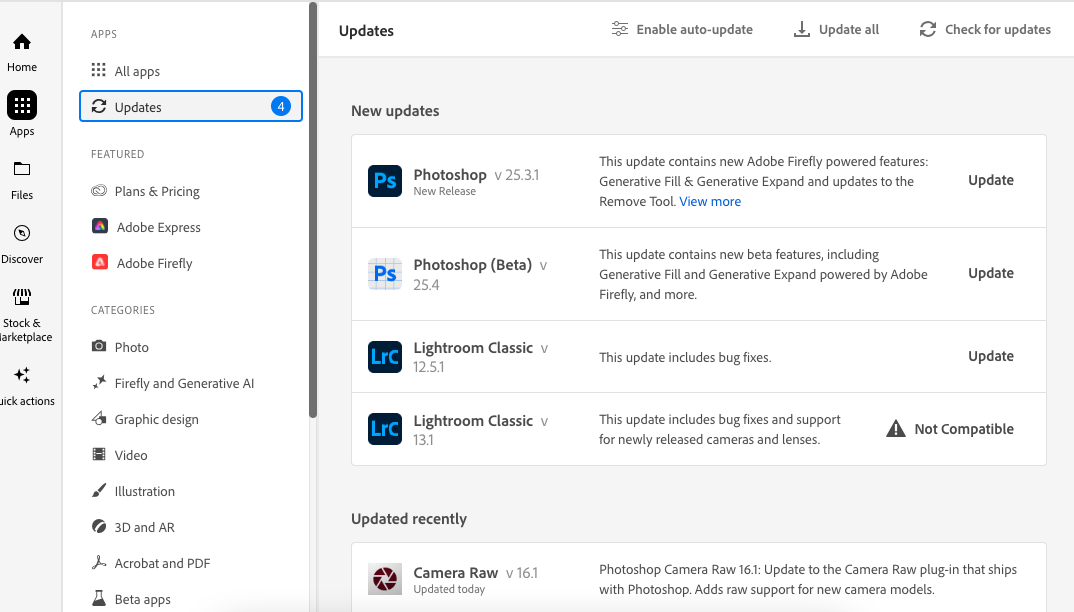
Once clicked, the Updates page will open, displaying the new updates available.
Beside each update available will be a list of the new features included.
If you wish to update all the programs at the same time, click “Update all” in the top menu bar.
Creative Cloud will immediately update all your software programs.
To update only one program, choose the program and click “Update“.
Enable Adobe Auto Updater
You now know how to disable Adobe Updater, so what happens if you wish to enable it?
Easy you can just turn it back on.
To allow Auto Updater to automatically update, simply head back to the Creative Clouds Desktop App.
Click on Apps and hit “Enable auto-update” in the top menu bar.
Once clicked, a pop-up window will appear. Here, you can select which apps you wish to be updated.
You can select all the apps or only one. It's up to you.
When you've made your selection, press Done at the bottom of the window.
Syncing Speed and Data Usage
Sometimes, the reason you wish to disable automatic updates is that the data usage interferes with your workflow,
If this is the case, you can change the rate at which Creative Cloud updates and syncs instead of disabling Adobe's Updater.
This means you can keep Adobe Updater switched on and receive all the fantastic novel updates.
To change the speed of the download data usage, head to the Syncing settings in the left side panel.
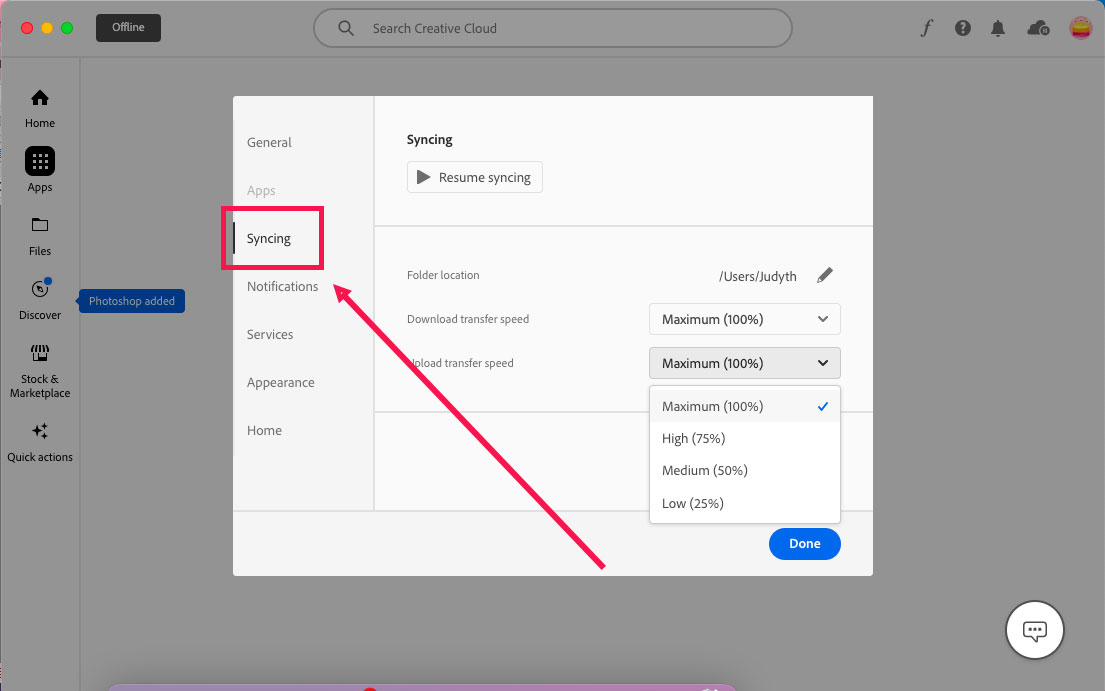
Once clicked, you will be presented with two options: the Upload Transfer Speed and the Download Transfer Speed.
By default, they will both be set to a Maximum speed of 100%.
Click on the value box, and a drop-down box will appear. From here, select your choice: Maximum (100%), High (75%), Medium (50%), or Low (25%).
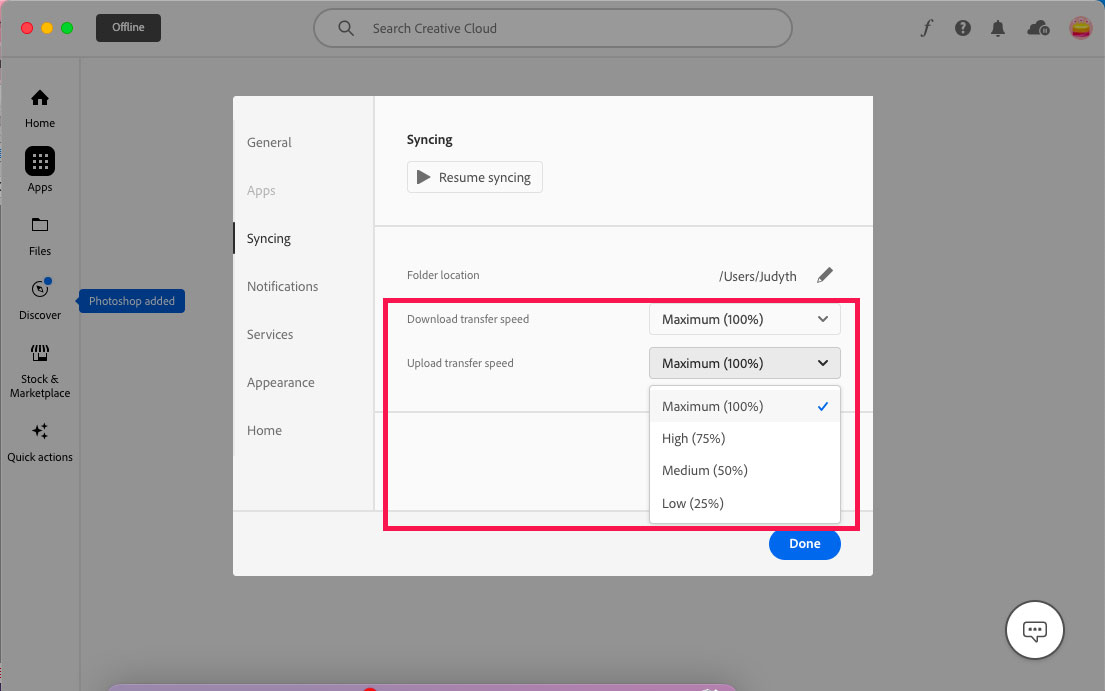
Set the Download option to Low (25%), and Creative Cloud updates will chew up less data.
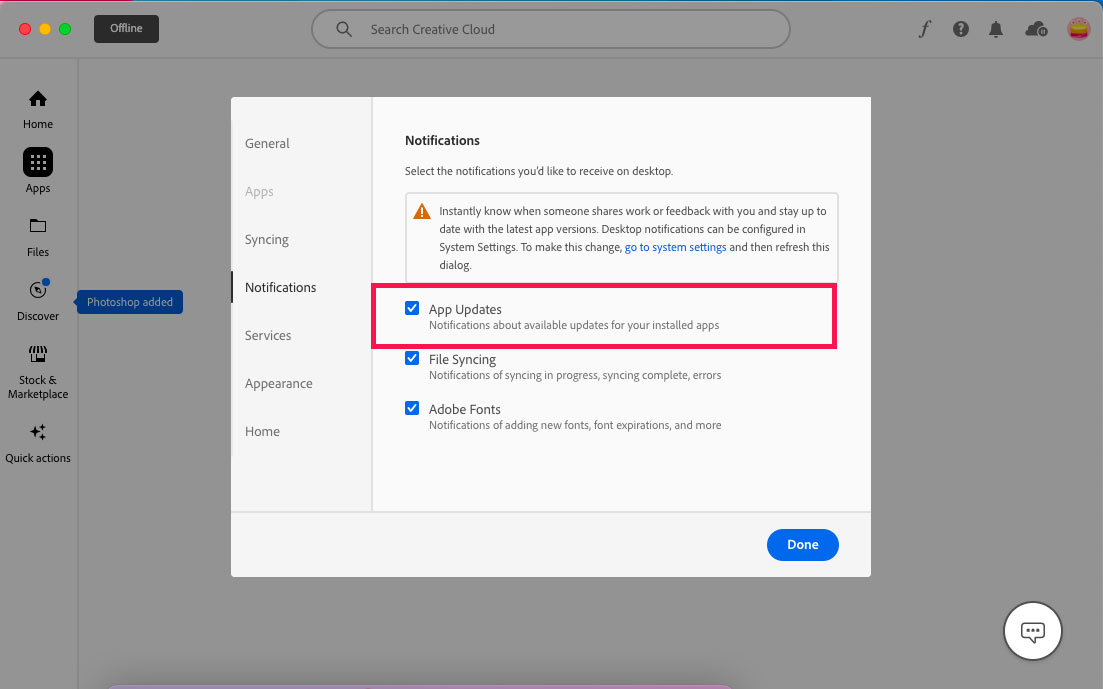
Notifications of Updates
If you've disabled Adobe Updater, it's worth ensuring that the Creative Cloud App Updates notification is enabled. This way, you will be informed of the latest software updates.
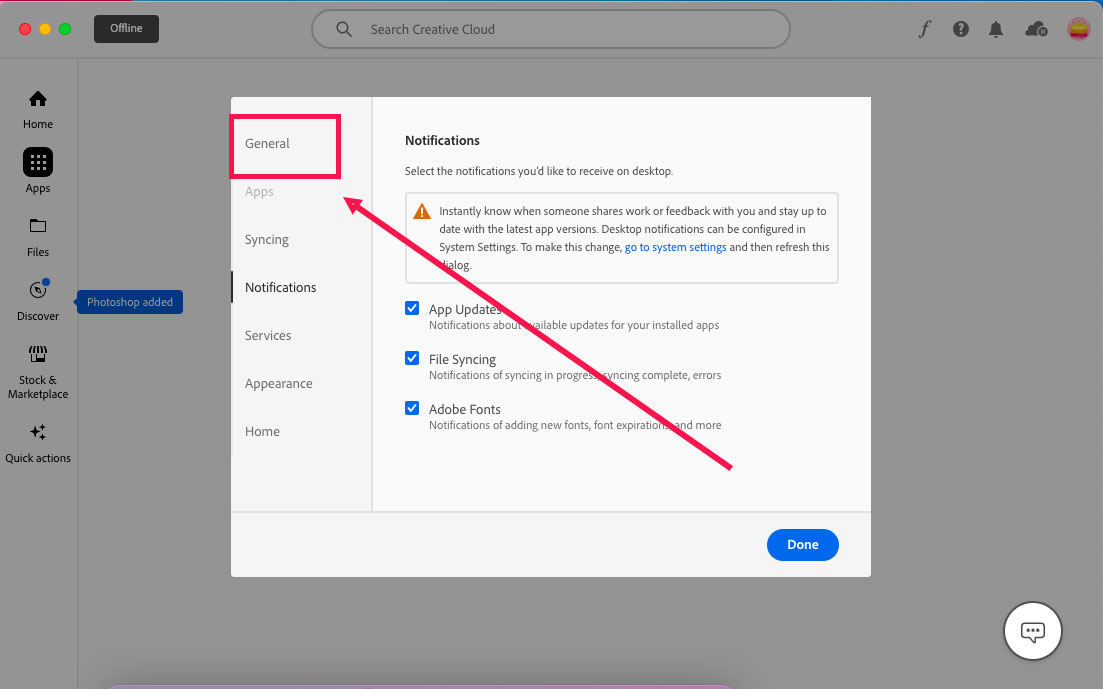
To turn notifications on, head to the left side panel and click on Notifications.
Tick the box beside App Updates to ensure you receive information about app updates.
This will ensure that you receive notifications of future updates.
If you can’t see an auto-update button, it could be because you are subscribed through a group, and the coordinator of the group has switched off auto updates.
I hope you enjoyed this tutorial. You now have all the tools to maintain a steady workflow without Adobe Updater interrupting you.
If you liked this tutorial, you might also like this post – Best Free Photoshop Alternatives.
FAQ
How do I turn off Adobe Updater?
You can turn off Adobe Updater using the Creative Cloud desktop app.
Head to the Creative Cloud preferences and select Apps.
In the Apps dialogue window, switch off the Auto-updates button. Then hit Done to save.
Where is Adobe Updater located?
Adobe Updater is located in the Creative Cloud Desktop App.
You will find the automatic updater in Creative Clouds Preferences under Apps and General.
How do I stop Photoshop from updating?
To stop Photoshop from updating automatically, open your Creative Cloud desktop app.
Head to the Creative Cloud Apps window and select “Enable auto-update”.
Untick Photoshop from auto updating and click Done.
How do I uninstall Adobe Updater?
To uninstall Adobe Updater, open the Creative Cloud desktop app and disable auto-updates.
Select Creative Cloud > Preferences from the main menu. When the Preferences window opens, select Apps.
In the Apps dialogue window, you will be able to uninstall Adobe Updater by switching off the Auto-update button.
How do I permanently disable Adobe Acrobat Updater?
You can not permanently disable Adobe Acrobat Updater, as the option will always be there to turn it back on.
You can, however, switch Adobe Acrobat Updater off. When switched off, it will not update until you enable it.

Judyth is an experienced studio photographer and glass artist. When she isn’t Photoshopping comedians into the bellies of sharks, you can find her cooking delicious treats for her guests.
👋 WELCOME TO SHOTKIT!
🔥 Popular NOW:
