


Freelensing Photography: Easy Ways to Get Great Results
Learn freelensing photography techniques and discover easy ways to achieve stunning results with this creative, unconventional shooting method.
Learn | Photography Guides | By Ana Mireles
Shotkit may earn a commission on affiliate links. Learn more.
Have you ever tried freelensing photography? No?
Maybe you've tried it but didn't get the best results.
Don't worry; in this article, you'll learn how fun and freeing this technique can be.
Once mastered, even the most mundane thing can become the subject of an ethereal and mesmerizing picture.
Here, you'll find the basic steps to start doing freelensing photography. You'll also find some tips and tricks to improve your technique.
Last but not least, I'll share some amazing pictures to inspire you and some tricks for recreating the effects in post-processing.
Are you ready to free your mind from the rules of regular photography? Then, let's start freelensing.
What Is Freelensing in Photography?

Freelensing (also known as lens whacking or reverse freelens) is a creative technique that involves detaching the lens from the camera to achieve different effects.
What Is Freelensing Used for?
Freelensing photography has different uses – mostly, it's a fun technique that allows you to experiment and achieve unusual results.
However, it's sometimes used for specific things.
Freelensing is an affordable way to do macro photography. You simply have to reverse the lens – they even sell some reverse converter rings.
Another use for freelensing photography is to achieve a tilt-shift effect. Traditionally, the focal plane is parallel to the sensor. When you change this, you can experiment with the direction of the depth of field, the perspective distortion, etc.
Following this train of thought, you can also use freelensing to achieve an extremely shallow depth of field for creative selective focus.
Examples of Freelensing
Here are a few examples of what you can achieve with freelensing.
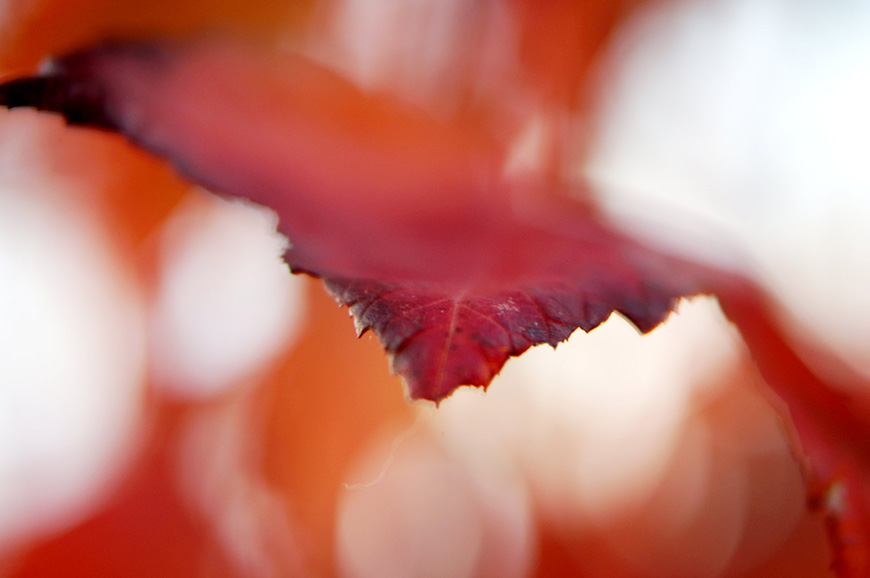
Isolating the subject

Credit: Joshua Kirby, CC-BY-2.0-DEED, via Flickr
Selective focus
Credit: Joshua Kirby, CC-BY-2.0-DEED, via Flickr
Self-portrait
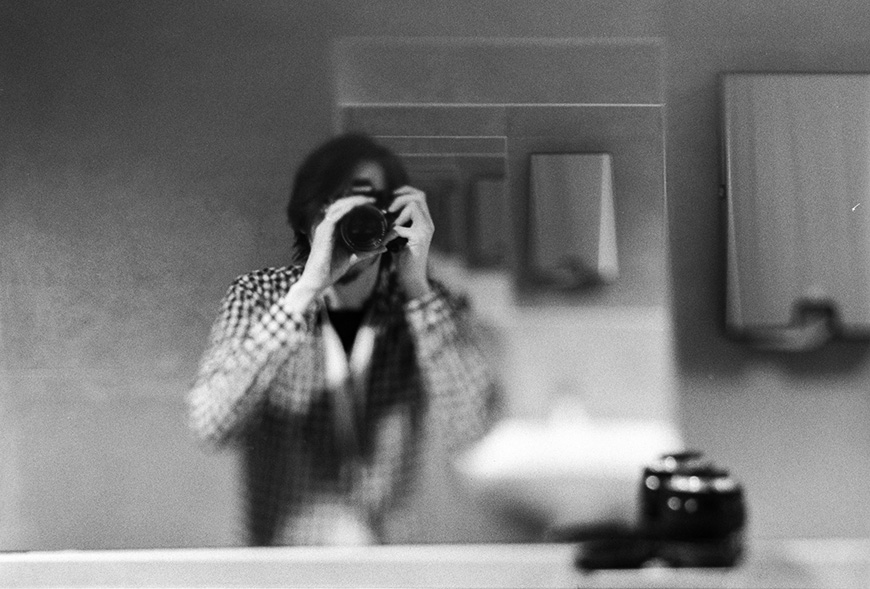
Credit: Jojonas, CC-BY-2.0-DEED, via Flickr
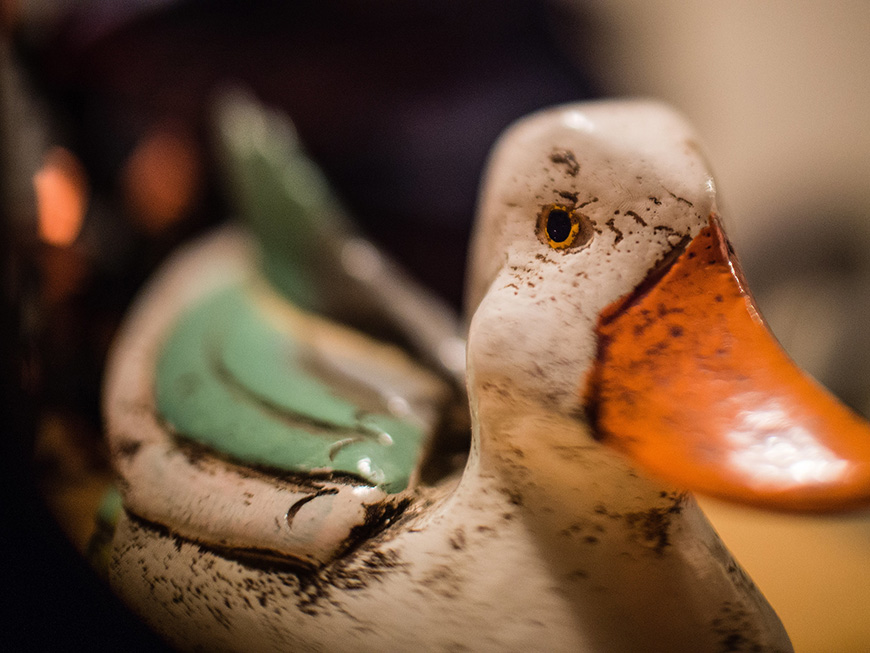
Toy photography

Credit: Inna Dee, CC-BY-2.0-DEED, via Flickr
Street photography
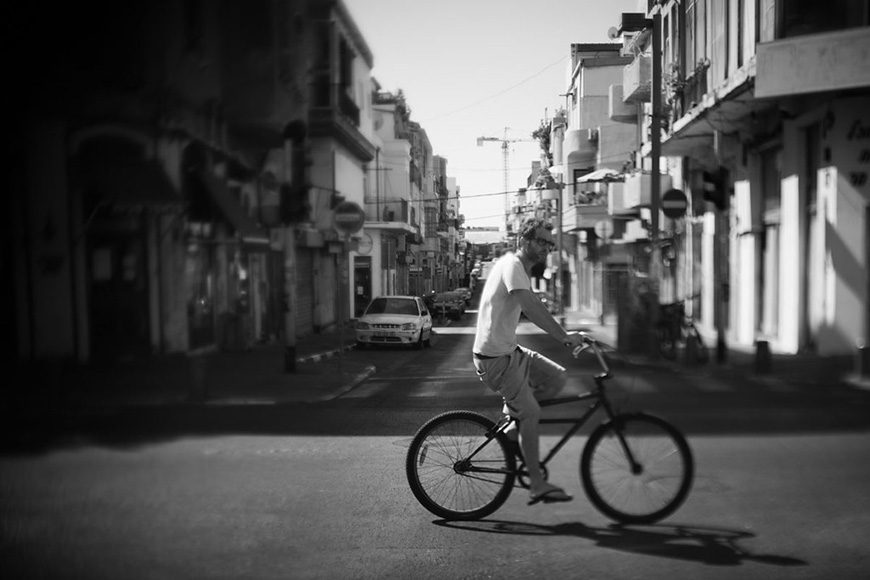
Credit: Victor Bezrukov, CC-BY-2.0-DEED, via Flickr
What Are the Best Lenses for Freelensing?
Prime lenses are usually better, especially if you're just starting with the freelensing technique.
A short or normal focal length is the best place to start. That means using a 50mm for a full-frame camera or a 35mm lens for a crop sensor.
This is because it's difficult to handle the camera on one hand and the lens on the other. Longer lenses will be heavier and might require more expertise.
Nikon users might have trouble with some Nikon lenses that close the aperture as soon as you detach the lens. To solve this, you can use one with a manual aperture ring.
However, feel free to experiment with whatever you have on hand.
The Best Camera Settings for Freelensing
In freelensing photography, it's best to set the exposure with the lens attached – at least on your first attempts. You also need to use the camera in manual mode.
You should use the widest aperture that your lens allows. So, if your lens is a 50mm f/1.4, set the aperture to f/1.4.
If there's enough light, set the ISO to the minimum – usually ISO 100.
Now, you can use the camera's exposure meter to determine the best shutter speed.
If the shutter speed is too slow and will cause camera shake or motion blur, then raise the ISO. However, you shouldn't have much trouble because the aperture is open to the maximum.
You'll also need to use your camera in manual focus and set the focus to infinity.
How to Do Freelensing
Step 1
Set the manual settings while the lens is still attached to the camera. The most important thing is that you keep the widest aperture.
Step 2
Set the lens to manual focus and turn the focus ring to set the focus at infinity.
Step 3
If you're using a digital camera, turn on Live View. This lets you see the effects as you move the lens before shooting.
Of course, you can do freelensing with film cameras. However, you won't have a preview of the effect. This can be part of the creative process, though.
Step 4
Detach the lens from the camera body. Hold it between your thumb and index fingers in front of the camera.
Step 5
You can start shooting with the lens close to the camera. Even by doing this, you'll get light leaks – but that's OK. After all, this is creative photography.
Then, keep shooting while experimenting with different angles of the lens in relation to the camera body.
You can tilt it or move it closer and further away from the camera to create amazing effects.
8 FreeLensing Tips, Tricks, & Techniques
Credit: Aidan Morgan, CC-BY-2.0-DEED, via Flickr
Here are a few tips for more fun and successful freelensing photography.
Tip 1 – Use Live View
While turning on Live View is not necessary to do freelensing photos, you'll find it much more comfortable.
You'll already have enough on your plate by holding the camera on one hand and the lens on the other. If you try to use the viewfinder, you're complicating your life a bit more.
Of course, this is all a matter of practice – you'll find it easier as you continue.
Tip 2 – Mix and match
One of the great things about freelensing photography is that the compatibility of the lens mount does not constrain you.
Freelensing lets you use older lenses with your brand-new mirrorless camera or a Canon lens on your Nikon, opening up a world of possibilities.
Tip 3 – Avoid humid or dusty environments
When you detach your lens from your camera, you leave the camera sensor exposed. You could damage the sensor in the long run in a humid or dusty space.
As a general rule, it's a good idea to use a rocket blower to clean the sensor after practicing freelensing photography.
Tip 4 – Try reverse freelensing photography
Credit: Travis Modisette, CC-BY-2.0-DEED, via Flickr
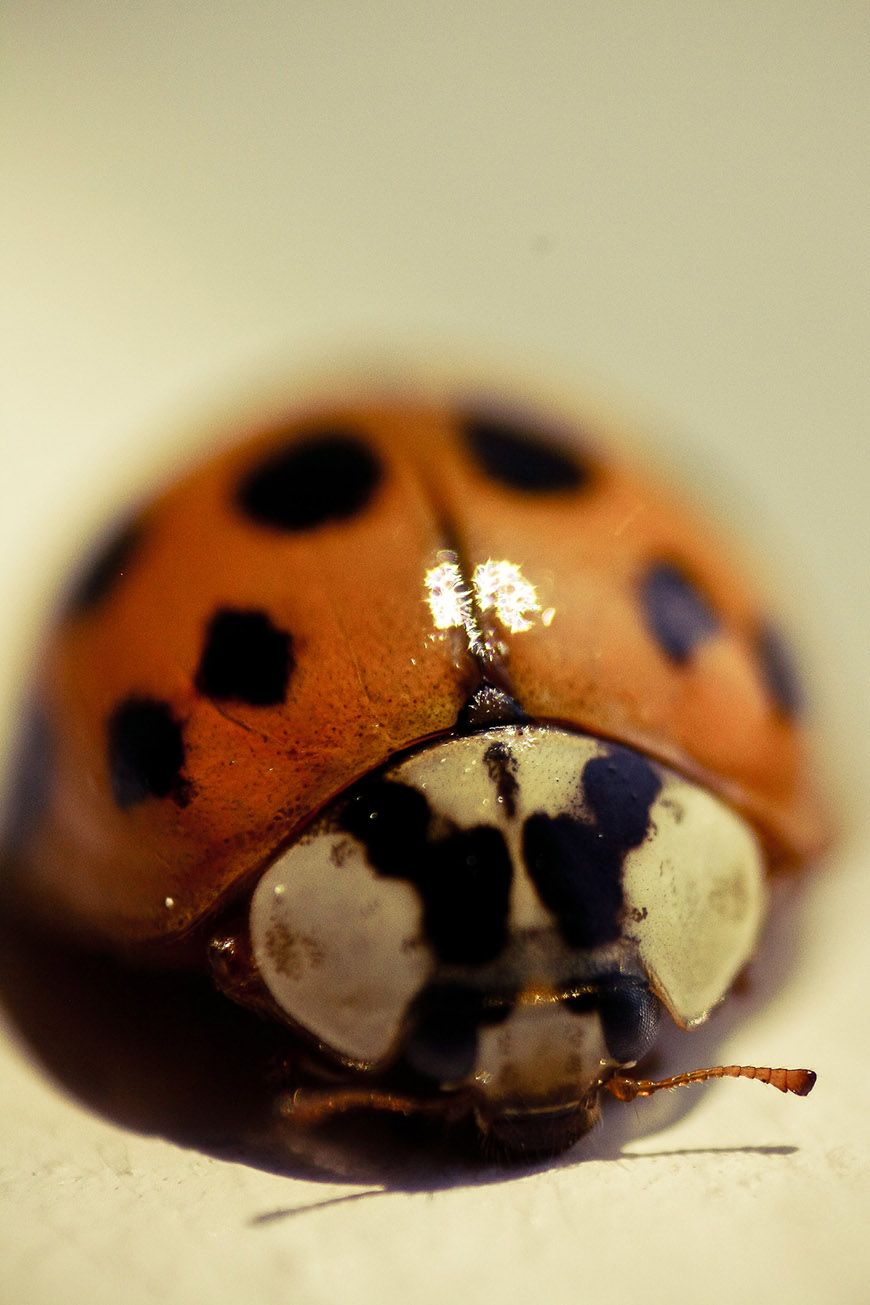
If you like macro photography but don't have the budget for a macro lens, you'll love freelensing.
To do macro photography with the lens detached from the camera, simply turn it around. This will create a magnifying effect.
Selective focus is important in macro photography – you have very little leeway.
Using this technique, there's no autofocus, so you have to physically move to get the main subject in focus and be careful not to change positions once you've achieved focus.
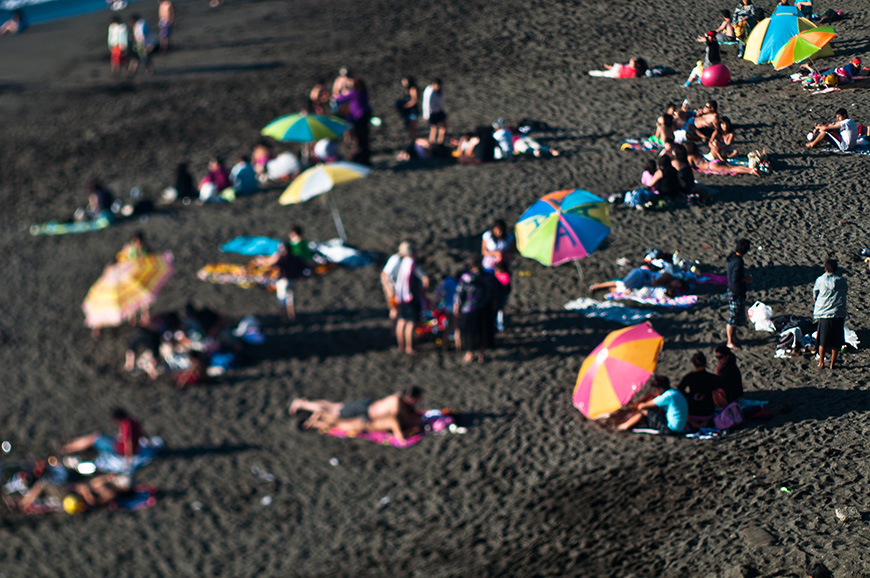
Tip 5 – Try doing miniature photos
Credit: Pablo Meneses, CC-BY-2.0-DEED, via Flickr
This effect is usually achieved by using tilt-shift lenses. In this case, you can do this by tilting the detached lens – this way, the focus plane is no longer parallel to the sensor.
You should take the photograph from a higher angle to achieve the miniature effect better. Now, tilt the lens up and down until the subject looks like it's a scale model.
Tip 6 – Experiment with light leaks and flares
Since there is no longer sealing between the camera body and the lens, light might come in from the side.
This can create a lens flare or a light leak. You don't need to eliminate them – simply use them creatively.
Tip 7 – Move
Focusing can be a bit tricky when you're freelensing. You need to remember that moving the lens will affect the focus.
When the lens is closer to the sensor, the subject that's further away will be in focus. Instead, moving the lens further away from the sensor will focus what's closer to the camera.
Tip 8 – Practice
The best way to improve your freelensed photos is to practice and experiment. This technique gives you a lot of flexibility, so just have fun.
How to Create the Freelensing Effect in Post-processing

Photo credit: Nichole Sebastian
There isn't just one way to create a freelensing effect in post-processing. This is because, as you've seen throughout the article, this technique can create many different effects.
You can create the tiny town effect, or the tilt-shift macro effect. Here, I'll show you a workflow that's as free as the technique.
For your photos to look like they were taken freelensing, you just have to consider two main factors: light leaks and selective focus.
You can achieve this using most photo editors – I'll show you how I do it in Lightroom Classic.
Once you've imported your photo into Lightroom, move to the Develop Module.
Here, use the Masking tool to selectively focus your subject. In this case, I combined three masks: two linear gradients and one radial.

This is because I wanted to blur the image in a way that wouldn't make much sense in regular photography.
Remember that by using the freelensing technique, you can tilt the lens and alter the direction of the depth of field.
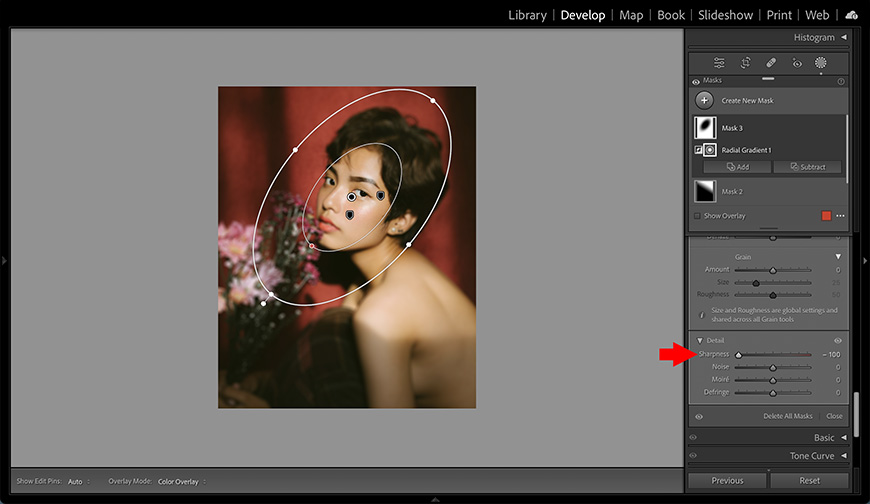
Once I had the masks, I moved the Sharpening slider all the way to the left to blur the photo.
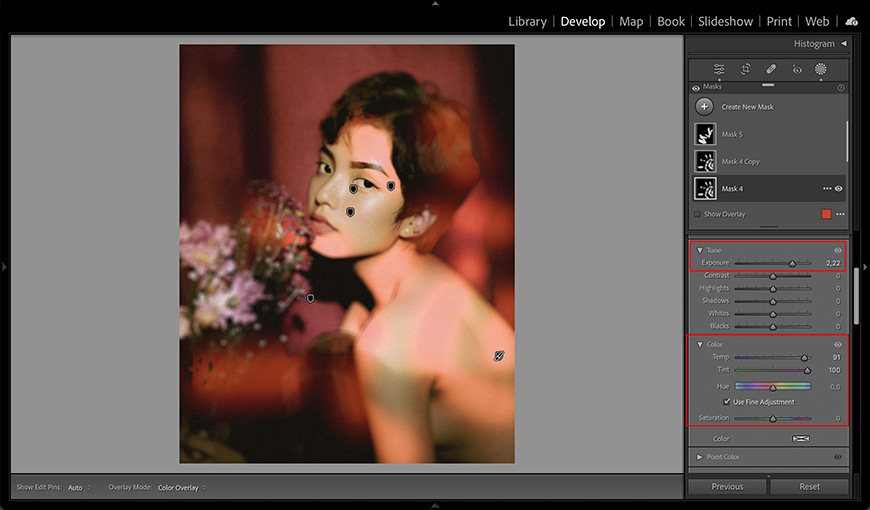
Next, I created light leaks by drawing freely with the brush masking tool.
Then, I modified the Exposure, Color Temperature, and Tint.
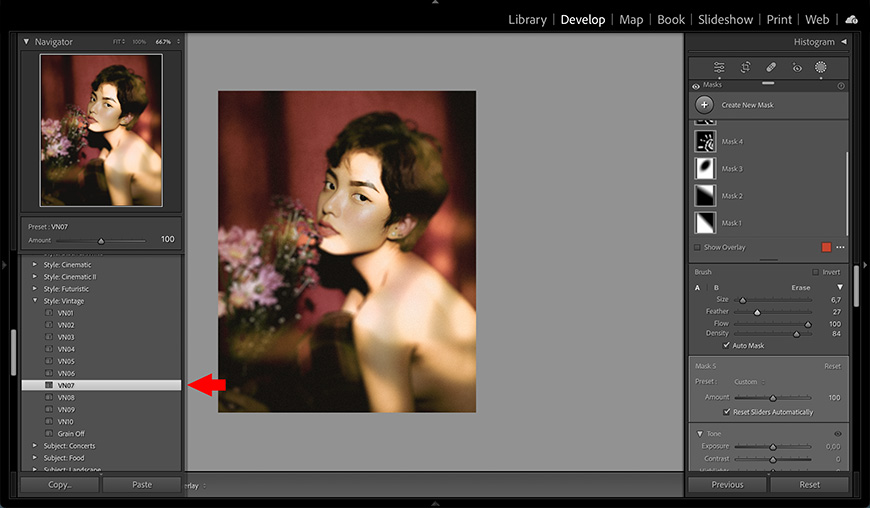
Lastly, you can add a preset. I like to use something from the Vintage or Creative collection, but feel free to experiment.
FAQs About Freelensing in Photography
Can you take a photo without a lens?
If you simply remove the lens, you'll get a plain white image. However, you can detach the lens and place it in front to do freelens photography. Alternatively, you can make a hole in the body cap and use the camera without a lens as a pinhole camera.
What is free lens photography?
Free lens photography is a technique where you detach the lens and hold it in front of the camera, creating all sorts of creative, fun effects.
What is reverse freelensing?
Reverse freelensing photography is an affordable way to create macro shots. You need to detach the lens from the camera body and turn it around – this way, it will work as a magnifier.
What does focus free lens mean?
A focus-free lens (AKA fixed-focus lens). You can't change the focus in these lenses because it's fixed at the hyperfocal distance when they're manufactured. These are the types of lenses used in disposable cameras or low-end point-and-shoot cameras.
Is lens whacking the same as free lensing?
Yes, they're both names for the same photography technique: you take off the lens and take the photos by holding it in front of the camera.
Is there a freelensing app?
There isn't an app specifically designed to mimic freelensing. However, you can use apps with a tilt-shift effect, such as Instagram or Tilt-Shift Camera. Alternatively, you can use apps with a customizable blur tool, such as Snapseed.
What is a tilt-shift lens?
Tilt-shift lenses have a special mechanism that allows you to tilt or shift the optics in relation to the sensor. They're commonly used in architectural photography because they prevent perspective distortion. However, they're also used in other types of photography to extend or modify the direction of the depth of field.

Check out these 8 essential tools to help you succeed as a professional photographer.
Includes limited-time discounts.

Ana Mireles is a Mexican researcher that specializes in photography and communications for the arts and culture sector.

👋 WELCOME TO SHOTKIT!
🔥 Popular NOW:
