


How Do You Take Macro Photography? Ultimate Guide
Find out the best macro photography tips and ideas in this must-read guide! Learn how to get started or take your shots to the next level.
Learn | Photography Guides | By Andy Day
Shotkit may earn a commission on affiliate links. Learn more.
The beauty of macro photography is that even with only basic equipment, photographers can discover incredible worlds and reveal remarkable details, bringing to life the minute by making it huge.
This guide is designed for beginners keen to take their first steps into the realm of macro photography, allowing you to start figuring the right techniques for taking photographs that are just as good as those captured by professionals.
You can produce decent results with a point-and-shoot digital camera or even a smartphone paired with a lens adapter. But if you want to create really special images, it's worth knowing what gear you will need and exactly how to put it to good use.
We'll give you out best macro photography tips so you can start taking amazing digital photography close ups and macro pictures.
What is Macro Photography?
Macro photography is creating images of tiny worlds, taking small subjects and presenting minuscule details that would often go unnoticed as life-size.
Macro photography goes beyond close-up photography, bringing a higher level of magnification. Up until recently, macro photography required specialist equipment, some of which was very expensive.
However, thanks to developments in technology, it's now more accessible than ever.
Macro photography has some complex terminology, and perhaps the most important one to understand is magnification.
Macro photographers are concerned with how big somethifng appears when it is projected onto the camera sensor compared with how large it is in real life-size when viewed with your naked eye.
For example, if a bug is 1cm in length and you can direct light so that it appears as 1cm long on the sensor of your camera, you have achieved a magnification ratio (or a “reproduction ratio”) of 1:1 magnification.
This means that it will be bigger than real life when viewed on your camera's LCD, and far bigger when viewed on a computer monitor.
Macro photography tends to describe anything from a ratio of 1:10 and beyond: i.e., 10mm in real life becomes 1mm on your camera sensor.
The expensive macro lenses used by professionals go beyond this level of magnification, with some offering 5:1 — that means that 1mm, in reality, is captured as 5mm on the camera's sensor.
Understanding how these reproduction ratios work should be one of the first steps in learning how to shoot macro photos.
What is the difference between micro and macro photography?
Confusingly, macro and micro photography refer to the same thing: photographing small subjects close up with increased levels of magnification compared to a regular lens.
While most people use the term “macro photography”, the confusion comes from Nikon's use of the word “micro” to describe its specialist macro lenses.
Other than this, there is no difference. There are no rules, but it's generally accepted that if the magnification ratio is 1:10 or beyond, it's macro.
12 Tips for Macro Photography
Here are 12 pro tips to get you started on your first macro photography shoot.
1. You can shoot with Minimal Gear, as long as you know how to use it
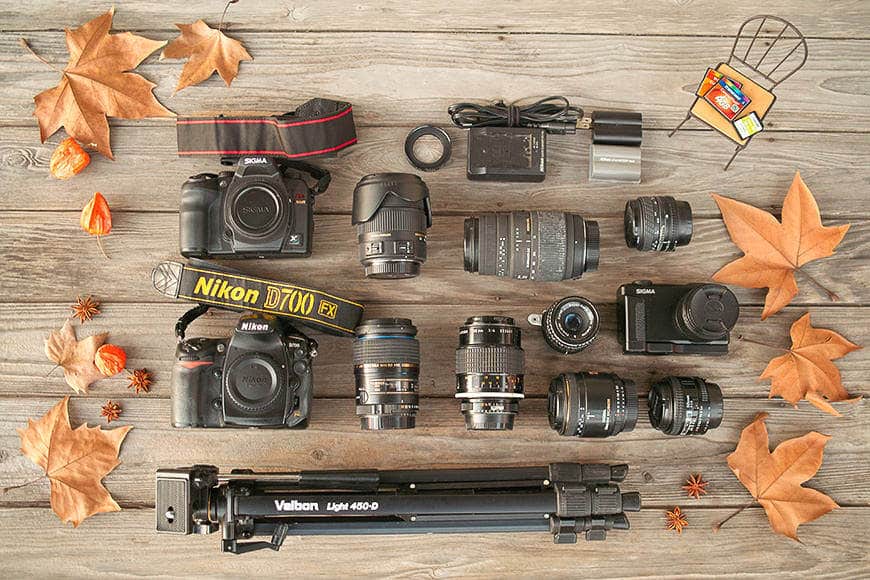
Credit: Lafugue Logos
As a result of improvements in photographic equipment in recent years, macro photography is no longer just for those with deep pockets. You might already own everything you need to shoot macro photography.
However, if you want to produce professional-looking results, what is needed for macro photography are some essential pieces of kit. These basics will take your shots beyond what can be achieved with a smartphone and a screw-on macro lens.
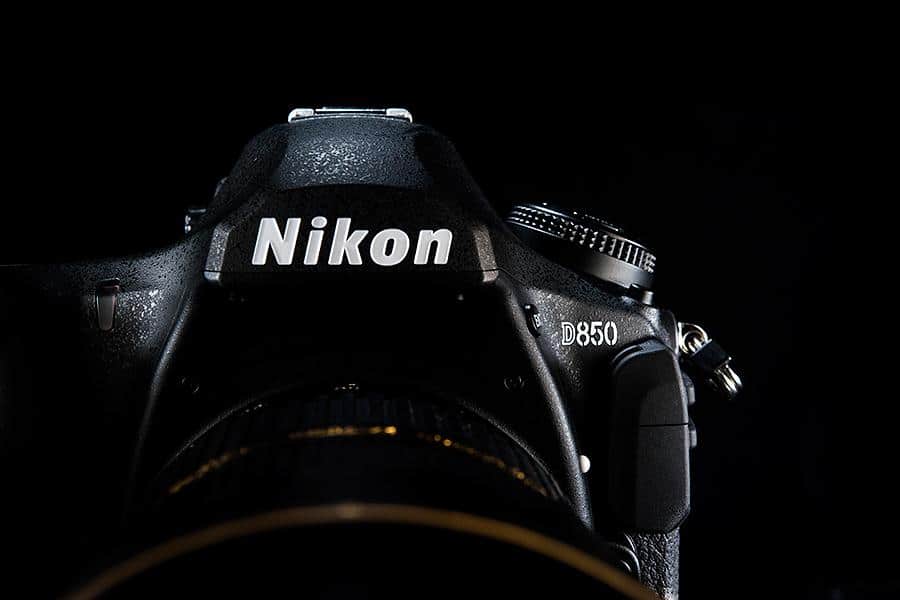
- Camera
Many point-and-shoot cameras such as these have decent dedicated macro modes, but you will soon want to see improvements — not just in image quality, but also in the level of control you have when it comes to creating your images.
Even the cheapest DSLR or mirrorless ILC (interchangeable lens camera ) will deliver excellent results by comparison.
It's a good idea to balance your macro photography needs with everything else that you will be shooting. Unless you're purchasing a camera that's specifically for macro photography, try and weigh it against other factors, such as portability or whether you will be shooting in low light.
Our list of digital cameras recommended for macro photography offers some great suggestions. As with most technology, you'll get what you pay for, but you don't need to spend thousands of dollars on the latest full-frame camera.
Credit: Jesse La Plante
Don't assume that you want the biggest sensor out there. The higher pixel density of APS-C and Micro Four-Thirds cameras can be beneficial when it comes to shooting macro photos, and these smaller sensors will naturally create a larger depth of field which can help keep more of your image in focus — and this can be very useful when you're starting out!
Plus, having a smaller camera can help you when trying to sneak up on small creatures that have a tendency to run (or fly) away.
Choosing a mirrorless camera over a DSLR might offer some advantages. EVFs aren't always better than optical viewfinders, but there are other perks such as a live histogram to check your exposure.
Particularly useful is the option to magnify the EVF in order to be really precise when focusing manually — and you will definitely need to focus manually!
Some DSLR cameras will have this magnify option available when you switch to Live View, but you will be restricted to using the LCD screen on the back of the camera (the optical viewfinder will be disabled).
That might be fine if you're shooting in a controlled set up indoors, but it's not so easy when out hunting for subjects. Holding the camera outstretched can make focusing very challenging.
Maximum burst speed is another factor that you might want to consider, especially if you want to shoot macro photographs outside of a controlled setup.
The ability to fire off a rapid series of shots will increase your chances of not only capturing the perfect moment but of also having it in perfect focus.
- Lens
You don't necessarily need to spend money on a dedicated macro lens (see: is it worth buying a macro lens?), but if you want to get the best results and give yourself the most flexibility, it's definitely the best option.
Every macro lens will have the word “macro” in its name, except for Nikon which uses the word “micro”.
(Ignore that cheap old iPhone macro lens you bought off eBay for now!)
Most macro lenses are prime, but there are some zoom options (telephoto lenses) available, such as the very affordable Tamron 70-300mm f/4.0-5.6 Di LD Macro Telephoto Lens.
It's worth noting that some macro lenses are more “macro” than others. For example, the new Canon RF 35mm f/1.8 Macro STM has a magnification ratio of 1:2, while the Canon EF 100mm f/2.8L IS USM Macro offers 1:1.
The focal length required depends on what you plan to photograph – every type of lens will give a different look.
You may want to give yourself the option of not having to get too close. Flying subjects tend to escape if they sense movement close by, and something like a 100mm lens is a much better option than a 35mm lens when it comes to photographing dragonflies or butterflies.
The gap between you and your subjects is called the “working distance”, and closer is not always better as you might also block off natural light sources.
You should also check out our in-depth guide to the best macro lens for more top tips before you head out to the shops!
- Flash
Shooting macro photography often means using a small aperture to try and maximise the depth of field and keep as much as possible in focus. However, this dramatically cuts down on the amount of light entering the lens (see also: why is depth of field important?)
As a result, there will be times when the amount of natural light available simply isn't sufficient — especially if you are shooting indoors.
For this reason, you may wish to consider budgeting for a flash. Major manufacturers all have their proprietary models like the Canon Speedlite 470EX-AI or the Nikon SB-700 AF Speedlight, but there are more affordable options such as the Godox TT600 Speedlite.
- Lighting Modifiers
The problem with speedlights that attach to your camera is that the light can be very harsh. There are plenty of gadgets that you can use to soften this light, such as the Godox Foldable Universal Softbox.
Alternatively, you can find your own methods for diffusing the light coming from your flash, such as a bedsheet.
Just note that as soon as you diffuse your light source, you are reducing its intensity so you will need to increase its power to compensate.
A ring flash (aka ring lights) can help distribute the light around a tiny object, which can be useful when shooting at a smaller aperture (i.e. f-stop).
Artificial lighting will allow you to shoot your subject whatever the ambient lighting conditions. Being able to control the light with flash diffusers allows you to play around with f-stops to get the right f-number, regardless of the ambient light in a room.
- Tripod
There is a bewildering array of tripods on offer to the average photographer, but if you're serious about macro photography, you will need to choose what's right for you.
There are a lot of things to consider, such as whether you will be taking it with you on long hikes or staying at home in the comfort of your newly-constructed macro photography studio.
You may wish to choose something that gives you lots of flexibility: if you want to photograph a subject crawling through the undergrowth, you will need a tripod that will allow you to get a low vantage point, perhaps just a few centimetres above the ground.
Something like the Benro SystemGo Plus Aluminum Tripod is a solid option, especially as it incorporates a monopod, another handy tool for many types of macro photography, especially product photography.
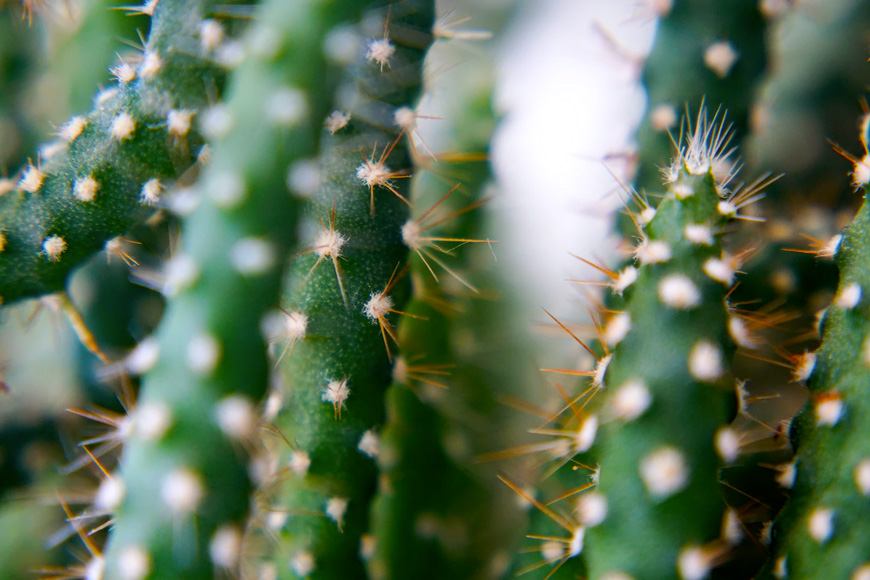
2. Understand Depth of Field
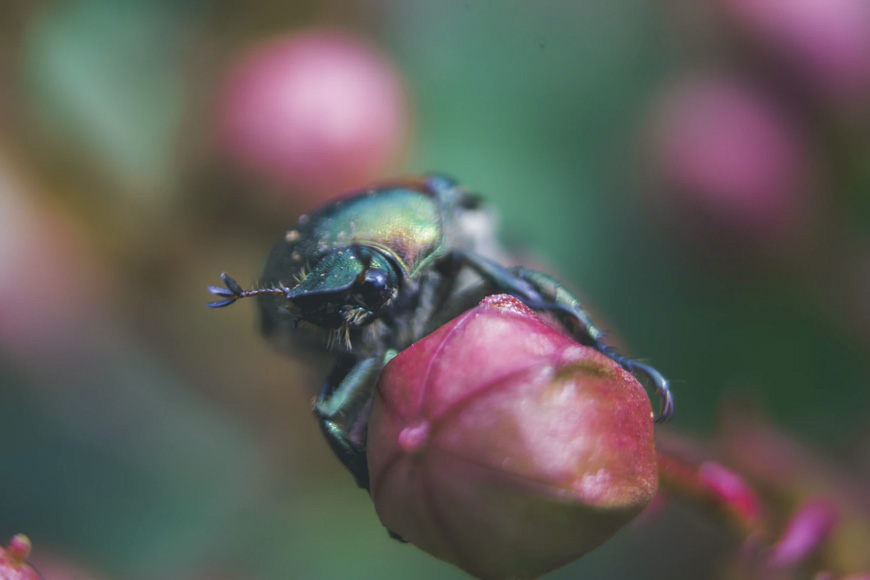
Credit: Timothy Dykes
Because of how a subject is magnified and how close it sits to the lens, macro photography means working with a very shallow depth of field.
This means that the portion of the image that is in focus can be razor-thin. For example, a bug's eye might be sharp while its antennae are blurred.
To maximise the depth of field, we typically shoot with a small aperture — often somewhere between f/5.6 all the way through to f/11.
This will often depend on the lens — if you go to f/16 and beyond, many lenses suffer from diffraction which, thanks to a quirk of physics, means that images are no longer as sharp.
You will need to experiment with your lens to find out the smallest aperture that you can use before image quality starts to drop off.
Because of the smaller apertures, you will need a lot of light. If you're shooting without any sort of artificial light, it's best to shoot in full daylight.
If it's too dark, you won't be able to hold your camera still enough to avoid causing the image to blur by the movement of your own hands. For this reason, you'll need a tripod.
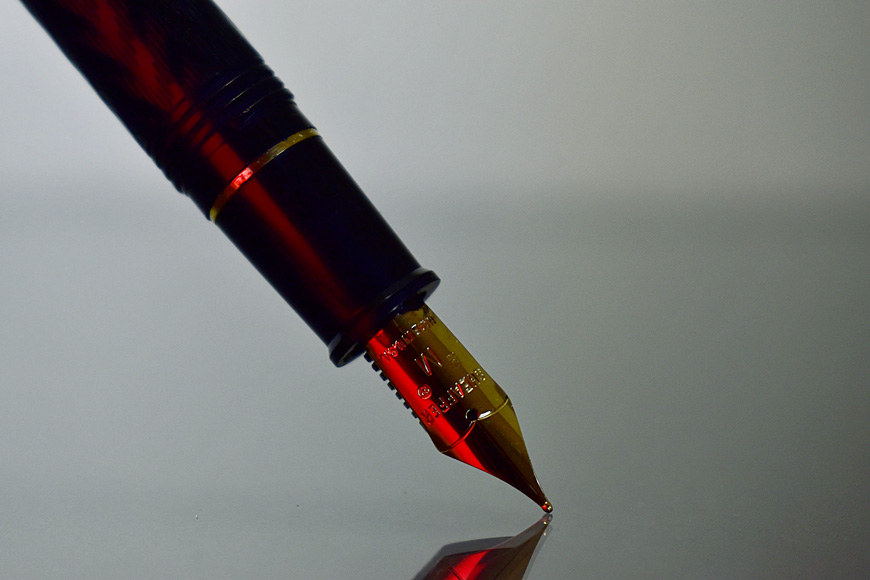
3. Know When to Use a Tripod

Credit: Sergiu Vălenaș
This is simple: if your subject doesn't move, use a tripod. This will give you a lot of advantages, such as slower shutter speeds (a good way to balance against the smaller apertures required in macro photography), the ability to be even more precise with your focusing, and the option to shoot a series of images and use focus stacking (see below).
Some tripods double as a monopod which can be a nice compromise when you need to be able to move around but still stabilize your camera.
Using a tripod gives you the possibility of using longer shutter speeds when shooting with natural light or continuous artificial light sources.
Tripods also free up your hands, allowing you to be more thoughtful in how you construct your scene, such as changing backgrounds, positioning strobes, or positioning your subject.
It also allows you to be more precise with your focusing, giving you the option to finetune your manual focusing.
You should also consider using a remote shutter release (aka ‘cable release‘) to take a photo without introducing even the slightest movement to your camera body.
4. Manual Focus
Credit: Trey Gibson
Manual focusing might seem scary if you're used to relying on your camera's incredible autofocus ability, but it doesn't need to be.
Manual focusing will give you an increased level of control and can often be more accurate than relying on autofocus.
Shooting subjects that don't move with your camera attached to a tripod makes manual focusing much easier, and if your camera has a focus magnifier (you may need to activate Live View if you're using a DSLR), this is the time to use it.
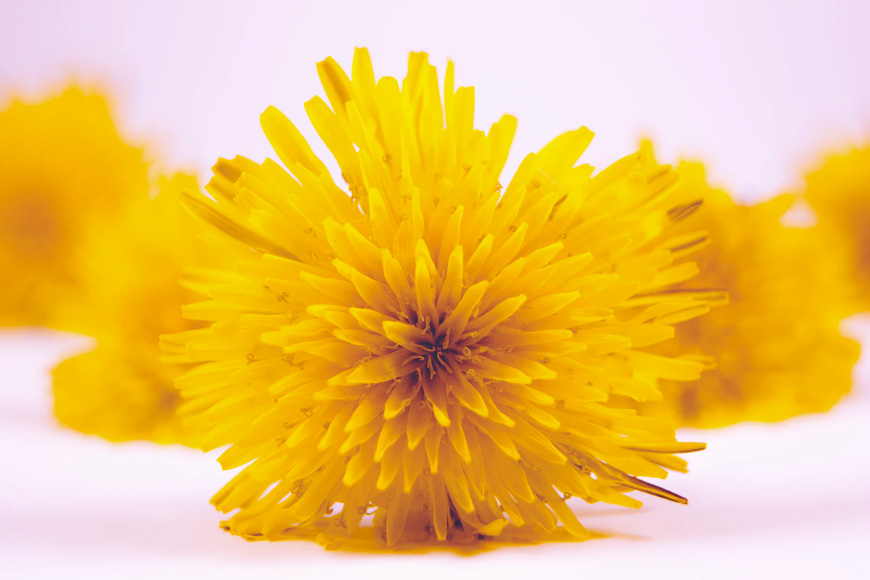
5. Know When to Shoot Handheld
Credit: Aaron Burden
Tripods are slow and clumsy out in the field, so subjects which threaten to disappear at a moment's notice will require you to shoot handheld.
You will need to keep an eye on your shutter speed to make sure that the natural shake of the camera in your hand doesn't introduce motion blur to your shots.
A general rule is to match the shutter speed to the length of the lens that you are using. For example, if you are using a 100mm lens, your shutter speed should be 1/100th or faster.
Manual focusing can be tricky, so learn how to set up a single point autofocus on your camera and maybe try back-button focusing.
To maintain a maximum depth of field and increase your odds of getting a sharp shot, you will want to use a small aperture. This means that you will have to increase your ISO to get the right exposure.
Alternatively, you might want to risk a larger aperture and experiment with the results. There's no rule against shooting at f/4 or beyond; just remember to take a lot of photographs as many of them will be blurry!
6. Take a LOT of Photographs

Credit: Alexander Sinn
Shooting digitally, we have the luxury of taking as many photographs as we want. Don't hold back, especially if you're shooting handheld.
Even experienced macro photographers know that the keeper rate when chasing bugs can be only a couple of percent, and often you will want to rattle off a lot of images in an attempt to get at least one that is sharp.
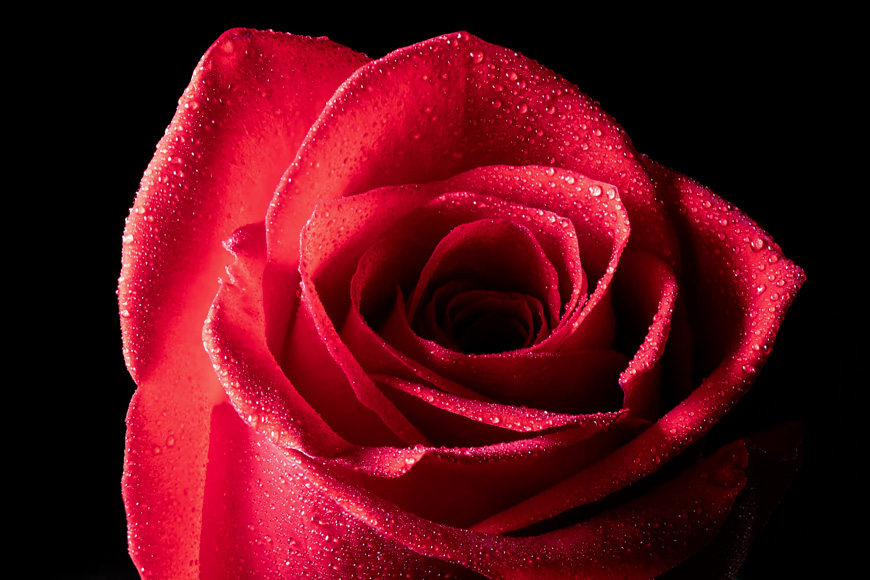
7. Get Your Focus Rocking

Credit: Alex Keda
This is a great trick for getting sharp images when shooting handheld.
Switch to manual focus and set your camera to its minimum focusing distance. Then line up your subject, slowly moving closer to it so that it's just about to become sharp.
You then take a burst of images, rocking forwards and thereby changing which part of your scene is in focus.
This can be a good way to capture subjects that might be about to fly away, getting increasingly closer to them while firing off a series of shots. Mirrorless cameras have an advantage here as you have the option to set your shutter to silent.
This can also work well when shooting with a monopod as opposed to a tripod.
8. Focus Stacking
Credit: Mike Thomson
If you're editing your images using software such as Lightroom or Photoshop, you can take advantage of their ability to automatically focus stack images.
This is the process of shooting a series of images (using a tripod) all at slightly different focal lengths. A different part of the subject is in focus in each shot.
The software then takes this batch of images, looks for the parts that are in focus and stacks them all into one photograph.
You can check out our guide for focus stacking in Lightroom or learn about all the best software to focus stack images.
9. Move Your Camera, Not Your Focusing
Credit: Geoffrey Baumbach
If you're shooting on a tripod and you want to make tiny adjustments to your focusing, consider moving your camera.
Sometimes it's easier and more accurate to incrementally shift your camera to change your focus. This can be particularly useful when creating a series of images for focus stacking.
There's even specialist gear to make this easier, such as the Neewer Pro 4-Way Macro Focusing Focus Rail Slider.
10. Move Your Subject, Not Your Camera
Credit: Timothy Dykes
Alternatively, you might want to ignore both your focusing ring and your camera and simply move your subject instead.
For a basic set up, put your camera on a tripod, dial in your minimum focus distance, and position your subject on a book on top of a table (perhaps with a sheet over the book to create a plain background).
You can then simply slide the subject into position, making tiny changes to ensure that your focusing is accurate for your working distance.
11. Adapt Your Existing Gear

Credit: Agto Nugroho
If you don't feel like spending a load of cash on an expensive lens or two, there are options to adapt your existing gear.
Diopters screw onto the front of your lens and are a good way to experiment with macro photography if you're not sure about it. Something like this Vivitar Series would be a good place to start.
Just be sure to check the diameter of your lens filter, and be careful aligning the filter threads when installing them.
Another affordable option is a set of bellows, such as this Fotodiox Macro Bellows for Sony, or extension tubes. Extension tubes and bellows can change the focal length and physics of how your lens works, but allow you to view small objects much bigger.
The results won't be the same as a dedicated macro lens, but this extension tube ring set from Vivitar is a fun way to start learning about macro photography.
Perhaps the cheapest option is to take one of your existing lenses and attach it to your camera backwards. Seriously!
This Fotodiox Macro Reverse Adapter takes any Canon EF lens with a 58mm thread (such as the Canon EF 85mm f/1.8 USM) and allows you to attach it to your camera the wrong way around. Different threads are available.
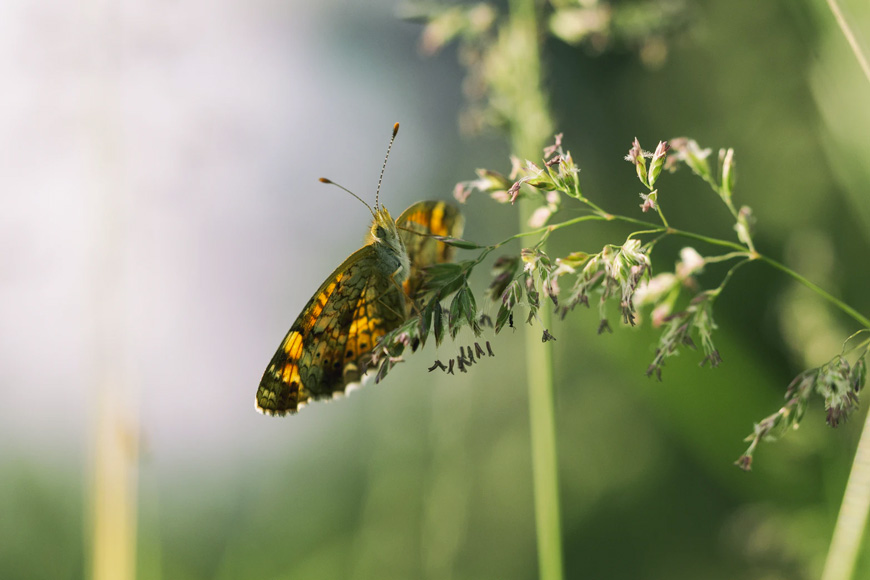
12. Shoot Parallel
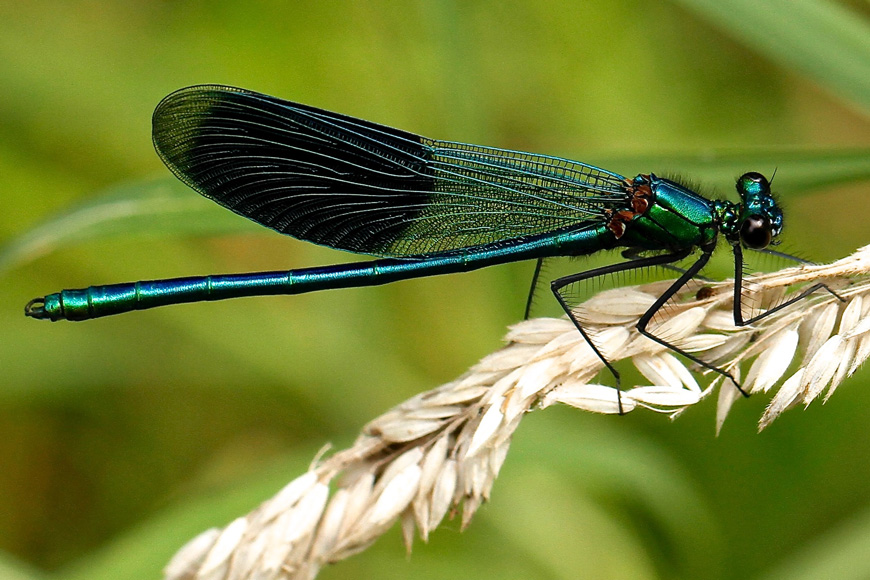
Credit: James Wainscoat
Because of the shallow depth of field , it can be a good idea — especially when you're starting out — to shoot your subject from sideways on to keep as much of it as possible in the plane that is in focus.
This can be particularly effective when shooting dragonflies and butterflies.
Macro Photography FAQs
What is the difference between macro and micro photography?
Though there's often some confusion, these two terms actually refer to the same thing: photographing small subjects with a particular level of magnification.
Do I need a macro lens for macro photography?
While you don't necessarily need to invest in a dedicated macro lens, it will give you better results. For it to be considered true ‘macro', you'll need any lens that allows for a reproduction ratio of at least 1:1.
Is macro photography difficult?
As with any genre, macro photography presents its own challenges and it can be difficult to master. However, if you get the right tools, and have time and patience to practice and experiment, you'll find it highly rewarding.
Final Words
Macro photography is about discovering new worlds and some simple gear and knowledge of techniques can put you in a great position to get started.
Shoot loads, learn how to manage the shallow depth of field, and practice your focusing and you'll be well on the way to getting some killer macro images.
If you have any questions, feel free to post them in the comments below.

Check out these 8 essential tools to help you succeed as a professional photographer.
Includes limited-time discounts.
Andy Day is a British photographer and writing, living and working in France, specialising in adventure, travel, architectural and landscape photography.
1 Comment
Leave a Comment
👋 WELCOME TO SHOTKIT!
🔥 Popular NOW:

We’ve been shooting lots of blossom here in France over the last few months. Let us know what you’ve been photographing! 😊