


How to Get Started with Radiant Photo (A Beginners Guide)
Radiant Photo is a powerful AI photo editing app that's refreshingly simple to start using. Here's how to take advantage of its AI tools to edit your images.
Radiant Photo | Software | By Kevin La Rue
Shotkit may earn a commission on affiliate links. Learn more.
Radiant Photo is a new time-saving image editor that uses AI technology trained on millions of printed images, making it very easy to get started and achieve high-quality results.
Working either as a standalone app or as a plug-in to Adobe Lightroom Classic and Adobe Photoshop, Radiant Photo is designed to complement the workflow and tools you already use.
For this article, we’ll assume that Radiant Photo is running as a standalone.
Let’s get started with Radiant Photo and explore this new image editor together.
Download the latest version of Radiant Photo to follow along with this simple tutorial.
Start a free 14-day trial today
How to Start Using Radiant Photo
Opening Images for Editing
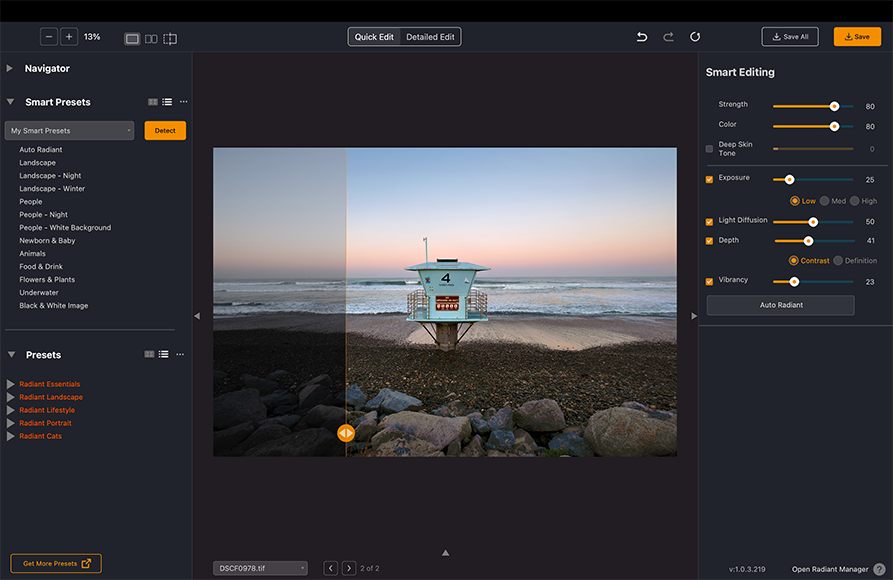
When Radiant Photo first opens, a clean workspace is displayed.
A variety of Presets are found on the left, editing tools are found on the right, and a large viewing area takes up the middle of the workspace.
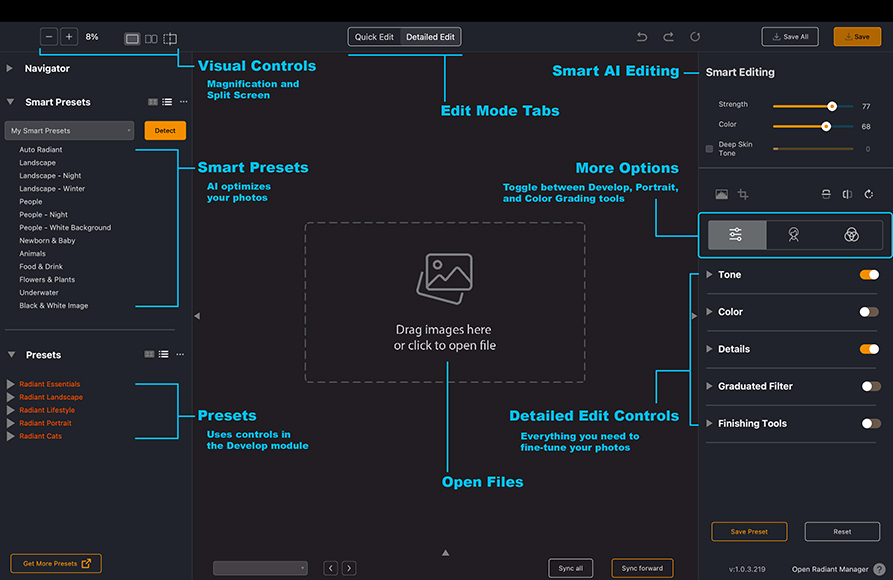
There are also controls along the top including magnification, before/after split screens, tabs to switch between editing modes, and saving controls.
To open an image while Radiant Photo is running as a standalone, simply drag an image into the middle area or click to browse for your file.
The app works great with most image formats — JPEG, PNG, RIFF and many Raw formats as well.
The app first recognizes the content of any photo and automatically applies a Smart Preset to enhance color, exposure, details and more in a few seconds. For 90% of photos, that may be enough.
If you want to work with your photo a little more, Radiant Photo also offers a Quick Edit panel that lets you refine images with 7 essential controls for adding a little more pop.
A Detailed Edit panel gives you a wealth of additional Develop options, as well as powerful Portrait and Color Grading tools.
Working with Smart Presets
The easiest way to develop your photos is with Smart Presets. When you open an image, Radiant Photo automatically recognizes its content using AI scene detection and optimizes the image by applying the appropriate preset for the content.

Using Smart Presets, the app can handle landscape images differently than portrait photos, plus make adjustments for daytime or nighttime lighting. It is trained to recognize 13 different types of images.
Also of note, as you work with Radiant Photo and hone in on your personal styles, it’s easy to save your own unique presets to use later on.
See more about how to use Smart Presets in Radiant.
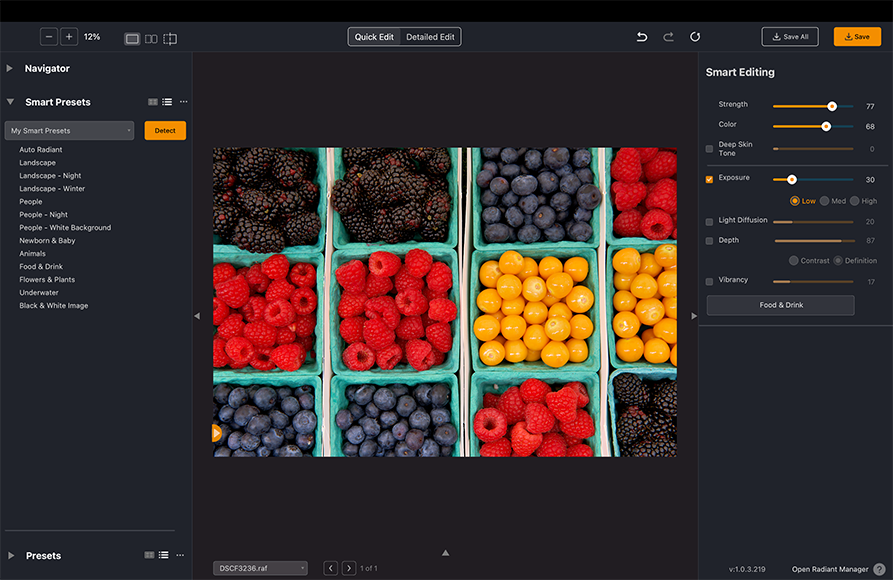
The Quick Edit Panel
If you want to make a few tweaks to your image after the Smart Preset has been applied, try the Quick Edit panel first. It gives you just enough controls to perfect your image, without being overwhelming.
Use the Strength slider to adjust tone and contrast, and the Color slider to adjust for all things color related. If Radiant Photo detects a portrait, the Deep Skin Tone slider will also be active.
Other controls for Exposure, Light Diffusion (to make light softer), Depth (for clarity) and Vibrancy (to enhance colors) are also on tap should you need them.
(See also: How to use toning tools in Radiant Photo)
The Detailed Edit Panel
The Detailed Edit panel gives you a wealth of controls and pretty much every option you need for perfecting color and contrast in your picture
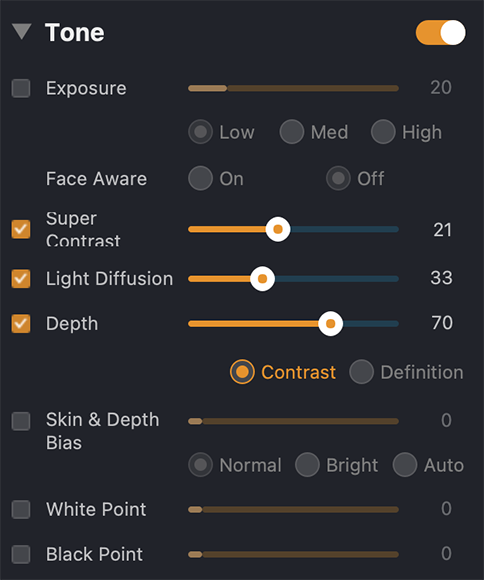
The workflow suggested by the Radiant team is to correct Tone (exposure) first, followed by Color and then Details. If needed, the Graduated Filter and Finishing tools can be used to put the final polish on.

It’s all at your fingertips. You don’t have to use all five panels on every photo, but it’s nice to know they are there.
The Tone panel in Radiant lets you optimize the light exposure in every pixel of your image while also maintaining the black and white points. This is important because it allows you to settle on the correct exposure without worrying about crushing the blacks or blowing out highlights.
Super Contrast makes your image appear sharper by adding more depth while Light Diffusion softens the light.
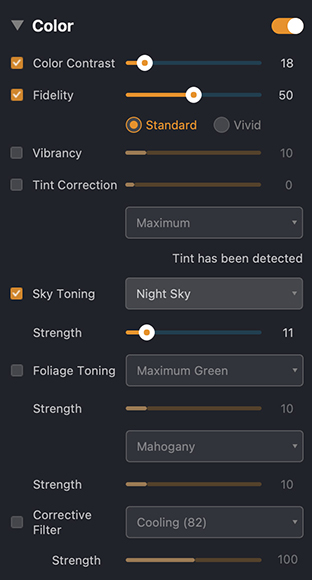
Once the tone is locked in, fine-tuning the color of your image with the Color panel is vital. Due to the linear nature of camera sensors, your photos can often look washed out.
Sliders like Color Contrast and Fidelity can easily fix that and give your photos more punch.
Using the Details panel to achieve a crisp-looking, noise-free photo can really help you up your game.
Due to how a camera (or smartphone) processes a photo, the result can be slightly “soft”, so sharpening is key.
Related: How to sharpen edges and remove noise in Radiant Photo.

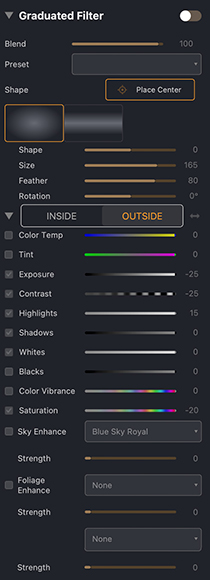
Tools in the Graduated Filter panel let you make adjustments to specific portions of your photo. For example, to just the top or bottom of a landscape image.
The Finishing Tools in Radiant Photo are designed to be applied after all other corrections are made. They are best used for making final and subtle changes to your image, not making massive adjustments.

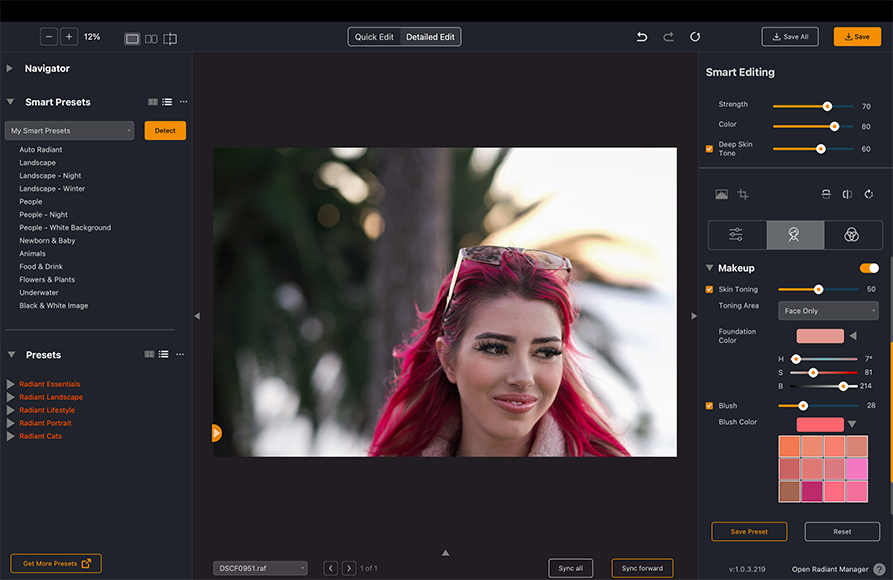
Portrait Editing
Let’s face it (pun intended): everyone loves portraits. Fortunately, Radiant Photo has a series of dedicated controls that make portrait editing easy.
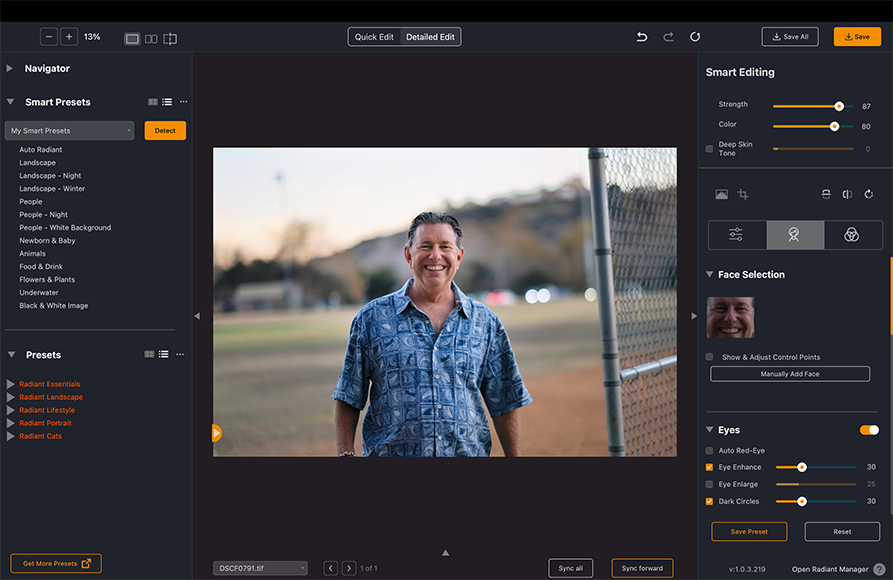
The app automatically selects faces and then provides straightforward controls to help you bring out the best in everyone.
You’ll find simple sliders for enhancing eyes, teeth and lips, as well as applying skin corrections. You can even enhance a subject’s makeup!
- Read more: How to optimize faces with Radiant Photo
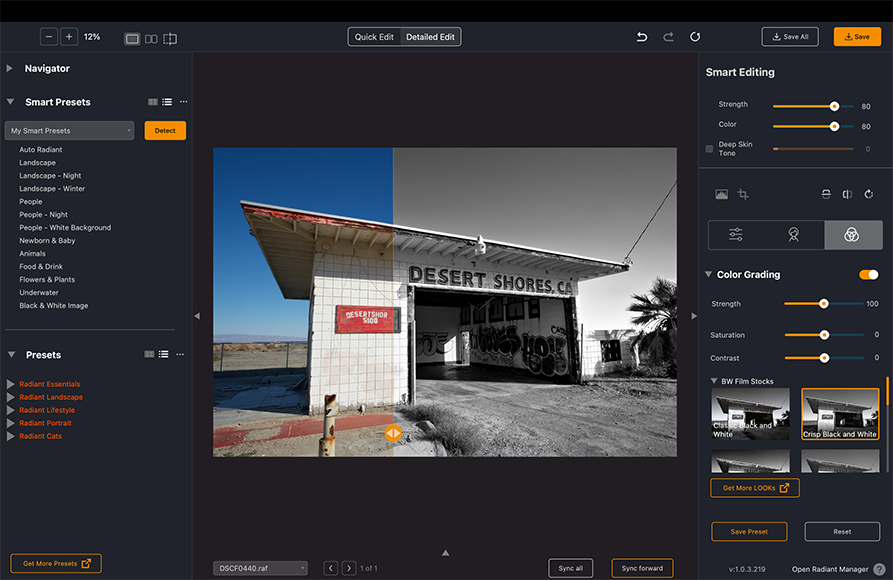
Creative Styling with Color Grading
Once your image is perfectly developed the way you want it, you may wish to explore adding a bit of creative style to it.
This is where Radiant Photo’s Color Grading comes into play.
Called “LOOKs” in the app, the Color Grading panel offers a host of choices based on an industry standard known as Look-up Tables or “LUTs”.
These adjustments remap the colors of your image and are independent of the other Develop controls inside Radiant Photo.
You’ll find LOOKs for different film stocks, lighting situations, retro and vintage styles, as well as typical color grades.
It’s fun to experiment and discover your own favorites – here's how to apply LOOKs to color grade in Radiant.
What Makes Radiant Different?
Radiant Photo comes from Radiant Imaging Labs, a company founded entirely by pro photographers who, first and foremost, love photography. They designed the app to quickly make any image better without being confusing or overwhelming.
The AI-driven technology found in Radiant was developed for high-volume printing labs, which produce millions of different kinds of images every year and where speed is critical.
Radiant Photo is also distinguished by what it *doesn’t* give users. By focusing on delivering great results in record time, Radiant Photo doesn’t try to tackle areas that other tools do perfectly well, like HDR, layers, digital asset management, focus stacking, panoramas, sky replacement and such.
Final Words
So, should you add Radiant Photo to your existing workflow or try it for your first photo editing tool?
It is a pretty unique image editing tool for photographers of all skill levels. It’s easily approachable and damned-near automatic for newbies yet has significant depth for those more advanced.
The app doesn’t try to do everything under the sun, leaving pixel-level brushing, layers, and crazy creative tasks to other capable tools like Adobe Photoshop. It also doesn’t help you manage your photo catalog like Adobe Lightroom Classic.
What Radiant Photo does exceedingly well is help you get professional-grade, print-ready results quickly, all while playing nice with Photoshop and Lightroom and pretty much any photo editing workflow you can imagine.
For that, it deserves a look and possibly a place in your photo editing toolkit. Give a try and let us know what you think below!
Download the latest version of Radiant Photo to follow along with this simple tutorial.
Start a free 14-day trial today

Kevin La Rue has been in the graphics and photo software game for over 30 years, with the last 15 years focused exclusively on bringing world-class photo editing tools to market. An avid photographer and traveler, when he isn’t taking photos you’ll find him riding his dual-sport motorcycle, Jeep camping in the desert, or trading crypto!
1 Comment
Leave a Comment
👋 WELCOME TO SHOTKIT!
🔥 Popular NOW:

some great & very interesting synopses