


What’s Vignetting in Photography? + How to Add/Remove Vignettes
What is vignetting, why does it happen and is it a good thing? Find out everything you need to know in this easy-to-follow guide!
Learn | Photography Guides | By Greg Cromie
Shotkit may earn a commission on affiliate links. Learn more.
Vignetting is a commonly used photography term that most photographers have a love/hate relationship with.
In this guide to vignetting, we’re going to take a closer look at this photography ‘defect’. We’ll learn what causes it and how to effectively manage it.
As a point of reference, the word vignette originated in the English language during the 18th century. It was originally used to describe page borders in books and later to describe the issue of photographs with reduced clarity at their edges.
Let’s get started on understanding how this phenomenon impacts current-day photography.
What Is Vignetting?
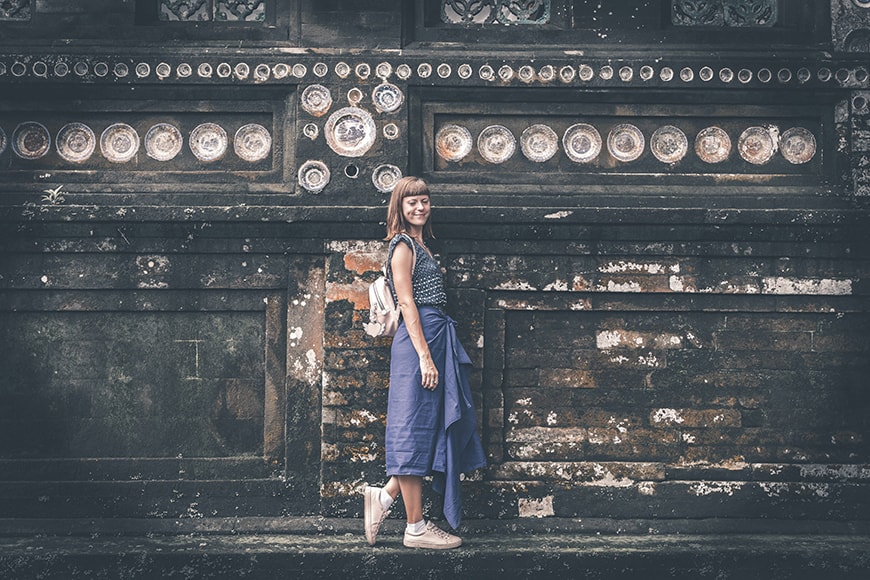
The most simple way to describe vignetting in photography is the darkness that occurs in the corners of an image compared to its centre brightness.
Also known as light fall-off in photography circles, this is often considered a form of distortion or an optical defect. It’s also interesting to note that while it’s considered a defect, it can also be the desired look in certain images.
The causes of vignetting can vary, and while we’ll cover those in far more detail below, it’s more often the result of the camera glass optics.
Intense optical vignetting can be hard to rectify and can seriously detract from an otherwise perfect photo. On the flip side, it can be manually applied on purpose to add depth and mood to a composition.
Fortunately, there are many ways to manage and even get rid of unwanted vignette effects – we’ll get to those too.
What Causes Vignetting?
There’s a whole range of situations that cause unwanted vignetting, and while we photographers complain about it, it’s often our choices that cause it.
And by that, I’m referring to the gear and even certain camera settings that we choose to employ. The type and quality of the camera equipment can directly contribute to vignetting appearing in varying degrees.
Let’s break down some of the more common causes.
-
Natural Vignetting
This type of vignetting occurs as a direct result of the angle at which the light travels through the lens and into the camera before hitting the image sensor.
Most notable brands and higher-end cameras have been corrected to prevent this from occurring.
These corrections happen at both a design and construction level as well as a software and processor one. The corrections are designed to combat natural vignetting.
-
Physical Obstruction
In these cases, there’s something physically obstructing or limiting the light that enters the lens, travels to the camera and hits the sensor.
For the most part, lenses are designed to intentionally correct vignetting. But that’s usually only as long as they’re not altered in any way.
If you start stacking filters onto the front of the lens, then you’re contributing to the physical obstruction.
Equally, adding lens mount adapters, rear filter mounts, and even extension tubes will alter the lens’s capacity to manage vignetting.
-
Intentional
As hinted at earlier, there are ways to intentionally add vignetting to your images.
You can attach store-bought or home-made filters to the front of the lens to replicate the effect. This is a simple camera hack that can be achieved in several ways.
But by far, the easiest way to intentionally add vignetting is to do so with post-processing software.
Applications such as Photoshop and Lightroom will allow you to apply a vignette effect to your images and control the strength, edge-feathering and even the shape of the ‘border’ formed by the vignette.
Here’s how to add a vignette effect in Photoshop.
As for why you would apply vignetting in this way, it can add a lot of depth and drama to a picture and help to draw the eye to the centre of the frame.
-
Lense Vignetting

When it comes to lenses, natural vignetting is far more common and evident in wide-angle optics. And while lens engineers work tirelessly to develop distortion-free lenses, by nature, their design causes vignetting.
Inside a lens, there are multiple elements of glass arranged in groups. These are designed to achieve a desired optical zoom and focus.
And as with physical obstruction, all that glass gradually diminishes the strength of the light travelling from the front to the rear of the lens.
Fortunately, high-quality lenses will compensate for this type of lens vignetting with maximum width apertures that optimise incoming light.
Is Vignetting Good or Bad?
The answer to this question is a matter of opinion. And your opinion is going to be heavily influenced by your photographic training and style of photography.
If you were trained old-school like me, then there’s a good chance you were instructed that any darkening around a photo’s edges is bad.
Many photographers will point out vignetting on a photograph as a flaw and something to be avoided. I’d only agree with this sentiment if the vignetting element was over-cooked and impacted the quality and purpose of the image.
However, there’s a strong school of thought that vignetting is a valuable mechanism to elevate image quality and punch.
It can be purposely added to an image to frame a subject and draw attention to the lighter elements of a photo. Further to this, it can be added to replicate the look of a bygone era or applied heavily for dramatic impact.
At the end of the day, I’d have to say that vignetting is a lot like hot-sauce on a wing. A few drops will bring it to life with flavour and intensity. But too much and you can no longer remember how good the chicken originally tasted.
How Is Vignetting Measured?
Credit: Artem Beliaikin
I’m not even going to pretend to be a camera-gear-number-nerd and explain to you the full extent of the science and math behind measuring vignetting.
Fortunately, there are plenty of camera-gear-number-nerds out there who have done the hard work for us.
If you’re so inclined to test your lens, begin by getting yourself a white or grey piece of card. The trick is to do your best to perfectly and evenly illuminate that card with whatever lighting source you can.
Once this is set up, you need to take a series of photos of that card with your test lens.
The first photo will have a 0 value of exposure compensation and the aperture open at its widest. Next, you need to continue taking images with each stopping down by one third in exposure compensation.
Then use your preferred image editor to measure the brightness of the pixels in the centre and at the edge of each image.
When the brightness value of a stoped down image matches the edge brightness of your first image (the one with 0 exposure compensation), you’ll know how many stops darker your corners are compared to the centre.
As for the value of this measuring method, it allows you to check that your vignetting is symmetrical in all four corners. Or, that the brightness value is the same in each of the corners.
Types of Vignetting

Credit: Adrien Tutin
Vignettes can be broken down into a few different types. Let’s take a look at those in some detail.
-
Optical Vignetting
There’s a normal level of optical vignetting in every lens. The design and quality of the lens will determine the intensity.
As we discussed earlier, camera lens developers are getting better at eliminating these types of distortions. The science department tells me that due to the design of lenses, the light begins to fall off as it passes from the front element to the image sensor.
The front element is usually much larger than the sensor, but as the barrel tapers-down, it blocks a certain amount of peripheral light rays from getting in.
This is especially evident with a wide-open aperture and more so with prime lenses than zooms.
Another form of optical vignetting occurs when, due to the design and placement of the glass elements, light can take longer to travel in some parts of the lens compared to others. As a result, the centre gets more exposure than the edges.
To test your lens, refer to our section above on how to measure vignetting.
-
Pixel Vignetting
Another type is known as pixel vignetting, and this impacts only the image sensor.
While a sensor is a flat plane and the pixels face forward, the light hitting the sensor is not completely even all the way across. The centre of the sensor gets a direct beam of light while the edges are hit at a slight angle. As a result, less light hits the edges compared to the centre.
It’s a little like spraying a garden hose at a brick wall. The water hits the centre of the wall with a strong flow, but the edges receive less as the water spreads out.
There’s no known cure for this style of vignetting; however, camera manufacturers try to accommodate this in the way the sensor reads brightness.
-
Mechanical Vignetting
This type of vignetting is especially evident in wide and super-wide lenses.
Lenses of this nature often pull in light from extreme angels, and this is why they usually come packaged with decent lens hoods.
The hood is designed to block most of the brightness that causes flares and light effects that penetrate from the sides.
Some photographers believe that lens hoods are the cause of mechanical vignetting. Of course, they serve an important purpose, but they’re equally designed to prevent unnecessary falloff – at the end of the day, it’s a delicate balance in choosing when to use a lens hood.
But the true cause of this style is the application of filters.
Having a single UV filter is not going to be a likely cause of vignetting. But once you start stacking up multiple filters or use thicker filters, then as the name suggests, you’re filtering the light.
This can then exacerbate the effects of optical and pixel vignetting as it increases the chance of light falloff.
-
Artificial (aka Intentional) Vignetting

Credit: Antevasin Nguyen
As we indicated earlier, vignetting doesn’t have to be an unwelcome part of your images. You can employ a little to add interest, depth and appeal to your composition.
And if your lens doesn’t give you the desired vignetting look, then you can simply add it with post-processing software. There are lots of available options for good quality image editing software, and everyone has a favourite.
Using applications such as Adobe’s Lightroom or Photoshop makes the process very simple.
We’re going to cover using Adobe products to apply vignetting in a lot more detail, so stick around for more.
How Do I Stop Vignetting?
While you can’t change the science that causes optical and pixel vignetting, there are some ways that you can stop vignetting getting out of control.
Let’s first cover some of the physical changes you can make to your gear and workflow:
- Don’t over-stack your filters or use super thick filters as this will limit the strength of light reaching the sensor.
- Only use lens hoods that the manufacturer recommends for the lens. And if you don’t need to use your lens hood for a shot, then don’t.
- If you ‘re shooting wide open and you notice that your images have noticeable vignetting, stop down the aperture a little if you can get away with it.
- Measure your corner vignetting and if it’s intense or not balanced, get your lens serviced or replaced.
- A lot of modern digital cameras have a vignette reduction control built in that you can apply to correct JPEG files.
Now let’s take a look at some of the post-processing steps you can take to manage vignetting:
- If you have enough image real-estate at the edges of your composition, then use a cropping tool to cut-away the vignetting frame.
- Use Photoshop to clone the impacted areas with areas that are not showing vignetting.
- Utilise the lens correction features available in Adobe Camera RAW, Photoshop and Lightroom.
How to Correct Vignetting in Lightroom or Photoshop
As we’ve discussed, you can correct unwanted vignetting in post-processing workflows. While we’ll cover Adobe products here, there are countless applications for editing images that also feature vignette control.
-
Vignette in Adobe Lightroom
I find Lightroom easy for managing vignetting – both in applying it and removing it.
In the Develop tab, under the Effects drop-down menu, there’s a tool labelled Post-Crop Vignetting. That title is important as you should only manage vignetting after you’ve finished aligning and cropping your composition.
This tool has several sliders to control the darkness and brightness of the vignette, the roundness, midpoint and feathering of the edges. By adjusting these, you can effectively manage and correct any vignetting successfully.
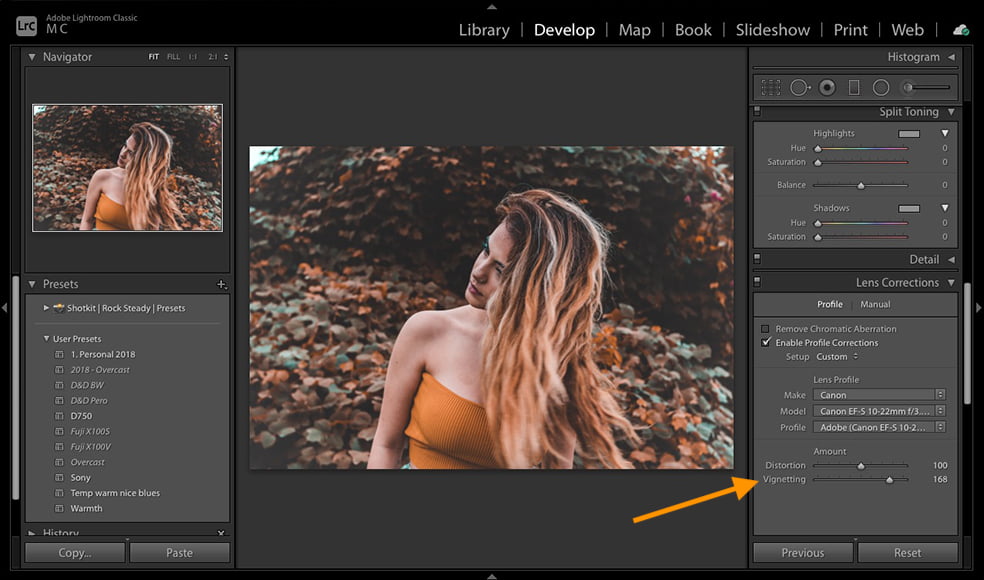
The other tool within Lightroom is the Lens Correction function – also within the Develop tab. Within the Manual controls, you can adjust vignetting and its midpoint.
-
Vignette in Photoshop

As with Lightroom, Photoshop has the ability to correct vignetting. From the Filter menu, select the Lens Correction tool and then jump to the Custom settings.
Within this panel, there are sliders to manage the strength of vignetting and the midpoint.
Again this is a really simple tool and certainly something you should probably try before you start cropping out your photo.
You can use the lens correction filter to add a vignette in Photoshop, or create a vignette on a new layer and use a curves adjustment layer, fill layer, or just the layer mask technique described above.
Vignetting FAQs
What does vignetting mean in photography?
Vignetting refers to a falloff of light at the periphery of a photo. Put more simply, it’s when your image is darker around the edges and corners in comparison to the centre.
What causes vignetting in photos?
Vignetting can be caused by the design of the lens, or by a physical obstruction that limits the light entering the lens. It can also be applied intentionally using a physical filter or during post-processing.
How do you fix vignetting?
In Lightroom, you can fix vignetting using the Post-Crop Vignetting tool or the Lens Correction function. Similarly, Photoshop has a Lens Correction tool that works well. See above for more details about these methods.
Final Words
Like most vintage-style effects, vignetting can be completely adored or wholly undesired. It all comes down to the mood you want for your photo.
If you’re finding that the edges of your images are darker, take a look at the types of vignetting we ran through above to isolate what’s causing your specific result. It could be your camera or the lenses you’re using, or something obstructing the sunlight from hitting your sensor evenly.
If you want to get rid of the effect, it’s pretty easy to do so in post processing.
And if you happen to think it gives your photos a dramatic, nostalgic glow – all the better! Embrace it, and see what creative results you can get.

Check out these 8 essential tools to help you succeed as a professional photographer.
Includes limited-time discounts.

I’m a Melbourne-based street photographer and blogger. I love to travel to Japan to photograph and document its dynamic people and culture.

👋 WELCOME TO SHOTKIT!
🔥 Popular NOW:
