


How to Make a Heart Photo Locket (Print + Add Photos)
Learn how to print and add photos to a heart locket, for a personalized jewelry piece that keeps loved ones close.
Learn | By Ana Mireles
Shotkit may earn a commission on affiliate links. Learn more.
Did you receive a heart photo locket as a present, and you're not sure how to use it?
Don't worry! In this tutorial, I'll show you how to measure, cut, and paste your favorite photo into your heart locket.
This way, you'll always have your loved ones close to your heart.
Let's get started.
More fun DIY photo projects:
Materials
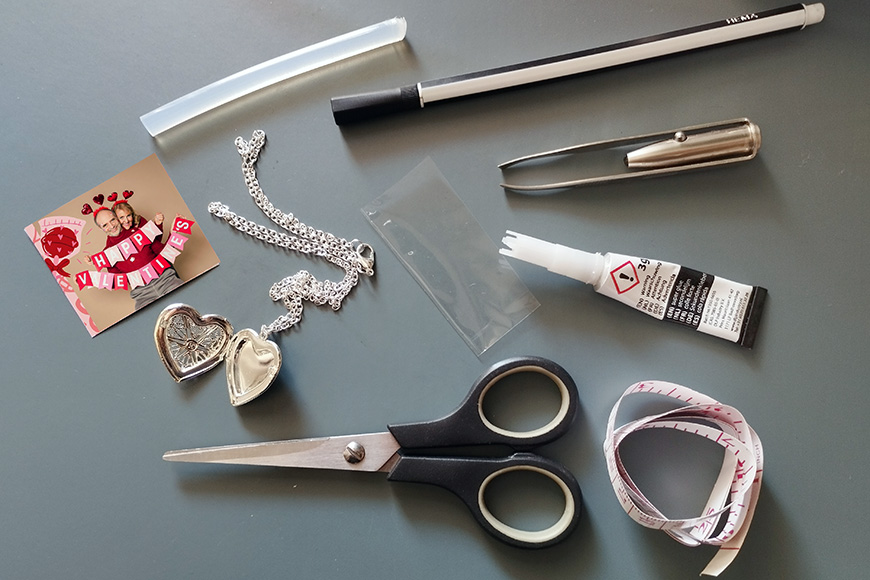
- A heart locket
- A photo
- Hot glue or glue clay
- Scissors
- Measuring tape
- An acetate sheet (optional)
- A pen
Method 1
If you already have a photo printed out, here's how to shape it to use it in your heart locket.
Step 1
Place something transparent on top of the heart locket – it can be a document sleeve, a plastic bag, scotch tape, etc. You can also use acetate or tracing paper.
Step 2
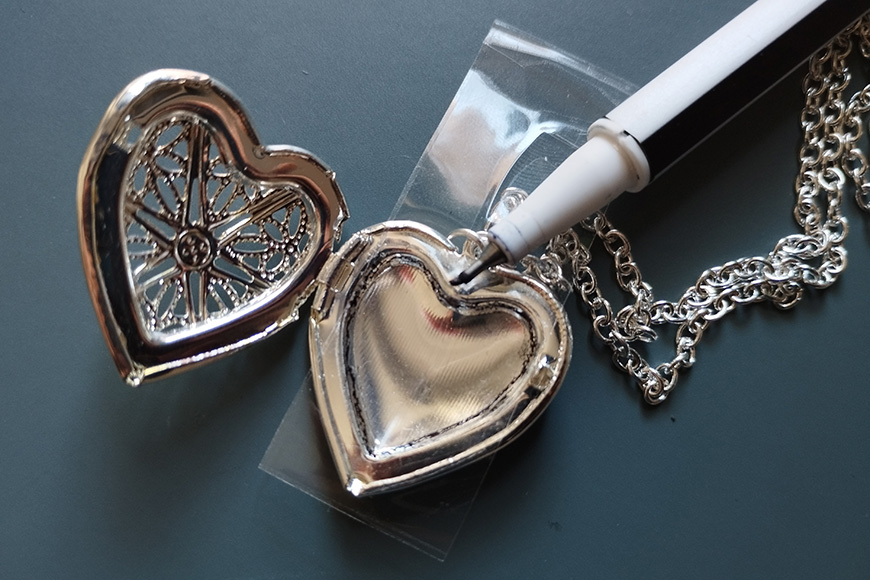
Trace the inside of the locket following the edge of the area for the photo. Don't worry about making it pretty, as it won't be part of the project. This is simply the template to cut your photo into the right size and shape.
Step 3
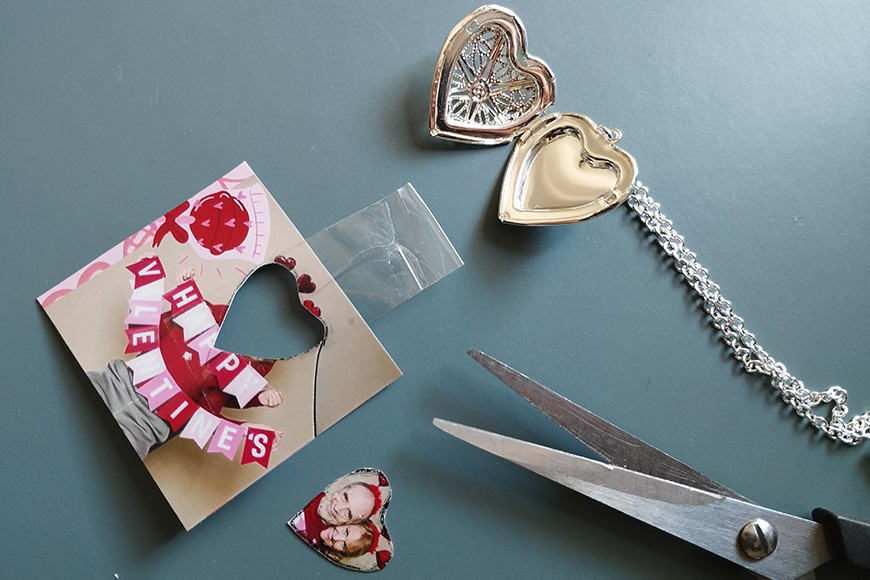
Cut the heart out of the plastic and place it on top of your desired photo. You can draw around the heart in the actual photo because this will be outside the area you will use.
However, using scotch tape to secure the template is safer. This way, you can be sure the template won't move or smudge. You'll have a perfect heart-shaped photo for your locket.
Now, cut the photo to that size and shape.
Step 4
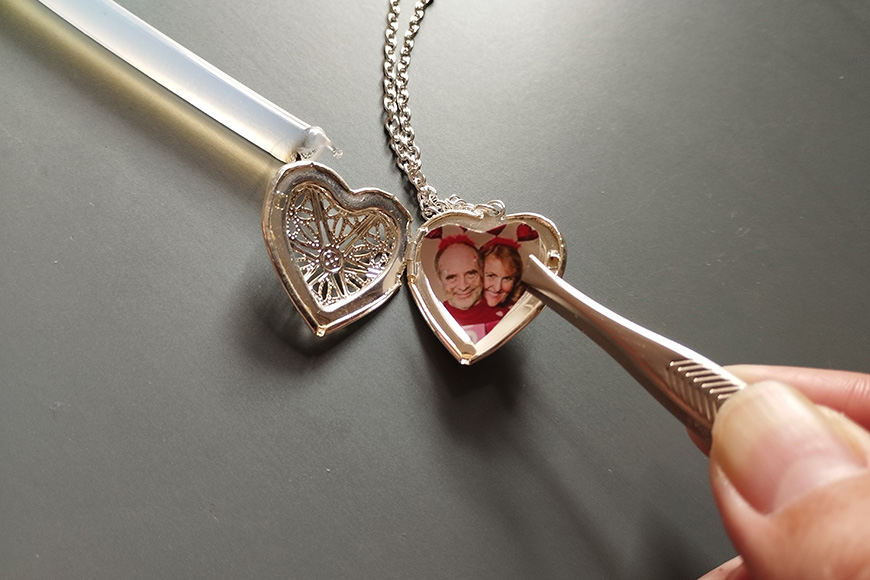
Using hot glue, paste the photo inside the locket. You can also use reusable glue clay, which will make it easier for you to exchange the photo occasionally.
Whatever you use, it's important that the photo sticks well and stays in place. Since you'll be moving about with the locket around your neck, you don't want to worry about the photo falling out.
You can use tweezers to make this task easier.
Step 5 (optional)
Some lockets come with plastic protection for the photo included.
If yours doesn't, cut it out of any rigid plastic material you can find. An acetate sheet works perfectly.
If you don't have any, feel free to try other materials.
This isn't absolutely necessary – so you can leave the photo without plastic protection if you prefer. Another alternative is to give it a coat of Mod Podge.
Method 2
This method is for when you want to print a photo specifically for this project.
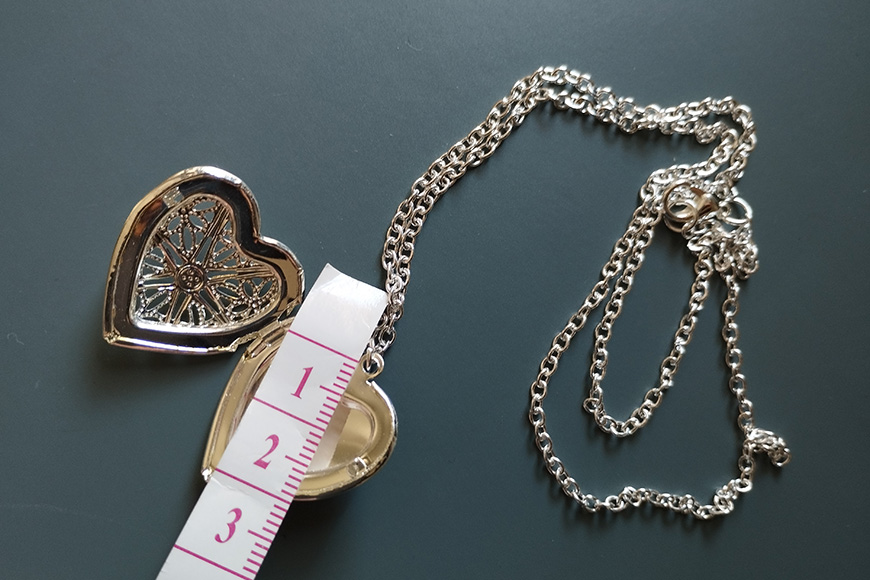
Step 1
Measure the space inside the heart locket.
Step 2
Now, you'll need to size and shape the photo for the locket. You can do this in the photo editing program of your choice – I use Photoshop.
These are the steps.
- Create a new document—the size doesn't matter as long as it's bigger than your locket. Make sure it's 300 ppi, though – this way, the photo will be printing quality.
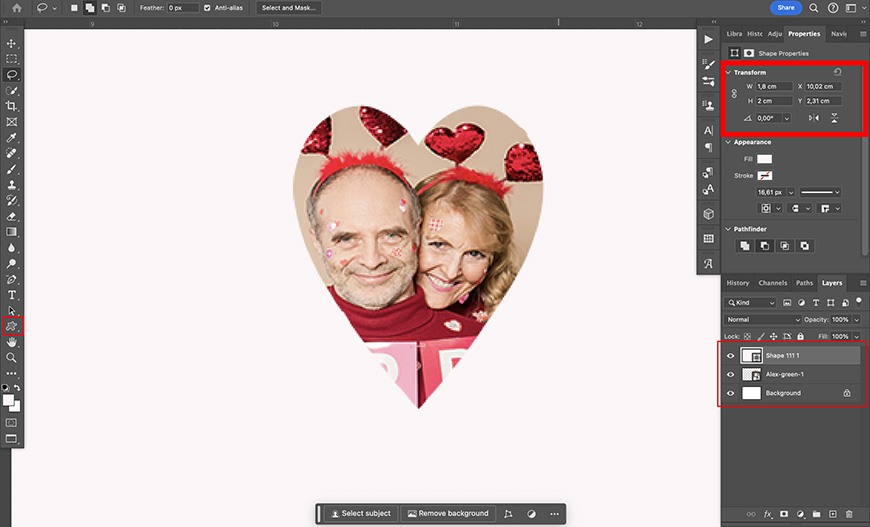
- Draw a heart using the Custom Shape tool. If you don't have a heart shape, you can either draw one with the pen tool or download one. I used one from myPhotoBrushes.
- Next, use the properties panel to set the shape's size to match the size of your locket.
- Now, go to Find > Place Embedded to add the photo you want to the document.
- Make sure the photo is on a layer below the shape.
- Lastly, go to Layers > Flatten Image.
- Save and print the photo.
If you prefer to skip the heart shape, you can simply resize the photo to a square or a rectangle and cut out the image as shown in the first method.
Step 3
Once the photo is printed at the right size, cut it out. Then, follow steps 4 and 5 from the previous method to place it inside the locket.
And there you have it: your cherished photo to keep with you always.

Check out these 8 essential tools to help you succeed as a professional photographer.
Includes limited-time discounts.

Ana Mireles is a Mexican researcher that specializes in photography and communications for the arts and culture sector.
👋 WELCOME TO SHOTKIT!
🔥 Popular NOW:
